들어가며..
이전에 배운 두가지 보완 방식을 합친 단방향 암호화의 대표적인 예시중 하나인 BCrypt에 대해서 알아봅시다.
왜 이거를 선택했냐면... 별 이유는 없습니다. Spring Security를 적용할 때 처음 사용했던 PasswordEncoder이었기 때문이죠.
BCrypt특성
- strength 를 통한
Key Stretching기법을 추가함 Salt를 생성해 암호문에 padding.- BlowFish를 응용한 해싱 알고리즘 사용 (여기서는 중요하게 다루지 않겠습니다.)
BCrypt 분석해보기
1. Salt 생성하기
1) BCryptVersion 버전 선택
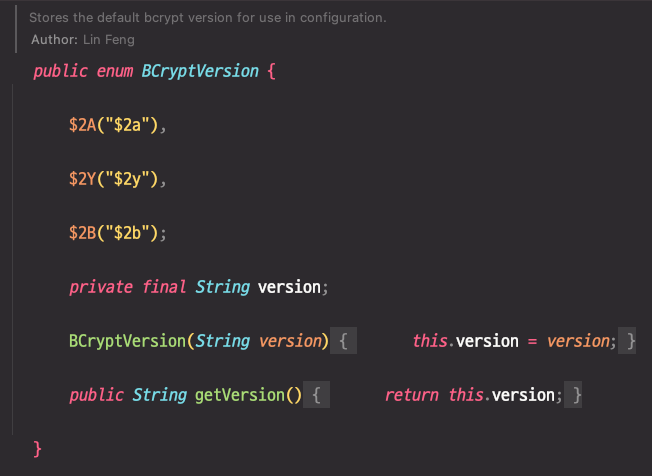
- 어떻게 BCrypt를 적용할 지 정하는 BCryptVersion을 먼저 선택을 해야 합니다.
- 기본적으로는
$2A가 적용됩니다.
2) Salt 생성
private String getSalt() {
	if (this.random != null) {
		return BCrypt.gensalt(this.version.getVersion(), this.strength, this.random);
	}
	return BCrypt.gensalt(this.version.getVersion(), this.strength);
}- Salt를 생성하는데
BCryptVersion과Strength가 필요하나보네요. 자세히 살펴봅시다.
public static String gensalt(String prefix, int log_rounds, SecureRandom random) throws IllegalArgumentException {
	StringBuilder rs = new StringBuilder();
	byte rnd[] = new byte[BCRYPT_SALT_LEN]; // BCRYPT_SALT_LEN == 16

    // BCryptVersion, Strength 검증
	if (!prefix.startsWith("$2")
			|| (prefix.charAt(2) != 'a' && prefix.charAt(2) != 'y' && prefix.charAt(2) != 'b')) {
		throw new IllegalArgumentException("Invalid prefix");
	}
	if (log_rounds < 4 || log_rounds > 31) {
		throw new IllegalArgumentException("Invalid log_rounds");
	}

    // Salt 난수 생성
	random.nextBytes(rnd);

	// BCryptVersion 추가
	rs.append("$2");
	rs.append(prefix.charAt(2));

    // Strength 추가
	rs.append("$");
	if (log_rounds < 10) {
		rs.append("0");
	}
	rs.append(log_rounds);

    // Salt 추가
	rs.append("$");
	encode_base64(rnd, rnd.length, rs); // (16byte Base64 변환) == 22글자 (Base64 postFix에 `=`는 제외를 함.)
	return rs.toString();
}- 생성할때 사용을 한다기 보다는, 버전과 strength 정보를 append 해서 반환을 하는 것으로 방향을 잡았네요 코드 재사용을 위해서 이런 방향성을 잡았나봅니다.
위의 로직을 그대로 따르면 다음과 같은 형식이 됩니다.

- 사이사이의
$은 구분자(Delimiter)로 간주하시면 충분합니다. - BCrypt 에서는 암호문에다가 Salt를 저장하기 때문에 Salt를 알려주는 방법이 필요합니다.(Delimiter로 표시하거나, 길이를 고정시키거나..)
- BCrypt는 고정된 길이의 Salt를 채택했고, 이를 위해 Base64Encoding을 사용했네요.
2. 암호문 생성
- 이제 raw한 비밀번호와 생성한 salt를 사용해 Password를 만드는 단계입니다.
- BCrypt는 salt + password를 blowfish 알고리즘을 응용한 해싱 알고리즘을 적용해서 암호화가 진행됩니다.
- 이 포스트에서는 저번 포스트에서 다루었던 보완법들이 어떻게 적용되었는지를 알아보기 위한것이기 때문에 굳이 알고리즘 자체는 자세히 다루지는 않습니다.
1) 비밀번호 해싱
private static String hashpw(byte passwordb[], String salt, boolean for_check) {
		BCrypt B;
		String real_salt;
		byte saltb[], hashed[];
		char minor = (char) 0;
		int rounds, off;
		StringBuilder rs = new StringBuilder();

		if (salt == null) {
			throw new IllegalArgumentException("salt cannot be null");
		}

		int saltLength = salt.length();

		if (saltLength < 28) {
			throw new IllegalArgumentException("Invalid salt");
		}

		if (salt.charAt(0) != '$' || salt.charAt(1) != '2') {
			throw new IllegalArgumentException("Invalid salt version");
		}
		if (salt.charAt(2) == '$') {
			off = 3;
		}
		else {
			minor = salt.charAt(2);
			if ((minor != 'a' && minor != 'x' && minor != 'y' && minor != 'b') || salt.charAt(3) != '$') {
				throw new IllegalArgumentException("Invalid salt revision");
			}
			off = 4;
		}

		// Extract number of rounds
		if (salt.charAt(off + 2) > '$') {
			throw new IllegalArgumentException("Missing salt rounds");
		}

		if (off == 4 && saltLength < 29) {
			throw new IllegalArgumentException("Invalid salt");
		}
		rounds = Integer.parseInt(salt.substring(off, off + 2));

		real_salt = salt.substring(off + 3, off + 25);
		saltb = decode_base64(real_salt, BCRYPT_SALT_LEN);

		if (minor >= 'a') {
			passwordb = Arrays.copyOf(passwordb, passwordb.length + 1);
		}

		B = new BCrypt();
		hashed = B.crypt_raw(passwordb, saltb, rounds, minor == 'x', minor == 'a' ? 0x10000 : 0, for_check);

		rs.append("$2");
		if (minor >= 'a') {
			rs.append(minor);
		}
		rs.append("$");
		if (rounds < 10) {
			rs.append("0");
		}
		rs.append(rounds);
		rs.append("$");
		encode_base64(saltb, saltb.length, rs);
		encode_base64(hashed, bf_crypt_ciphertext.length * 4 - 1, rs);
		return rs.toString();
}- 코드가 조금 복잡해보이는데 단순화를 해봅시다.
private static String hashpw(byte passwordb[], String salt, boolean for_check) {
	BCrypt B;
	String real_salt;  // 이전에 만든 salt나, 다른 암호문과 비교를 할 때 추출해야 함.
	byte saltb[], hashed[];
	char minor = (char) 0;
	int rounds, off;
	StringBuilder rs = new StringBuilder();

    -------------------- 검증 로직 --------------------
	isNull(salt);
	validateSaltFormat(salt);                // BCrypt의 Salt 포맷을 만족시키는가?
    char minor = extractBCryptVersion(salt); // a, y, b 중하나였죠?
    rounds = extractRound(salt);                      // Key Stretching 적용을 위해 round 추출
    -------------------------------------------------

    -------------------- Salt 추출 로직 --------------------
    realSalt = extractRealSalt(salt) // `${BCryptVersion}${Strength}$` 을 제외한 나머지 부분 추출
	saltb = decode_base64(real_salt, BCRYPT_SALT_LEN); // 암호화 적용을 위해 Bytes로 변환
    ------------------------------------------------------
	if (minor >= 'a') {
		passwordb = Arrays.copyOf(passwordb, passwordb.length + 1);
	}

	B = new BCrypt();

    // [Salt + Password Byptes]암호화 진행
    // 보통 Blowfish 알고리즘을 적용
    // Key Stretching 진행
	hashed = B.crypt_raw(passwordb, saltb, rounds, minor == 'x', minor == 'a' ? 0x10000 : 0, for_check);

    ---------------- BCrypt 암호문 조립 ----------------
    appendBCryptVersion(rs, minor);
    appendStrength(rs, rounds);
    appendSalt(rs, saltb); // 대신 22Bit로
    appendHashs(rs, hashed);
	encode_base64(saltb, saltb.length, rs);
	encode_base64(hashed, bf_crypt_ciphertext.length * 4 - 1, rs);
	return rs.toString();
    -------------------------------------------------
}- 이해하기 쉽게 자세히 구현된 부분들을 슈도 코드로 쳐내봤습니다. 전체적으로 이해가 가시나요?
B.crypt_raw에서 암호화 알고리즘이 실행됩니다.
2) B.crypt_raw : Key Stretching 적용 살펴보기
private byte[] crypt_raw(byte password[], byte salt[], int log_rounds, boolean sign_ext_bug, int safety,
			boolean for_check) {
		int cdata[] = bf_crypt_ciphertext.clone();
		int clen = cdata.length;

		...

		else {
			rounds = roundsForLogRounds(log_rounds);	// shift 연산 (round = 2^log_rounds)
			if (rounds < 16 || rounds > 2147483648L) {
				throw new IllegalArgumentException("Bad number of rounds");
			}
		}

		...

        // round 만큼 반복 (strength가 클 수록 오래걸리는 이유)
		for (int i = 0; i < rounds; i++) {
			key(password, sign_ext_bug, safety);
			key(salt, false, safety);
		}

		...
}- 다른 알고리즘은 신경쓰지 말고
roundsForLogRounds(int)와crypt_raw의 반복문만 보시면 됩니다. - BCrypt에서 strength 는 기본값이 10으로 설정되어 있습니다.
static long roundsForLogRounds(int log_rounds) { // log_rounds가 strength라고 보시면 됩니다.
	if (log_rounds < 4 || log_rounds > 31) {
		throw new IllegalArgumentException("Bad number of rounds");
	}
	return 1L << log_rounds;
}- 암호화 rounds를 늘려 암호화 및 비교시간을 늘려 BruteForce를 대비하는 모습을 보여주고 있습니다.
최종

- 이제 모든 BCrypt 스펙을 앞에 붙이고, 가장 마지막에 Salt와 함께 암호화를 적용했던 Password를 붙여줍니다.
- 이렇게 되면 따로 Salt 저장 필요 없이 해당 암호문만 주어져도 충분하겠죠?
실제로 얼마나 느려지는가?
마지막으로 JMH를 통해 BCrypt에 대해 테스트를 진행해보겠습니다.
실행 환경
- Java 17
- MacOS Mac Silicon(M1)
- Ram : 16GB
테스트 코드
@BenchmarkMode(Mode.AverageTime)
@OutputTimeUnit(TimeUnit.MILLISECONDS)
@Fork(value = 2, jvmArgs= {"-Xms4G", "-Xmx4G"})
public class Test1 {

    public static void main(String[] args) throws IOException, RunnerException {
        Options opt = new OptionsBuilder()
            .include(Test1.class.getSimpleName())
            .warmupIterations(10)
            .measurementIterations(10)
            .forks(1)
            .build();
        new Runner(opt).run();
    }

    @Benchmark
    public String easyBCrypt() {
        String rawPassword = "rawPassword1234";
        BCryptPasswordEncoder encoder = new BCryptPasswordEncoder(10);

        return encoder.encode(rawPassword);
    }

    @Benchmark
    public String strongBCrypt() {
        String rawPassword = "rawPassword1234";
        BCryptPasswordEncoder encoder = new BCryptPasswordEncoder(20);

        return encoder.encode(rawPassword);
    }
}- strength가 31은 정말 너무 오래걸리기 때문에 20으로 타협을 봤습니다.
Result
Benchmark                          Mode   Cnt   Score     Error     Units
_02_BCryptTest.Test1.easyBCrypt    avgt   10   74.939    ± 1.384    ms/op
_02_BCryptTest.Test1.strongBCrypt avgt 10 76895.705 ± 535.434 ms/op- 평균 시간소요가 1000배 차이가 되는군요. 이정도는 과하니 한 12~15 사이로 두는 것이 좋을 것 같습니다. (약 1초 정도 걸리게?)