Introduction
Learning Points 📖
- Understanding of Intersection Observer API
- Acquire the way to use Intersection Observer API through out making infinite scroll
Body
Backdrop of use
Let's say that you are fetching data with hundres images from the server.
If you are trying to show all images to the clients at once, it will provide a terrible user experience due to network overload.
Then, your precious clients will leave the page in 3secs.
That's why you need to consider Lazy Load.
What is Lazy Load?
Bascially, lazy load just means that contents would be loaded later.
you can load 3 or 4 images at once then show rest images based on the view port that is watched by clients.
Except 3 or 4 images that should be loaded in the first place, the rest are replacing the actual file path in the data-src attribute.
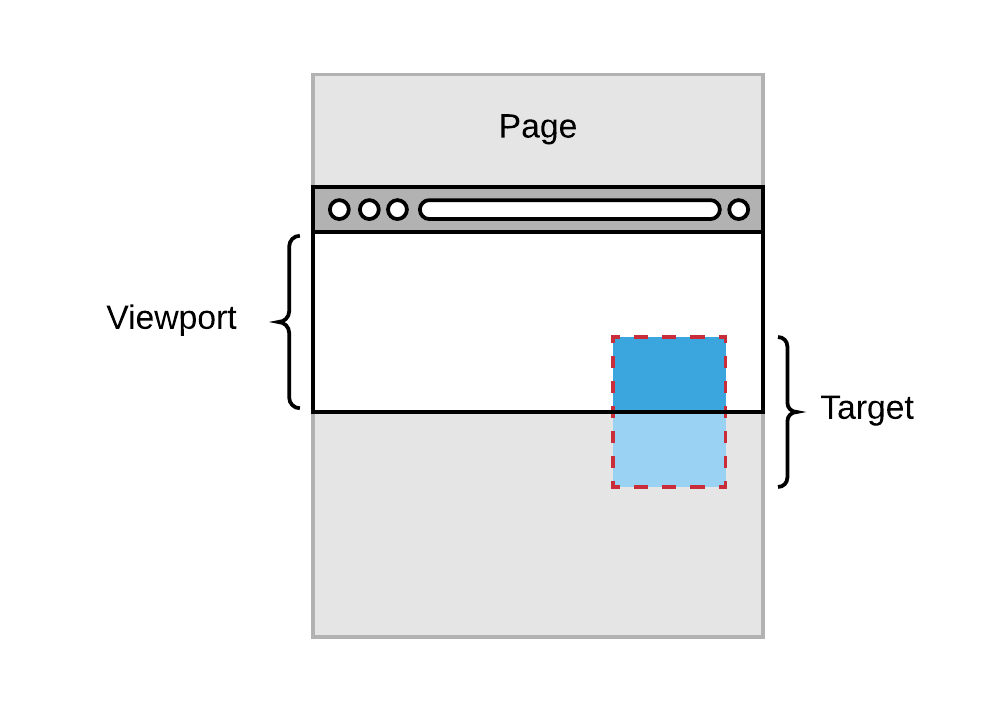
Then, this data-src attribute will be changed based on the user's view port.
The main idea to change data-src to src is simple.
You only need to know whether the user's view port is in the specific section that has to be shown one of the rest images.
you have 2 ways to change data-src to src.
The first one is to use scroll event and the other one is to use Intersection Observer.
How does the scroll event work?
Before diving into the scroll event, it has several issues to consider. (Click each of them to see what it is)
- Reflow
- rAF
- Throttle & Debounce
There are many more considerations to use scroll event such as resize for responsive web design. Of course, you have alternative ways to solve these problems but still a lot of things to do. And finally, Intersection Observer API popped up to solve all of these things easily.
Way of use
Let's make infinite scroll to see how you can use Intersection Observer API
These are the steps
- Markup
- Fetch from NASA API
- Create & Insert data
- Apply Lazy loading & Infinite scroll
Markup
Here's the simple markup.
You are gonna create li elements with fetching data from NASA API and insert these data inside ul tag.
<main>
        <div class="viewport">
            <div class="app index" id="main">
                <div class="content">
                    <div class="loading"></div>
                    <h1 class="heading-title motion">
                        <span>Spacestagram</span>
                    </h1>
                    <span class="sub-tit motion">Brought to you <br class="_m"> by NASA's image API</span>
                    <ul class="list">
                    </ul>
                    <div class="fetch-trigger"></div>
                </div>
            </div>
        </div>
    </main>
Fetch from NASA API
You can get API key from here
export default class Index extends page{

    async getData(){
        const api_key = 'your_api_key';
        const count = 10;
        const addr = `https://api.nasa.gov/planetary/apod?${api_key}&count=${count}`

        try{
            const fetchData = await axios.get(addr).then(el=>el.data);
            this.appendElements(fetchData);
        }catch(error){
            console.error(error);
        }

    }

}
Create & Insert data
You need two templates for li tag.
One is for regular and the other one is for lazy-load.
export default class{
constructor({hdurl,title,date,explanation}) {
this._li = `<li class="item">
<div class="img-wrap motion">
<img src="${hdurl}" alt="Space picture">
</div>
<div class="txt">
<em class="tit motion">${title}</em>
<span class="date motion">${date}</span>
<p class="cont motion">
${explanation}
</p>
<button class="btn motion" data-click="false">
<span>Like</span>
</button>
</div>
</li>`
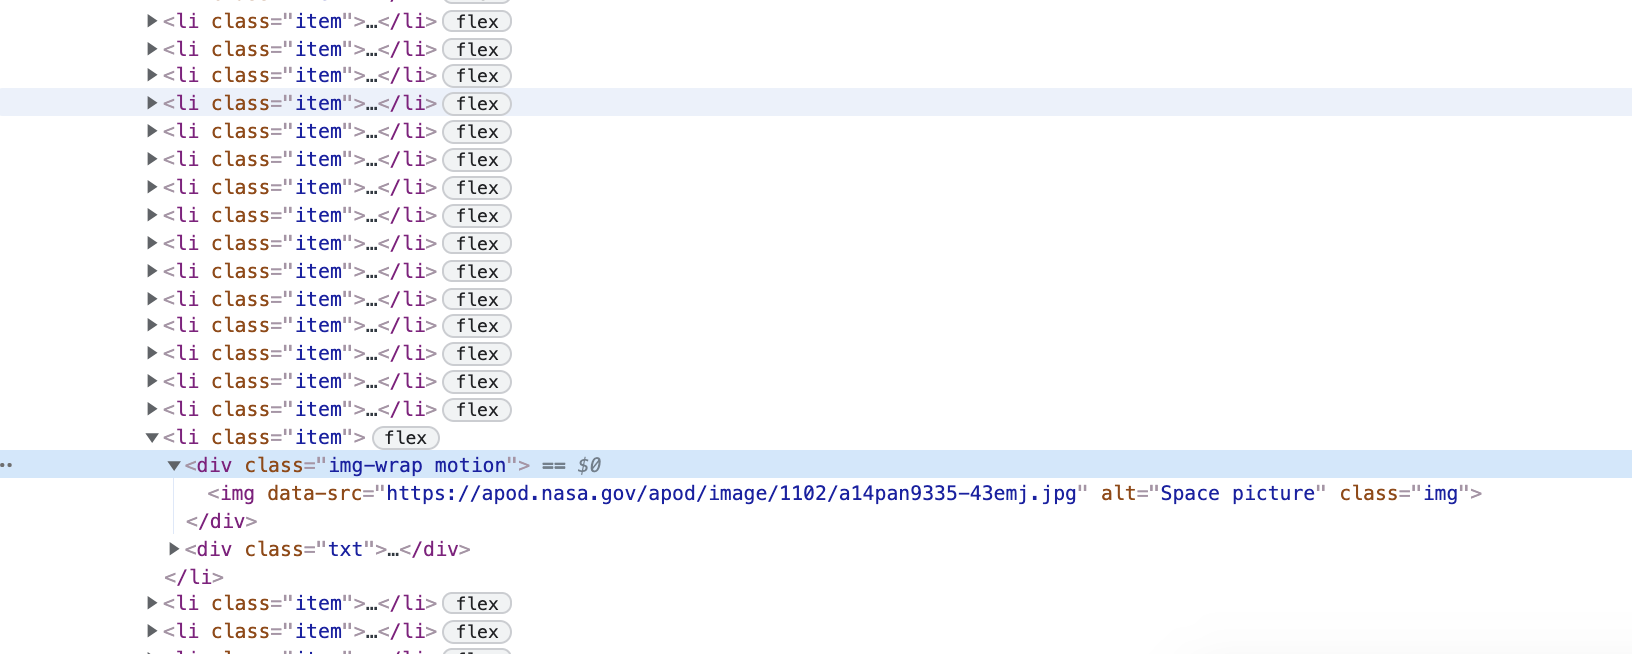
this._liLazy = `<li class="item">
<div class="img-wrap motion">
<img data-src="${hdurl}" alt="Space picture" class="img">
</div>
<div class="txt">
<em class="tit motion">${title}</em>
<span class="date motion">${date}</span>
<p class="cont motion">
${explanation}
</p>
<button class="btn motion" data-click="false">
<span>Like</span>
</button>
</div>
</li>`
}
get li(){
return this._li;
}
get liLazy(){
return this._liLazy;
}
}
// better to create templates with a new class as a componentAdd a function in the Index class.
appendElements(fetchData){
    const el = fetchData.map((el,idx,arr)=>{
      if(idx<4) return new liElement(el).li;
      else return new liElement(el).liLazy;
    }).join('');

    const target = document.querySelector('.list');
    target.insertAdjacentHTML('beforeend',el);

    this.addScrollEvent();
}
Apply Lazy loading & Infinite scroll
Now you need to apply lazy loading and Infinite scroll using Intersection Observer.
First add a function in the Index class.
addScrollEvent(){
    const images = document.querySelectorAll('.img-wrap');
    intersectionObserver.triggerLazyLoading(images);

    const fetchTrigger = document.querySelector('.fetch-trigger');
    intersectionObserver.fetchTrigger(fetchTrigger);
}
Then, create a class that would be work as a util class.
export default class {

    static triggerLazyLoading(el){
        const config = {
            root : null,
            rootMargin : '0px 0px 200% 0px',
            threshold : 0,
        };

        const observer = new IntersectionObserver(entries=>{
            entries.forEach(entry=>{
                const {isIntersecting, target} = entry;

                if(isIntersecting){
                    target.childNodes[1].src = target.childNodes[1].dataset.src || target.childNodes[1].src;
                    observer.unobserve(target);
                }

            })
        },config)

        el.forEach(el=>{
            observer.observe(el);
        })
    }

    static triggerFetch(el){
        const config = {
            root : null,
            rootMargin : '0px 0px 100% 0px',
            threshold : 0,
        }

        const observer = new IntersectionObserver((entries)=>{
            entries.forEach((entry)=>{
                const {isIntersecting, target} = entry;
                if(isIntersecting){
                    new Index().getData();
                }
            })
        },config);

        observer.observe(el);
    }

}
First, let's take a look at lazy load.
// configuration for the object

const config = {
    root : null, // default is the view port
    rootMargin : '0px 0px 200% 0px', // 200% from the bottom so that we can load images in advance to give a better UX
    threshold : 0, // 0 means at the beginning of element, 1 means at the end of element
};
const observer = new IntersectionObserver(entries=>{
entries.forEach(entry=>{
// You need isIntersecting to check whether the element is inside of viewport that applied configuration.
// target means the element you want to observe
const {isIntersecting, target} = entry;
if(isIntersecting){
// if the element is inside of viewport and has data-src, add src with the value of data-src
target.childNodes[1].src = target.childNodes[1].dataset.src || target.childNodes[1].src;
observer.unobserve(target); // once the target is loaded, unobserve it to stop repeating
}
})
},config)
el.forEach(el=>{
observer.observe(el); // observe every image element
})
}Second, let's take a look at infinite scroll.
const config = {
    root : null,
    rootMargin : '0px 0px 100% 0px', // 100% from the bottom so that we can fetch data in advance
    threshold : 0,
}
const observer = new IntersectionObserver((entries)=>{
entries.forEach((entry)=>{
const {isIntersecting, target} = entry;
if(isIntersecting){
new Index().getData(); // Fetch data from NASA again.
}
})
},config);
// as you can see el is just the empty tag to check if the viewport is at the end of the document
observer.observe(el); Third, You can add a motion effect that triggered by the scroll position
Try yourself for this!
conclusion
Pros and Cons
There is no reason not to use Intersection Observer.
It can solve the problems that cuased from scroll event.
The thing is it can't be used in IE.
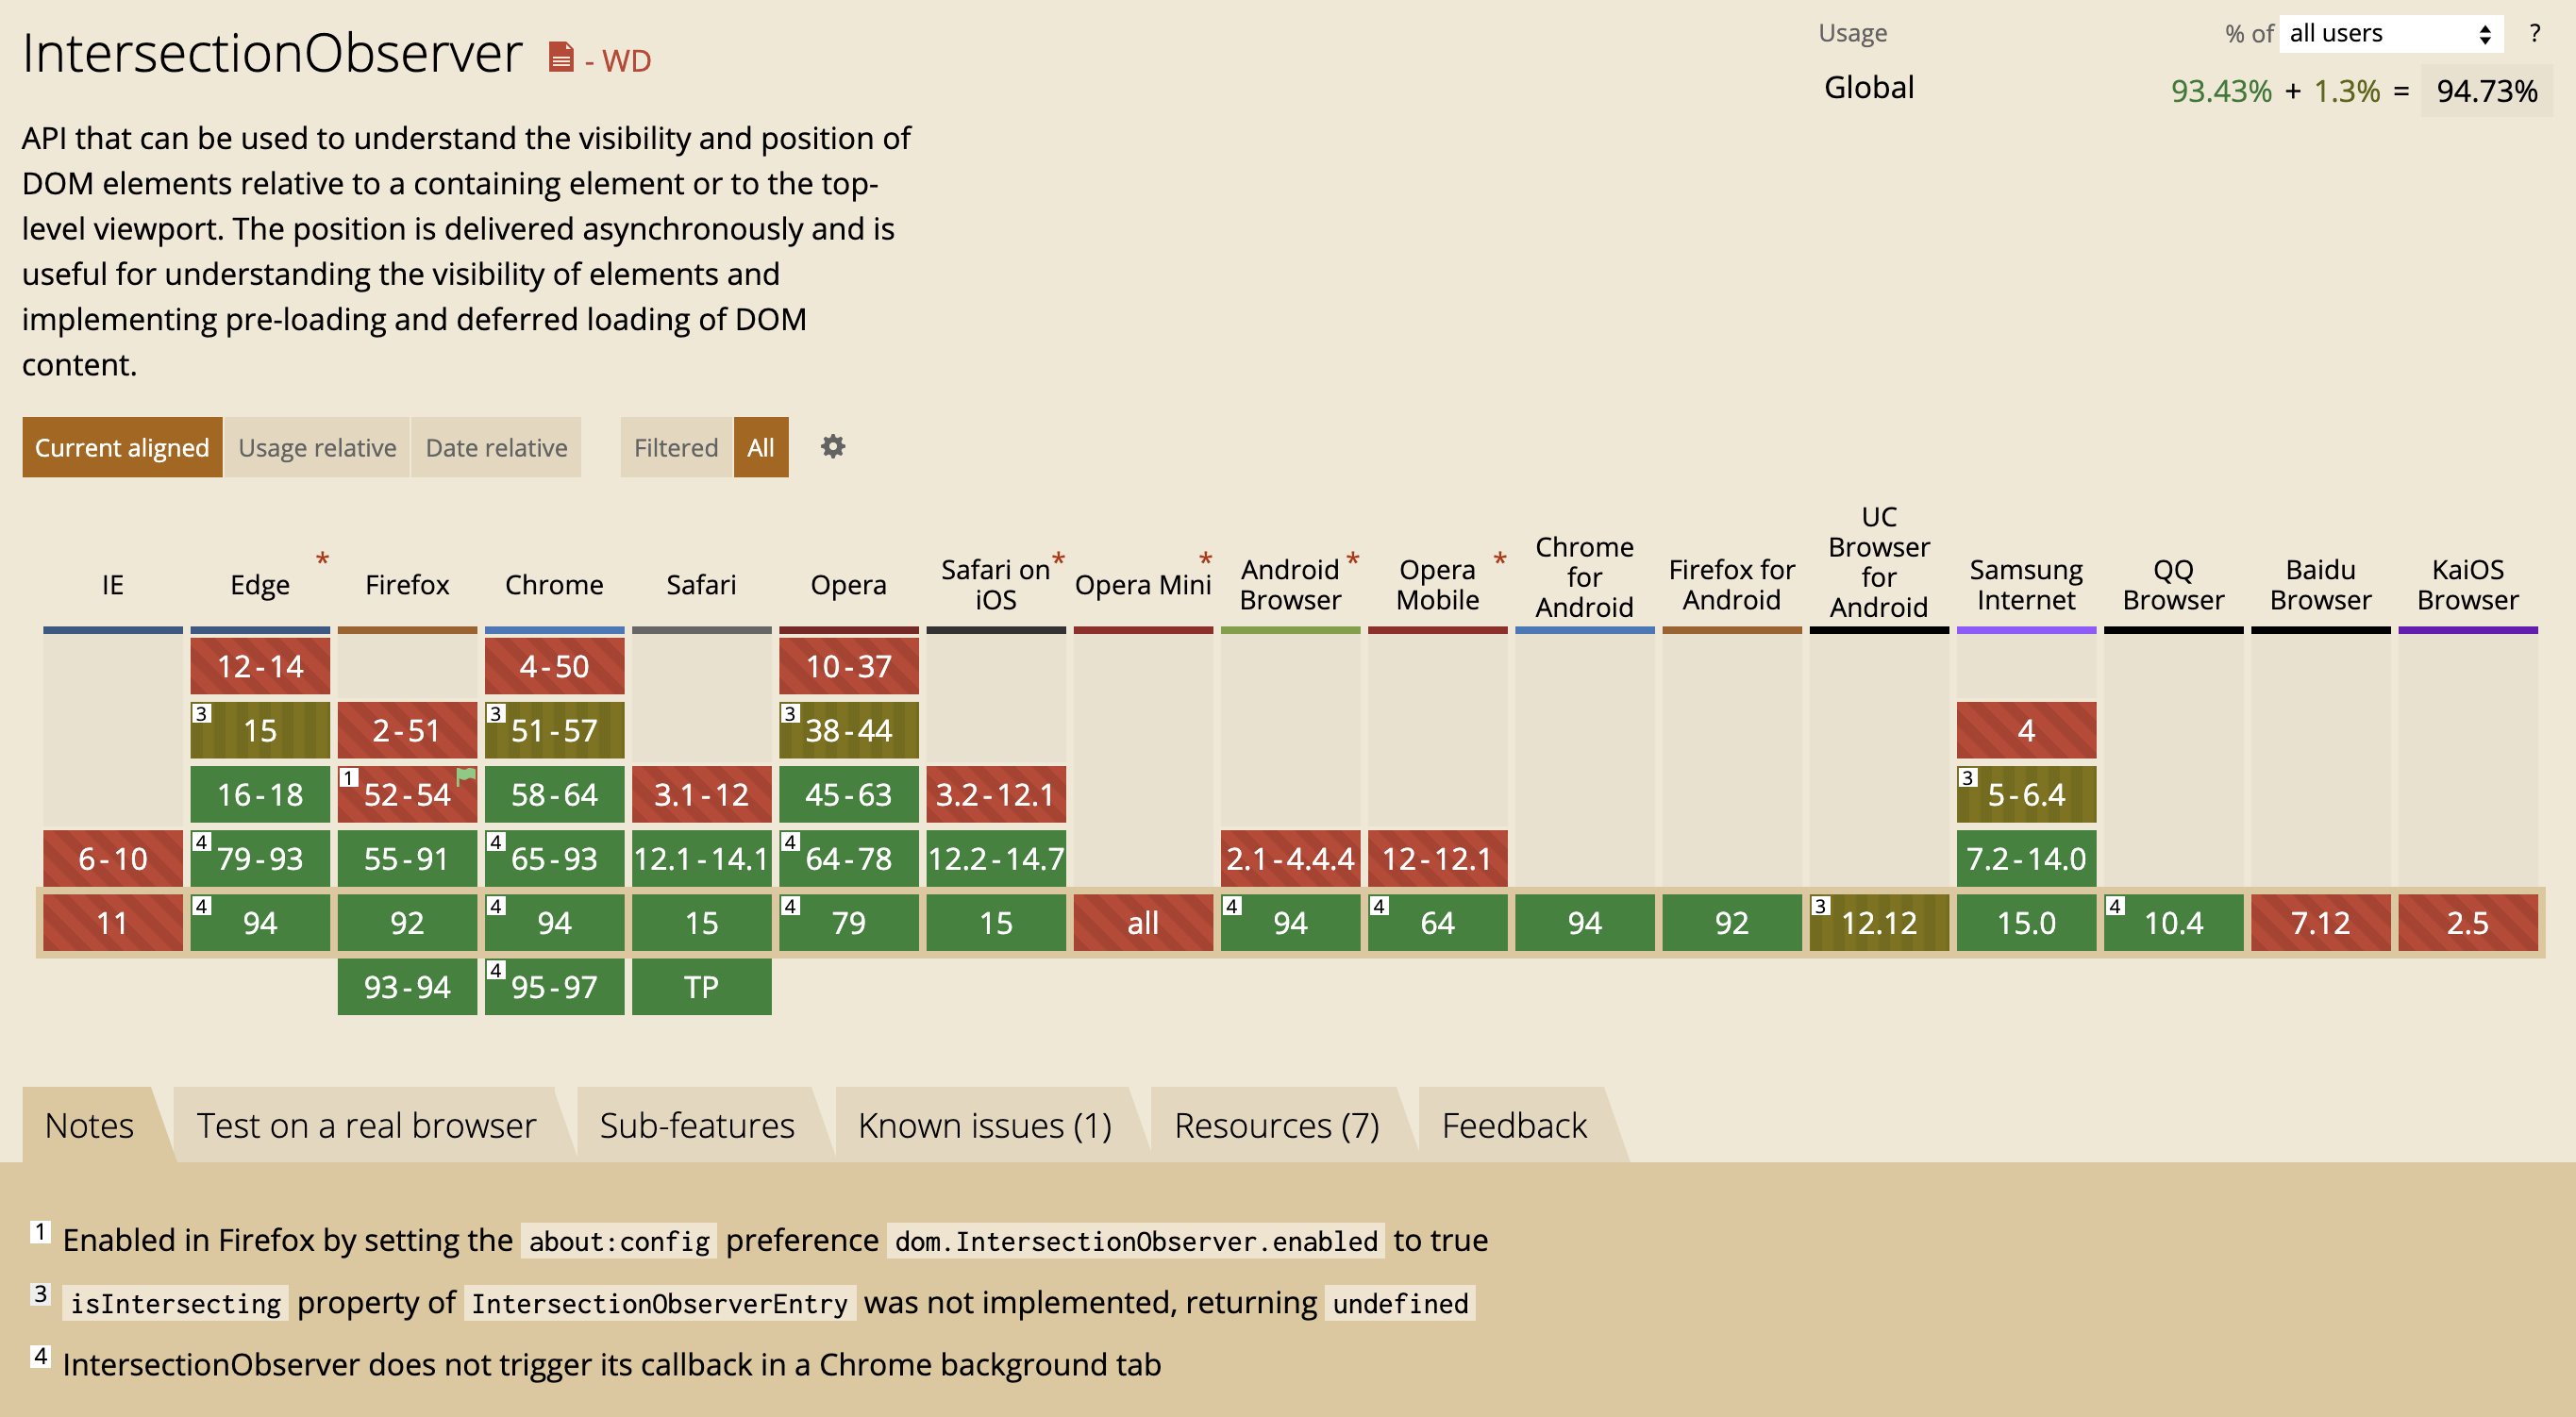
However, there are some polyfills so not a big deal.


영어를 잘쓰시네요 부럽습니다.