아래 글을 참고하여 Spring Boot 프로젝트 생성
https://kyuhyuk.kr/article/spring-boot/2020/07/19/Spring-Boot-JPA-MySQL-Board-Write-Post
프로젝트 정보
- Spring Boot 2.5.4
- Gradle
- Java
- PostgreSQL
- JPA 2.5.4
- Thymeleaf 3.0.12
- Lombok 1.18.20
- Bootstrap 4.5.0
1. Spring Boot 프로젝트 생성
Spring Initializr에 접속하여 아래와 같이 프로젝트 생성
→ Dependencies : Spring Web, Spring Data JPA, PostgreSQL Driver, Thymeleaf, Lombok
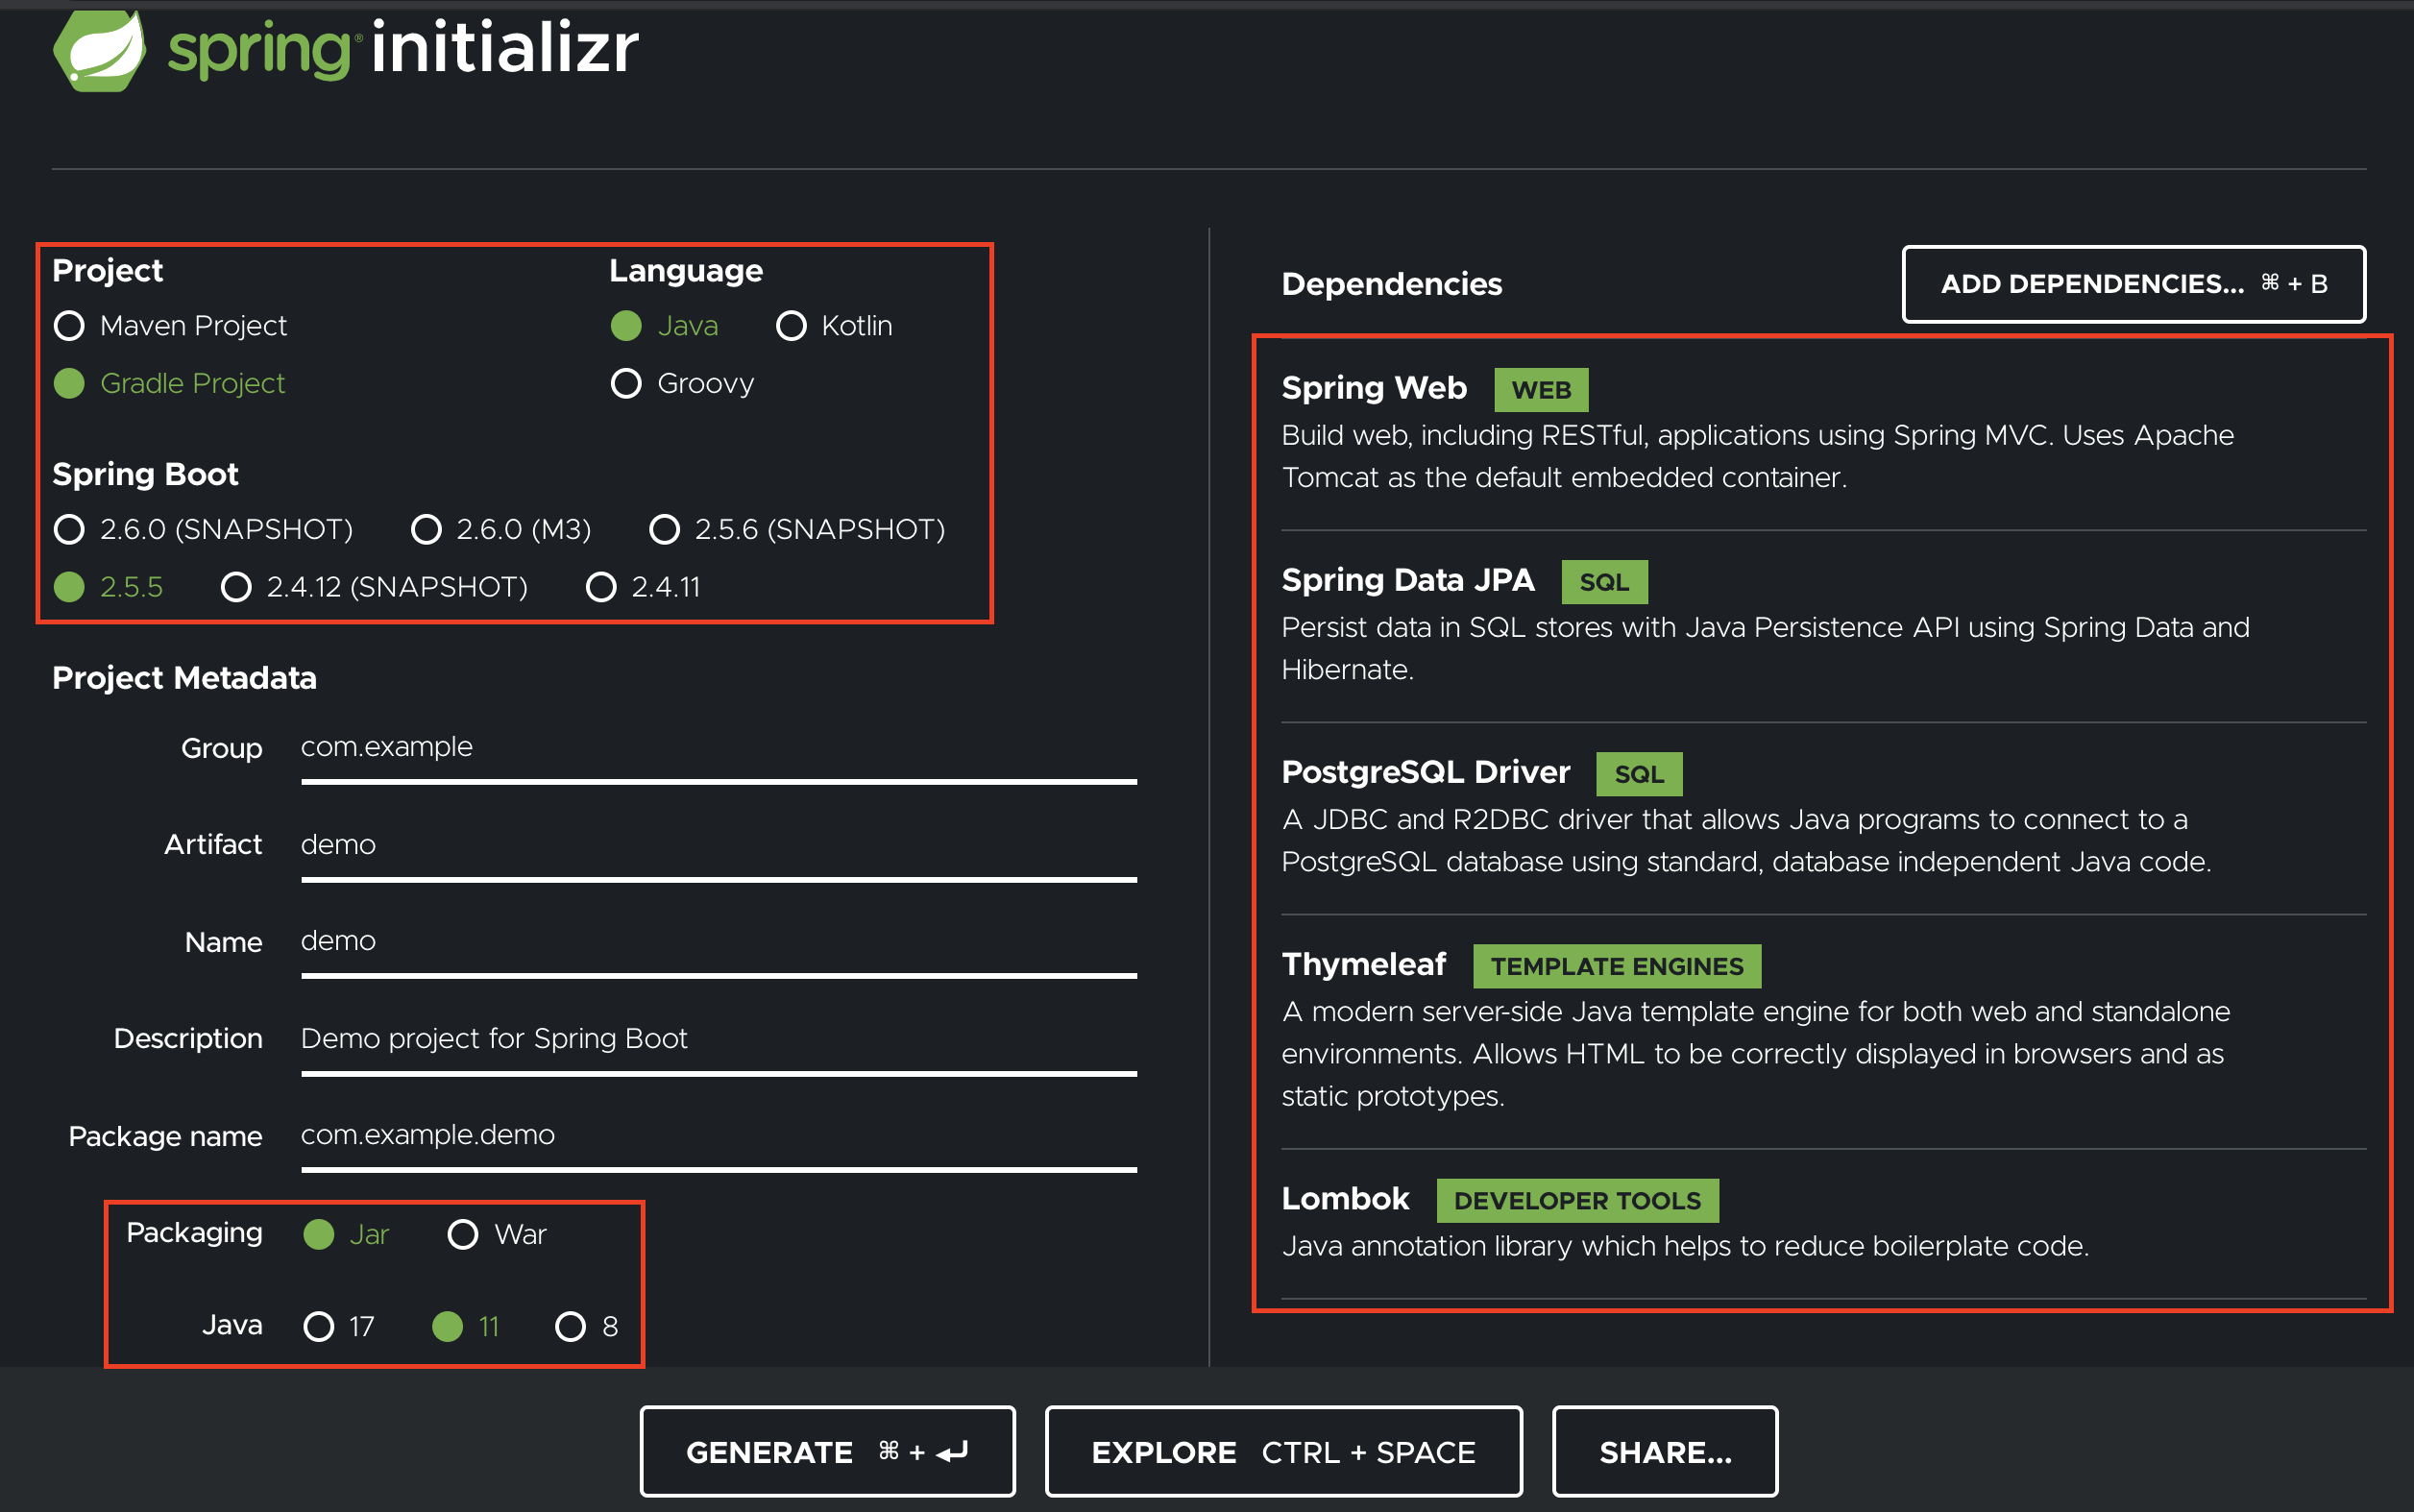
설정이 완료되었으면 GENERATE를 클릭하여 프로젝트 Export

2. IntelliJ에서 프로젝트 Open
Export한 프로젝트를 workspace로 Copy 후 압축을 푼다.
IntelliJ에서 Project를 Open하여 build.gradle에서 설정 정보를 확인한다.

3. Bootstrap 추가
화면을 쉽게 만들 수 있도록 build.gradle에 Bootstrap을 추가한다.
runtimeOnly 'org.webjars:bootstrap:4.5.0'build.gradle의 최종 내용은 아래와 같다.
plugins {
	id 'org.springframework.boot' version '2.5.4'
	id 'io.spring.dependency-management' version '1.0.11.RELEASE'
	id 'java'
}

group = 'com.example'
version = '0.0.1-SNAPSHOT'
sourceCompatibility = '11'

configurations {
	compileOnly {
		extendsFrom annotationProcessor
	}
}

repositories {
	mavenCentral()
}

dependencies {
	implementation 'org.springframework.boot:spring-boot-starter-data-jpa'
	implementation 'org.springframework.boot:spring-boot-starter-thymeleaf'
	implementation 'org.springframework.boot:spring-boot-starter-web'
	compileOnly 'org.projectlombok:lombok'
	runtimeOnly 'org.postgresql:postgresql'
	annotationProcessor 'org.projectlombok:lombok'
	testImplementation 'org.springframework.boot:spring-boot-starter-test'
	runtimeOnly 'org.webjars:bootstrap:4.5.0'
}

test {
	useJUnitPlatform()
}
4. IntelliJ에 Lombok 플러그인 설치
Lombok 플러그인을 설치한다.
IntelliJ IDEA → Preferences(Command+,) → Plugins에서 Lombok을 검색하여 Install
Installed 탭에서 Install 된 것 확인

5. 프로젝트 구조에 맞춰서 개발
| Path | 파일 |
|---|---|
| src/main/java/com/{GroupId}/{Artifact}/controller | - URL과 실행 함수를 매핑 - 비즈니스 로직이 있는 sevice를 호출하여 비즈니스 로직 처리 - 반환할 템플릿을 정의 및 JSON 등으로 응답 |
| src/main/java/com/{GroupId}/{Artifact}/service | - 비즈니스 로직을 구현 - 데이터 처리(모델)를 담당하는 repository에서 데이터를 가져와서 controller에 넘겨주거나, 비즈니스 로직을 처리 |
| src/main/java/com/{GroupId}/{Artifact}/domain/entity | - DB 테이블과 매핑되는 객체(Entity)를 정의 - JPA에서는 Entity를 통해 데이터를 조작함 |
| src/main/java/com/{GroupId}/{Artifact}/domain/repository | - 데이터를 가져오거나 조작하는 함수를 정의 - interface를 implements 하여 미리 만들어진 함수를 사용할 수 있으며, 또한 직접 구현이 가능 |
| src/main/java/com/{GroupId}/{Artifact}/dto | - controller와 service 간에 주고받을 객체를 정의하며, 최종적으로는 view에 뿌려줄 객체 - Entity와 속성이 같을 수 있으나, 여러 service를 거쳐야 하는 경우 dto의 몸집은 더 커짐 - ex) A Entity에 a 속성, B Entity에 b 속성이 있을 때, Z Dto에 a, b 속성으로 정의될 수 있음 - entity와 dto를 분리한 이유는 Entity는 DB 테이블이 정의되어 있으므로, 데이터 전달 목적을 갖는 객체인 dto를 정의하는 것이 좋다 |
| src/main/resources/static/ | - css, js, img 등의 정적 자원들을 모아놓은 디렉터리 |
| src/main/resources/templates/ | - 템플릿을 모아놓은 디렉터리 - Thymeleaf는 HTML을 사용한다 |