오늘 정리
JSON이란? 데이터를 문자열의 형태로 나타내기 위해 사용되며, 데이터를 주고 받을 때 많이 사용된다.
여러 데이터 유형들 중 가독성이 좋다는 장점이 있다. 그 메소드로는 JSON.stringify()(→JSON)의 형식으로, JSON.parse()(→js의 객체형식으로)가 있다.
복습
[FullCalendar]
- 이벤트 추가하기
(https://illysamsa.tistory.com/entry/fullcalendar-ajax로-event-추가하기)
- 데이터셋을 json으로 가져오는 부분 → 백엔드의 영역, html과 json이 만나는 부분의 작업```jsx <!DOCTYPE html> <html lang="ko"> <head> <meta charset="UTF-8"> <meta name="viewport" content="width=device-width, initial-scale=1.0"> <title>기본달력 테스트 - 실습</title> <!-- CDN 방식 import --> <script src="https://code.jquery.com/jquery-1.12.4.min.js"></script> <script src='https://cdn.jsdelivr.net/npm/fullcalendar@6.1.9/index.global.min.js'></script> <script> document.addEventListener('DOMContentLoaded', function() { const calendarEl = document.querySelector('#calendar'); const calendar = new FullCalendar.Calendar(calendarEl, { initialView: 'dayGridMonth', headerToolbar:{ left: 'prev, next today', center: 'title', right: 'dayGridMonth, timeGridWeek,listWeek' }, //일정에 대한 데이터셋 가져오기(배열, 계속 쌓여나감) eventSources: [{ events: function(info, successCallback, failureCallback) { $.ajax({ url: 'events2.json', type: 'GET', dataType: 'json', success: function(data) { console.log(data); successCallback(data); } });//end of ajax },//end of events // color : '#FF0000', textColor : '#FFFF00' }]//end of eventSources }); calendar.render(); }); </script> </head> <body> <div id="calendar"></div> </body> </html> ``` 
[자꾸만 나오는 JSON??]
💡JSON이란?
데이터를 문자열의 형태로 나타내기 위해 사용되며, 데이터를 주고 받을 때 많이 사용된다.
여러 데이터 유형들 중 가독성이 좋다는 장점이 있다.
- JSON 내장객체의 메소드
- JSON.parse() : JSON 문자열을 js의 객체로 변환(외부의 데이터를 내장의 데이터 타입으로 변환하는 것이다) → js에서 데이터 처리 가능
- JSON.stringify() : js 객체를 JSON 문자열로 변환
강의 내용
[사용자 정의 프로토타입] - Array.prototype[@@unscopables]
-
(https://developer.mozilla.org/ko/docs/Web/JavaScript/Reference/Global_Objects/Array/@@unscopables)
-
자바스크립트는 클래스라는 개념이 없다. 따라서 기존의 객체를 복사하여 새로운 객체를 생성하는 프로토타입 기반의 언어이다.
-
프로토타입 정의 시 화살표 함수 x (this의 값이 달라짐)
const fruits = ['🍓', '🥝', '🍎']
const fruits2 = new Array('🍌', '🍇', '🍋')

console.log(fruits) //['🍓', '🥝', '🍎']
console.log(fruits2) //['🍌', '🍇', '🍋']
console.log(fruits2.includes('🍇')) //true(존재함)
console.log(fruits2.includes('🍓')) //false(존재x)

Array.prototype.method = function () {
  console.log(this) //['🍓', '🥝', '🍎']['🍌', '🍇', '🍋']
}

fruits.method()
fruits2.method()
- 다른 곳에 정의된 함수 사용
-
다트연산자 & call (※ 함수 뒤에 ()는 넣지 않는다)
const person = {
  firstName: '초보', lastName: '나',
  printName: function () {
    return `${this.firstName}${this.lastName}`
  },
}
const student = {
  firstName: '신입', lastName: '나',
}

console.log(person.printName()) //초보나
// console.log(student.printName()) //호출 불가 그럼 어떻게??
// 함수도 객체이다. 함수의() 빼고(일급함수, 일급객체)
// 다트로 call하여 파라미터에 넣어 함수 사용 가능
console.log(person.printName.call(student)) //신입나
-
- 프로토타입의 함수를 수정 → 함수를 사용한 아래 결과 값에 대해 일괄적인 변경 가능!!
function Emp(fName,lName){
  //자스는 왜 선언부가 없지? 클래스라는 껍데기가 없기 때문에
  this.fName = fName //자스는 따로 선언안해도 전변선언 가능
  this.lName = lName
}

//프로토타입 정의 시 화살표 함수 x -> this가 달라짐
Emp.prototype.printName = function(){
  return `${this.fName}${this.lName}`
}
const james = new Emp('고수','나')
const king = new Emp('초보','나')
console.log(james.printName()); //'고수나'
console.log(james.printName);   //[Function]
console.log(king.printName());  //'초보나'
console.log(king.printName);    //[Function]
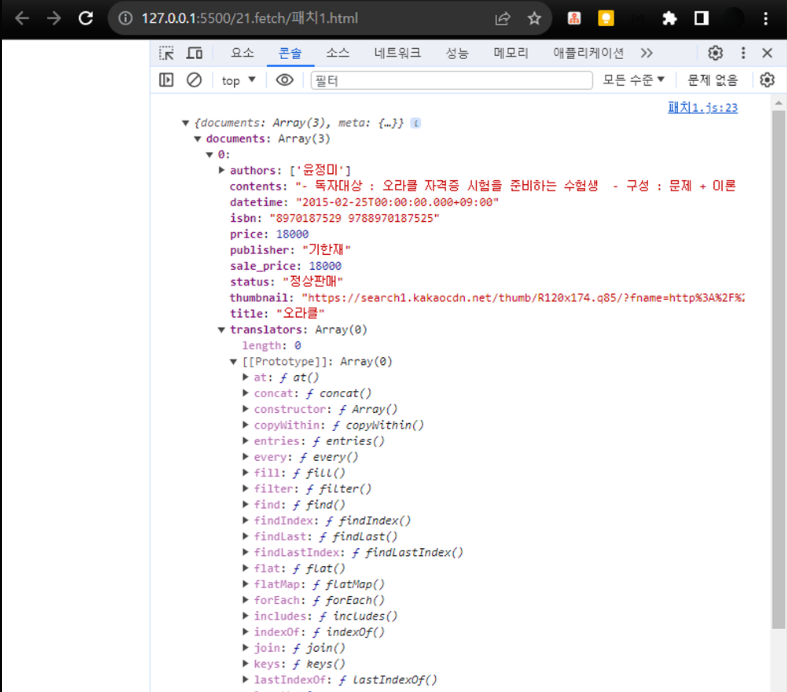
[패치함수(책검색 API)]
- https://joie-kim.github.io/GET-POST-PUT-PATCH/
- GET 방식 : 서버 넘겨서 정보를 조회할 때 → 쿼리스트링 사용(💡쿼리스트링? URL 끝에 ?와 함께 이름, 값 쌍을 이루는 요청 파라미터)
- POST 방식 : 리소스 생성, 변경위한 메소드
-
body 속성 이용하여 넘길 때 → POST 방식 전송해야함.
var requestOptions = {
  method: 'POST',
  headers: myHeaders,
  body: JSON.stringify({
    name: '나신입',
    email: '신입@hot.com',
  }),
  redirect: 'follow',
}
-
.then((response) => response.json())

.then(response => response.text())
- method: 'GET', → 에러 발생(왜? 쿼리스트링을 사용해야함.)
[구조분해할당]
- (https://developer.mozilla.org/ko/docs/Web/JavaScript/Reference/Operators/Destructuring_assignment)
- 배열이나 객체의 속성을 해체하여 그 값을 개별 변수에 담을 수 있게 하는 JavaScript 표현식
- 초기화 방법의 단계
const Sonata = {
  carColor: 'black',
  speed: 30,
}

//1단계 : 기본적인 초기화 방법
const carColor = Sonata.carColor
console.log(carColor)
const speed = Sonata.speed
console.log(speed)

//위의 초기화 방법은 비효율적 ->  구조분해 할당 사용해보기
//2단계 : 한번에 생성 가능
{
  //스코프로 감싸면 이름충돌 막음.
  const { carColor, speed } = Sonata
  console.log(carColor, speed)
}

//3단계 : 다른 이름으로 사용 가능
{
  //스코프로 감싸면 이름충돌 막음.
  const { carColor : myColor, speed : mySpeed } = Sonata
  console.log(myColor, mySpeed)
[기본값 매개변수]
- (https://developer.mozilla.org/ko/docs/Web/JavaScript/Reference/Functions/Default_parameters)
- 값이 전달되지 않거나 undefined인 경우 명명된 매개변수를 기본값으로 초기화
const msgPrint = (msg) => {
  if ((mst = null)) {
    mst = 'default message'
  }
  console.log(msg) //'🤚' undefined '📖'
}

msgPrint('🤚')
msgPrint()
msgPrint('📖')

{
  const msgPrint = (msg='default message') => {
    console.log(msg) //'🤚' 'default message' '📖'
  }
  msgPrint('🤚')
  msgPrint()
  msgPrint('📖')
}
[객체초기자]
- (https://developer.mozilla.org/ko/docs/Web/JavaScript/Reference/Operators/Object_initializer)
- 객체는 new Object(), Object.create() 또는 literal 표기법(initializer 표기법)을 사용해 초기화
- key 값의 이름, value 값의 이름 같을 때 생략 가능
[전개구문 with 전개연산자 … ]
- (https://developer.mozilla.org/ko/docs/Web/JavaScript/Reference/Operators/Spread_syntax)
- 반복 가능한 문자를 0개 이상의 인수 (함수로 호출할 경우) 또는 요소 (배열 리터럴의 경우)로 확장하여, 0개 이상의 키-값의 쌍으로 객체로 확장 → 깊은복사(다른 배열이 됨)
- 얕은복사 vs 깊은복사
- 얕은복사(shallow copy) : 복사된 객체와 원본객체의 인스턴스 변수는 같은 메모리 주소를 참조한다. → 하나를 변경하면 같이 변경된다.
- 깊은복사(deep copy) : 참조를 공유하지 않는다.
[템플릿 리터럴]
- (https://developer.mozilla.org/ko/docs/Web/JavaScript/Reference/Template_literals)
- 백틱 (
[삼항연산자]
- https://developer.mozilla.org/ko/docs/Web/JavaScript/Reference/Operators/Conditional_operator
- 세 개의 피연산자를 받는 유일한 연산자 (if … else 문의 대체재)
- 조건문, 물음표(?), 조건문이 참(truthy)일 경우 실행할 표현식, 콜론(:), 조건문이 거짓(falsy)일 경우 실행할 표현식이 배치
const isCar = true
let carName

if (isCar) carName = '소나타'
else carName = '자동차가 아니다'
console.log(carName)

//3항연산자로 바꾸기
{
  let carName = isCar ? '소나타':'자동차가 아니다.';
  console.log(carName)
}- 비동기 처리에 대한 이해(Ajax, jquery, jsp 등등 사용🥲)

강의 마무리
- 비동기 처리에 대한 이해
- 프론트와 백이 만나는 부분에 대한 연습 필요