
Framer Motion이 뭐예요?
Framer Motion은 리액트를 위한 모션 라이브러리예요. 유저와의 상호작용에 따른 모션을 간단하게 표현할 수 있게 해줘요 . 프레이머 모션에서는 <motion> 이라는 컴포넌트를 제공해요. 이것을 이용해서 HTML을 작성하듯이 모션 컴포넌트를 만들 수 있어요.
기본 사용법
슬라이드 애니메이션을 만들기 위해 먼저 알아야할 Framer Motion의 기본적인 사용법 이에요.
animate
<motion> 컴포넌트의 속성으로 animate라는 prop을 주고, 이 값을 변경하는 것만으로도 간단하게 애니메이션을 생성할 수 있어요.
<motion.div animate={{ x: 100 }} />animate prop에 주어진 값이 변경되면 자동으로 애니메이션을 생성해요.
아래 예제는 animate prop에 각각 x, y, rotate 값에 해당하는 useState 값을 넣고 인풋의 변경되는 값으로 set 하여 애니메이션을 만들어요. 단지 값을 바꾸었을 뿐인데 자연스러운 움직임이 만들어져요.
출처: Framer Motion
transition prop을 사용하면 위와 같은 스프링 움직임 효과도 적용할 수 있어요.
<motion.div animate={{ x, y, rotate }} transition={{ type: "spring" }}/>
initial
initial prop에 값을 설정하면 컴포넌트가 DOM에 렌더링될 때 애니메이션의 값으로 사용되어요.
아래 예제에서 처음 DOM에 렌더링 되는 순간 initial에 지정한 값에서 animate에 지정한 값으로 애니메이션이 진행되는 것을 볼 수 있어요. (새로고침 버튼을 눌러보세요.)
<motion.div
				  initial={{ opacity: 0, scale: 0.5 }}
			      animate={{ opacity: 1, scale: 1 }}
			      transition={{ duration: 0.5 }}
/>
출처: Framer Motion
exit
DOM에 렌더링될 때의 애니메이션을 구현하는 것과는 달리 제거될 때의 애니메이션을 구현하기 위해서는 <AnimatePresence> 로 <motion> 컴포넌트를 감싸야해요. 그럼 <motion> 컴포넌트가 애니메이션을 실행하고나서 제거될 수 있도록 만들어줘요.
exit prop에 값을 설정하면 컴포넌트가 DOM에서 제거될 때 애니메이션의 값으로 사용되어요,
모달이 닫힐 때 컴포넌트가 DOM에서 제거되기 때문에 애니메이션을 실행시켜 자연스럽게 사라지도록 할 수도 있어요.
<AnimatePresence>
    {isVisible && (
      <motion.div
        key="modal"
        initial={{ opacity: 0 }}
        animate={{ opacity: 1 }}
        exit={{ opacity: 0 }}
      />
    )}
  </AnimatePresence>

// 출처: Framer Motion
클릭하면 닫히는 모달 예시
Variants
애니메이션을 객체로 선언해서 사용할 수 있어요. 복잡한 애니메이션이나 재사용할 애니메이션을 따로 정의하고 <motion> 컴포넌트의 variants prop에서 사용할 수 있어요,
const variants = {
  visible: { opacity: 1 },
  hidden: { opacity: 0 },
}

<motion.div
  initial="hidden"
  animate="visible"
  variants={variants}
/>

// 출처: Framer Motion
Dynamic variants (custom)
custom prop에 값을 설정하면 variants 객체에서 값을 동적으로 지정할 수 있어요.
아래 예시에서는 i라는 값을 넘겨서 items 배열이 각각의 컴포넌트로 만들어질 때 transition의 delay가 다른 애니메이션이 나타나도록 했어요.
const variants = {
  visible: i => ({
    opacity: 1,
    transition: {
      delay: i * 0.3,
    },
  }),
  hidden: { opacity: 0 },
}

return items.map((item, i) => (
  <motion.li
    custom={i}
    animate="visible"
    variants={variants}
  />
))

// 출처: Framer Motion
슬라이드 애니메이션 만들기 (예제)
리액트에서는 컴포넌트의 key 값을 변경하면 새로운 컴포넌트로 인식해요. 따라서 바뀐 key 값을 가진 새로운 컴포넌트가 DOM에 렌더링될 때 initial prop의 값에서 animate 값으로 애니메이션이 실행되고, 이전 key값을 가진 컴포넌트가 DOM에서 제거되며 exit prop의 값에서 animate 값으로 애니메이션이 실행되어요.
아래 예제에서는 좌우 버튼에 따라서 key 값으로 설정한 page 값을 변화시키고 컴포넌트가 마운트되고 마운트가 해제되는 것을 이용해서 슬라이드 애니메이션을 구현했어요.
<AnimatePresence>
		<motion.img
					key={page}
					src={imgList[page]}
					initial={{ opacity: 0, x: direction > 0 ? 1000 : -1000 }}
					animate={{ opacity: 1,  x: 0 }}
					exit={{ opacity: 0, x: direction < 0 ? 1000 : -1000 }}
		/>
</AnimatePresence>
출처: Framer Motion
적용해보기
스케치북 이동하기
한 유저의 단어에서 시작한 게임 결과가 담긴 스케치북을 다 보고 나면 다음 스케치북으로 이동할 수 있게 했고, 다른 스케치북을 본다는 피드백을 정확하고 재미있게 주기 위해서 슬라이드 애니메이션을 사용하기로 했어요. 슬라이드 애니메이션을 위한 Variants를 만들었어요. custom prop으로 슬라이드가 이동할 방향과 이동할 수치를 받아요. 다른 곳에서 재사용할 Variants라서 얼마나 이동할지도 고정값 대신 동적인 값을 사용해요.
슬라이드 애니메이션 Variants 만들기
direction을 1이나 -1을 받아서 이동할 방향을 정해줬어요. 이미지가 약간 겹친다면 새로 만들어지는게 위쪽으로 오도록 zIndex 값을 설정했어요.
export const slideVariants = {
    enter: ({ direction, xValue }: { direction: number; xValue: number }) => {
        return {
            x: direction * xValue,
            opacity: 0,
        };
    },
    center: {
        zIndex: 1,
        x: 0,
        opacity: 1,
    },
    exit: ({ direction, xValue }: { direction: number; xValue: number }) => {
        return {
            zIndex: 0,
            x: direction * xValue  * -1,
            opacity: 0,
        };
    },
};
스케치북 컴포넌트에 애니메이션 적용하기
현재 유저들이 보고있는 결과 스케치북의 인덱스를 key값으로 설정했어요. 실제로 서비스에 적용해보며 특히 좋았던 점은 슬라이드 애니메이션을 구현하기 위해 여러개의 컴포넌트를 만들어서 이동시키는 대신 하나의 컴포넌트(motion.div)로 라이프사이클을 이용해서 애니메이션을 만들 수 있다는 것이에요. 하나의 컴포넌트기 때문에 스케치북 이미지도 한번만 넣으면 끝이었어요.
// SketchbookCard.tsx (생략 및 일부 수정)
// 드로잉 게임 결과를 보여주는 컴포넌트예요. 스케치북에 유저의 답이 담겨서 표현되어요.
<SketchbookWrapper>
		<AnimatePresence initial={false} custom={{ direction: bookDirection, xValue }}>
				<motion.div
		        key={currentBookIdx}
		        custom={{ direction: bookDirection, xValue }}
		        variants={slideVariants}
		        initial='enter'
		        animate='center'
		        exit='exit'
		        transition={{
				        x: { type: 'spring', damping: 30, stiffness: 300 },
				        opacity: { duration: 0.2 },
		        }}
    >
				    <img src={SketchbookImg} alt={'sketchbook'} />
				    <QuizResultContent /> // 유저가 그린 그림이나 답이 들어가요.
		    </motion.div>
    </AnimatePresence>
</SketchbookWrapper>
Variants 재사용하기
위에서 사용한 slideVariants를 재사용했어요. 같은 슬라이드 애니메이션이라도 transition prop에 설정한 값에 따라 다른 느낌의 애니메이션을 만들 수 있어요.
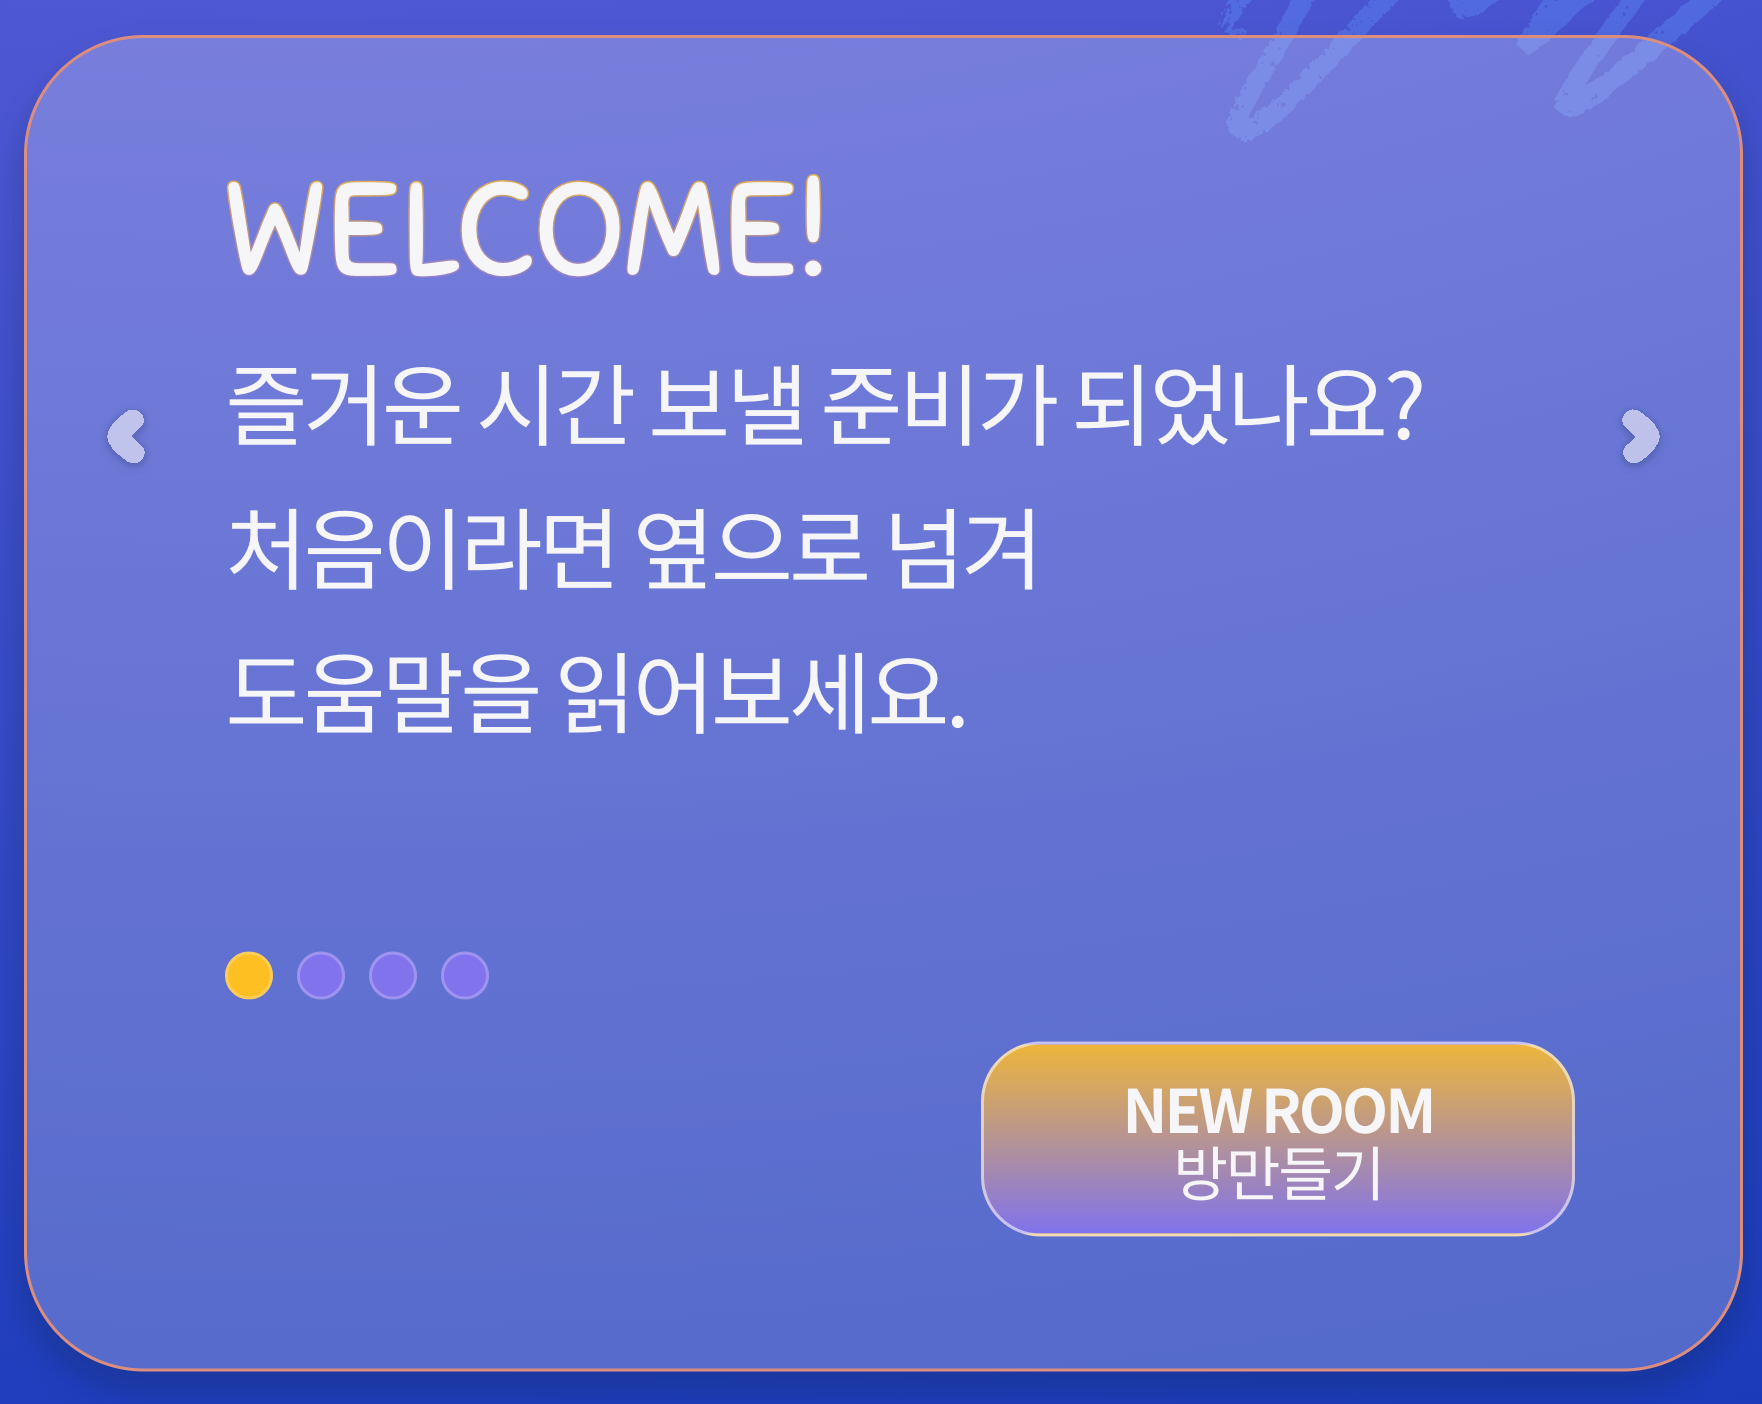
// InfoCarousel.tsx (생략 및 일부 수정)
// 메인페이지의 게임을 설명하는 컴포넌트예요.
<Slide>
		<LeftArrowIcon className={'arrowIcon'} onClick={() => moveSlide(-1)} />
		<Window>
				<AnimatePresence initial={false} custom={{ direction, xValue }}>
		        <SlideInner
                key={currentPage}
				custom={{ direction, xValue }}
                variants={slideVariants}
                initial='enter'
                animate='center'
                exit='exit'
                transition={{ duration: 0.3, ease: 'easeOut' }}
            >
		            {contents[currentPage]}
            </SlideInner>
        </AnimatePresence>
    </Window>
    <RightArrowIcon className={'arrowIcon'} onClick={() => moveSlide(1)} />
</Slide>
성능 개선
Framer Motion에서 <motion> 컴포넌트의 props에 설정하는 x, y, z 등의 값들은 기본적으로 transform 속성이에요.
기존에 margin으로 구현되어있어 Layout 단계부터 다시 그려지던 애니메이션을 transform 속성을 사용하는 애니메이션으로 대체하면서 3배 이상 성능이 개선되었어요. (Task당 1.37ms ⇒ 0.45ms)
margin버전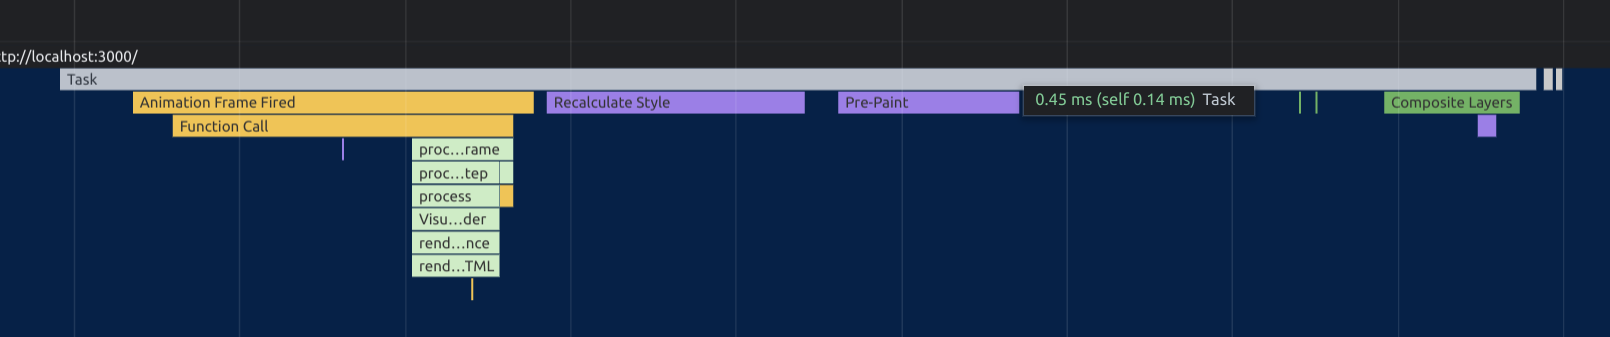
- 프레이머(
transform) 버전. 애니메이션 및 transition은 동일하게 적용

응용하기
flipVariants 라는 객체를 만들어서 스케치북의 페이지가 넘어가는 애니메이션을 정의했어요. 넘어갈 때 스케치북 배경컬러보다 약간 더 어두운 색으로 점차 변하게 해서 더 자연스러운 애니메이션을 만들었어요.
export const flipVariants = {
    enter: (direction: number) => {
        return {
            opacity: 0,
            rotateX: direction < 0 ? -120 : 0,
            backgroundColor: direction < 0 ? '#A8B2C2' : '#F6F5F8',
        };
    },
    center: {
        zIndex: 2,
        opacity: 1,
        rotateX: 0,
        backgroundColor: '#F6F5F8',
    },
    exit: (direction: number) => {
        return {
            zIndex: 0,
            opacity: 0,
            rotateX: direction > 0 ? -120 : 0,
            backgroundColor: direction > 0 ? '#A8B2C2' : '#F6F5F8',
        };
    },
};
// QuizResultContent.tsx (생략 및 일부 수정)
<AnimatePresence initial={false} custom={pageDirection}>
<QuizResult
key={currentPageIdx}
initial='enter'
animate='center'
exit='exit'
variants={flipVariants}
custom={pageDirection}
transition={{ duration: 0.4 }}
>
{currentSketchbook.type === 'DRAW' ? (
<img src={currentSketchbook.content} alt={'quiz result content'} />
) : (
<div>{currentSketchbook.content}</div>
)}
</QuizResult>
</AnimatePresence>
const QuizResult = styled(motion.div)``마치며
Framer Motion에는 이 외에도 Gestures나 Scroll을 이용한 애니메이션 등 다양한 기능을 제공하고 있어요. 좀 더 쉽게 성능도 좋은 애니메이션을 구현할 수 있다는 것과 이를 통해 유저에게 인터랙션에 대한 피드백을 제공하고 즐거움을 줄 수 있다는 생각에 재미있게 학습하고 적용해보는 시간이었습니다.
참고자료
Examples | Framer for Developers

12개의 댓글


Framer Motion provides various functions such as gestures and animation using scroll. It was a fun time to learn and apply the idea that it would be easier to implement animations with better performance, and that it would provide users with feedback on interactions and give them pleasure.

Are you wanting to manage your toll payments or view your payment history on PaybyPlateMA.com in Massachusetts? You're in the proper place if that's the case.We'll go over a number of subjects in the sections that follow, such as who is eligible to utilize PaybyPlate MA, how to use it, and an outline of the Massachusetts toll payment procedure.
We've listed a remedy and some typical reasons if you're experiencing issues utilizing Pay by PlateMA's online payment system or looking over your transaction history. So let's get right to the details without any further delay!

Activating Beachbody On Demand is like unlocking a door that may lead to your fitness adventure. It enables one to browse a constantly available selection of exercises from the comfort of one's own home at any time that works for them. The traditional gym memberships that limit your schedule are no longer necessary, ushering in a new era of customized exercise regimens for all.
The unique feature of Beachbody On Demand is that it's not your normal workout. This workout platform is packed with features and was created with your preferences in mind. A variety of fitness programs taught by top-notch instructors are available for you to select from; new options are frequently added to keep your workout regimen fresh and engaging.

Use the same phone number you used to apply for the Credit One credit card, 1-877-825-3242, to activate your credit card. Following that, you will need to give the customer executive agent some personal information. Your credit card will then be activated once the information you have provided has been verified.
Don't use a different mobile number; instead, utilise the same one you provided on your application.

Businesses must have a strong online presence in this era of internet development. Making sure their website is usable and accessible by individuals is a part of this. You most likely wish to start utilizing your Conns.com account because you want to take advantage of their offerings. This tutorial will walk you through the process of activating your conns.com account.
We are now going to discuss activation. In order to appreciate its significance, keep in mind that activation is not only a necessary step but also the gateway to all of Conns.com's benefits.
Regions' Skylight ONE Card is a turnkey solution that enables companies to set up an affordable payroll card program.
Lower payroll costs, boost employee direct deposit participation, and cut down on outsourcing, risk, and check fees. The Skylight® ONE Card could save you time and money if you have contract workers, hourly workers, unbanked personnel, or staff who are spread out geographically. Start electronically processing payroll payments and issue Skylight ONE Cards on-site. Free online account management tools are also advantageous to employees. https://skylightpeycard.info/

Through the BayCare Patient Portal, patients can safely view their medical records online. Through the Baycare Patient Portal, patients may interact with their healthcare professionals, seek prescription refills, and examine their medical data, including test results and diagnoses.
One of the top nonprofit health care systems in the US is BayCare. Patients in Georgia, Alabama, and Florida are served by it. The various features of the Baycare Health Patient Portal Login Guide and my daycare Patient Portal will be covered in this post, along with how it can support your continued communication with your healthcare professionals. Let's begin!
https://baycerepatientporrtal.info/

https://globalceshcard.info/: The company Global Cash Card, Inc. offers payment options. The business provides corporate solutions, such as flex benefit cards, payroll, travel and per diem, and gift cards. Global Cash Card caters to clients all around the world.
Find answers to frequently asked concerns concerning the Global Cash Card below. No company provides, reviews, or endorses editorial or user-generated content. Please remember that financial institutions are not obligated to guarantee that every post and query gets addressed.

The district's Student Information System (SIS), HISD Connect by PowerSchool, includes data on student contact, enrollment, demographics, grades, and online services. Every student's parents receive an access ID, which they can use to register and view their child's profile on the parent portal. Parents whose children have not received an access ID should be contacted by the school.
The goal of the HISD Connect board is to provide all students with an equitable education so they graduate with the abilities and information necessary for success. Every kid deserves equal opportunity and access to a quality, individualized education in a caring and secure setting.
실제로 해보고싶어요 ㅎㅎㅎㅎ 가족들과 연말에 얼굴보면서 해보면 재밌을 것 같네요 글 잘 보고 갑니다