package.json
dependencies를 보도록 하겠습니다.
"dependencies": {
    "@nestjs/common": "^9.0.0", // nestjs 안에서 자체적으로 동작하는 라이브러리
    "@nestjs/core": "^9.0.0", // nestjs 안에서 자체적으로 동작하는 라이브러리
    "@nestjs/platform-express": "^9.0.0", // nestjs 안에서 자체적으로 동작하는 라이브러리
    "reflect-metadata": "^0.1.13", // 데코레이터 사용 가능하게 해주는 라이브러리
    "rimraf": "^5.0.1", // 리눅스, 맥의 rm -rf 를 윈도우에서 사용 가능하게 해주는 라이브러리
    "rxjs": "^7.2.0" // 비동기를 위한 라이브러리
  },
컨트롤러
컨트롤러는 들어오는 요청을 처리하고 클라이언트에 응답을 반환하는 역할을 합니다.
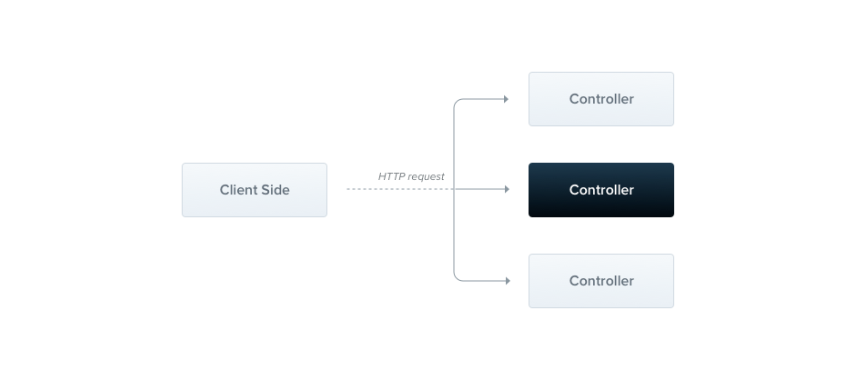
브라우저에서 http 요청을 보내면 request를 받고 response를 주는 역할을 합니다.
import { Controller, Get } from '@nestjs/common';
import { AppService } from './app.service';

@Controller()
export class AppController {
  constructor(private readonly appService: AppService) {}

  @Get()
  getHello(): string {
    return this.appService.getHello();
  }
}
컨트롤러는 기본적으로 클래스와 데코레이터를 사용합니다. 데코레이터는 스프링의 어노테이션이라고 생각하시면 됩니다. 데코레이터는 클래스를 필수 메타데이터와 연결하고 Nest가 라우팅 맵을 생성할 수 있도록 합니다. (요청을 해당 컨트롤러에 연결).
라우팅
@Controlelr() 데코레이터 안에 경로 접두사를 넣게 되면 경로 집합을 그룹화가 가능합니다.
@Controller('cats')
export class AppController {
  constructor(private readonly appService: AppService) {}

  @Get('hello') // localhost:8000/cats/hello
  getHello(): string {
    return this.appService.getHello();
  }

  @Get('bye') // localhost:8000/cats/bye
  getBye(): string {
    return 'bye';
  }
}
컨트롤러 메서드에서는 파라미터로 여러 정보들을 받을 수 있습니다.
import { Controller, Get, Req, Body, Param } from '@nestjs/common';
// ... 생략
  @Get('hello')
  getHello(@Req() request, @Body() body, @Param() param): string {
    return this.appService.getHello();
  }
request, body, param 등의 값을 파라미터로 받아 사용이 가능합니다.
더 자세한 내용은 공식 홈페이지의 가이드를 확인하시면 됩니다.
https://docs.nestjs.com/controllers
성장하는, 나눌 줄 아는 개발자