🖊️이론
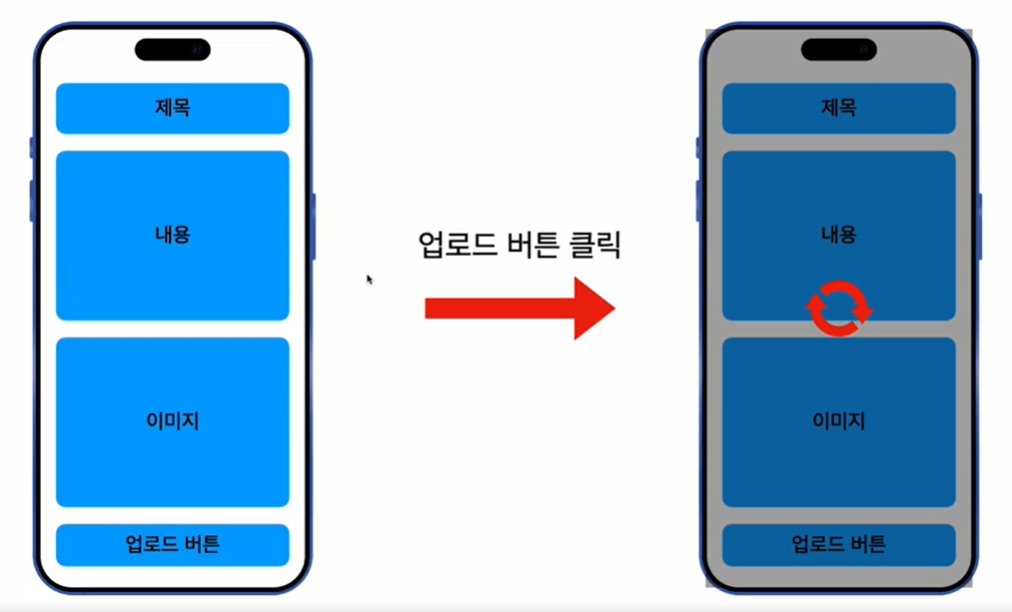
고전적인 방법으로, 제목 내용 이미지를 작성하고 업로드 버튼을 누르면 서버로 전송이 됩니다.
현재 구현돼있는 이미지 업로드 방식
- 제목, 내용, 이미지를 모두 선택한 다음 모든 정보를 한번에 서버로 업로드
- 텍스트는 빠르지만 파일은 오래걸릴 수 있음
- 업로드 버튼을 누를 때, 시간이 오래걸리면 사용자는 불편을 느낌
- 파일 1개가 아닌 여러개면 더욱 오랜시간이 걸림
앞으로 바꿀 방식
- 이미지를 선택할 때마다 업로드 시키기
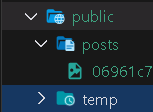
- 업로드 된 이미지들은
임시폴더에 잠시 저장(/public/temp) - 이미지 업로드를 한 후 응답받은 이미지의 경로만 프론트에서 저장 해둔 후, 포스트를 업로드 할 때 이미지의 경로만 추가
- POST /posts 엔드포인트에 이미지 경로를 함께 보낼경우 해당 이미지를 임시 폴더
(/public/temp)에서부터 포스트 폴더(/public/posts)로 이동시키기 - PostEntity의 image 필드에 경로를 추가한다.
S3 presigned url을 사용하면 많이 사용되는 방식이다.
장단점
| 기존 방식 | 신규 방식 | |
|---|---|---|
| 체감 속도 | 이미지 업로드되는 시간 기다리기 때문에 길다. | 이미지를 선택하자 마자 먼저 업로드를 진행하기 때문에 속도감이 좋다. |
| 서버 과부하 | 업로드 버튼을 눌렀을때만 요청이 보내지기 때문에 포스트 하나당 한번의 요청만 보낸다. | 이미지를 선택할때마다 업로드를 진행하기 때문에 많은 요청이 보내진다. 특히 이미지 선택하고 포스트를 하지 않으면 리소스만 낭비한다. |
| 엔드포인트 관리 | 파일을 업로드 해야하는 엔드포인트가 생길때마다 파일 업로드 관련 multer세팅을 계속해줘야 한다. | 공통된 이미지 업로드 엔드포인드를 하나 만들어서 모든 이미지 업로드를 한번에 관리 할 수 있다. |
| 파일 관리 | 포스팅 버튼을 눌렀을 때만 파일이 업로드 되기 때문에 잉여 파일이 생길 가능성이 적다. | 이미지를 선택하면 바로 업로드를 진행하기 때문에 선택한 이미지를 삭제하거나 변경하면 잉여 파일이 생긴다. 잉여 파일들은 주기적으로 삭제 해줘야한다. |
🖊️이미지 업로드 엔드포인트 생성
posts 모듈에 있던 MulterModule를 common 모듈로 이동시킵니다. 모든 파일 업로드는 common 모듈에서 진행을 하도록 하겠습니다.
- common.module.ts
import { BadRequestException, Module } from '@nestjs/common';
import { CommonService } from './common.service';
import { CommonController } from './common.controller';
import { MulterModule } from '@nestjs/platform-express';
import { extname } from 'path';
import * as multer from 'multer';
import {v4 as uuid} from 'uuid'; // 일반적으로 많이 사용하는 버전 v4

@Module({
    imports: [
      	AuthModule,
    	UsersModule,
        MulterModule.register({
            // 파일을 다룰 떄 여러가지 옵션 기능
            limits: {
                // 바이트 단위로 입력
                fileSize: 10000000,
            },
            fileFilter: (req, file, cb) => { // req: 요청 | file: req에 들어있는 파일
                /**
                 * cb(에러, boolean)
                 *
                 * 첫번째 파라미터에는 에러가 있을경우 에러정보를 넣어준다.
                 * 두번쨰 파라미터는 파일을 받을지 말지 boolean을 넣어준다.
                 */

                // asdasd.jpg -> .jpg
                const extension = extname(file.originalname);

                if (extension !== '.jpg' && extension !== '.jpeg' && extension !== '.png') {
                  return cb(new BadRequestException('jpg/jpeg/png 파일만 없로드 가능합니다. '), false); // cb(에러, boolean)
                }
                return cb(null, true); // 파일을 받는다.
            },
            storage: multer.diskStorage({
                // 파일 저장시 어디로 이동 시킬까?
                destination: function(req, res, cb) {
                      cb(null, ); // 파일 업로드 위치
                },
                // 파일 이름 뭐로 지을래?
                filename: function(req, file, cb) {
                    // uuid + file의 확장자
                    cb(null, `${uuid()}${extname(file.originalname)}`); // POST_IMAGE_PATH로 이동
                }
            }),
        }),
    ],
    controllers: [CommonController],
    providers: [CommonService],
    exports: [CommonService]
})
export class CommonModule {}
파일 업로드의 위치만 변경하면 됩니다. path.const.ts로 이동해서 임시폴더의 경로를 만들어 주고, public에 temp 폴더를 생성하겠습니다.
- common/const/path.const.ts
import { TEMP_FOLDER_NAME } from './path.const';
import { join } from "path";

export const PROJECT_ROOT_PATH = process.cwd();
export const PUBLIC_FOLDER_NAME = 'public';
export const POSTS_FOLDER_NAME = 'posts';
// 임시 폴더 이름
export const TEMP_FOLDER_NAME = 'temp';

export const PUBLIC_FOLDER_PATH = join(
     PROJECT_ROOT_PATH,
     PUBLIC_FOLDER_NAME
)

export const POST_IMAGE_PATH = join(
     PUBLIC_FOLDER_PATH,
     POSTS_FOLDER_NAME,
)

export const POST_PUBLIC_IMAGE_PATH = join(
     PUBLIC_FOLDER_NAME,
     POSTS_FOLDER_NAME,
)

// 추가
export const TEMP_FOLDER_PATH = join(
     PUBLIC_FOLDER_PATH,
     TEMP_FOLDER_NAME,
)
선 업로드 방식은 먼저 temp 폴더에 전부 저장을 하겠습니다. common.module.ts로 가서 임시 폴더의 경로를 입력하겠습니다. 이제 파일을 업로드하면 전부 temp폴더에 이동을 할 것입니다.
- common.module.ts
@Module({
    imports: [
      	AuthModule,
    	UsersModule,
        MulterModule.register({
            limits: {
                fileSize: 10000000,
            },
            fileFilter: (req, file, cb) => {
                const extension = extname(file.originalname);

                if (extension !== '.jpg' && extension !== '.jpeg' && extension !== '.png') {
                  return cb(new BadRequestException('jpg/jpeg/png 파일만 없로드 가능합니다. '), false);
                }
                return cb(null, true);
            },
            storage: multer.diskStorage({
                destination: function(req, res, cb) {
                      cb(null, TEMP_FOLDER_PATH); // 파일 업로드 위치
                },
                filename: function(req, file, cb) {
                    cb(null, `${uuid()}${extname(file.originalname)}`);
                }
            }),
        }),
    ],
    controllers: [CommonController],
    providers: [CommonService],
    exports: [CommonService]
})
export class CommonModule {}
common.module.ts에 작성을 했으니까, controller로 이동해서 작업을 하겠습니다.
- common.controller.ts
@Controller('common')
export class CommonController {

    constructor(private readonly commonService: CommonService) {}

    @Post('image')
  	@UseGuards(AccessTokenGuard)
    @UseInterceptors(FileInterceptor('image'))
    postImage(
      	@UploadedFile() file: Express.Multer.File,
    ) {
		// 여기까지 왔다면?
    }
}
만약 주석이 달려있는 곳까지 통과를 했다면 common.module.ts의 코드를 전부 통과하고, temp 폴더에 이미지가 존재하는 상태입니다. 마지막은 filename만 반환하면 됩니다.
@Controller('common')
export class CommonController {
constructor(private readonly commonService: CommonService) {}
@Post('image')
@UseGuards(AccessTokenGuard)
@UseInterceptors(FileInterceptor('image'))
postImage(
@UploadedFile() file: Express.Multer.File,
) {
return {
fileName: file.filename,
}
}
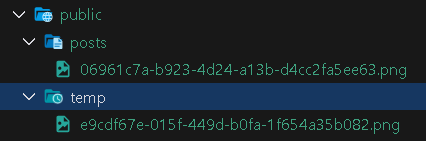
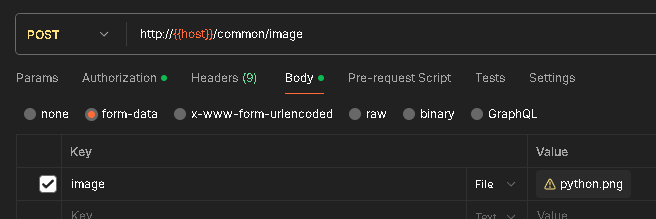
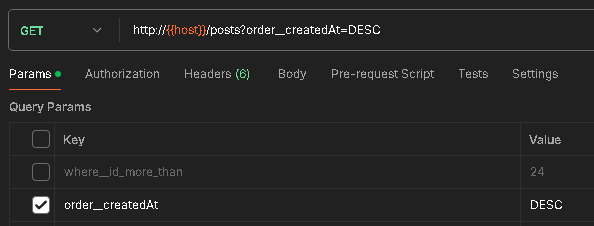
}포스트맨으로 테스트를 해보겠습니다.

{
    "fileName": "e9cdf67e-015f-449d-b0fa-1f654a35b082.png"
}
🖊️POST posts엔드포인트 변경
현재 이미지 name을 받아오는 API를 만들었습니다. 이제 post를 생성할 때, 반환받을 이미지의 이름을 postPosts()에 보내주게 되면 해당 path에 mapping을 하고 temp폴더에 있는 이미지를 post 폴더로 이동시키도록 만들겠습니다.
- posts.controller.ts
@Post()
@UseGuards(AccessTokenGuard)
@UseInterceptors(FileInterceptor('image')) // 더 이상 필요 없다. -> 이미지 받는 것은 common에서 처리하기 때문에!
postPosts(
    @User('id') userId: number,
    @Body() body: CreatePostDto,
    @UploadedFile() file?: Express.Multer.File,
) {
    return this.postsService.createPost(
      	userId, body, file?.filename,
    );
}
.
.
변경
.
.
@Post()
@UseGuards(AccessTokenGuard)
postPosts(
    @User('id') userId: number,
    @Body() body: CreatePostDto,
    @UploadedFile() file?: Express.Multer.File,
) {
    return this.postsService.createPost(
      	userId, body,
    );
}- posts.service.ts
async createPost(authorId: number, postDto: CreatePostDto) { // 변경
    const post = this.postsRepository.create({
        author: {
          	id: authorId,
        },
        ...postDto,
        // 변경
        likeCount: 0,
        commentCount: 0,
    });

    const newPost = await this.postsRepository.save(post);
    return newPost;
}- posts/dto/create-post.dto.ts
export class CreatePostDto extends PickType(PostsModel, ['title', 'content']) {

     @IsString()
     @IsOptional()
     image?: string;
}
image에 temp 폴더의 이미지 이름을 넣어주게 되면, postPostw() 내부의 createPost()에 CreatePostDto를 통해서 들어가고 생성됩니다.
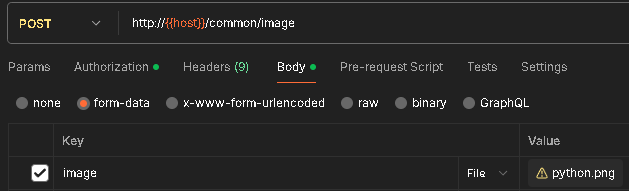
포스트맨으로 테스트를 해보겠습니다. 로그인을 먼저 하고 common/image를 보내서 temp폴더에 이미지를 이동시킵니다.
{
    "fileName": "36b07d14-7378-4370-a605-58fad992b224.png"
}
그 후, 해당 이미지 이름을 복사해서 /posts에 추가를 합니다.
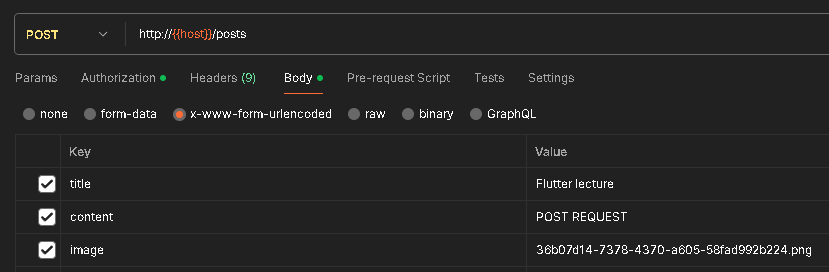
{
    "title": "Flutter lecture",
    "content": "POST REQUEST",
    "image": "/public\\posts\\36b07d14-7378-4370-a605-58fad992b224.png", // 생성
    "likeCount": 0,
    "commentCount": 0,
    "author": {
        "id": 1
    },
    "id": 110,
    "updatedAt": "2024-02-12T01:48:35.564Z",
    "createdAt": "2024-02-12T01:48:35.564Z"
}
등록이 잘 되었는지 확인을 해보겠습니다.
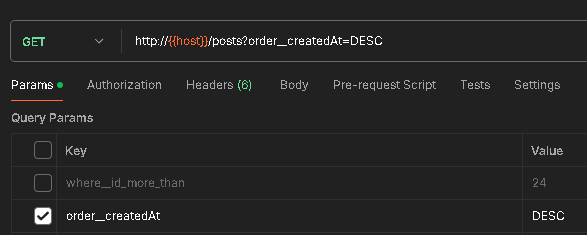
{
    "data": [
        {
            "id": 110,
            "updatedAt": "2024-02-12T01:48:35.564Z",
            "createdAt": "2024-02-12T01:48:35.564Z",
            "title": "Flutter lecture",
            "content": "POST REQUEST",
            "image": "/public\\posts\\36b07d14-7378-4370-a605-58fad992b224.png",
            "likeCount": 0,
            "commentCount": 0,
            "author": {
                "id": 1,
                "updatedAt": "2024-01-26T05:58:10.800Z",
                "createdAt": "2024-01-26T05:58:10.800Z",
                "nickname": "codefactory",
                "email": "codefactory@codefactory.ai",
                "role": "USER"
            }
        },
사진이 들어가 있는지 확인을 해보겠습니다.
http://localhost:3000/public//posts//36b07d14-7378-4370-a605-58fad992b224.png// 20240212195015
// http://localhost:3000/public//posts//36b07d14-7378-4370-a605-58fad992b224.png
{
"statusCode": 404,
"message": "ENOENT: no such file or directory, stat 'C:\\workspace\\nestjsworkspace\\df_sns_2\\public\\index.html'"
}이렇게 에러가 발생한 이유는 temp폴더에 있는 사진을 posts폴더로 아직 옮기지 않았기 때문입니다.

🖊️엔티티가 생성될 때 임시 폴더로부터 이미지 파일 이동시키기
- posts.service.ts
async createPostImage(dto: CreatePostDto) {
    // dto의 이름을 기반으로 파일의 경로를 생성한다.
    const tempFilePath = join( // 이미지의 절대경로를 tempFilePath로
        TEMP_FOLDER_PATH,
        dto.image,
    );
}
.
.
추가
.
.
import { promises } from 'fs'; // fs: file system

async createPostImage(dto: CreatePostDto) {

    const tempFilePath = join(
        TEMP_FOLDER_PATH,
        dto.image,
    );

    try { // import { promises } from 'fs'
        // 파일이 존재하는지 확인
        // 만약에 파일이 존재하지 않으면 에러를 던짐
        await promises.access(tempFilePath);
    } catch (error) {
      	throw new BadRequestException('존재하지 않는 파일입니다. ');
    }
}
.
.
완성
.
.
import { basename, join } from 'path';

async createPostImage(dto: CreatePostDto) {

    const tempFilePath = join(
        TEMP_FOLDER_PATH,
        dto.image,
    );

    try {
        await promises.access(tempFilePath);
    } catch (error) {
      	throw new BadRequestException('존재하지 않는 파일입니다. ');
    }

    // 파일의 이름만 가져오기
    // /Users/aaa/bbb/ccc/asdad.jpg -> asdad.jpg
    const fileName = basename(tempFilePath);

    // 새로 이동할 포스트 폴더의 경로 + 이미지 이름
    // {프로젝트 경로}/public/posts/asdad.jpg
    const newPath = join(
        POST_IMAGE_PATH,
        fileName,
    );

    // 파일 옮기기
    await promises.rename(tempFilePath, newPath);
    return true;
}
post를 생성하기 전에 만드는 방법으로 컨트롤러 코드를 작성하겠습니다.
- posts.controller.ts
@Post()
@UseGuards(AccessTokenGuard)
async postPosts(
    @User('id') userId: number,
    @Body() body: CreatePostDto,
    @UploadedFile() file?: Express.Multer.File,
) {
    await this.postsService.createPostImage(body); // temp -> posts
    return this.postsService.createPost(
      	userId, body,
    );
}temp폴더에 존재하는 이미지를 posts폴더로 이동시키고 post를 생성합니다. 포스트맨으로 테스트를 해보겠습니다.
{
    "fileName": "ba9df4fd-f970-4709-91b5-8a36d5251794.png"
}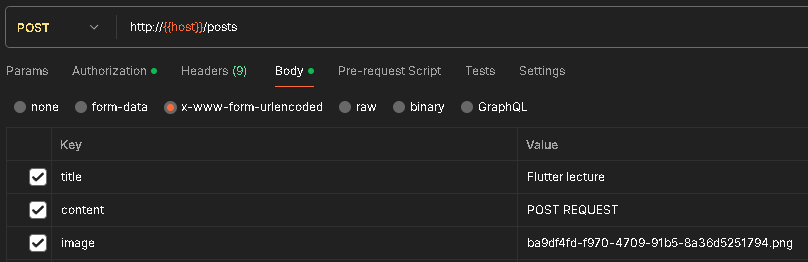
{
    "title": "Flutter lecture",
    "content": "POST REQUEST",
    "image": "/public\\posts\\ba9df4fd-f970-4709-91b5-8a36d5251794.png",
    "likeCount": 0,
    "commentCount": 0,
    "author": {
        "id": 1
    },
    "id": 111,
    "updatedAt": "2024-02-12T02:18:52.698Z",
    "createdAt": "2024-02-12T02:18:52.698Z"
}
{
    "data": [
        {
            "id": 111,
            "updatedAt": "2024-02-12T02:18:52.698Z",
            "createdAt": "2024-02-12T02:18:52.698Z",
            "title": "Flutter lecture",
            "content": "POST REQUEST",
            "image": "/public\\posts\\ba9df4fd-f970-4709-91b5-8a36d5251794.png",
            "likeCount": 0,
            "commentCount": 0,
            "author": {
                "id": 1,
                "updatedAt": "2024-01-26T05:58:10.800Z",
                "createdAt": "2024-01-26T05:58:10.800Z",
                "nickname": "codefactory",
                "email": "codefactory@codefactory.ai",
                "role": "USER"
            }
        },
http://localhost:3000/public//posts//ba9df4fd-f970-4709-91b5-8a36d5251794.png
ba9df4fd-f970-4709-91b5-8a36d5251794.png 이미지가 이동된 것을 알 수 있습니다.
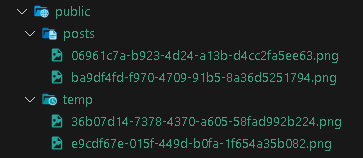
지금 과정은 temp폴더에 있는 사진을 옮기면 끝이 나기 때문에 사용자 입장에서는 매우 빠르다고 느끼게 됩니다.
물론 단점으로는 temp폴더에 적재된 이미지들을 저장소를 위해 관리해줘야하는 불편함이 존재합니다. 따라서 기존방법과 새로운 방법을 같이 사용하는 것이 좋습니다.