
학습사항
- 자바에서 예외 처리 방법 (try, catch, throw, throws, finally)
- 자바가 제공하는 예외 계층 구조
- Exception과 Error의 차이는?
- RuntimeException과 RE가 아닌 것의 차이는?
- 커스텀한 예외 만드는 방법
Error & Exception
컴파일에러 와 런타임에러
JVM은 실행할 수 없는 상황이 되면 꺼져버린다. 그리고 그 때 우리는 에러가 발생했다고 얘기한다.
실행할 수 없는 상황은 컴파일 단계와 런타임 단계에서 일어날 수 있다.
각각을 컴파일 에러, 런타임 에러라고 하며,
컴파일 에러가 있을 경우 기본적으로 자바 컴파일러가 문법 검사를 해주어 친절하게 어느 부분에서 에러가 발생했는지 알려준다.


이를 참고해, 컴파일 에러를 고치고 컴파일을 완료하여다 할 지라도, 프로그램이 돌아가는 도중 에러(Runtime Error)는 터질 수 있다.
만약 이렇게 에러가 터져버리면 프로그램이 종료가 되어버림으로 최악의 상황을 피하기 위해 런타임에러를 최대한 컨트롤 해야할 필요가 있다.
런타임에러는 개발자가 컨트롤 할 수 있는 영역인 Exception 과 기반 시스템의 문제로 발생하는 영역인 Error 로 구분되어 있고 이 부분을 도식화 해보면 다음과 같다.
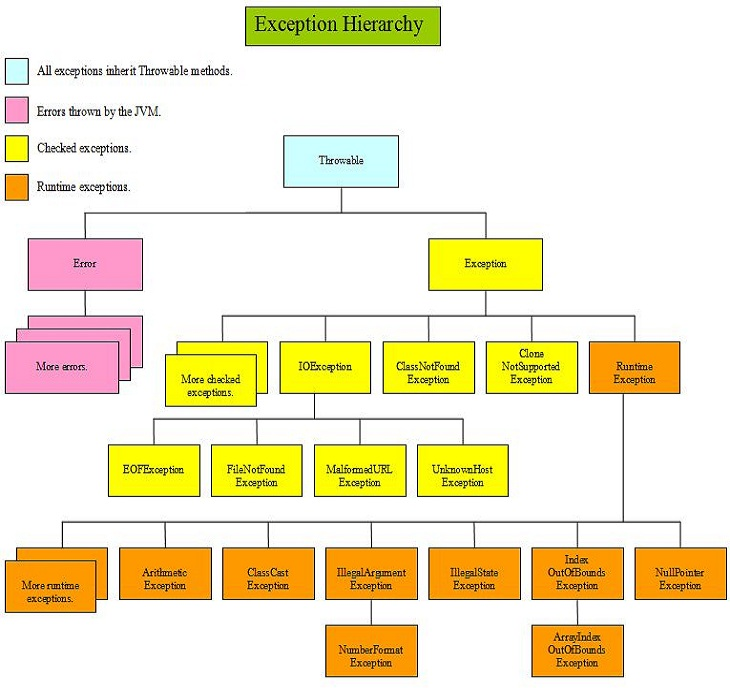
(사진 출처 - http://java5tutor.info/java/flowcontrol/exceptionover.html)
Checked Exception & Unchecked Exception
Checked Exception은 예외처리를 하지않을 경우 컴파일 에러를 발생시키도록 하여, 반드시 예외처리를 해야하는 Exception을 말하고, Unchecked Exception은 처리하지 않더라도, 컴파일에러가 발생하진 않지만 발생할 수 있는 예외들로 RuntimeException 클래스를 상속하는 모든 Exception 클래스가 Unchecked Exception 이다.
(Error 도 Unchecked Excpetion 이다.)
Checked Exception


Checked Exception 중 하나인 ClassNotFoundException 의 경우, 다음과 같이 예외처리를 하지 않을 시 컴파일에러를 발생시킨다.
Unchecked Exception
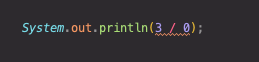
어떤 수를 0으로 나누는 경우,Unchecked Exception 중 하나인 ArithmeticException 이 발생하는데 이 경우 컴파일은 되지만 0으로 나누는 일은 할 수 없음으로, 실행하게 되면

다음과 같이 에러코드가 찍히면서 프로그램이 종료된다.
자바에서 예외 처리 방법 (try, catch, throw, throws, finally)
try - catch
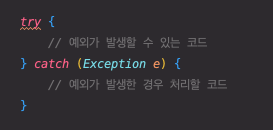
자바에서는 예외처리를 위해서 사용할 수 있는 try-catch 구문이 있다.
가장 기본적인 구조를 보자면 다음과 같다.
여러개의 catch 문을 활용하면, 더 세밀한 컨트롤이 가능하다.
    public static void main(String[] args) {

        try {
            System.out.println(3/0);
        } catch (IndexOutOfBoundsException ioe) {
            System.out.println("IndexOutOfBoundsException 이 발생할 경우 수행");
        } catch (ArithmeticException ae) {
            System.out.println("ArithmeticException 이 발생할 경우 수행");
        }

    }
try 문과 대치하는 여러개의 catch 문을 작성할 수 있음으로 필요한 경우 세밀하게 컨트롤 하여 사용할 수 도있다. 물론, 필요없는 경우 다형성을 활용해 Exception 으로 받는 것도 가능하다.
그리고 java 1.7 부터는 catch 문을 합쳐서 사용할 수 도 있게 되었다.
    public static void main(String[] args) {

        try {
            System.out.println(3/0);
        } catch (IndexOutOfBoundsException | ArithmeticException e) {
            System.out.println("IndexOutOfBoundsException 혹은  ArithmeticException 발생할 경우 수행");
        }

    }
try - catch - finally
예외가 발생하든, 하지않든 수행하고 싶은 구문이 있다면 finally 블럭을 활요하면 된다.
try {
	    System.out.println(3/0);	// 1 - ArithmeticException 발생
        } catch (Exception e){
            e.printStackTrace(); 	// 2 -catch 블럭 수행
        } finally {
            System.out.println("반드시 수행");	// 3- finally 블럭 수행
     }
/* console
java.lang.ArithmeticException: / by zero
	at weeks9.Main.main(Main.java:16)
반드시 수행
*/


//-----------------------------------------------

try {
            System.out.println(3/1);	// 1 - Exception 없이 수행
        } catch (Exception e){
            e.printStackTrace();
        } finally {
            System.out.println("반드시 수행");   // 2 - finally 블럭 수행
     }
/* console
3
반드시 수행
*/
try - catch - finally 문은 특히 자원해제가 필요할 때 많이 사용된다.
        Connection con = null;
        Statement stmt = null;
        try{
            con = DriverManager.getConnection(URL, ID, PW);
            stmt = con.createStatement();

            stmt.close();
            con.close();
        } catch (SQLException e){
            e.printStackTrace();
        } catch (Exception e){
            e.printStackTrace();
        } finally {
            try{
                if(stmt!=null) stmt.close();
            } catch (SQLException e){
                e.printStackTrace();
            }
            try{
                if(con != null) con.close();
            } catch (SQLException e){
                e.printStackTrace();
            }
        }
위 코드에서 finally 를 통해 자원을 해제하지 않을 경우, Exception 이 발생할 경우 자원을 해제하지 않아, 메모리 누수가 발생할 수 있기 때문에 finally 를 통해 자원 해제를 해주었다. 하지만 자바 7 부터 try-with-resource 문이 생기면서 더 쉽게 자원 해제를 할 수 있게 되었다.
try - with - resource 활용
 try (
        Connection conn = DriverManager.getConnection(URL, ID, PW);
        Statement stmt = conn.createStatement()){
        } catch (Exception e){
            e.printStackTrace();
        }
try-with-resource 를 사용하면 exception 이 발생할 경우 JVM 이 자동으로 try( ) 안의 자원을 해제 해준다.
throw
throw 를 활용하면 의도적으로 예외를 발생시킬 수 있다.
try{
            System.out.println("예외를 발생시켜보자");
            throw new Exception("!생성한 예외!");
        } catch (Exception e){
            e.printStackTrace();
        }
/* console
예외를 발생시켜보자
java.lang.Exception: !생성한 예외!
	at weeks9.Throw.main(Throw.java:8)
*/
throws
throws 는 메소드에 붙일 수 있는 키워드로 메소드 내부에서 exception 이 발생할 경우 예외처리를 내부에서 하지 않고 메소드를 호출한 쪽에서 처리하도록 하는 키워드이다.
 public static void main(String[] args) {
        try {
            test();
        } catch (Exception e) {
            e.printStackTrace();
        }

    }

    private static void test() throws Exception{
        System.out.println("이 메소드는 내부적으로 exception 이 발생할 수 있음");
        throw new Exception("예외!");
    }
코드를 보면 test() 메소드 내부에서 발생하는 exception을 메소드 안에서 예외처리 하지않고 test()를 호출한 메인메소드에서 try-cathch 를 통해 예외처리하는 것을 볼 수 있다. 메인메소드 에서도 역시나 throws 를 사용할 수 있는데 그럴경우 예외를 처리하지 않는것과 마찬임으로 유의해야한다.
 public static void main(String[] args) throws Exception {
            test();
    }

    private static void test() throws Exception{
        System.out.println("이 메소드는 내부적으로 exception 이 발생할 수 있음");
        throw new Exception("예외!");
    }
RuntimeException과 RE가 아닌 것의 차이
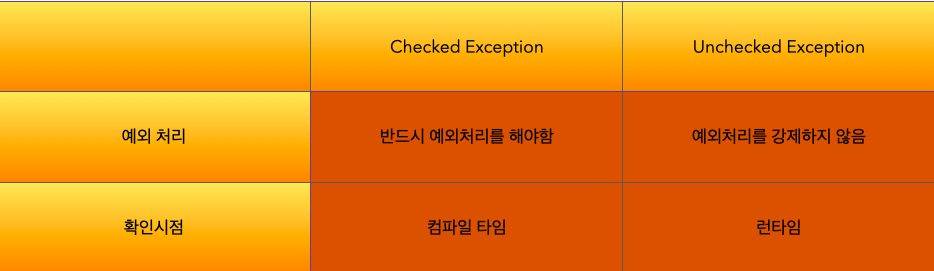
Exception 은 기본적으로 checked exception 이다. 하지만 RuntimeException을 상속하는 exception 들은 unchecked exception 으로 예외처리를 강제화하지 않는다.
checked exception 과 unchecked exception 의 차이는 위에서도 말했지만, 한번 더 정리된 표로 살펴보면 다음과 같다.
커스텀한 예외 만들기
필요한 경우 예외를 커스텀하게 만들어서 사용해도 되는데, Java의 상속을 활용하여 만들면 된다.
public class CustomException extends Exception {

    public CustomException(String message) {
        super(message);
    }

}

// -----------

public static void main(String[] args) {
        try{
            throw new CustomException("커스텀 예외");
        } catch (CustomException e){
            e.printStackTrace();
        }
    }
/* console
weeks9.CustomException: 커스텀 예외
	at weeks9.Tester.main(Tester.java:6)
*/예제코드 깃헙레포 : https://github.com/JadenKim940105/whiteship-study/tree/master/src/main/java/weeks9