
해킹을 시작하기 전에 기초를 공부하기 위해 OverTheWire에서 Bandit을 풀어보았다.
> Level 0
The goal of this level is for you to log into the game using SSH. The host to which you need to connect is bandit.labs.overthewire.org, on port 2220. The username is bandit0 and the password is bandit0. Once logged in, go to the Level 1 page to find out how to beat Level 1.
가장 먼저 ssh 명령어를 이용해서 bandit0 서버에 접속해보자. 접속해야 하는 host는 bandit.labs.overthewire.org이고, username은 bandit0, password 역시 bandit0이다. port는 2220이다.
접속 명령어는 ssh bandit0@bandit.labs.overthewire.org -p 2220이다.


접속에 성공하였다!
> Level 0 -> Level 1
The password for the next level is stored in a file called readme located in the home directory. Use this password to log into bandit1 using SSH. Whenever you find a password for a level, use SSH (on port 2220) to log into that level and continue the game.
ls 명령어를 통해 readme 파일이 있음을 확인할 수 있었고, cat readme로 비밀번호를 확인할 수 있었다.

pw : NH2SXQwcBdpmTEzi3bvBHMM9H66vVXjL
bandit1에 접속하는 방법은 이전과 동일하다. 0만 1로 바꿔주고, 위의 비밀번호를 입력하면 된다. 이 방법은 계속 동일하므로 앞으로는 생략하겠다.
그리고 다음 서버에 접속하기 위해서는 이전 서버와의 연결을 끊어야 한다. 이때는 exit이나 logout 명령어를 이용한다.
> Level 1 -> Level 2
The password for the next level is stored in a file called - located in the home directory
ls를 하면 '-' 라는 파일이 있음을 확인할 수 있다. 그런데 cat - 를 해도 이를 읽을 수 없다.
구글링을 해서 알아본 결과 'cat < -'를 통해 읽을 수 있었다.
참고

pw: rRGizSaX8Mk1RTb1CNQoXTcYZWU6lgzi
> Level 2 -> Level 3
The password for the next level is stored in a file called spaces in this filename located in the home directory
이번에는 파일 이름이 'spaces in this filename'으로 중간에 공백이 포함되어 있다!
만약 cat spaces in this filename이라고 입력하면 spaces, in, this, filename을 다 따로 판단하기 때문에 파일을 읽을 수 없다.
따라서 작은 따옴표나 큰 따옴표로 파일 이름을 묶어서 입력해야 한다.

pw : aBZ0W5EmUfAf7kHTQeOwd8bauFJ2lAiG
> Level 3 -> Level 4
The password for the next level is stored in a hidden file in the inhere directory.
이번에는 inhere라는 디렉토리 안에 숨겨진 파일에 password가 있다고 한다. 먼저 cd inhere로 디렉토리에 들어간다. ls를 하더라도 숨겨진 파일은 보이지 않는다. 따라서 ls에 -a를 추가하여 숨겨진 파일까지 확인한다.
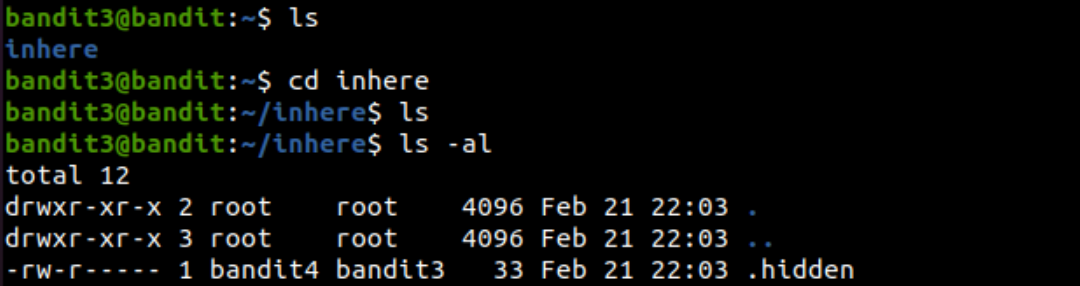
.hidden이라는 숨겨진 파일이 있다! 이를 읽으면 된다.

pw : 2EW7BBsr6aMMoJ2HjW067dm8EgX26xNe
> Level 4 -> Level 5
The password for the next level is stored in the only human-readable file in the inhere directory. Tip: if your terminal is messed up, try the “reset” command.
inhere 디렉토리 안에 10개의 파일이 존재한다. 그런데 password는 human-readable 파일에 존재한다고 한다. 이때 사용할 수 있는 명령어는 'file ./-*'이다.
file 명령어는 지정한 파일의 종류(타입)을 알려준다. 그리고 ./-*는 -로 시작하는 모든 파일을 가리키게 된다. 왜냐하면 *는 와일드카드로 뭐가 와도 괜찮다고 인식하기 때문이다.
참고

human-readable 파일은 ASCII로 되어 있는 -file07이었다.
pw: lrIWWI6bB37kxfiCQZqUdOIYfr6eEeqR
> Level 5 -> Level 6
The password for the next level is stored in a file somewhere under the inhere directory and has all of the following properties:
human-readable
1033 bytes in size
not executable
inhere directory 안에서 위의 조건을 만족하는 파일을 찾아야 한다. 그런데 inhere 디렉토리 안에 여러 디렉토리가 있다. 일일이 찾는 건 힘들것 같다.
find 명령어에 -size 옵션과 -executable 옵션을 추가하여 찾아보았다. 그랬더니 maybehere07 디렉토리에 .file2를 찾아주었다.
참고
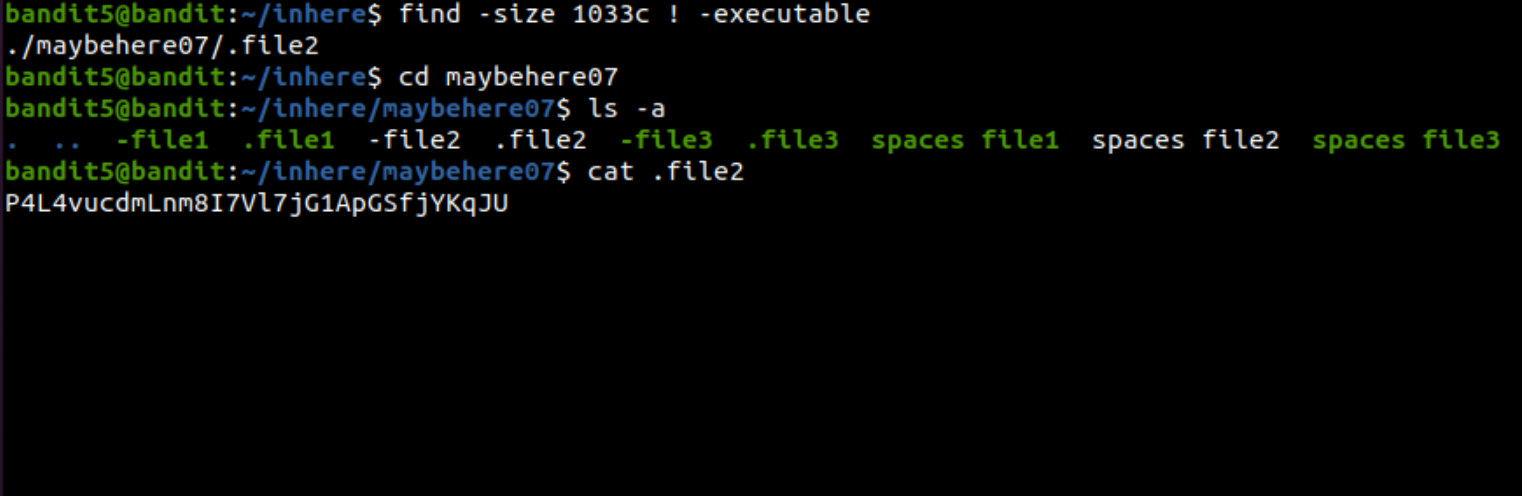
pw: P4L4vucdmLnm8I7Vl7jG1ApGSfjYKqJU
> Level 6 -> Level 7
The password for the next level is stored somewhere on the server and has all of the following properties:
owned by user bandit7
owned by group bandit6
33 bytes in size
이번에 찾아야 하는 파일은 서버 어딘가에 존재하는데 위의 속성들을 만족한다고 한다.
find에 -user, -group, -size 옵션을 더하여 입력한다. 하지만 거의 Permission denied라고 나온다.
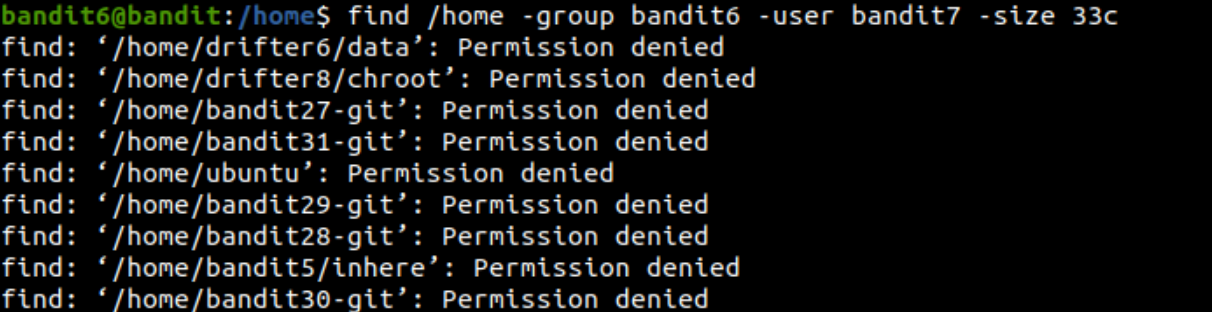
리눅스에서 Permission denied는 표준 에러(Standard error)로 file descriptor가 2에 해당한다.
따라서 리눅스의 쓰레기통에 해당하는 /dev/null로 Permission denied 목록들을 버리고, 우리가 보고자 하는 것만 출력해 보았다.
참고

우리가 원하던 password를 찾았다!
pw : z7WtoNQU2XfjmMtWA8u5rN4vzqu4v99S
> Level 7 -> Level 8
The password for the next level is stored in the file data.txt next to the word millionth
이번에는 data.txt에 비밀번호가 있는데 'millionth'라는 단어 뒤에 있다고 한다.
이때 사용하는 것이 grep 명령어다. grep '~'를 추가하면 ~로 시작하는 문자열만 뽑아서 출력해준다.
참고
또한 이제 '|'를 사용하게 된다. 이것은 파이프라인이라고 부르고, '명령어1 | 명령어2' 형식으로 사용하면, 명령어1의 결과를 명령어 2로 보내게 된다.

pw : TESKZC0XvTetK0S9xNwm25STk5iWrBvP
> Level 8 -> Level 9
The password for the next level is stored in the file data.txt and is the only line of text that occurs only once
password는 data.txt 안에 오직 한번만 등장하는 문자열이라고 한다.
그 말은 즉슨 password를 제외한 나머지 문자열은 모두 중복이 존재하는 문자열이라는 것이다.
중복이 없는 문자열을 출력하기 위해서는 sort와 uniq 명령어를 사용한다. sort 명령어로 data.txt를 정렬하고, 정렬된 데이터에서 uniq에 -u 옵션을 통해서 중복되지 않는 값만 출력한다.
참고

pw : EN632PlfYiZbn3PhVK3XOGSlNInNE00t
> Level 9 -> Level 10
The password for the next level is stored in the file data.txt in one of the few human-readable strings, preceded by several ‘=’ characters.
data.txt에서 human-readable strings만 먼저 뽑아내야 한다. 이때 strings 명령어를 사용한다.
strings 명령어는 실행파일의 ASCII 문자만 찾아 화면에 출력해준다. 따라서 strings와 grep을 함께 사용하여 =으로 시작하는 문자열을 찾아냈다.

pw : G7w8LIi6J3kTb8A7j9LgrywtEUlyyp6s
> Level 10 -> Level 11
The password for the next level is stored in the file data.txt, which contains base64 encoded data
password가 base64 encoded data라고 한다. 따라서 base64 명령어에 decode 옵션으로 해당 데이터를 읽으면 될 것 같다.

pw : 6zPeziLdR2RKNdNYFNb6nVCKzphlXHBM
> Level 11 -> Level 12
The password for the next level is stored in the file data.txt, where all lowercase (a-z) and uppercase (A-Z) letters have been rotated by 13 positions
password가 rot13되어있다고 한다. 이때 필요한 명령어는 tr이다.
tr 명령어는 특정 문자를 치환하거나 삭제하는 명령어이다.
tr 'A-Za-z' 'N-ZA-Mn-za-m'이라고 하면 rot13된 문자열을 다시 원래 상태로 되돌릴 수 있다. (tr '원본' '새 문자열')
참고

pw: JVNBBFSmZwKKOP0XbFXOoW8chDz5yVRv
> Level 12 -> Level 13
The password for the next level is stored in the file data.txt, which is a hexdump of a file that has been repeatedly compressed. For this level it may be useful to create a directory under /tmp in which you can work using mkdir. For example: mkdir /tmp/myname123. Then copy the datafile using cp, and rename it using mv (read the manpages!)
나만의 디렉토리를 만들어서 파일을 옮기고 진행했다. (/tmp/jin926)
먼저 hexdump된 파일이라고 했으므로 xxd를 이용하여 data로 바꿨다.
file data로 확인하니 gzip으로 압축되어 있었다.
압축을 푸는 것은 다음과 같은 순서로 진행하면 된다.
- mv data.bin data.bin.gz (다른 압축 방법일 경우 bz2 혹은 tar) - 확장자 붙여주기
- gzip(bzip2,tar) -d(tar은 -xvf) data.bin.gz(bz2, tar)
- file data.bin으로 파일 압축 형태 확인하기
위의 과정을 반복하다보면 password를 얻게 된다.

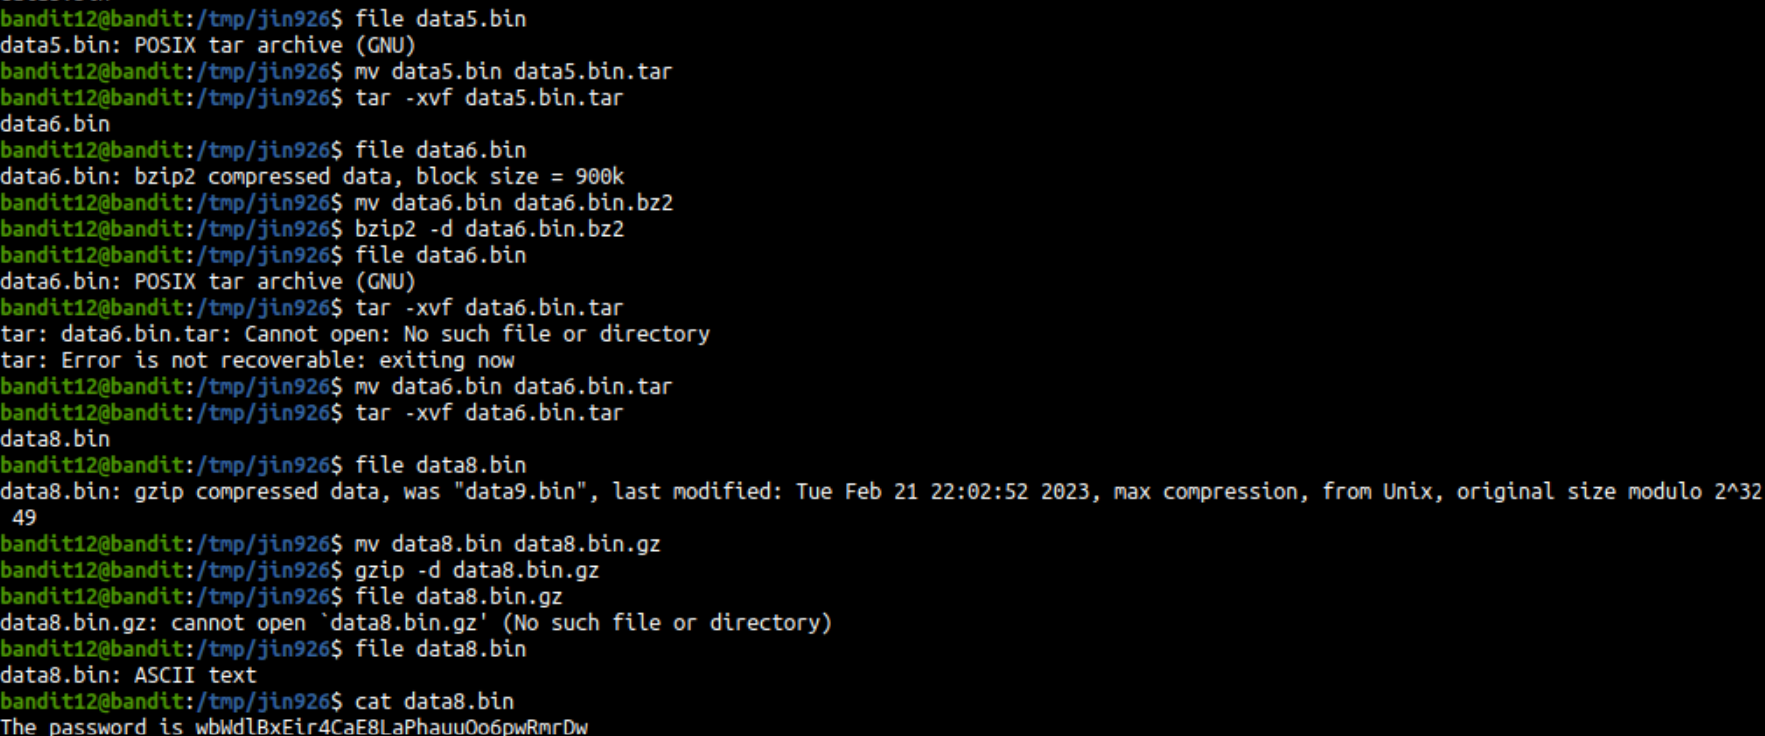
pw : wbWdlBxEir4CaE8LaPhauuOo6pwRmrDw
> Level 13 -> Level 14
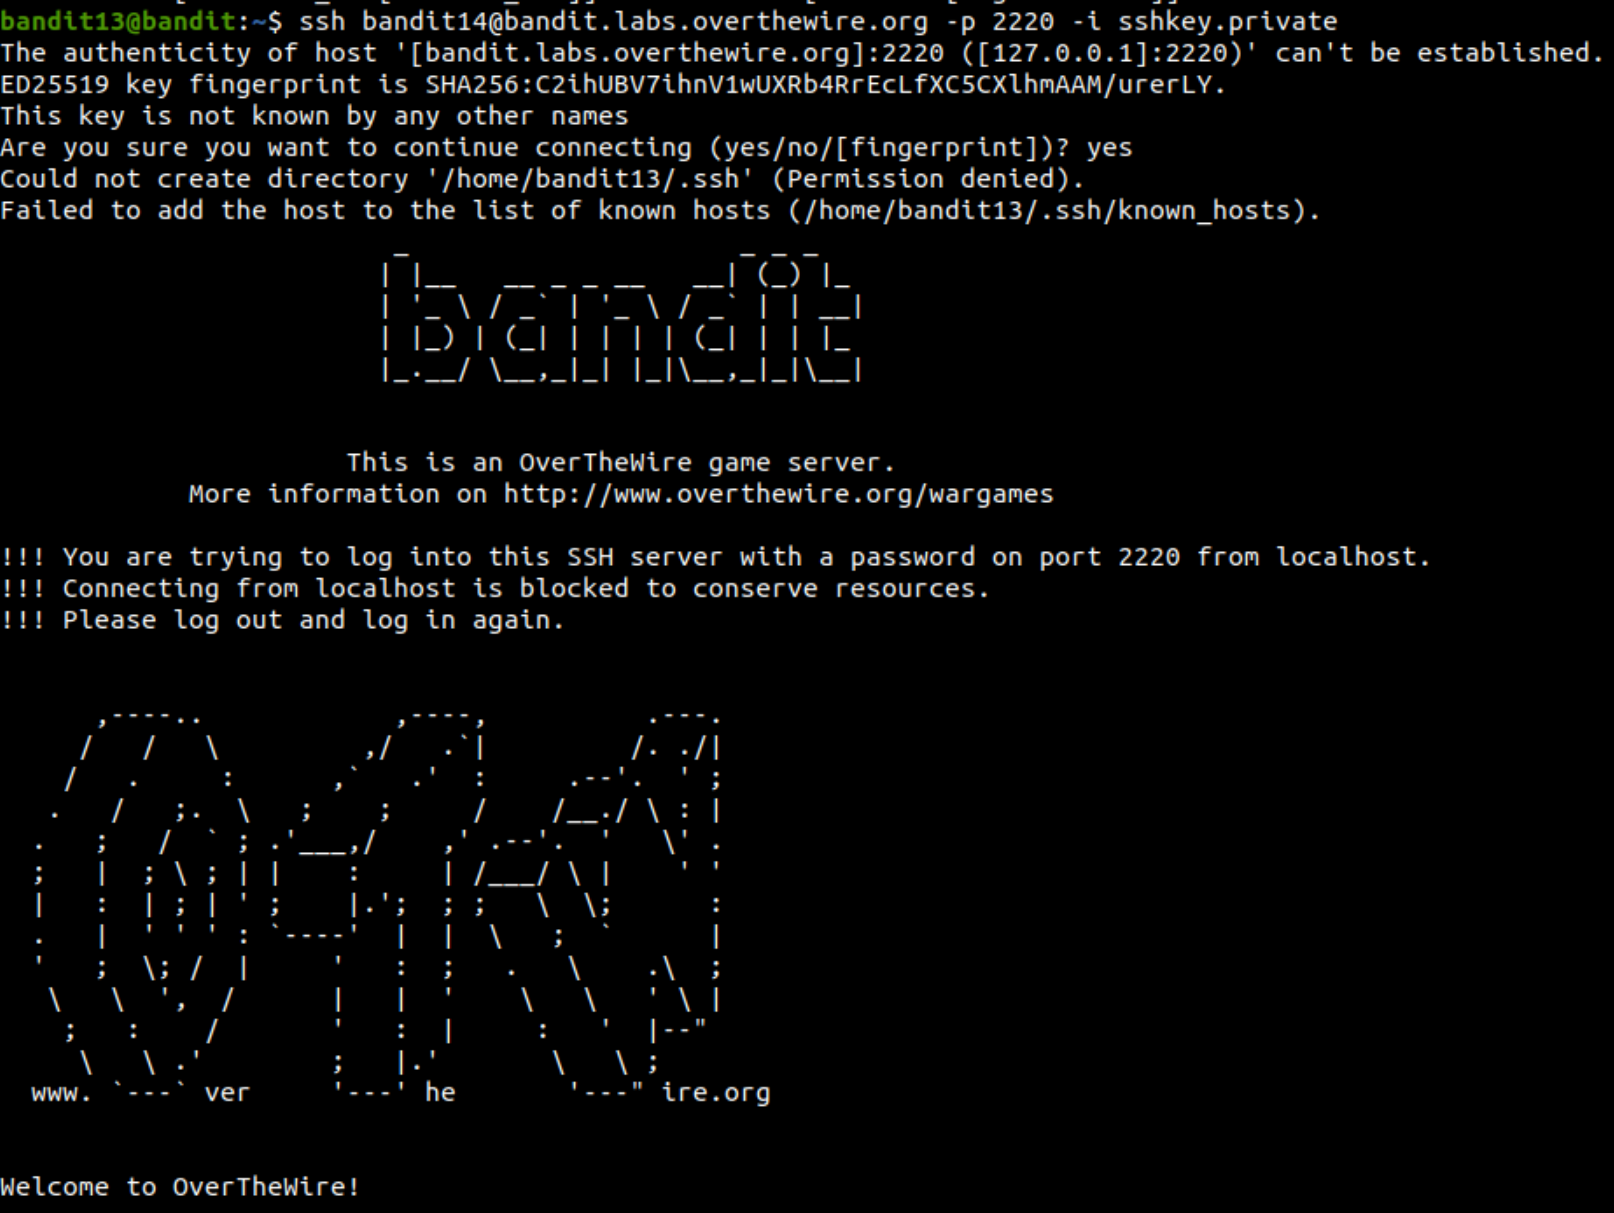
The password for the next level is stored in /etc/bandit_pass/bandit14 and can only be read by user bandit14. For this level, you don’t get the next password, but you get a private SSH key that can be used to log into the next level. Note: localhost is a hostname that refers to the machine you are working on
ssh.private key 파일을 가지고 있다. 이 파일을 사용하여 bandit13에서 bandit14로 로그인해야 한다.
지금까지 ssh 접속해왔던 것에서 -i 옵션을 추가한 후, sshkey.private 파일을 넣어주었다.
참고
이렇게 개인키를 사용하여 비밀번호를 얻지 않고도 연결에 성공하였다.
> Level 14 -> Level 15
The password for the next level can be retrieved by submitting the password of the current level to port 30000 on localhost.
이번 레벨에서는 비밀번호가 한번 더 쓰인다고 한다.
아무런 단서가 없어서 찾아보다가 /etc에 비밀번호가 있음을 알게 되었고, bandit14의 비밀번호를 출력했다.
그리고 ssh로는 접속이 안돼서 nc로 접속하였다. (port는 30000, host는 localhost)
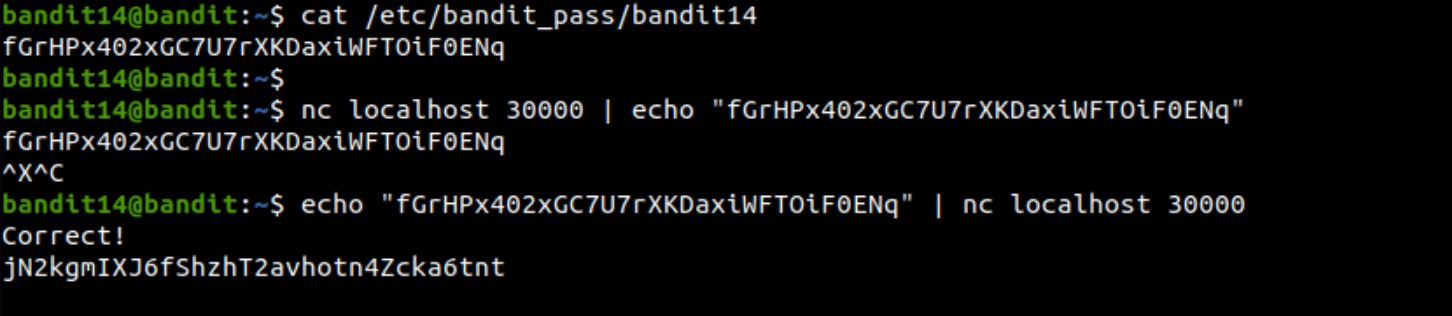
password를 얻어냈다!
pw :jN2kgmIXJ6fShzhT2avhotn4Zcka6tnt
> Level 15 -> Level 16
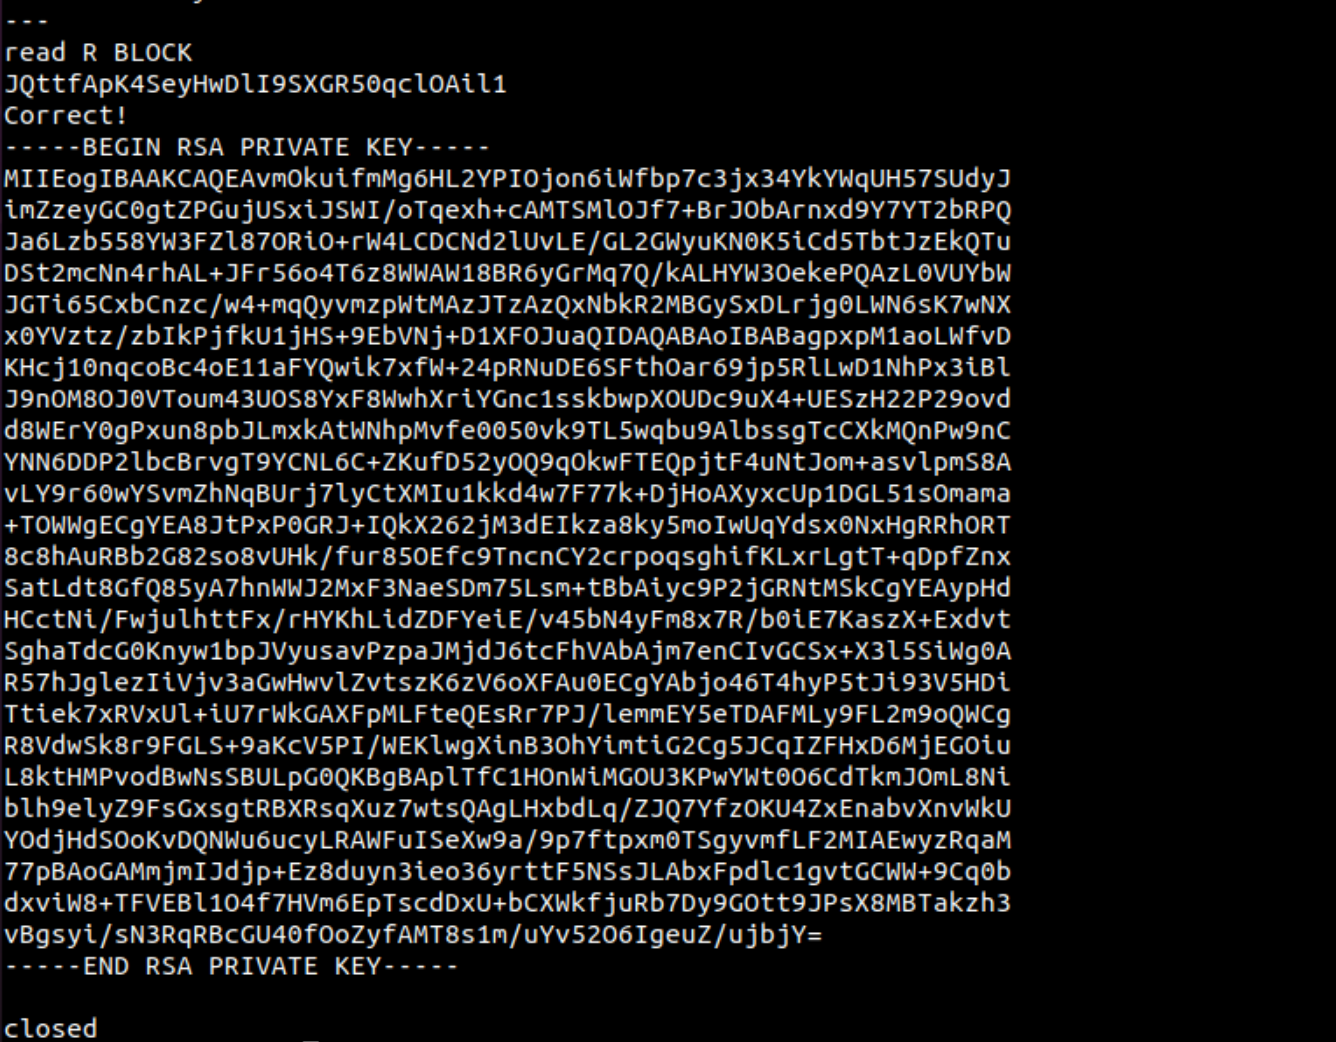
The password for the next level can be retrieved by submitting the password of the current level to port 30001 on localhost using SSL encryption.
Helpful note: Getting “HEARTBEATING” and “Read R BLOCK”? Use -ign_eof and read the “CONNECTED COMMANDS” section in the manpage. Next to ‘R’ and ‘Q’, the ‘B’ command also works in this version of that command…
ssl encryption을 사용해서 접속하라고 했으므로 openssl 명령어를 사용하면 된다.
참고
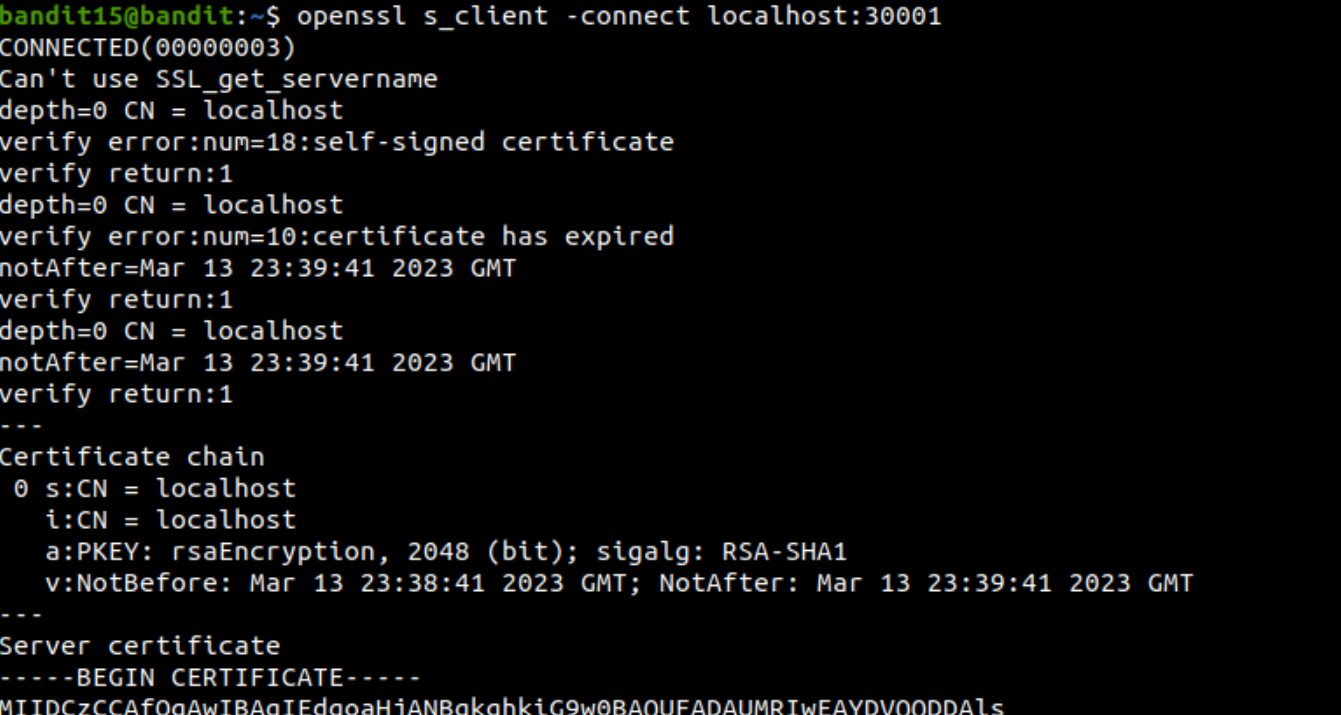
그리고 이번 레벨의 password를 입력하면 다음 레벨의 password를 알려준다.

pw : JQttfApK4SeyHwDlI9SXGR50qclOAil1
> Level 16 -> Level 17
The credentials for the next level can be retrieved by submitting the password of the current level to a port on localhost in the range 31000 to 32000. First find out which of these ports have a server listening on them. Then find out which of those speak SSL and which don’t. There is only 1 server that will give the next credentials, the others will simply send back to you whatever you send to it.
먼저, nmap 명령어를 사용하여 31000-32000 사이에 열려있는 포트를 알아냈다.
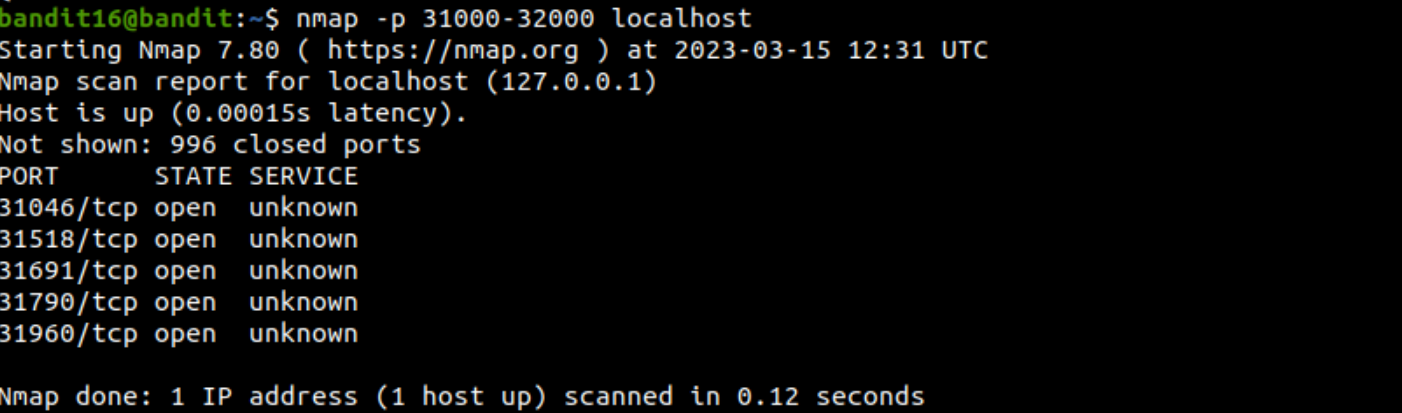
그 다음, openssl 명령어로 위의 5개 포트에 일일이 접속하고 password를 입력했는데, 그 중 31790 포트에서 다음 credentials를 알려줬다!
이제 나가서 vi로 sshkey.private에 해당 키를 입력해준다.
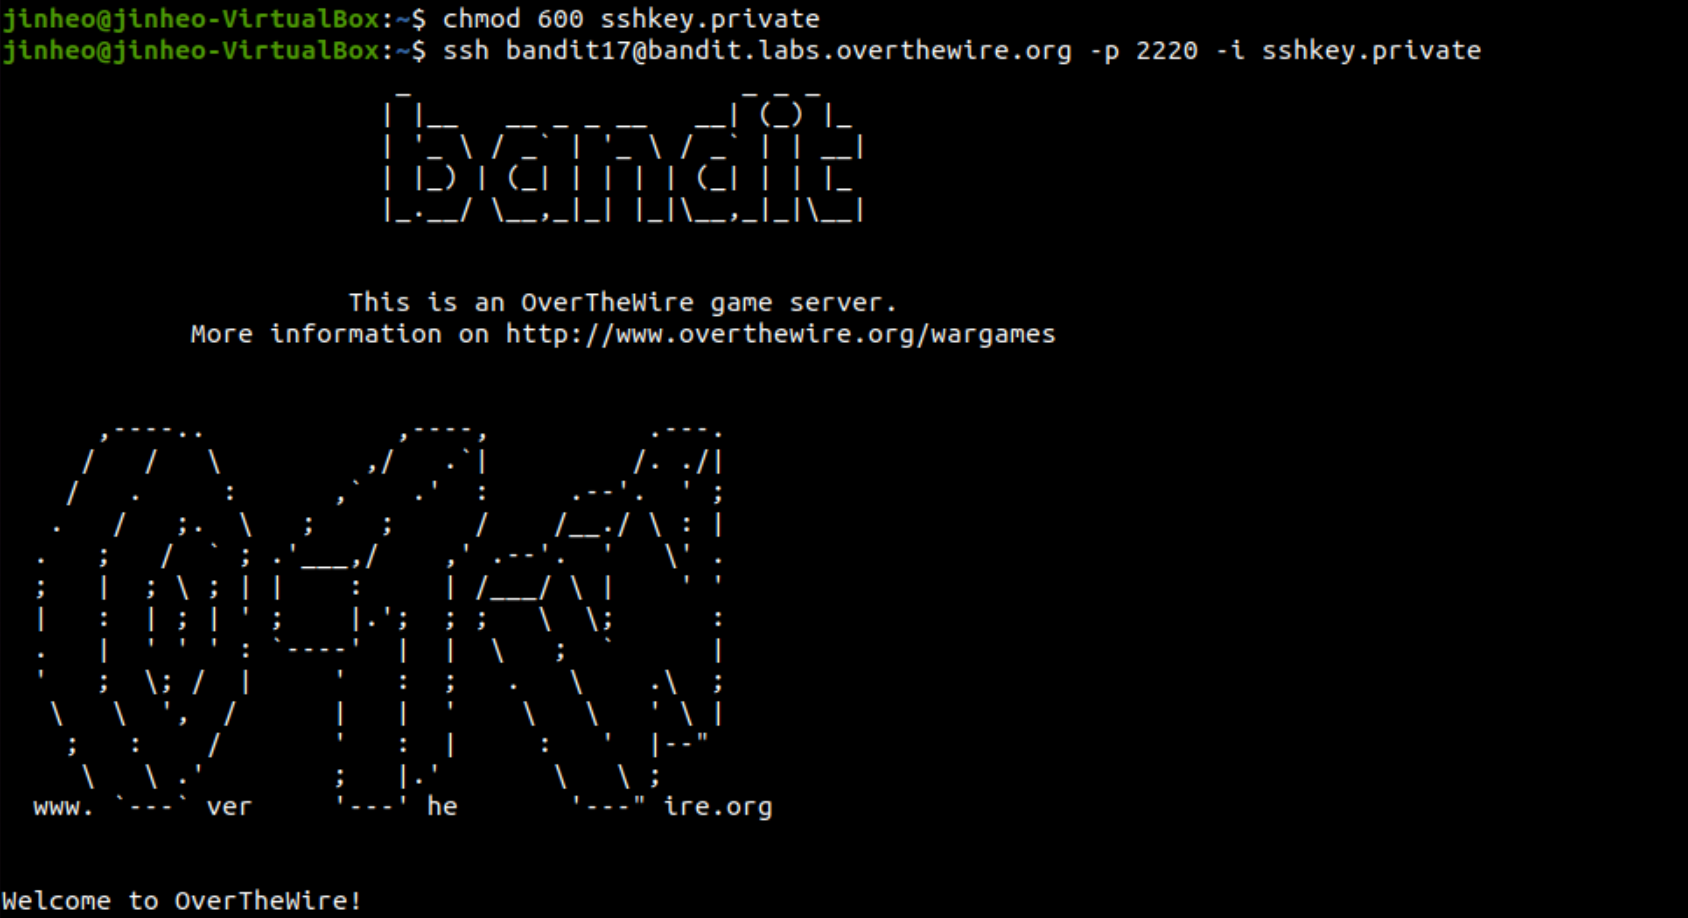
chmod 600으로 비밀키에 다른 사람이 접근하지 못하도록 만들어주고, 해당 비밀키를 이용하여 다음 단계에 접속하면 된다!
> Level 17 -> Level 18
There are 2 files in the homedirectory: passwords.old and passwords.new. The password for the next level is in passwords.new and is the only line that has been changed between passwords.old and passwords.new
NOTE: if you have solved this level and see ‘Byebye!’ when trying to log into bandit18, this is related to the next level, bandit19
두 파일의 다른 점을 찾으면 된다. 이럴 때는 diff 명령어를 사용하면 된다.

키를 얻어냈다!
다만 위의 주의사항에 말했듯이 접속을 시도해도 ByeBye를 출력한다.
pw : hga5tuuCLF6fFzUpnagiMN8ssu9LFrdg
> Level 18 -> Level 19
The password for the next level is stored in a file readme in the homedirectory. Unfortunately, someone has modified .bashrc to log you out when you log in with SSH.
누군가 .bashrc를 수정해서 접속이 되지 않았던 것이다.
이를 해결하기 위해서는 ssh로 접속할 때 셸을 지정해주면 된다.
나는 /bin/sh로 설정하고 접속했다. 접속에 성공하고 readme 파일에서 password를 읽어냈다.
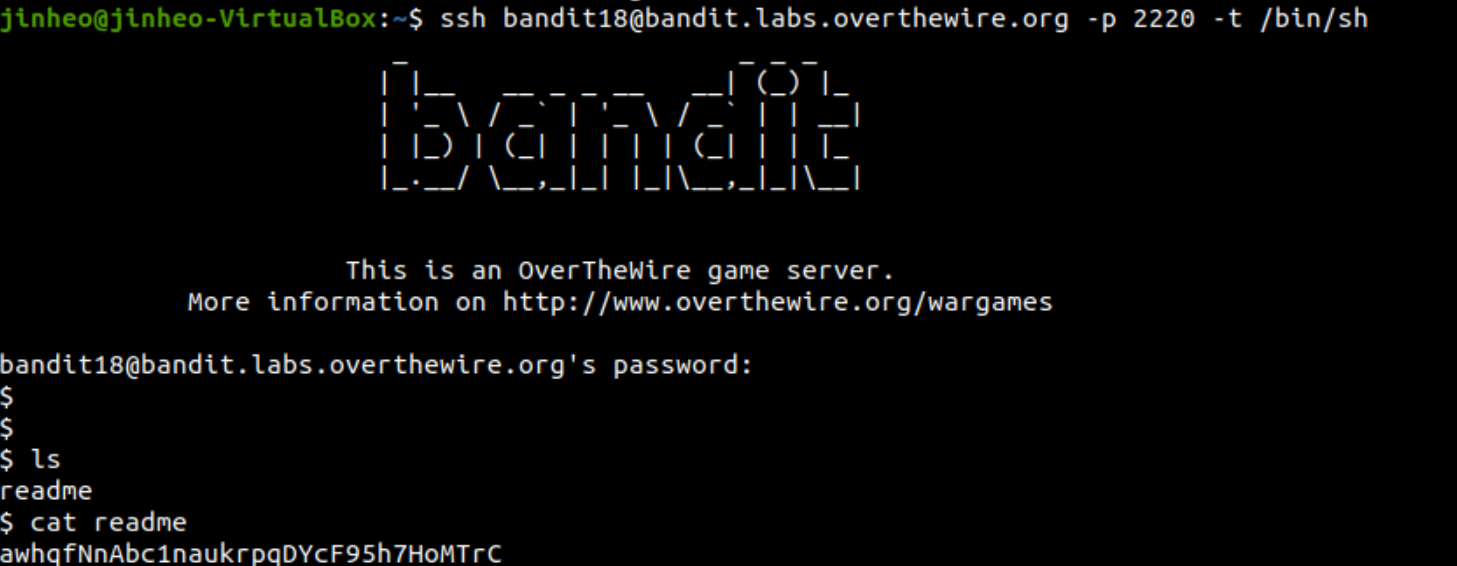
pw : awhqfNnAbc1naukrpqDYcF95h7HoMTrC
> Level 19 -> Level 20
To gain access to the next level, you should use the setuid binary in the homedirectory. Execute it without arguments to find out how to use it. The password for this level can be found in the usual place (/etc/bandit_pass), after you have used the setuid binary.
디렉토리에 bandit20-do라는 setuid가 설정된 파일이 있다.
setuid 파일을 실행하면 파일 소유자의 권한을 얻게 된다. 그러므로 해당 파일을 실행하면서 /etc/bandit_pass/bandit20을 읽어내면 된다.

pw: VxCazJaVykI6W36BkBU0mJTCM8rR95XT
> Level 20 -> Level 21
There is a setuid binary in the homedirectory that does the following: it makes a connection to localhost on the port you specify as a commandline argument. It then reads a line of text from the connection and compares it to the password in the previous level (bandit20). If the password is correct, it will transmit the password for the next level (bandit21).
NOTE: Try connecting to your own network daemon to see if it works as you think
suconnect라는 setuid파일이 있다. 이는 port에서 localhost와 연결을 만들고, 연결에서 한 줄을 읽어서 이전 레벨의 password와 비교한다.
이 단계에서 시간도 가장 오래 쓰고 삽질도 많이 했다.. 그러다가 결국 동기의 도움을 받아서 스스로 포트를 열어야 한다는 것을 알게 되었다..!
일단 기존의 화면에서 61337로 포트를 열고 password를 보냈다.

그런 다음 새로운 터미널을 열어서 suconnect로 61337에 연결한다. 그런 다음 이전 password를 입력했더니 다음 password를 알려줬다.


pw : NvEJF7oVjkddltPSrdKEFOllh9V1IBcq
> Level 21 -> Level 22
A program is running automatically at regular intervals from cron, the time-based job scheduler. Look in /etc/cron.d/ for the configuration and see what command is being executed
어떤 프로그램이 자동으로 실행되고 있다고 한다.
직접 확인해보라고 해서 먼저 /etc/cron.d에 들어가보았다.

아무래도 다음 단계가 22이기에 cronjob_bandit22를 열어보았다.

또 어떠한 경로를 알려주길래 해당 파일을 열어보았다.

열어보니 다음 password가 /tmp/t7O6lds9S0RqQh9aMcz6ShpAoZKF7fgv에 저장되어 있음을 확인할 수 있었다.

pw : WdDozAdTM2z9DiFEQ2mGlwngMfj4EZff
> Level 22 -> Level 23
A program is running automatically at regular intervals from cron, the time-based job scheduler. Look in /etc/cron.d/ for the configuration and see what command is being executed.
NOTE: Looking at shell scripts written by other people is a very useful skill. The script for this level is intentionally made easy to read. If you are having problems understanding what it does, try executing it to see the debug information it prints.
이전 단계와 비슷한 것 같다. /etc/cron.d에 들어가서 cromjob_bandit23을 출력해봤다.

이번에도 해당 파일을 출력해보았다.
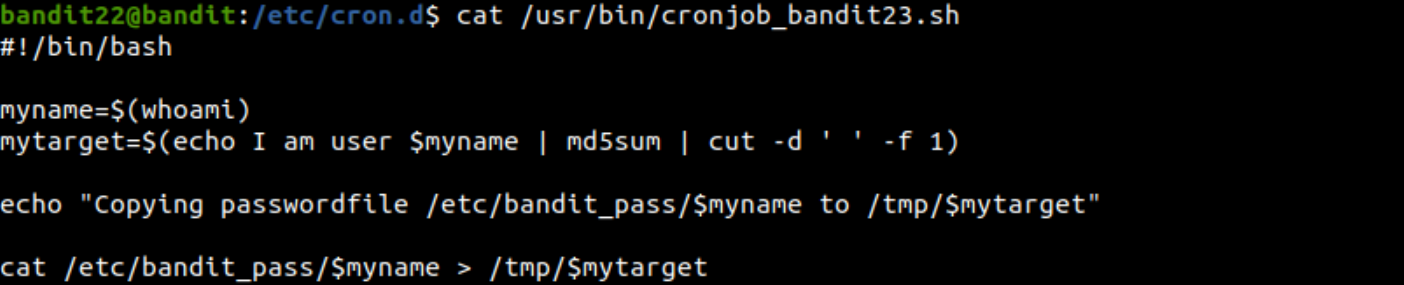
password를 저장하는 경로를 어떻게 계산하는지 알려주는 코드가 들어있었다!
실행해본 결과, 현재 bandit22이므로 이전 단계 password가 들어있는 경로를 출력해주었다.

따라서, 위의 방법과 동일하게 myname 부분만 bandit23으로 바꿔서 경로를 찾아냈다.

해당 경로에 다음 password가 저장되어 있었다!

pw : QYw0Y2aiA672PsMmh9puTQuhoz8SyR2G
> Level 23 -> Level 24
A program is running automatically at regular intervals from cron, the time-based job scheduler. Look in /etc/cron.d/ for the configuration and see what command is being executed.
NOTE: This level requires you to create your own first shell-script. This is a very big step and you should be proud of yourself when you beat this level!
NOTE 2: Keep in mind that your shell script is removed once executed, so you may want to keep a copy around…
이번에도 저번 단계와 마찬가지로 /etc/cron.d에서 cronjob_bandit24를 읽어보니 /usr/bin/cronjob_bandit24.sh를 가리키고 있었다. 그래서 해당 셸스크립트를 출력해보았다.
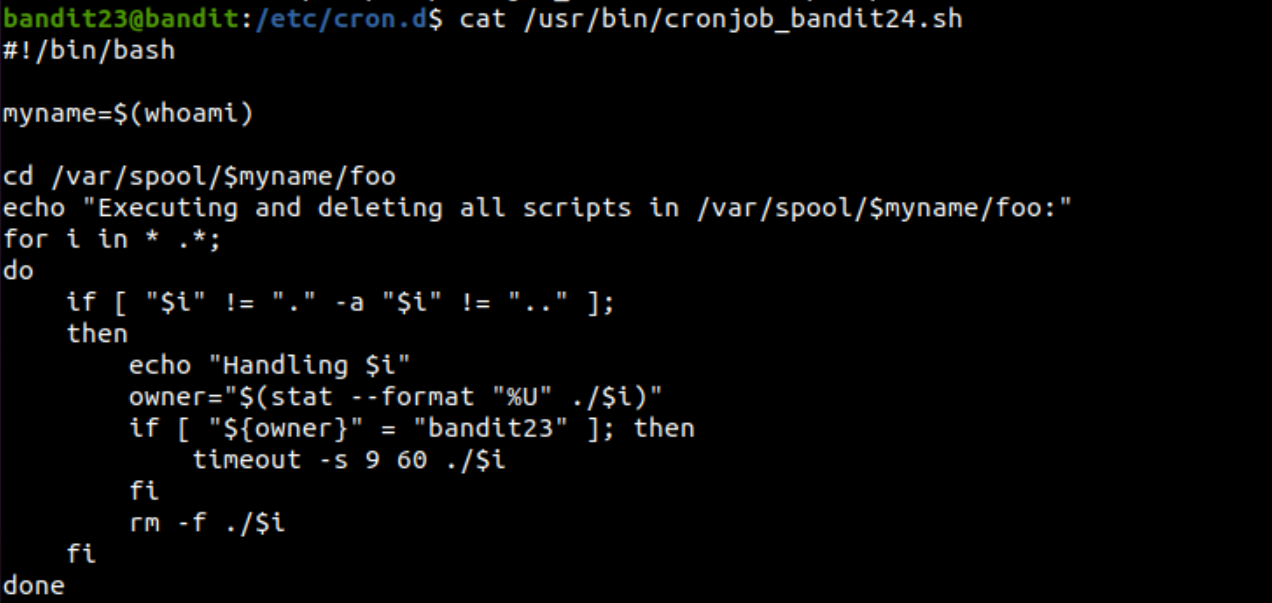
위의 코드는 /var/spool/$myname/foo 라는 디렉토리에 들어가서, 해당 디렉토리의 모든 파일을 삭제하는 코드다. 그런데 만약 파일의 소유자가 bandit23이라면 60초후에 수행하고 이를 삭제한다.
이 디렉토리를 이용해서 password를 알아낼 수 있다. 셸코드를 보면 60초마다 삭제되기 때문에 미리 복사를 해놓기를 권장하고 있다.
/tmp/jin926이라는 디렉토리를 만들고 myscript.sh를 만들었다.

스크립트를 보면 password를 /tmp/jin926/password에 붙여준다. /etc/bandit_pass/bandit24의 경우 bandit23로는 읽을 수 없다. 해당 스크립트를 아까 보았던 /var/spool/bandit24/foo에 복사해놓으면 60초 정도 후에 /tmp/jin926/password가 생긴 것을 확인할 수 있다.
여기서 주의할 점은 다른 사람이 파일을 쓸 수 있기 위해 권한을 수정해주어야 한다.
chmod 777로 /tmp/jin926의 디렉토리와 파일을 권한 상승시켜준다.

pw : VAfGXJ1PBSsPSnvsjI8p759leLZ9GGar
> Level 24 -> Level 25
A daemon is listening on port 30002 and will give you the password for bandit25 if given the password for bandit24 and a secret numeric 4-digit pincode. There is no way to retrieve the pincode except by going through all of the 10000 combinations, called brute-forcing.
You do not need to create new connections each time
30002 포트에서 나에게 password를 줄 것이다.
필요한 것은 bandit24의 password와 4자리의 랜덤한 숫자이다.
랜덤한 숫자는 brute-forcing을 통해 알아내야 한다!

다음과 같이 makekey.py를 작성했다.

위의 코드 실행 결과로 생긴 key.txt이다.
cat key.txt | nc localhost 30002위의 명령어를 수행했더니 다음과 같은 결과를 얻었다.

pw : p7TaowMYrmu23Ol8hiZh9UvD0O9hpx8d
> Level 25 -> Level 26
Logging in to bandit26 from bandit25 should be fairly easy… The shell for user bandit26 is not /bin/bash, but something else. Find out what it is, how it works and how to break out of it.
.
일단 bandit25에는 bandit26에 접속하기 위한 private key 파일이 존재했다. 하지만 ssh -i bandit26.sshkey ~ 를 해봐도 접속이 되질 않았다.
아마 bandit26의 셸이 /bin/bash가 아닌 것과 관련이 있어 보인다.

cat /etc/passwd로 사용자 정보를 확인해보았더니 bandit26만 /usr/bin/showtext로 되어 있었다.

/usr/bin/showtext의 내용을 확인하니 more 명령을 실행하는 코드였다.
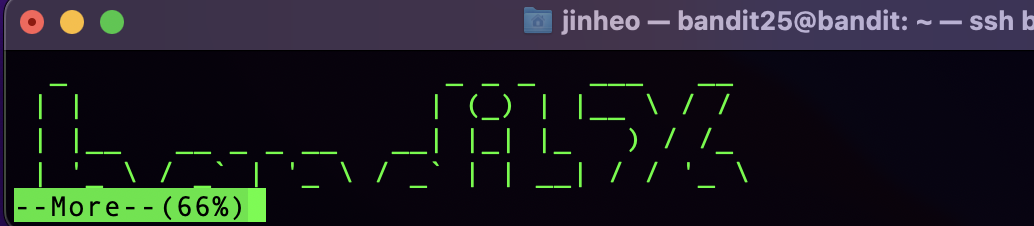
화면을 줄여서 ssh 연결을 했더니 다음과 같이 More이 등장했다.
more에서는 v를 눌러 vi 편집기를 켤 수 있다.
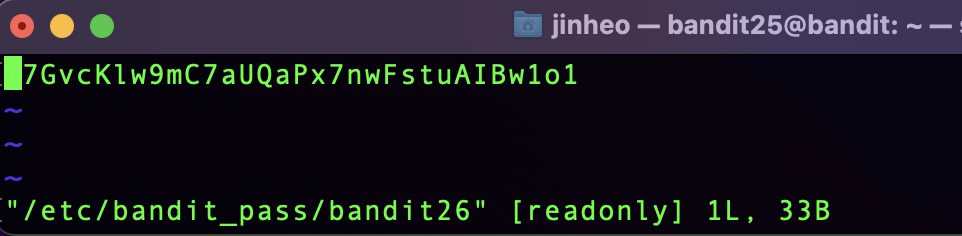
:e /etc/bandit_pass/bandit26을 입력해 password를 얻어냈다!
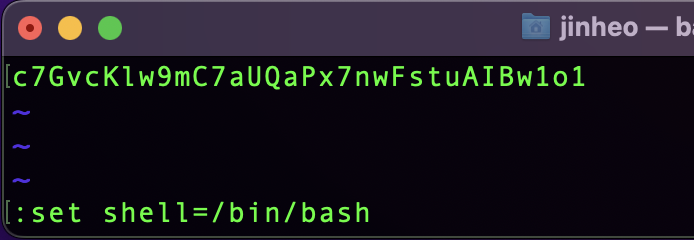
그 후 shell을 /bin/bash로 설정해주었다.

shell을 입력하면 bandit26으로 로그인되어 있는 것을 확인할 수 있다!
> Level 26 -> Level 27
Good job getting a shell! Now hurry and grab the password for bandit27!
홈 디렉토리에 bandit27-do라는 set-uid가 설정된 파일이 있다. 이 파일을 실행하면 bandit27의 권한을 얻어서 명령을 실행할 수 있다.

따라서 bandit27의 password를 알아냈다.

pw : YnQpBuifNMas1hcUFk70ZmqkhUU2EuaS
> Level 27

끝!