Segues
-
하나의 view controller에서 다른 view controller로의 전환을 의미
- 시작: 사용자가 버튼을 누르는 등의 행동 수행
- 끝: 새로운 view controller가 보여짐
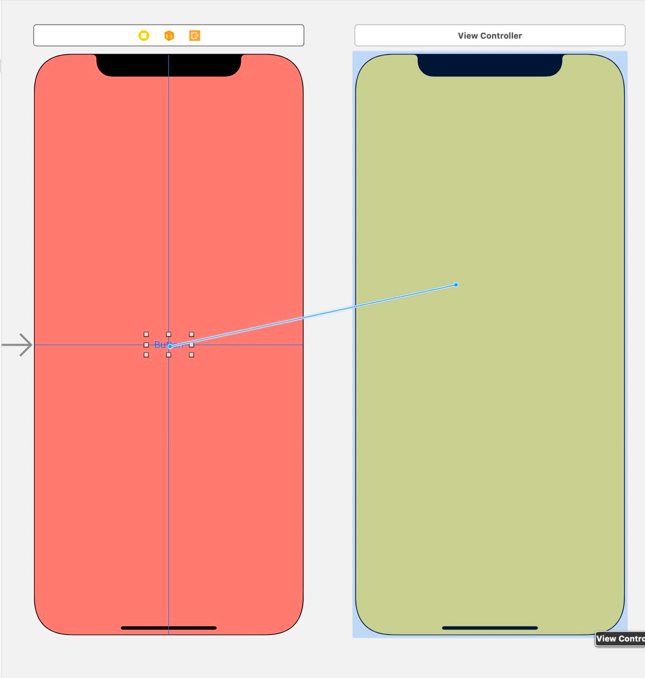
UIButton을 클릭하면, 새로운 view로 전환되는 segue 생성
- 새로운 view controller에 아무 class도 할당하지 않은 경우,
UIViewControllerinstance와 연결되어 있다.
-
segue의 property
-
identifier- segue를 구별하는 이름
- Interface Builder에서 설정 가능
-
destination- segue가 완료되면 보여질 view controller
UIViewController타입- 해당 view의 property에 접근하기 위해서는
UIViewController의 subclass로 downcast하여 사용한다.
-
Present Modally
-
새로운 view가 아래에서 위로 올라오며 이전 view를 가린다.
-
view 제거 방법
- default: 새로운 view를 위에서 아래로 드래그하여 없앤다.
- unwind segue: 현재 view에서 상위 view로 되돌아가는 segue
- default: 새로운 view를 위에서 아래로 드래그하여 없앤다.
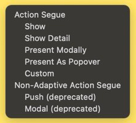
- Unwind Segue
버튼을 Exit object와 연결시킨 후, 팝업에서
unwindToRedWithUnwindSegue를 선택해 unwind segue를 생성한다.// UIStoryboardSegue parameter: Interface Builder에게 해당 view가 unwind segue를 만들 준비가 되었음을 알림 @IBAction func unwindToRed(unwindSegue: UIStoryboardSegue) { // 새로운 view -> 이전 view 로 정보를 전달할 수 있다. }
Show
-
navigation controller와 함께 쓰이며, 새로운 view로 화면이 전환된다.
-
navigation controller가 추가되기 전까진 present modally와 동일하게 동작한다.
Navigation Controllers
-
stack 구조로 root view controller 위에 다른 view controller들이 push되고, 뒤로가기를 누르면 가장 최근에 push된 view가 pop된다.
-
계층적 구조로 push 할수록 점점 깊은 계층으로 들어가고, pop 할수록 다시 root쪽으로 되돌아온다.
-
ex) iOS 기본 Setting 앱
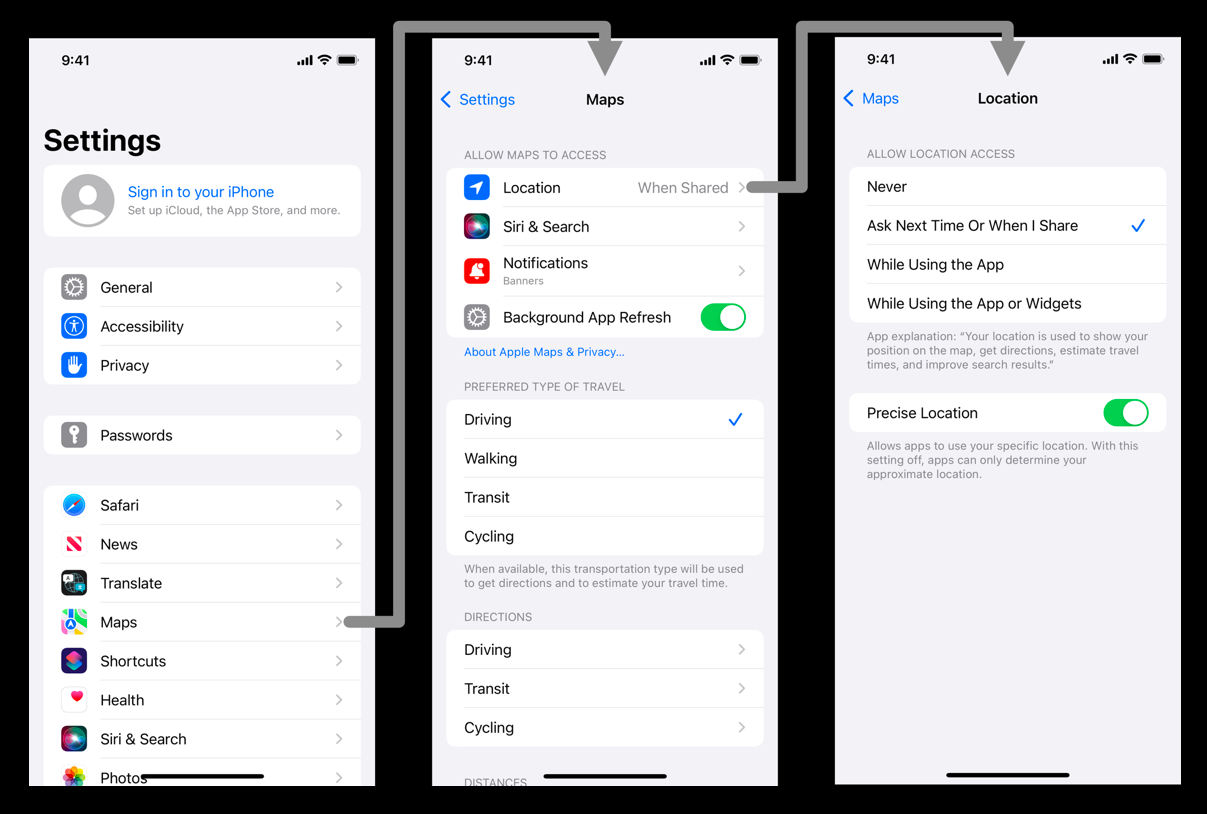
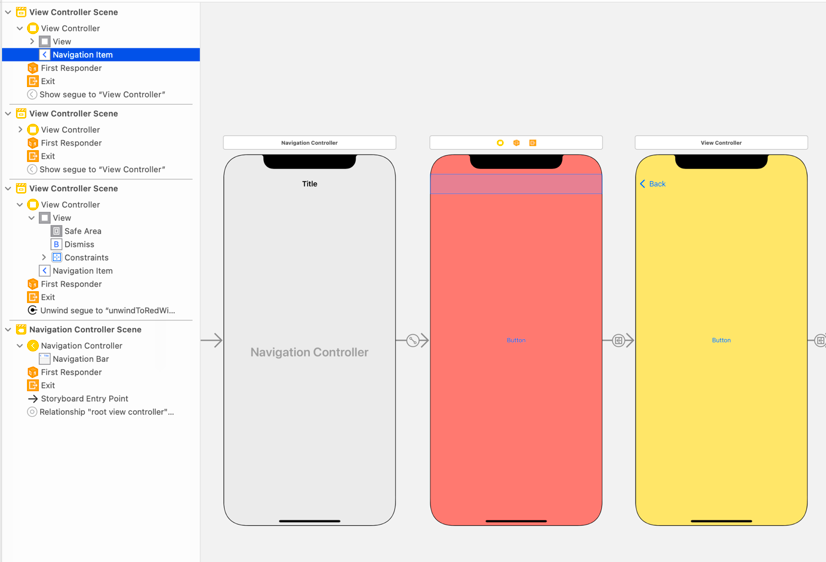
- Embeded In 버튼을 통해 navigation controller를 추가한다.
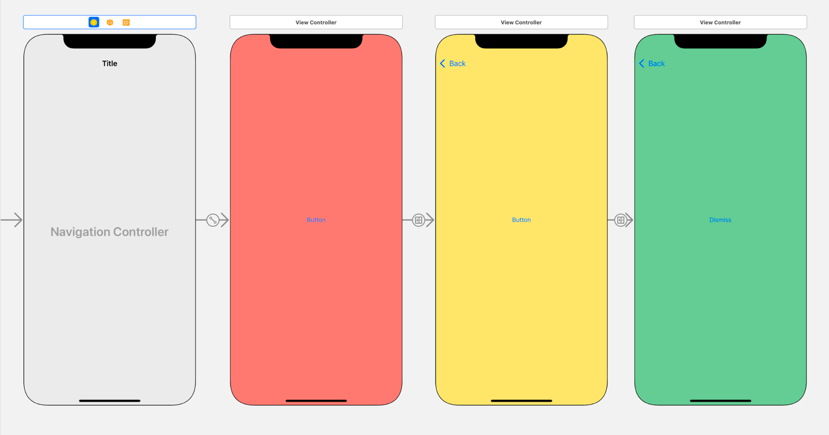
1. Navigation Bar
- navigation controller에 navigation bar가 생성된다.
2. Navigation Item
- 나머지 모든
UIViewController는 navigation bar를 설정하는navigationItem이 생성된다.
-
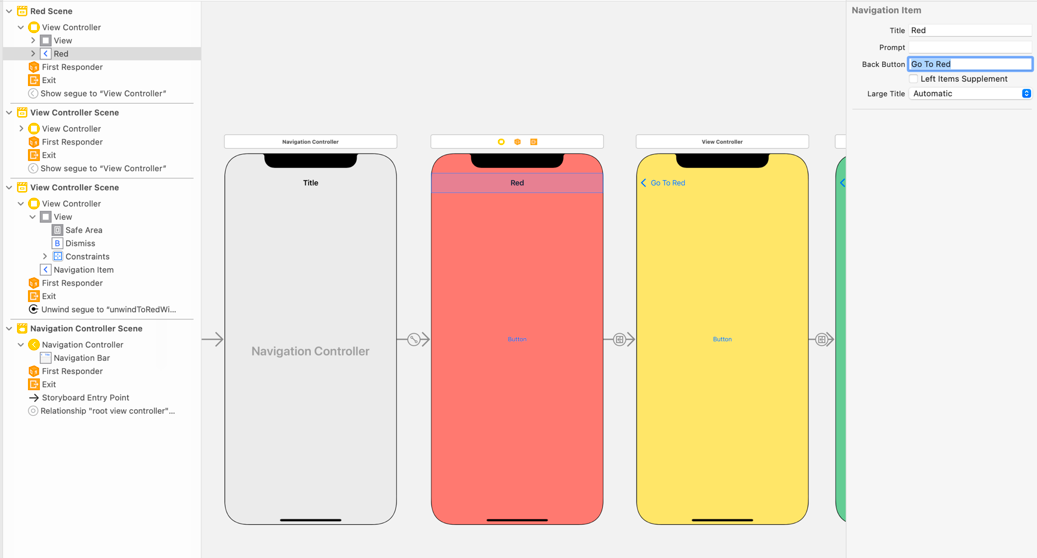
Title: navigation bar의 제목
-
Back Button: 현재 view로 돌아가는 Back 버튼의 제목
-
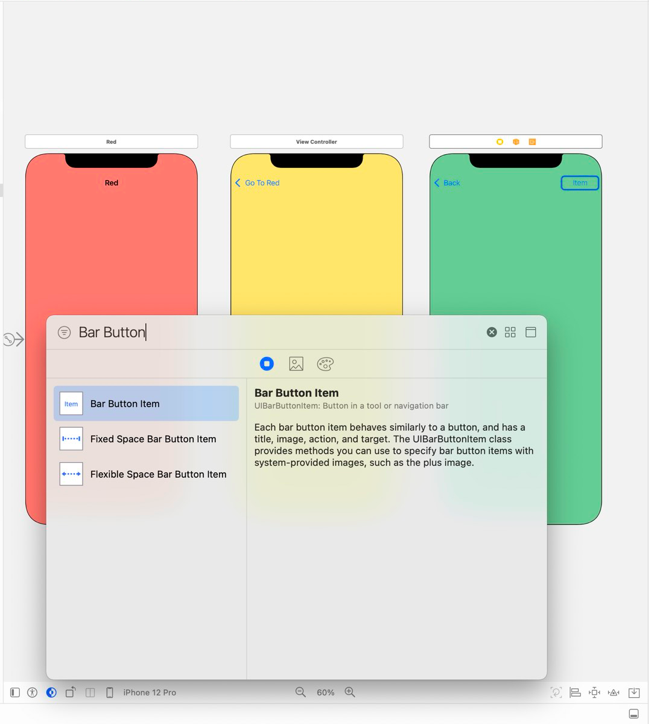
이외에도, Object library를 통해 navigation item을 추가할 수 있다.
- ex) Bar button Item을 navigation bar에 추가하여 Back 버튼 이외에 또 다른 버튼 생성 가능
3. Large Titles
-
Navigation Bar의 속성 중 Prefers Large Titles를 체크하면 navigation bar의 title이 커진다.
-
root view controller를 포함한 모든 view controller의 title 크기가 커진다.
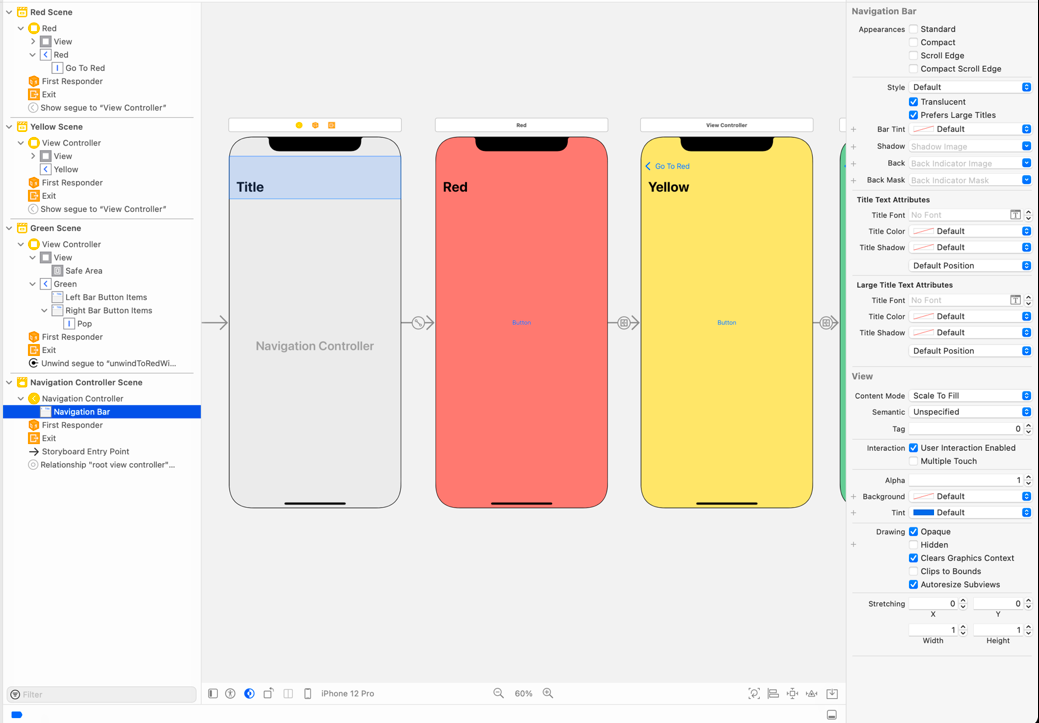
-
각 view controller의 navigation item 옵션을 통해 하위 view controller의 제목 크기를 조정할 수 있다.
- Always: navigation item의 title을 항상 큰 사이즈로 유지
- Never: navigation item의 title을 항상 작은 사이즈로 유지
- Automatic: 상위 view controller의 특성을 따름
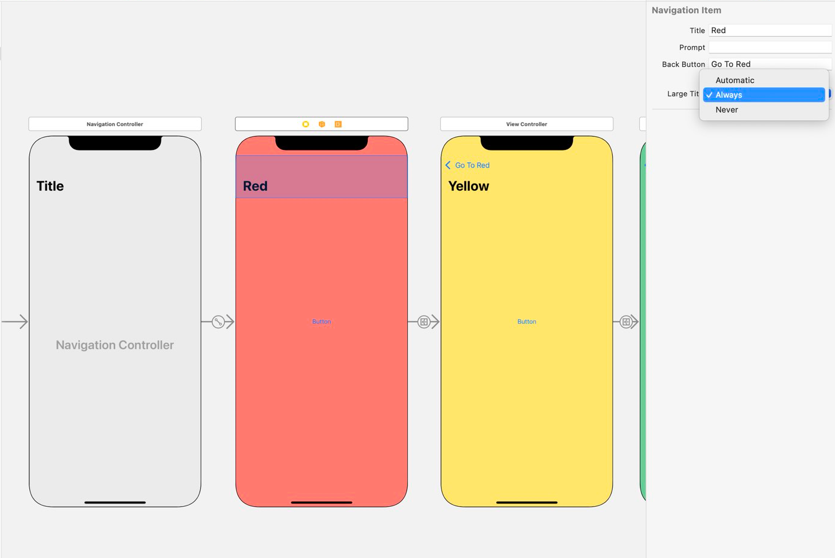
- root view controller의 title은 큰 사이즈, 나머지 하위 view들은 작은 사이즈가 일반적이다.
Pass Information
-
하나의 view controller에서 다른 view controller로 정보를 전달한다.
- ex) 연락처 앱에서 이름을 누르면, 상세정보를 보여주는 view를 띄우기 전 해당 이름에 해당하는 연락처를 불러온다.
prepare(for:sender:)
-
해당 view controller에 위치한 segue가 실행되기 전에 호출된다.
-
모든
UIViewController는prepare(for:sender)메서드를 가진다.
prepare(for segue: UIStoryboardSegue, sender: Any?)
- 하나의 segue만 존재하여
identifier생략titleproperty는 모든UIViewController가 가지고 있으므로 downcast 생략override func prepare(for segue: UIStoryboardSegue, sender: Any?) { // 하위 view 제목을 상위 view의 텍스트 필드 값으로 설정 segue.destination.navigationItem.title = textField.text }
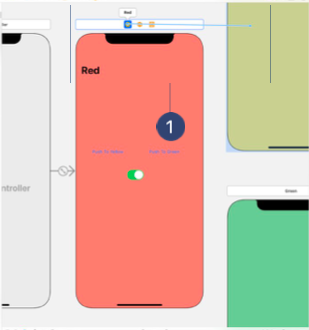
performSegue(withIdentifier:sender:)
-
해당 view controller에 있는 특정 segue를 실행
withIdentifier: 실행시킬 segue의 identifiersender: segue에 넘겨줄 추가적인 정보
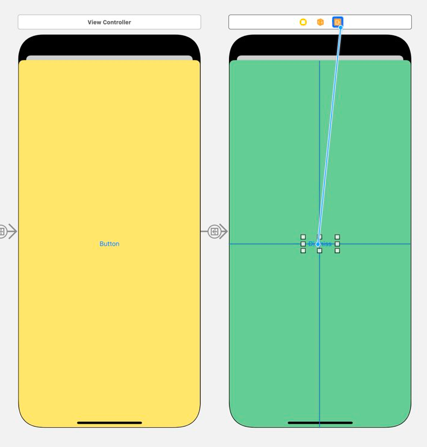
- 출발지의 view controller 아이콘과 도착지의 화면을 연결
// yello button을 터치했을 경우
@IBAction func yellowButtonTapped(_ sender: Any) {
// switch가 on 상태라면 Yellow segue 실행
    if segueSwitch.isOn {
        performSegue(withIdentifier: “Yellow”, sender: nil)
    }
}
shouldPerformSegue(withIdentifier:sender:)
-
해당 view controller의 segue가 실행되기 직전에 호출되어, 반환값이
true인 경우에만 segue가 실행된다. -
performSegue(withIdentifier:sender:)를 사용하여 segue를 호출할 경우 호출되지 않는다.performSegue(withIdentifier:sender:)로 호출된 segue는shouldPerformSegue(withIdentifier:sender:)의 반환값과 관계없이 항상 호출된다.)
// switch가 on일 경우에만 segue 실행
override func shouldPerformSegue(withIdentifier identifier: String, sender: Any?) -> Bool {
  return segueSwitch.isOn
}