System View Controller
-
UIKit에서 앱 컨텐츠를 보여주고, 접근하고, 공유하는 기능을 제공하는UIViewControllersubclass들ex) 프로필 사진을 설정하기 위해 카메라 앱 사용, 메세지 앱을 통해 기사 공유, 앱스토어 구매 시 패스워드 입력
UIActivityViewController
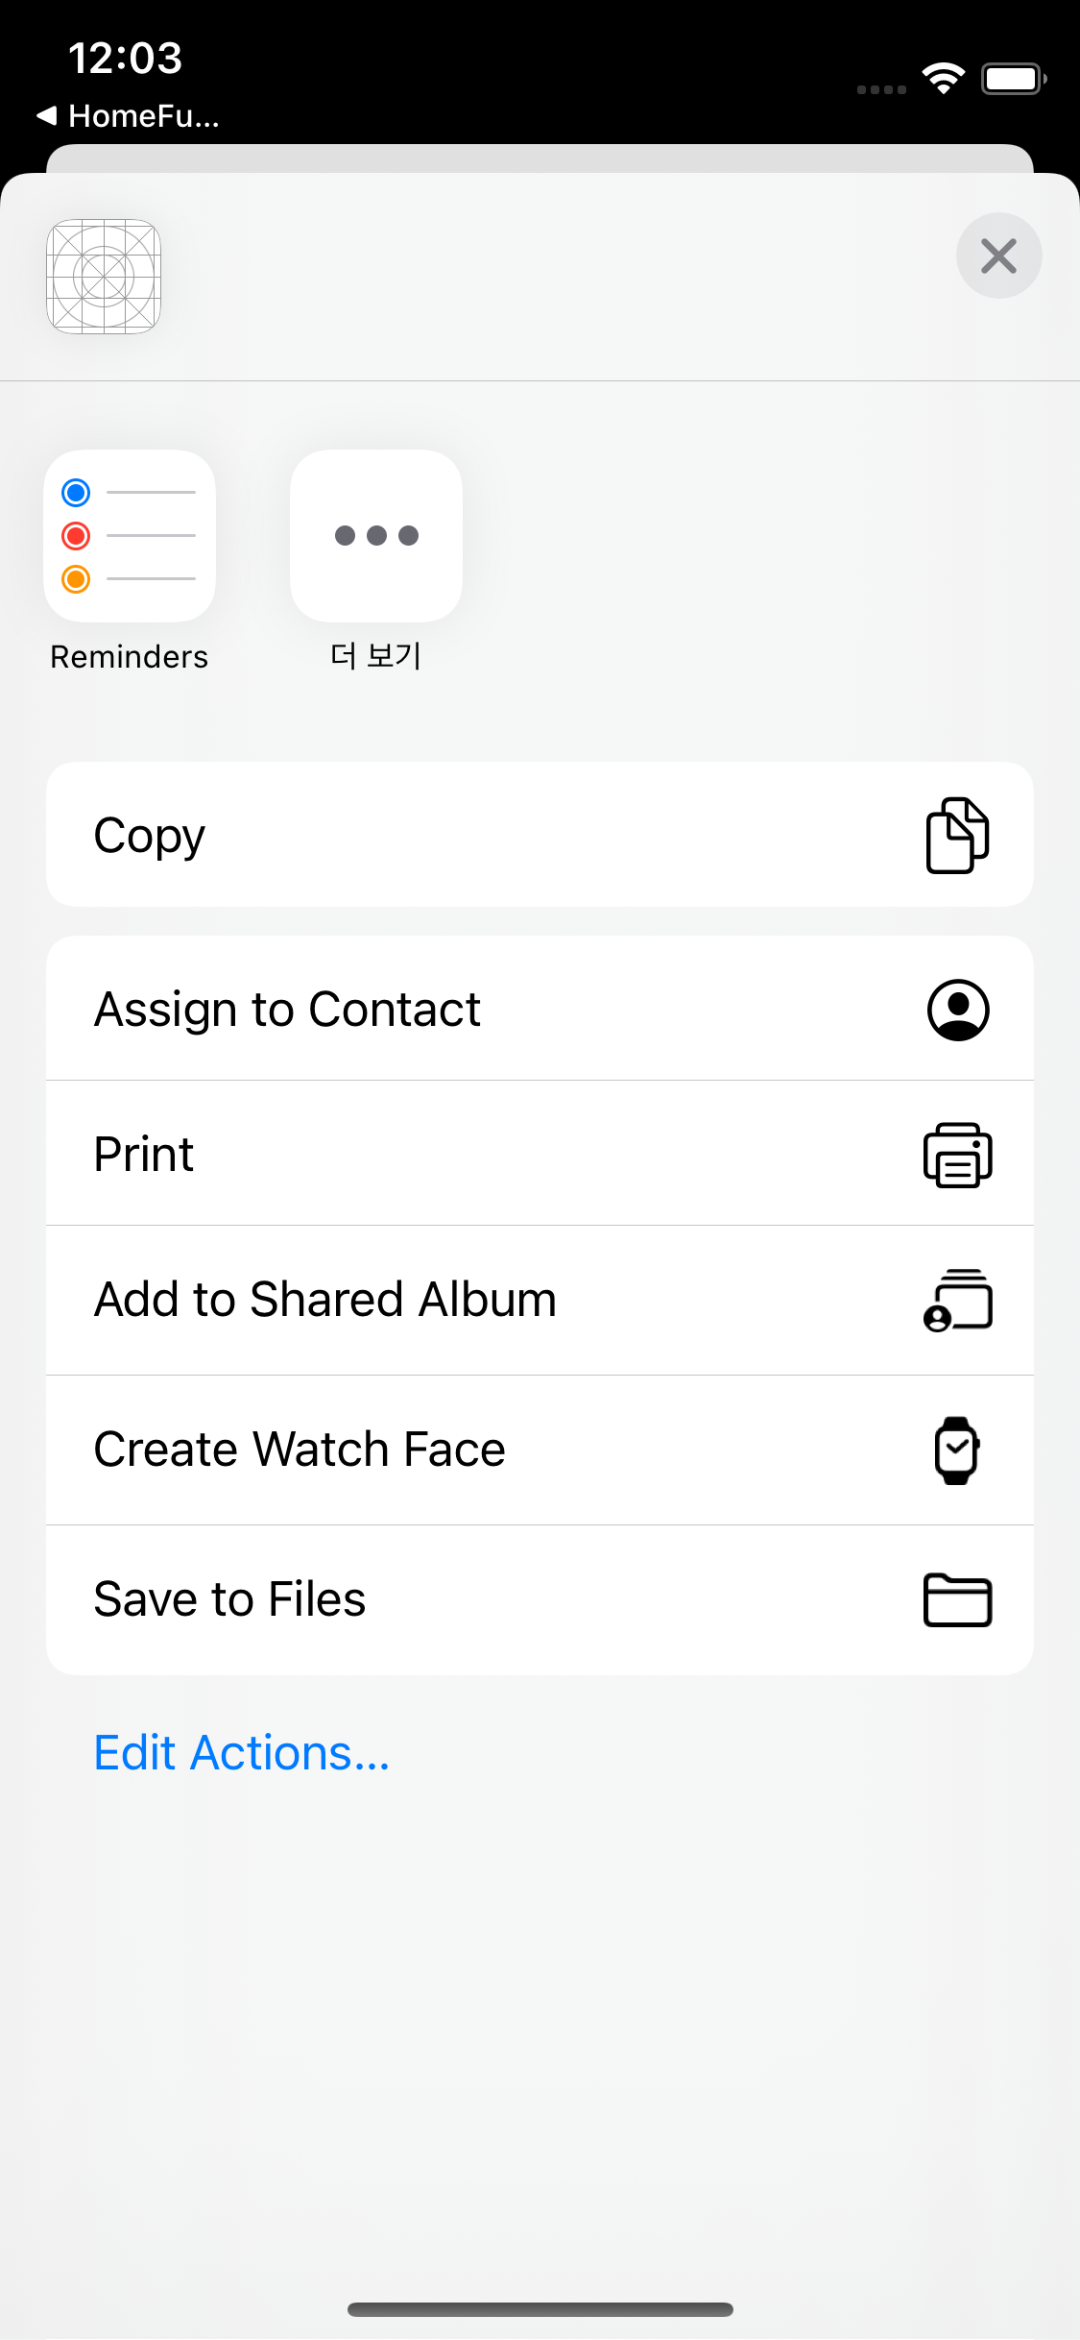
- 사용자에게 특정 앱으로부터 디바이스에 설치된 다른 앱들로 컨텐츠를 공유하는 기능 제공
@IBAction func shareButtonTapped(_ sender: UIButton) {
    guard let image = imageView.image else { return }
    let activityController = UIActivityViewController(activityItems: [image], applicationActivities: nil)
    activityController.popoverPresentationController?.sourceView = sender
    present(activityController, animated: true, completion: nil)
}
1. UIActivityViewController(activityItems:applicationActivities:)
let activityController = UIActivityViewController(activityItems: [image], applicationActivities: nil)
-
activity view controller의 initializer
-
activityItems[Any]type- 공유할 컨텐츠들을 담는다.
-
applicationActivities- 나의 앱이 지원하는 custom service들 표시
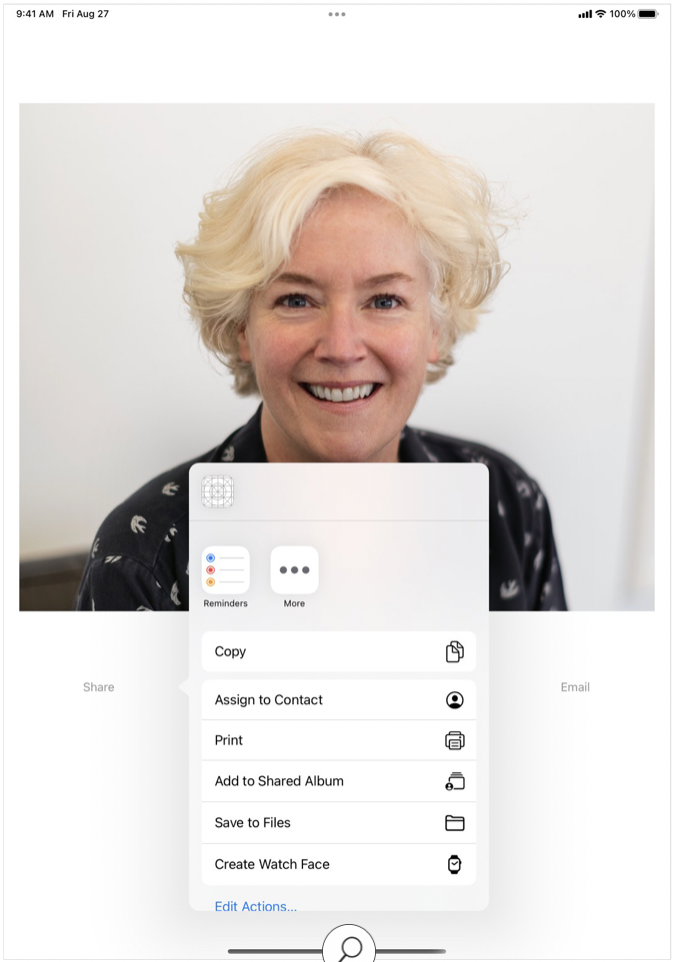
2. popoverPresentationController
activityController.popoverPresentationController?.sourceView = sender- iPad의 경우,
UIActivityViewController는 특정 view에서 퍼져나오는 형태의 popover 창에 표시된다. - popover는 해당 화면을 호출하는 버튼을 표현하기 적합하다. (해당 예시에서는
sender) - 해당 code는 작은 iOS 기기에서는 아무 효과를 일으키지 않는다.
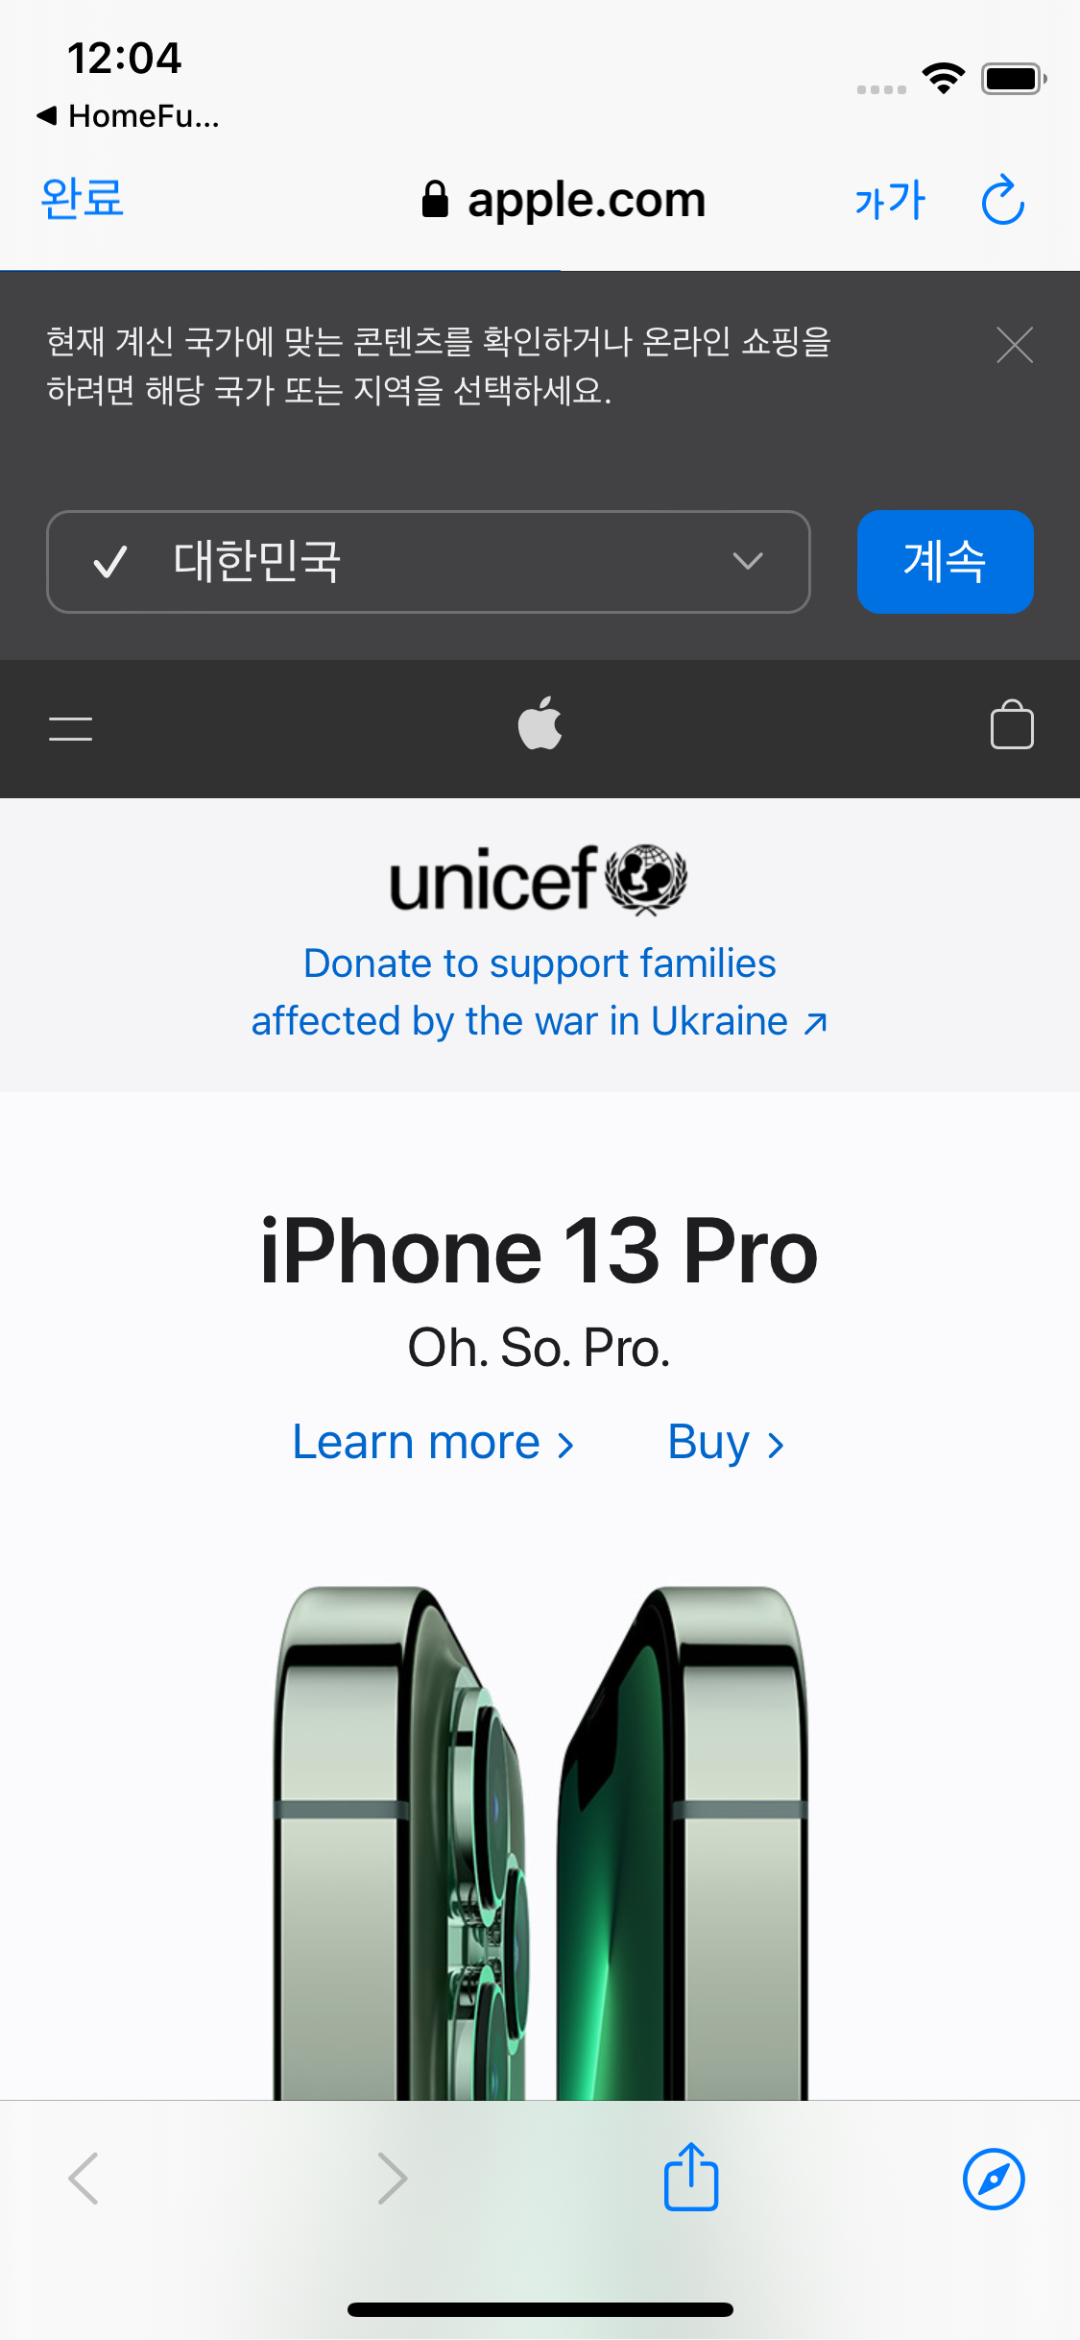
SFSafariViewController
-
앱 내부에서 Safari를 띄워 웹페이지를 여는 기능
-
SafariServiceframework에 정의되어 있다.
import SafariServices- 왼쪽 위의 'Done' 버튼 클릭 시, 원래의 view controller로 되돌아간다.
@IBAction func safariButtonTapped(_ sender: UIButton) {

	// URL(string:) initializer: optional 반환
    if let url = URL(string: "https://www.apple.com") {
        let safariViewController = SFSafariViewController(url: url)
        present(safariViewController, animated: true, completion: nil)
    }
}
1. SFSafariViewController(url:)
let safariViewController = SFSafariViewController(url: URL(string: "https://www.apple.com"))url- 사용자에게 띄워줄 웹사이트 주소
- read-only address
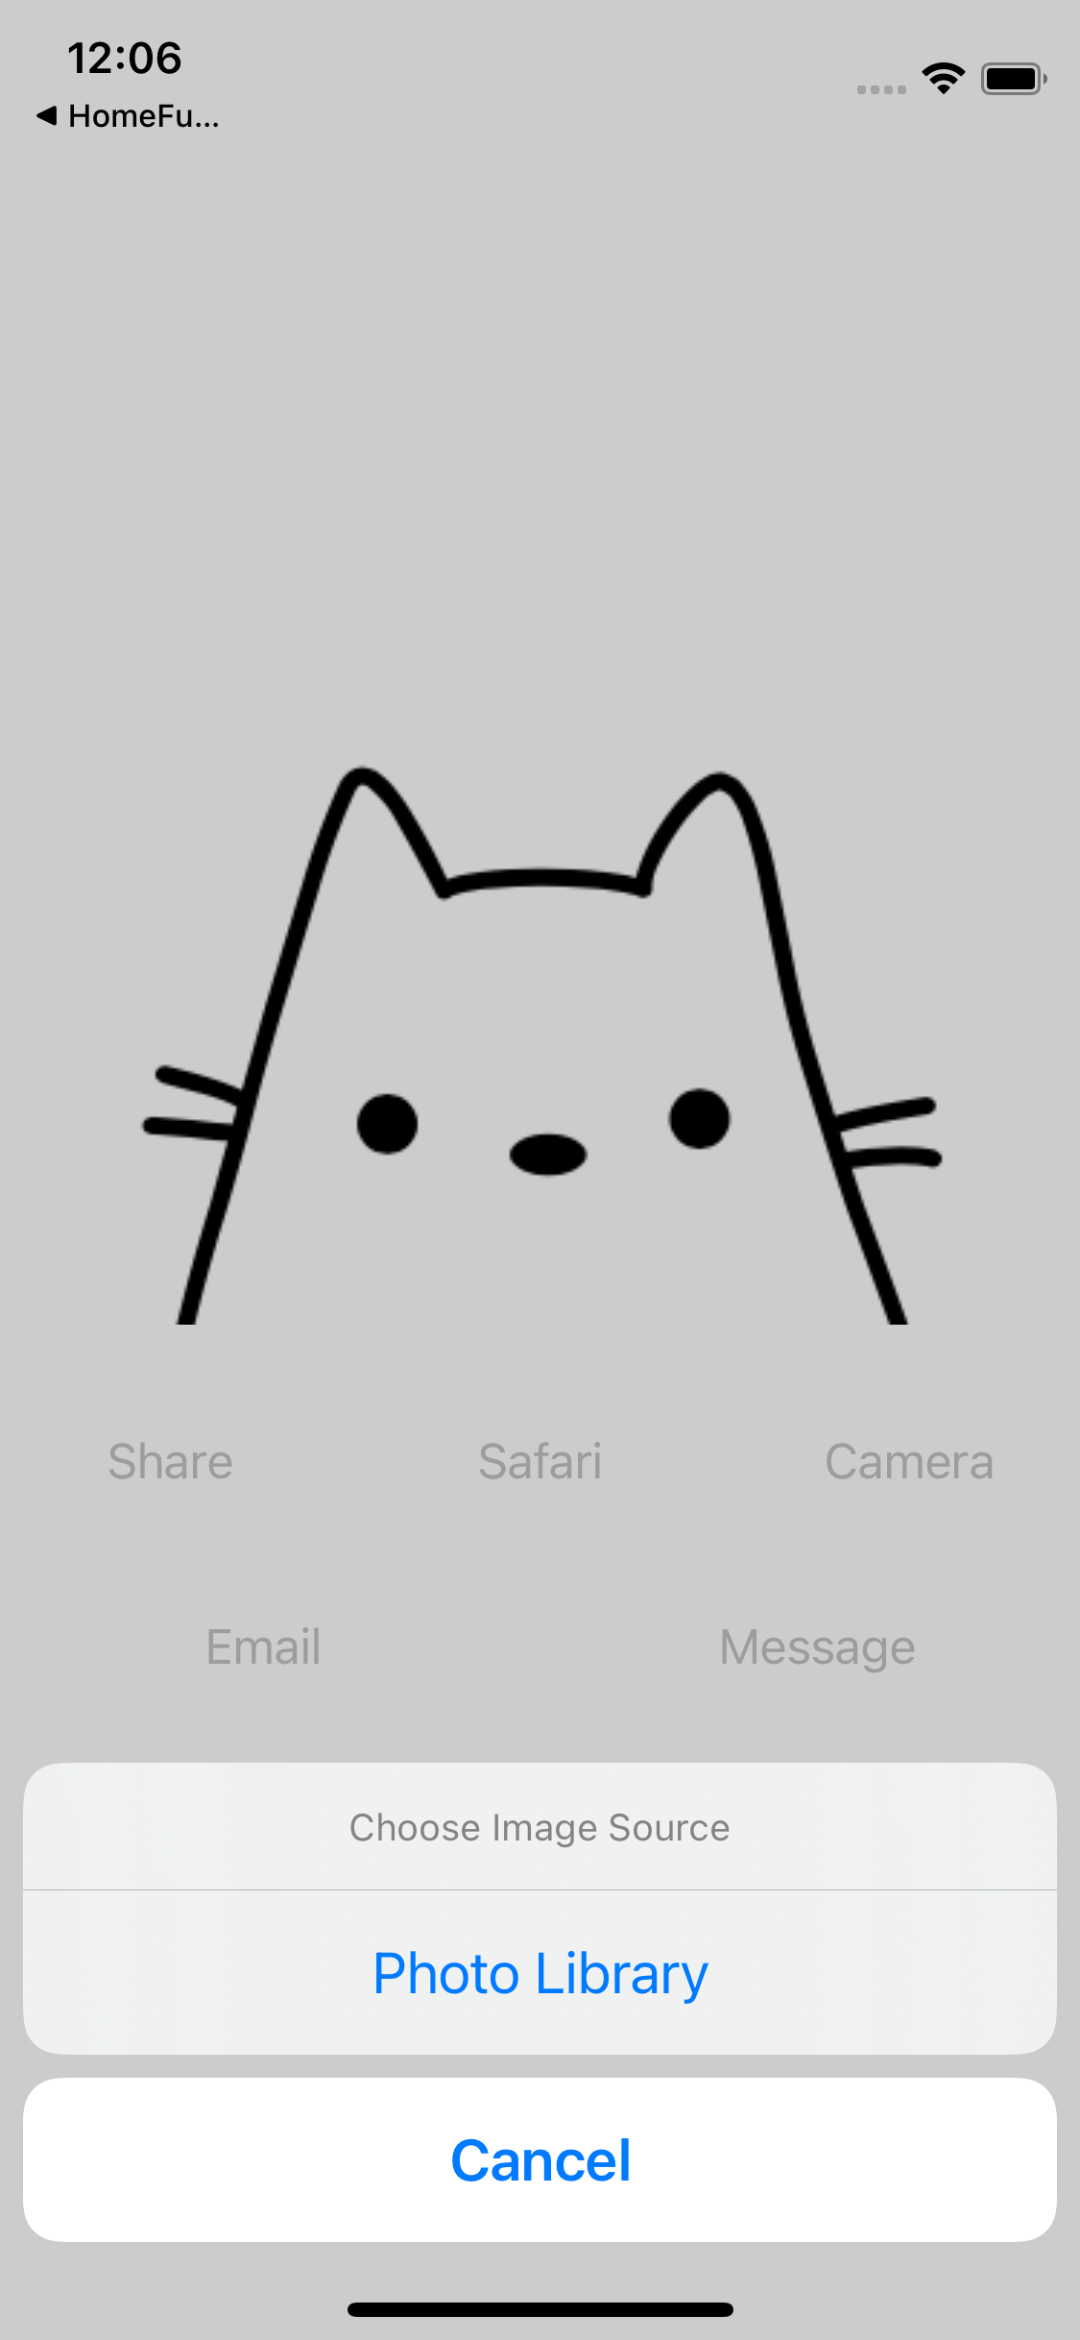
UIAlertController
-
사용자의 주위를 끌고, 여러가지 선택지를 제공하는 기능
ex) 배터리 부족 알람, 소프트웨어 업데이트 알람
1. UIAlertController(title:message:preferredStyle:)
let alertController = UIAlertController(title: "Choose Image Source", message: nil, preferredStyle: .actionSheet)-
preferredStyle- 알람의 위치를 결정
.alert: 화면의 가운데에 알람을 띄움.actionSheet: 화면의 아래에 알람을 띄움
2. UIAlertAction(title:style:handler:)
let cameraAction = UIAlertAction(title: "Camera", style: .default, handler: { action in
    print("User selected Camera action")
})-
handler- 사용자가 해당 선택지를 선택했을 때, 실행시킬 코드
- closure 형태
전체코드
// 사용자에게 갤러리의 사진을 가져올지 새로운 사진을 찍을지 선택지 제공
@IBAction func cameraButtonTapped(_ sender: UIButton) {
    let alertController = UIAlertController(title: "Choose Image Source", message: nil, preferredStyle: .actionSheet)

    let cancelAction = UIAlertAction(title: "Cancel", style: .cancel, handler: nil)
    let cameraAction = UIAlertAction(title: "Camera", style: .default, handler: { action in
        print("User selected Camera action")
    })

    let photoLibraryAction = UIAlertAction(title: "Photo Library", style: .default, handler: { action in
        print("User selected Photo Library action")
    })

    alertController.addAction(cancelAction)
    alertController.addAction(cameraAction)
    alertController.addAction(photoLibraryAction)
    alertController.popoverPresentationController?.sourceView = sender

    present(alertController, animated: true, completion: nil)
}
UIImagePickerController
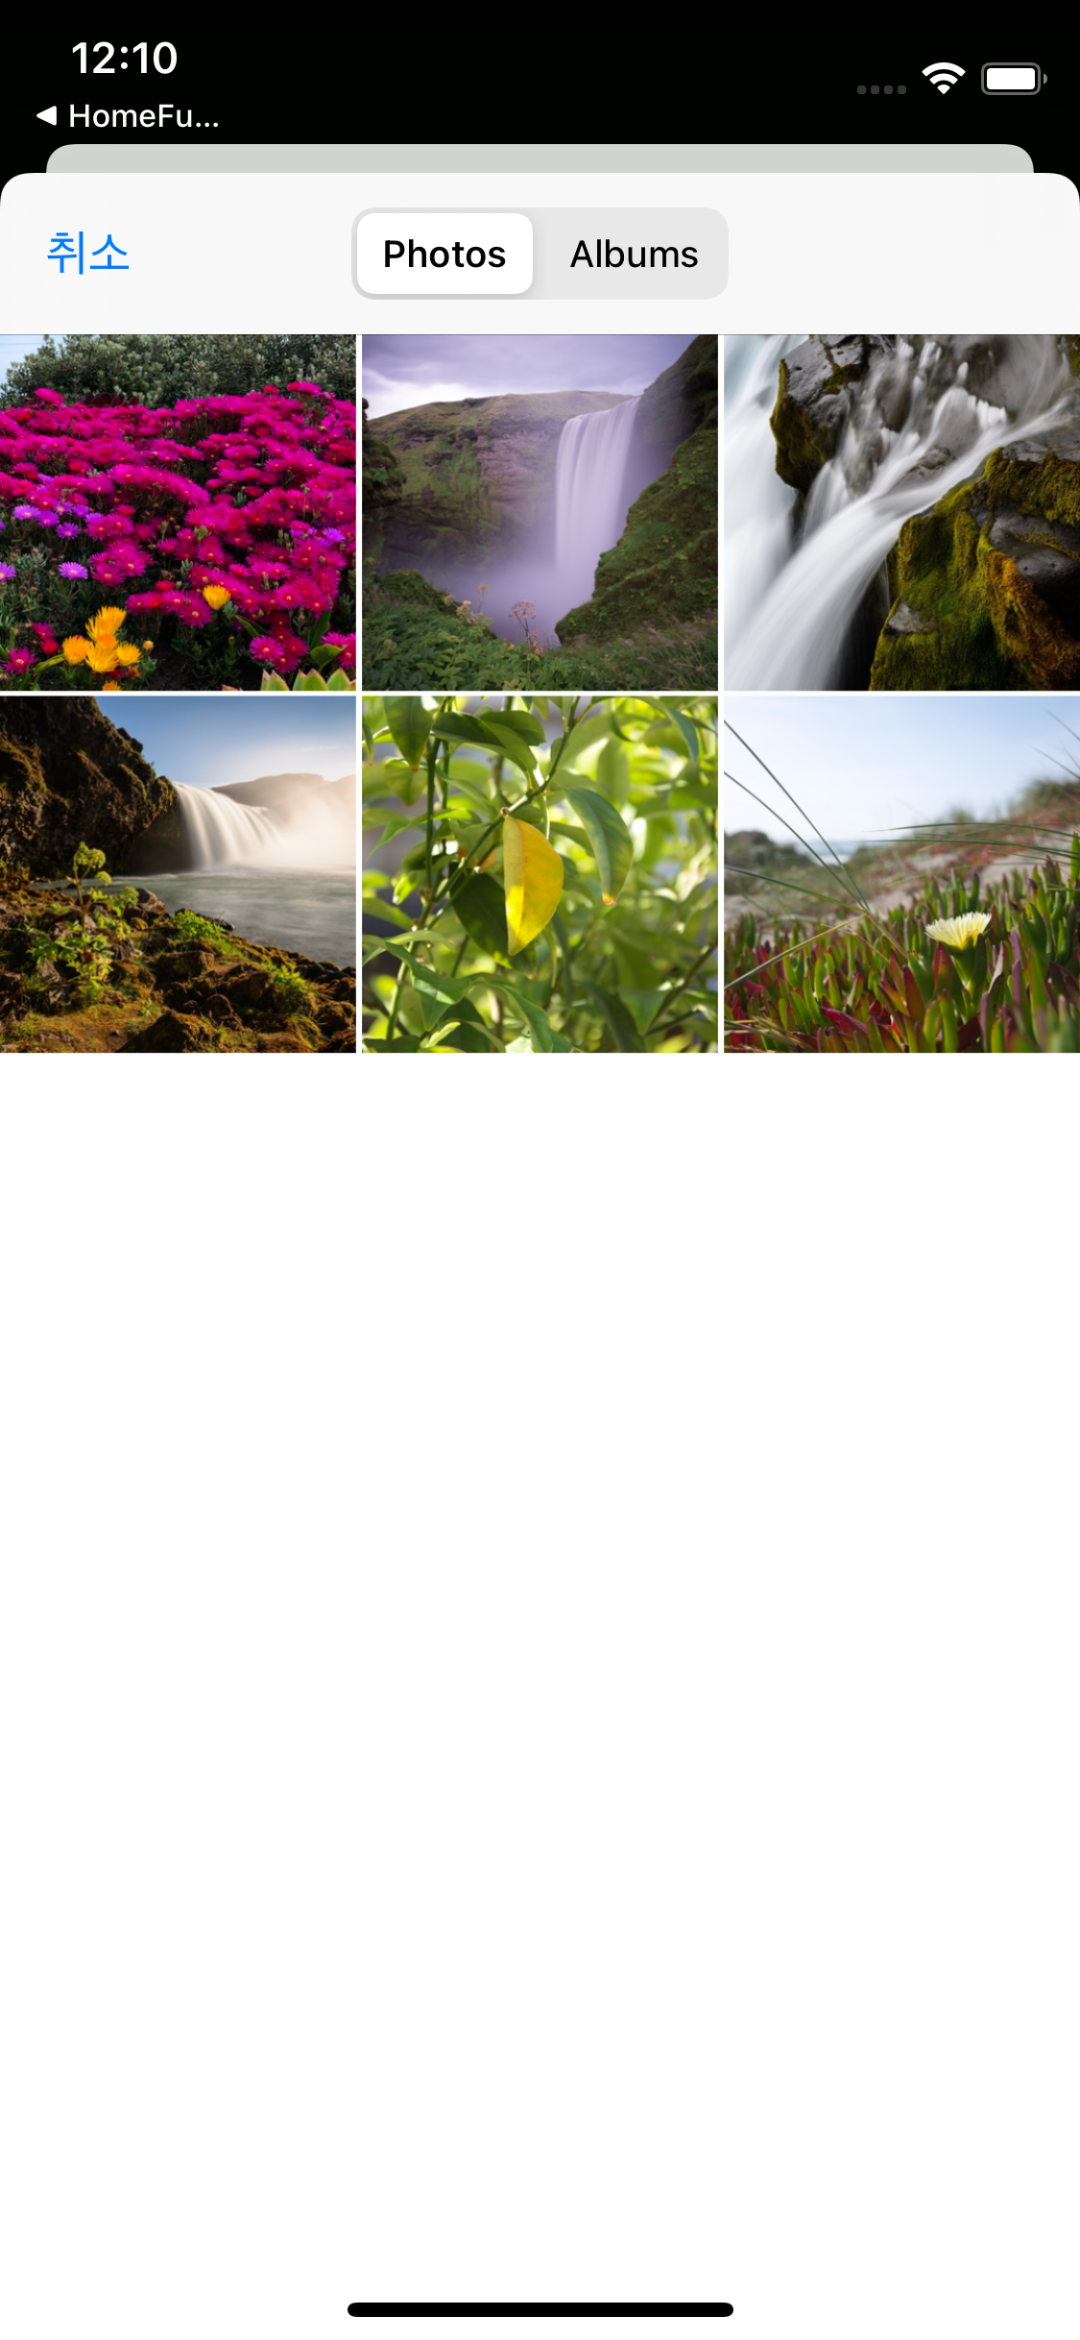
-
사용자의 카메라 또는 갤러리에 접근하는 기능
ex) 사용자가 프로필 사진을 선택하는 앱, 사진 공유 앱
-
2개의 protocol을 차용해야 한다.
-
UIImagePickerControllerDelegate- 선택된 이미지 정보를 나의 앱으로 전달시켜준다.
-
UINavigationControllerDelegate- 사용자가 image picker view를 나갈 때 실행될 로직을 다룬다.
-
class ViewController: UIViewController,
   UIImagePickerControllerDelegate, UINavigationControllerDelegate
   {...}
1. delegate
- view controller를 image picker controller의 대리자로 지정한다.
@IBAction func cameraButtonTapped(_ sender: UIButton) {
    let imagePicker = UIImagePickerController()
    imagePicker.delegate = self

    //...
}
2. isSourceTypeAvailable(_:)
-
현재 디바이스에서 해당 source type이 사용될 수 있는지 여부를
Bool형태로 반환 -
시뮬레이터의 경우 카메라를 지원하지 않는다.
-
해당 메서드를 통해 확인함으로써, 시뮬레이터에선 카메라 선택지를 보여주지 않을 수 있다.
-
앱이 fatal error와 함께 충돌하는 것을 막는다.
-
if UIImagePickerController.isSourceTypeAvailable(.camera) {
let cameraAction = UIAlertAction(title: "Camera", style: .default, handler: { action in
imagePicker.sourceType = .camera
self.present(imagePicker, animated: true, completion: nil)
})
alertController.addAction(cameraAction)
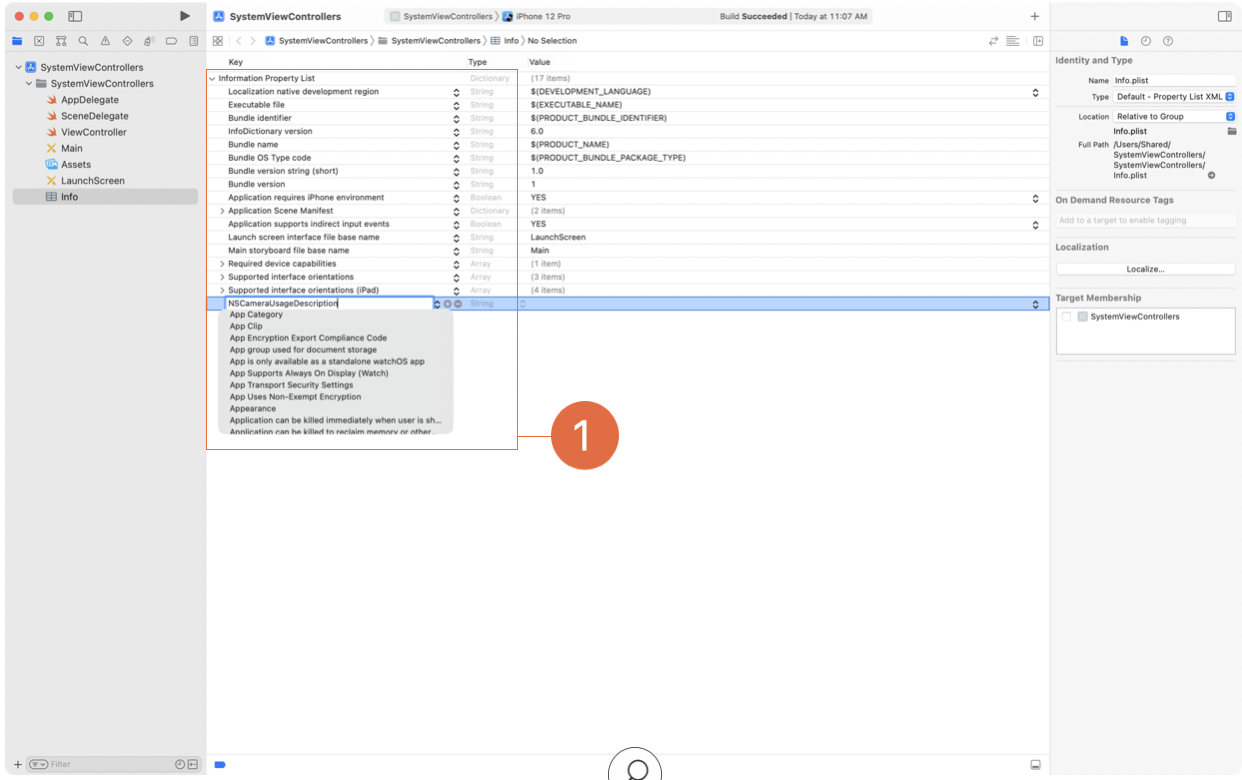
}3. NSCameraUsageDescription
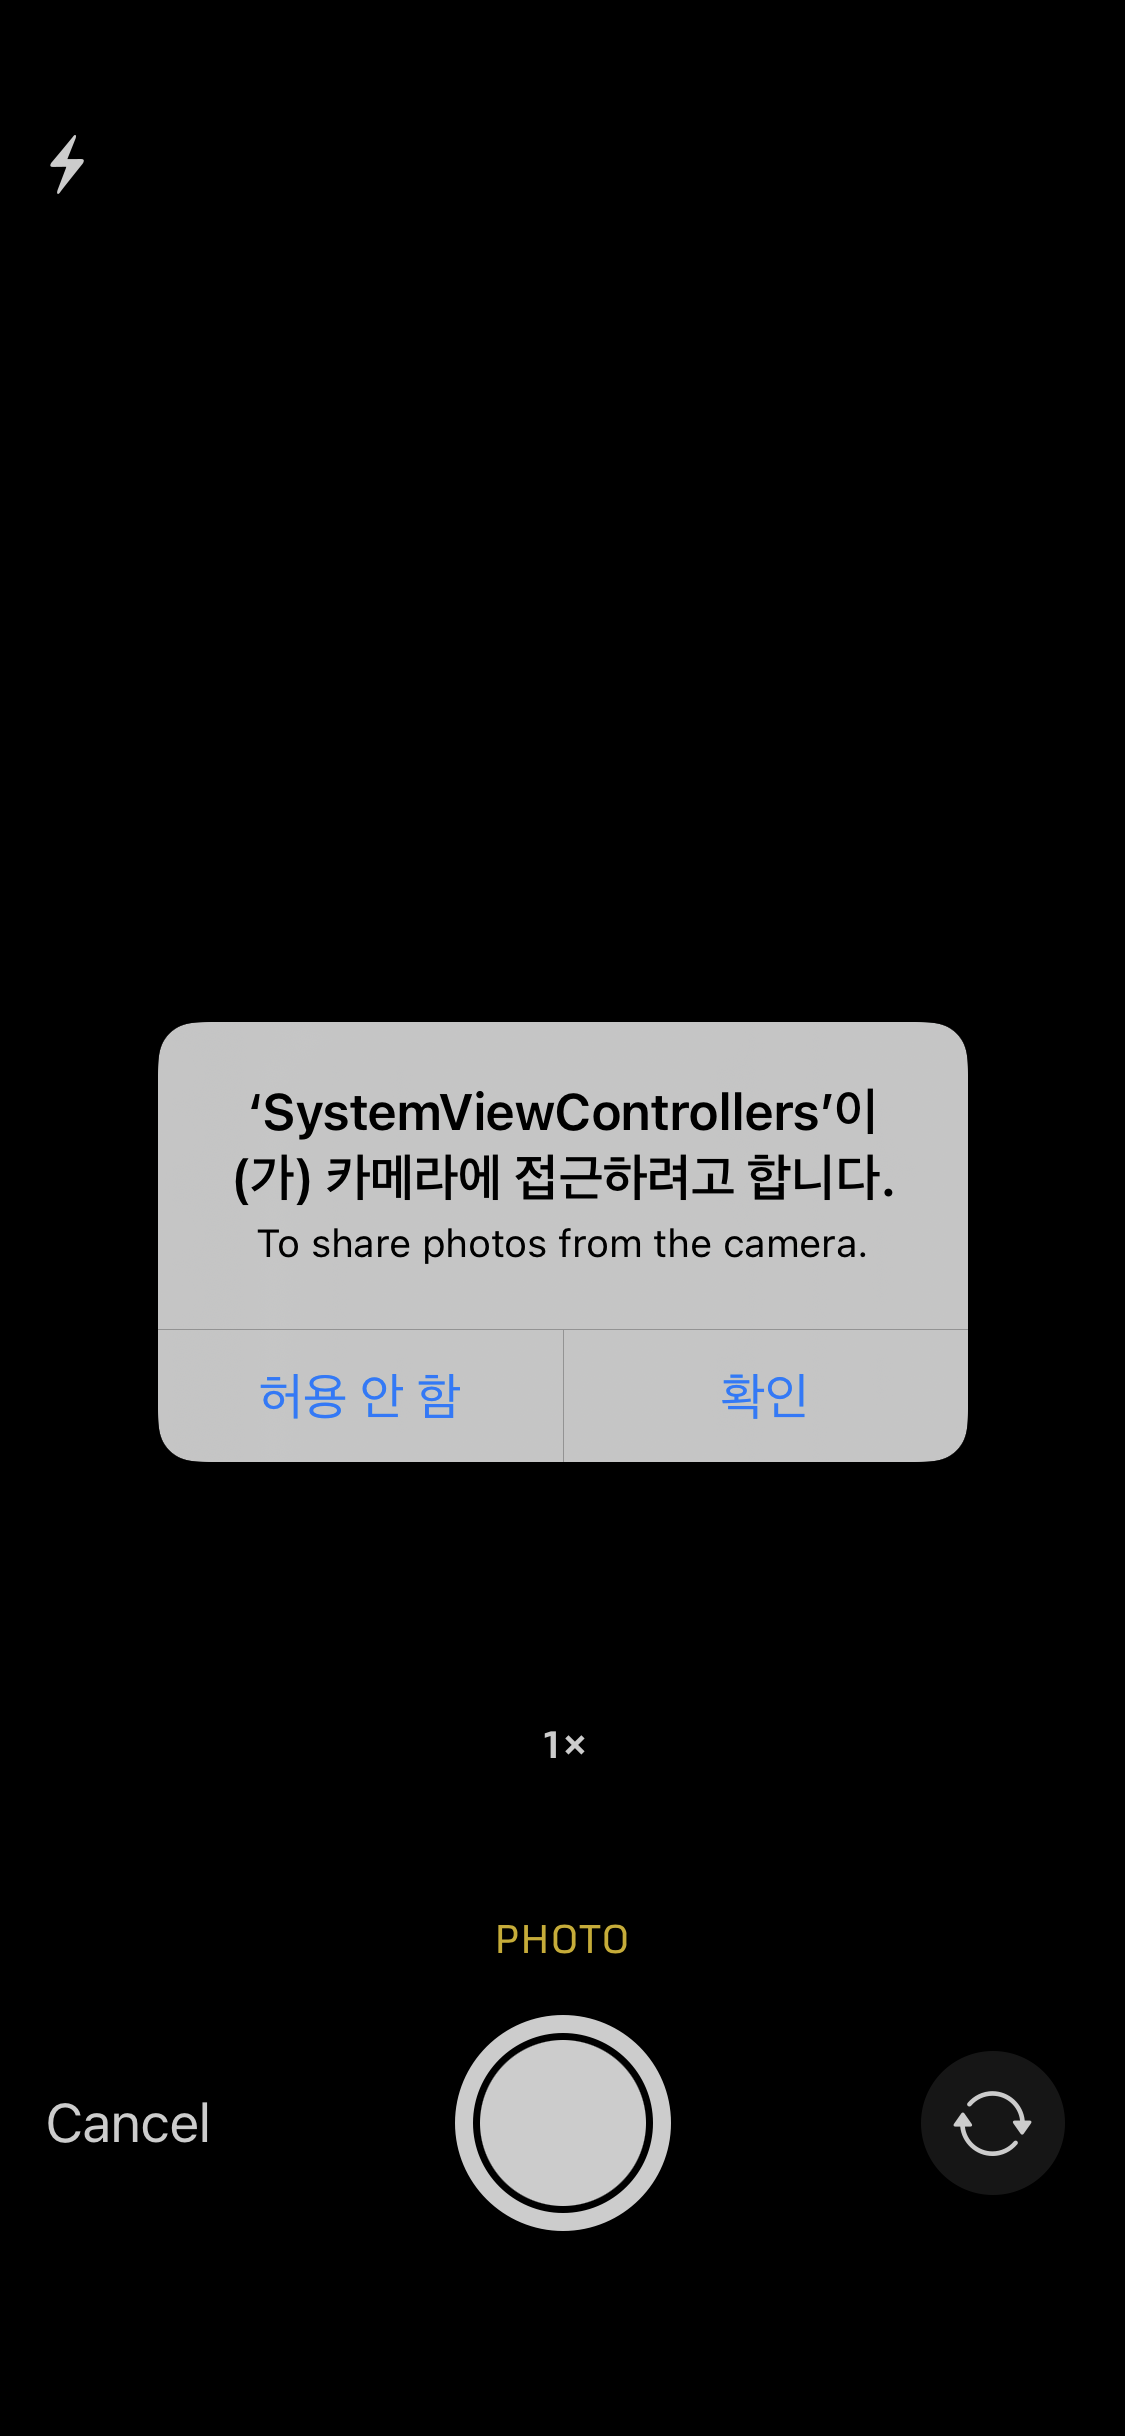
-
앱은 카메라와 같은 사용자의 개인정보에 접근을 시도하기 전 허가를 요청해야 한다.
- 허가를 요청하지 않은채 카메라에 접근하는 경우 앱이 충돌하며 console에 해당 메세지를 띄운다.
This app has crashed because it attempted to access privacy-sensitive data 	    without a usage description. The app's Info.plist must contain an
NSCameraUsageDescription key with a string value explaining to the user how
the app uses this data.
- 허가를 요청하지 않은채 카메라에 접근하는 경우 앱이 충돌하며 console에 해당 메세지를 띄운다.
-
OS는 사용자에게 접근을 허락할 것인지 묻는 창을 띄운다.
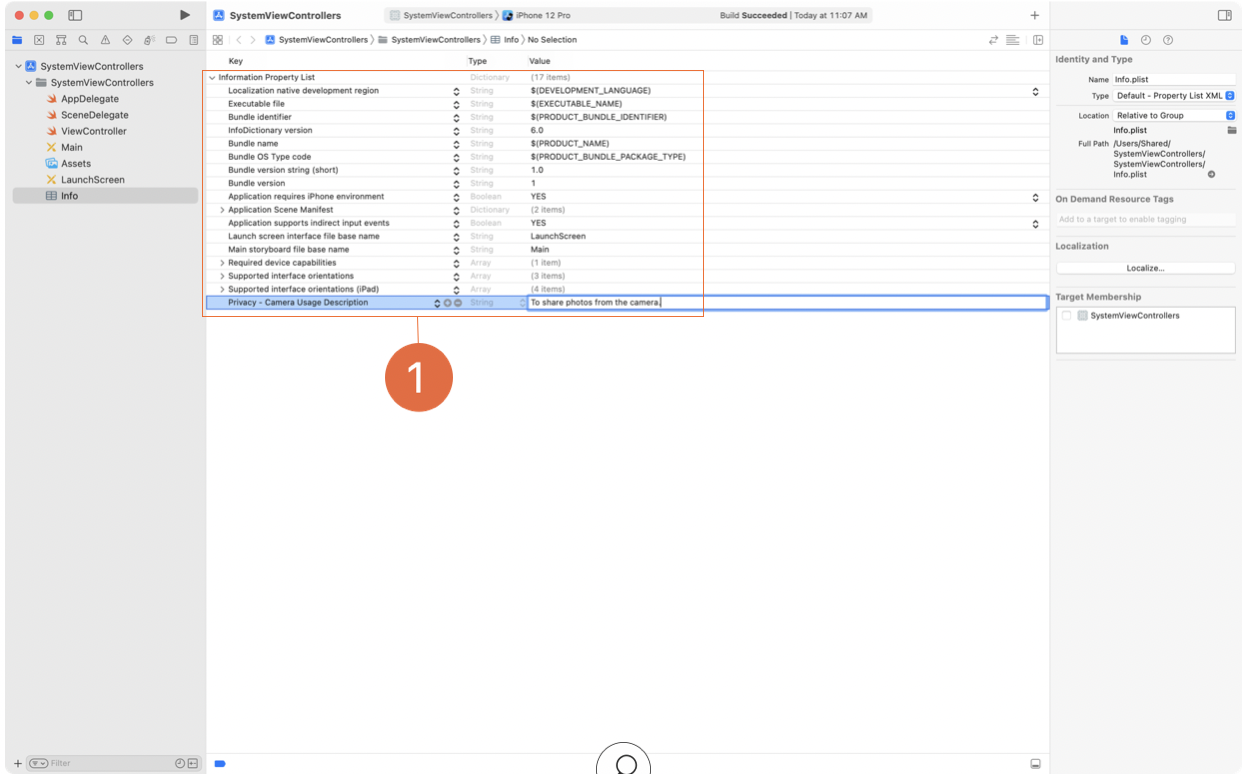
-
NSCameraUsageDescriptionkey는 왜 앱이 카메라에 접근을 원하는지 이유를 사용자에게 설명하는데 쓰인다. -
Infofile에서NSCameraUsageDescriptionkey를 생성하고, 어떻게 사용자의 데이터를 사용할 것인지 입력한다.ex) "To share photos from camera."
4. imagePickerController(_:didFinishPickingMediaWithInfo:)
-
사용자가 사진 또는 다른 미디어를 선택하는 경우 실행되는 delegate method
-
info-
infodictionary에 사진이 저장되어 있어 해당 parameter를 통해 미디어에 접근할 수 있다. -
dictionary key는
UIImagePickerController.InfoKeytype으로 이루어져 있어 사용자가 세션에서 선택한 이미지에 관한 정보에 접근할 수 있게 한다..originalImage: 사용자가 선택한 image를 가져오는 key
-
[UIImagePickerController.InfoKey: Any]type으로 해당 value값을 이용하기 위해선 타입을 변환해주어야 한다.- original image에 접근하기 위해선
UIImage로 타입을 변환해주어야 한다.
- original image에 접근하기 위해선
-
-
dismiss(animated:completion:)- image picker view를 사라지게 한다.
@IBAction func cameraButtonTapped(_ sender: UIButton) {...}

func imagePickerController(_ picker: UIImagePickerController,
   didFinishPickingMediaWithInfo info: [UIImagePickerController.InfoKey : Any]) {
    guard let selectedImage = info[.originalImage] as? UIImage else { return }

    imageView.image = selectedImage
    dismiss(animated: true, completion: nil)
}
전체코드
@IBAction func cameraButtonTapped(_ sender: UIButton) {
    let imagePicker = UIImagePickerController()
    imagePicker.delegate = self

    let alertController = UIAlertController(title: "Choose Image Source", message: nil, preferredStyle: .actionSheet)

    let cancelAction = UIAlertAction(title: "Cancel", style: .cancel, handler: nil)
    alertController.addAction(cancelAction)

    if UIImagePickerController.isSourceTypeAvailable(.camera) {
        let cameraAction = UIAlertAction(title: "Camera", style: .default, handler: { action in
            imagePicker.sourceType = .camera
            self.present(imagePicker, animated: true, completion: nil)
        })
        alertController.addAction(cameraAction)
    }

    if UIImagePickerController.isSourceTypeAvailable(.photoLibrary) {
        let photoLibraryAction = UIAlertAction(title: "Photo Library", style: .default, handler: { action in
            imagePicker.sourceType = .photoLibrary
            self.present(imagePicker, animated: true, completion: nil)
        })
        alertController.addAction(photoLibraryAction)
    }

    alertController.popoverPresentationController?.sourceView = sender

    present(alertController, animated: true, completion: nil)
}
MFMailComposeViewController
-
앱 내부에서 이메일을 전송할 수 있게 해주는 기능
-
이메일, 문자메세지 전송에 관한 인터페이스가 있는
MessageUIframework에 속해있다.
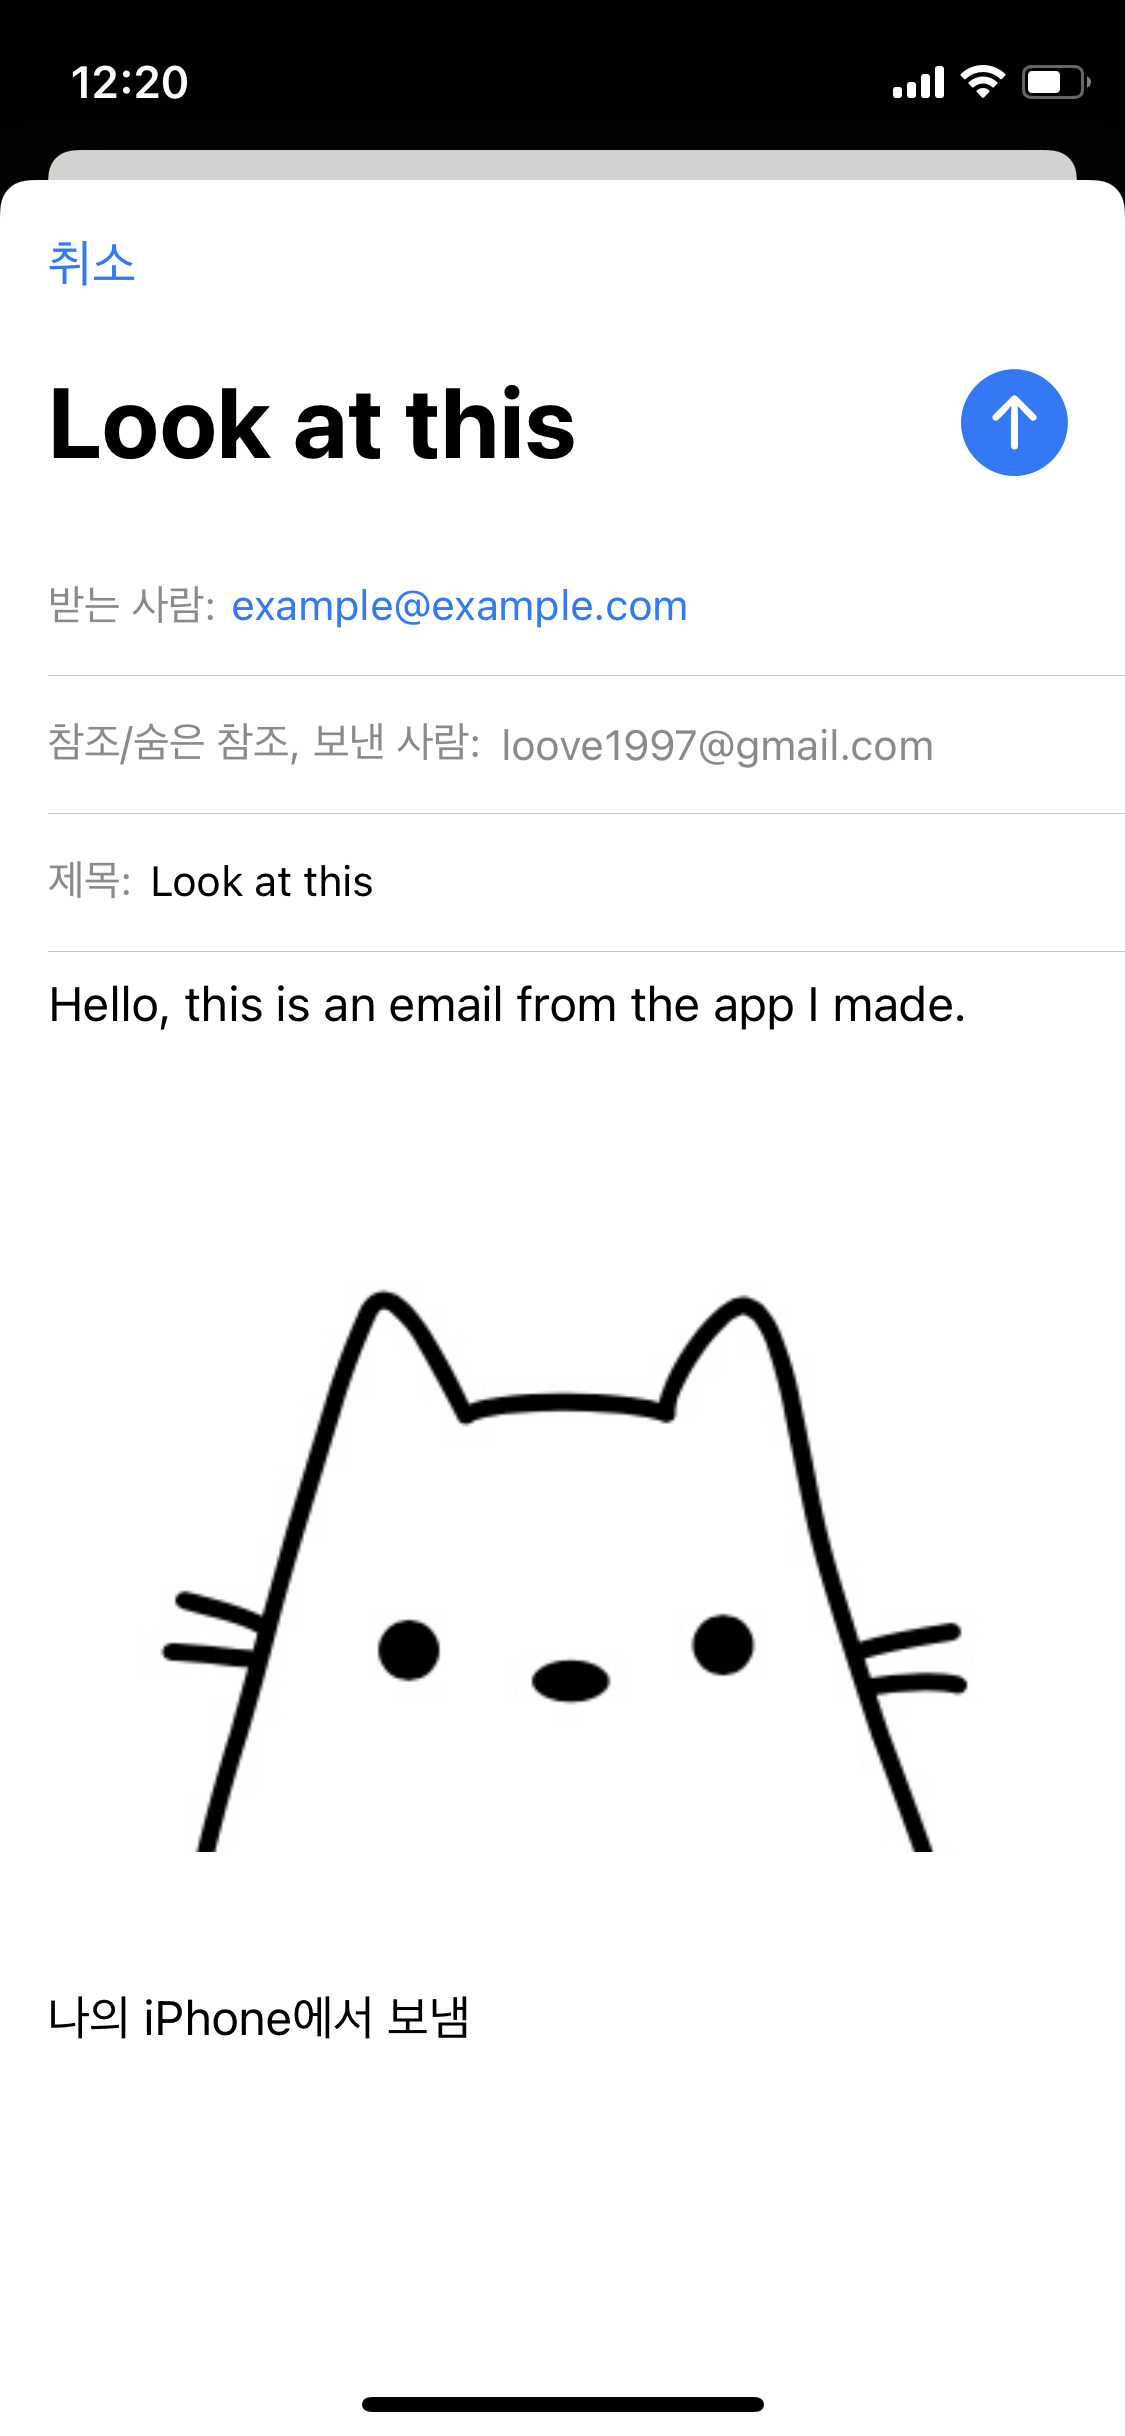
import MessageUI- 수신인, 제목, 본문, 첨부파일을 설정할 수 있다.
mailComposer.setToRecipients(["example@example.com"])
mailComposer.setSubject("Look at this")

// plain text or HTML
mailComposer.setMessageBody("Hello, this is an email from the app I made.", isHTML: false)

if let image = imageView.image, let jpegData =
   image.jpegData(compressionQuality: 0.9) {
    mailComposer.addAttachmentData(jpegData, mimeType: "image/jpeg", fileName: "photo.jpg")
}

present(mailComposer, animated: true, completion: nil)
1. canSendMail()
- 현재 디바이스에서 메일 서비스가 이용가능한지 결정하는 함수
@IBAction func emailButtonTapped(_ sender: UIButton) {
    guard MFMailComposeViewController.canSendMail() else {
        print("Can not send mail")
        return
    }
}-
실제 환경에서는
false를 return 했을 때 다음과 같은 조치를 취해야한다.- 이메일 옵션을 선택할 수 없도록 한다.
- 이메일 옵션을 보여주지 않는다.
- 상황에 대해 설명하는 메세지를 띄운다.
2. mailComposeDelegate
- 적절한 시기에 mail compose view controller에서 나올 책임이 있는
mailComposeDelegate를 세팅하기 위해MFMailComposeViewControllerDelegateprotocol을 차용해야 한다.
class ViewController: UIViewController, MFMailComposeViewControllerDelegate {...}- 현재 view controller를
mailComposeDelegate로 설정한다.
@IBAction func emailButtonTapped(_ sender: UIButton) {
    guard MFMailComposeViewController.canSendMail() else { return }

    let mailComposer = MFMailComposeViewController()
    mailComposer.mailComposeDelegate = self
}
3. mailComposeController(didFinishWith:)
- 사용자가 메일 전송을 끝마쳤을 때, 해당 view를 없애는 기능을 수행하는 delegate method
func mailComposeController(_ controller: MFMailComposeViewController,
   didFinishWith result: MFMailComposeResult, error: Error?) {
        dismiss(animated: true, completion: nil)
}