로그인 기능 구현
로그인 만들기
1. firebase.js에 만들어둔 auth 가져오기
2. 리덕스에서 loginFB 함수 만들기
3. auth.signInWithEmailAndPassword()로 로그인
4. Login 컴포넌트에서 loginFB를 호출!
5. 리덕스의 user 정보 업데이트 후에 메인 페이지로 이동하기
1. firebase.js에 만들어둔 auth 가져오기
//firebase.js
import firebase from 'firebase/compat/app';
import 'firebase/compat/auth';
import 'firebase/compat/firestore';

// Your web app's Firebase configuration
const firebaseConfig = {
  apiKey: "---",
  authDomain: "---"
  projectId: "---",
  storageBucket: "---",
  messagingSenderId: "---",
  appId: "---"
};

// Initialize Firebase
firebase.initializeApp(firebaseConfig);

//firebase 인증 가져와서 쓰기
const auth = firebase.auth();

export {auth};- auth 가져오기
//user.js
import { auth } from "../../shared/firebase";
2. 리덕스에서 loginFB 함수 만들기
//user.js
//Action
const LOG_IN = "LOG_IN";
const loginFB = (id, pwd) => {
return function ( dispatch, getState, { history }){
}
}
3. auth.signInWithEmailAndPassword()로 로그인
-이메일 주소와 비밀번호로 사용자 로그인 처리
//user.js
const loginFB = (id, pwd) => {
return function ( dispatch, getState, { history }){
signInWithEmailAndPassword(auth, id, pwd)
.then((user) => {
// Signed in
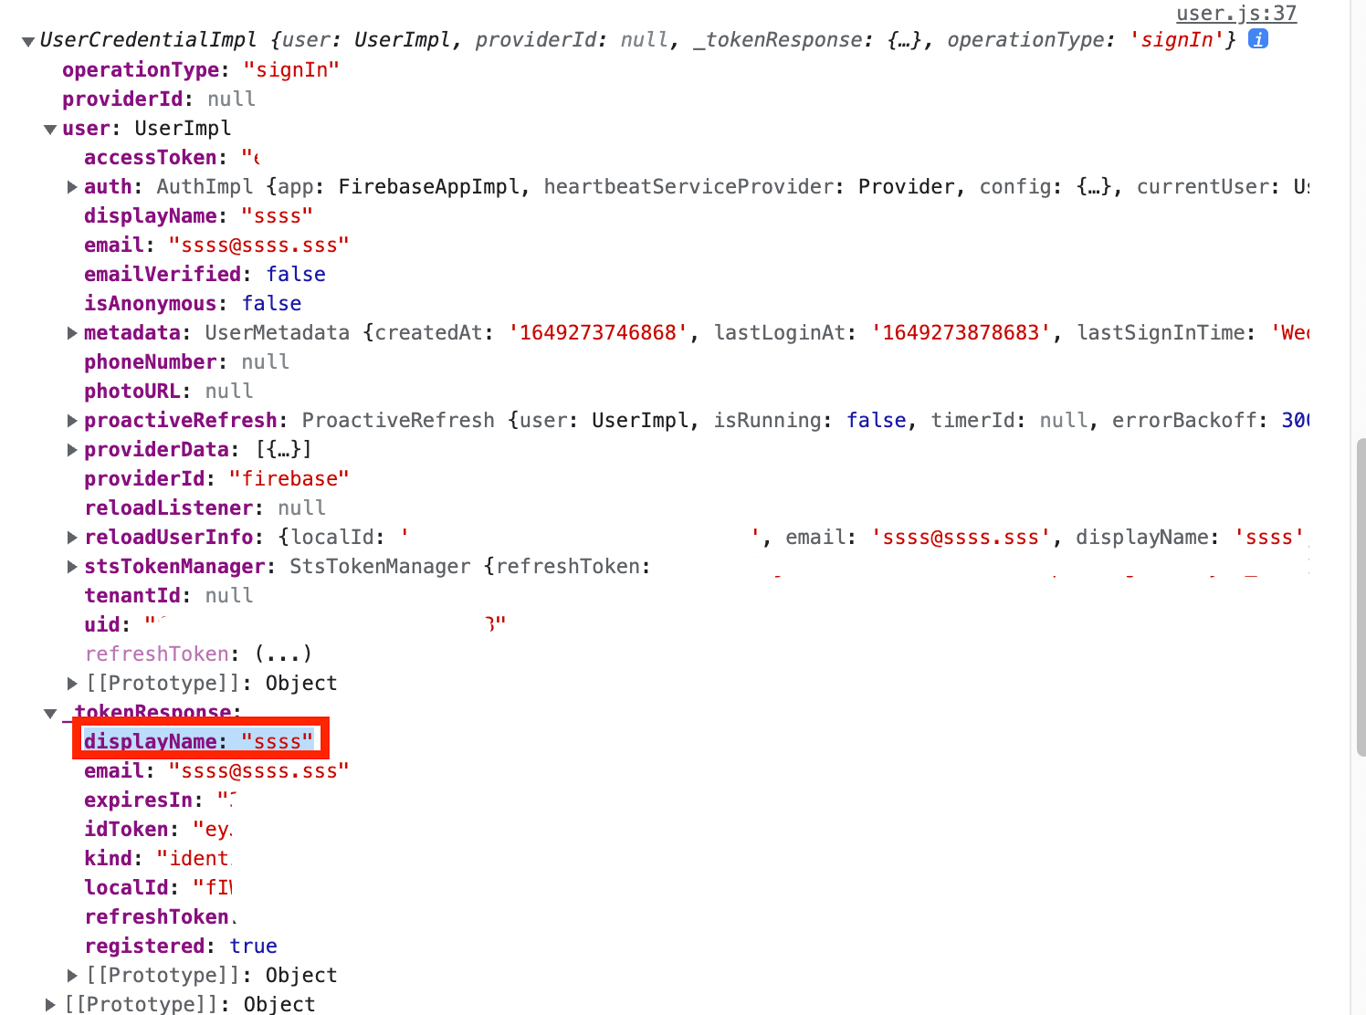
console.log(user); // user_name 바꿔주려고 콘솔창에 찍어봄
dispatch(setUser({id: id, user_name: user.user.displayName, user_profile: ''}));
history.push("/"); // 로그인하면 바로 메인페이지 이동
// ...
})
.catch((error) => {
const errorCode = error.code;
const errorMessage = error.message;
console.log(errorMessage);
});
}
}4. Login 컴포넌트에서 loginFB를 호출!
//login.js
const Login = (props) => {
    const dispatch = useDispatch();

  //useState()로 id와 pwd state 받아와서 수정
    const [id, setId] = React.useState();
    const [pwd, setPwd] = React.useState();

    const loginID = (e) => {
        setId(e.target.value);
    }
    const loginPWD = (e) => {
        setPwd(e.target.value);
    }

    const logIn = () => {
        if(id === '' || pwd === ''){
            window.alert("아이디 혹은 비밀번호를 입력해주세요.");
        }
        dispatch(userActions.loginFB(id, pwd));
    }

    return (
        <Wrap>
            <h1>Log In</h1>
            <div>
                <div>
                    <label htmlFor="id">ID</label><br />
                    <Input id="id" value={id} _onChange={loginID} type="text" placeholder="Please enter your ID" /><br />
                    <label htmlFor="password">Password</label><br />
                    <Input id="password" value={pwd} _onChange={loginPWD} type="password" placeholder="Please enter your Password"/><br />
                </div>
                <br />

                <div>
                    <Button style={{width: "300px"}}
                            variant="contained" color="secondary"
                            onClick={() => {logIn()}}>Log In</Button>
                </div>
            </div>
        </Wrap>
    )
}
5. 리덕스의 user 정보 업데이트 후에 메인 페이지로 이동하기
-user.js에서 loginFB()안에서 dispatch 후 history.push("/"); 넣어서 메인 페이지로 이동하게 하기
로그인 유지기능 구현
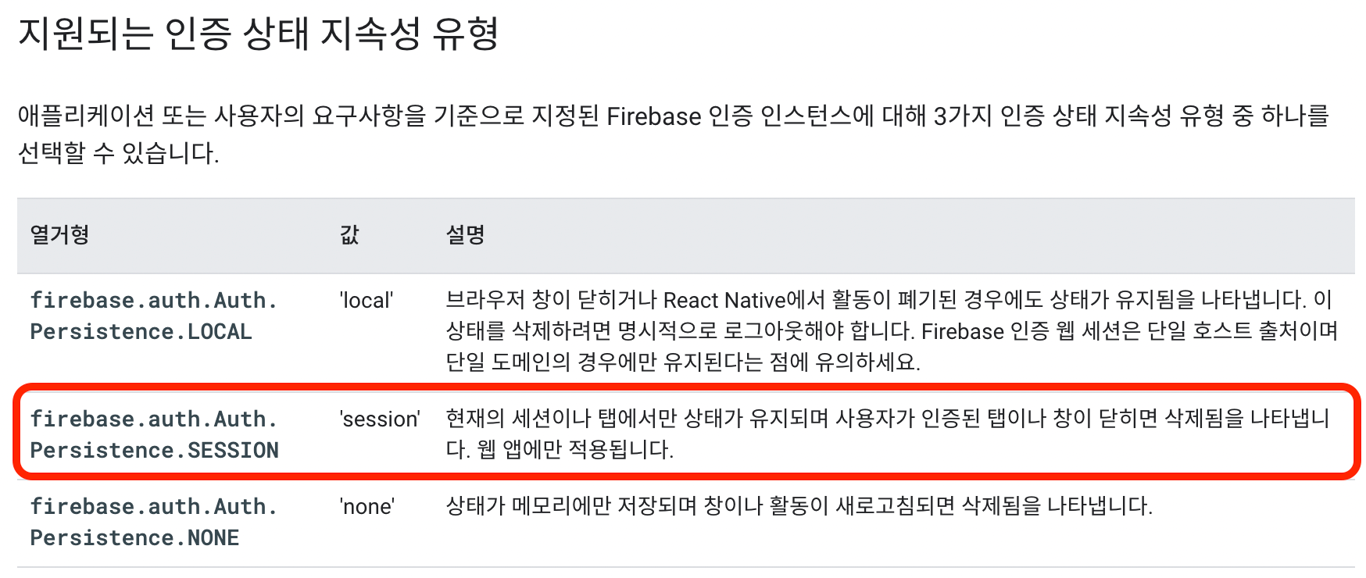
1. 로그인 시, 세션에 로그인 상태를 기록하게 하기
로그인 상태가 유지되어 보안성을 잃거나 혹은 새로고침 될 때마다 로그아웃 되지 않도록 세션에 로그인 정보를 기록하게 할 것이다.
const loginFB = (id, pwd) => {
    return function ( dispatch, getState, { history }){
      // 이부분을 사용해서 session에 정보 삽입
        << setPersistence(auth, browserSessionPersistence)
        .then(() => { >>
            // Existing and future Auth states are now persisted in the current
            // session only. Closing the window would clear any existing state even
            // if a user forgets to sign out.
            // ...
            // New sign-in will be persisted with session persistence.
            signInWithEmailAndPassword(auth, id, pwd)
            .then((user) => {
            // Signed in
                console.log(user);
                dispatch(setUser({
                    id: id,
                    user_name: user.user.displayName,
                    user_profile: '',
                }));
                history.push("/");
            })
            .catch((error) => {
                const errorCode = error.code;
                const errorMessage = error.message;
                console.log(errorCode, errorMessage);
            });

        })

    }
}
2. loginCheckFB () 생성
//user.js
const loginCheckFB = () => {
    return function ( dispatch, getState ){
        onAuthStateChanged(auth, (user) => {
            if (user){
                dispatch(setUser({
                    id: user.email,
                    user_name: user.displayName.replace,
                    user_profile: "",
                    uid: user.uid,
                }))
              // User is signed in, see docs for a list of available properties
            } else {
              // User is signed out
              dispatch(logOut());
            }

        }
    )}
}
3. firebase 인증 키를 export
//firebase.js
...
const apiKey = firebaseConfig.apiKey;

export {auth, apiKey};
4. 세션을 체크해서 로그인 상태를 유지
App.js가 Head.js보다 시작점에 있으므로 시작하면서부터 체크하기 위해서 App.js에서 세션을 체크해줄 것이다.
//App.js
import { actionCreators as userActions } from "./redux/modules/user";
import { loginCheckFB } from "./redux/modules/user";
import { apiKey } from "./shared/firebase";

function App() {
    const history = useHistory();
    const dispatch = useDispatch();
    const is_login = useSelector((state) => state.user.is_login);  // redux store에 is_login이 true인지 false인지 가져옴
    const session_key = `firebase:authUser:${apiKey}:[DEFAULT]`;

    const is_session = sessionStorage.getItem(session_key) ? true : false;
    console.log(is_session);
    React.useEffect((is_session) =>{
        dispatch(userActions.loginCheckFB()); // 세션에 값있으면 loginCheckFB
    })
}