[인프런] Spring Boot를 이용한 RESTful Web Services 개발 - Spring Boot API 사용
Level3 단계의 REST API 구현을 위한 HATEOAS 적용
Step 21 - Implementing HATEOAS for RESTful Services
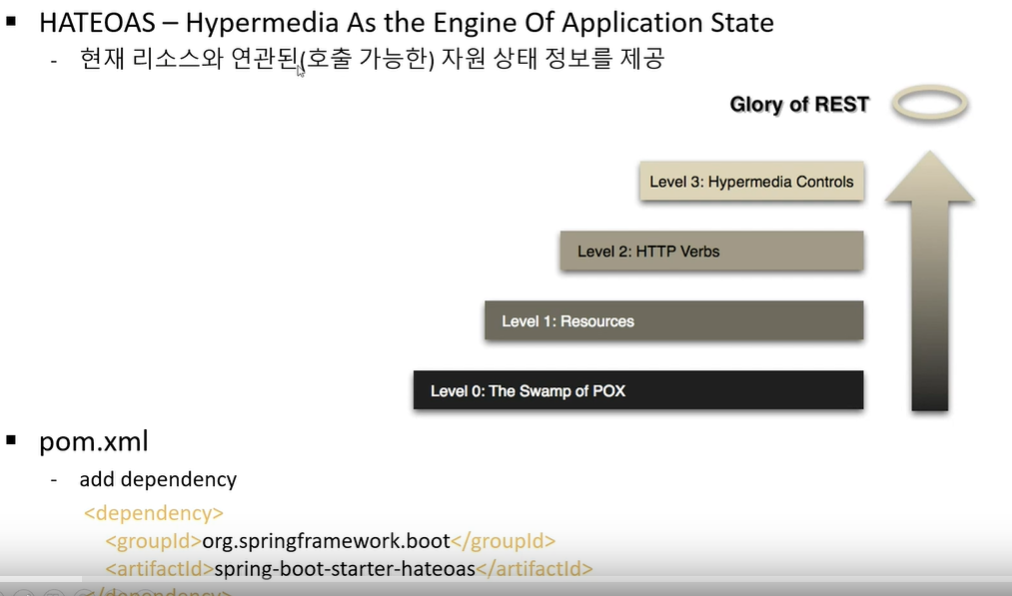
HATEOAS라는 현재 사용하고 있는 REST API의 자원 또는 호출 가능한 자원 상태를 보여준다.
지금까지 진행한 것은 level 2까지이다.
		<dependency>
			<groupId>org.springframework.boot</groupId>
			<artifactId>spring-boot-starter-hateoas</artifactId>
		</dependency>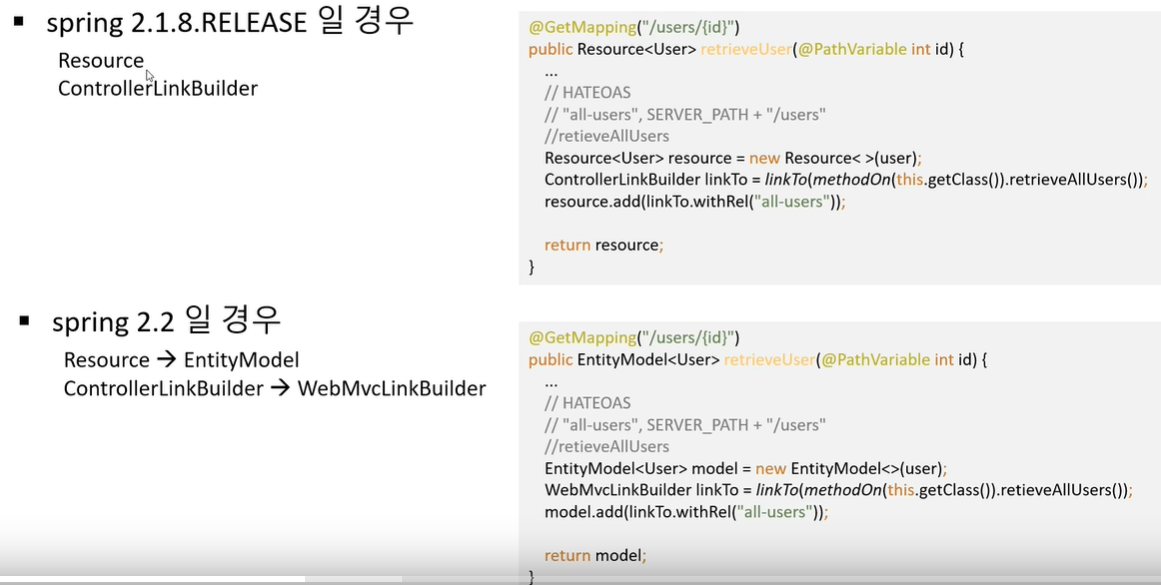
중요
강의에서는 2.1버전을 기준으로 헀으나, 나는 2.4버전이기 때문에 코드가 다르다.
참고 글
    @GetMapping("/users/{id}")
    public EntityModel<User> retrieveUser(@PathVariable(value="id") int id) {
        User user = service.findOne(id);
        if(user == null) {
            throw new UserNotFoundException(String.format("ID[%s] not found", id));
        }
        //HATEOAS
        EntityModel<User> model = new EntityModel<>(user);
        WebMvcLinkBuilder linkTo = linkTo(methodOn(this.getClass()).retrieveAllUsers());
        model.add(linkTo.withRel("all-users"));

        return model;
    }
User의 JsonFilter 어노테이션을 주석처리해준다.
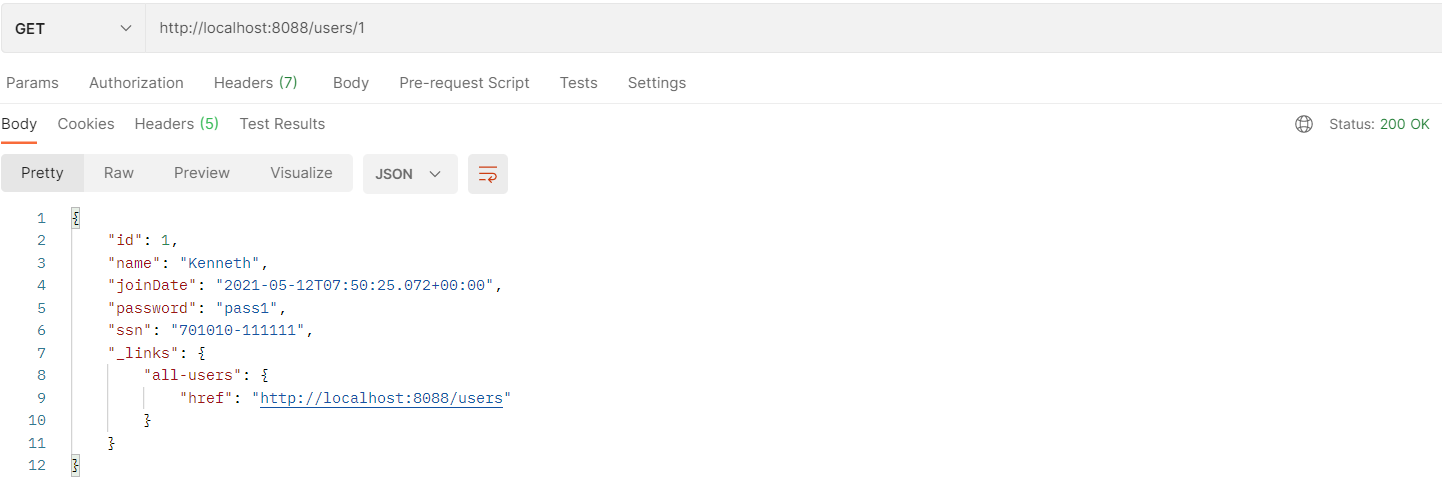
all_users 아래에 서버 주소와 포트번호 users가 보인다.
hateoas에서 retrieveAllUsers와 "all-users"를 연결시켜놨다. 지금 예제에서는 간단하지만, 삭제할 수 있는 곳에 대한 정보, 수정하기로 가기 위한 링크등을 추가할 수 있다.
hateoas를 사용하면 하나의 리소스에서 파생할 수 있는 여러가지 추가적인 작업도 확인할 수 있다. 사용자의 입장에서는 추가적인 정보를 한번에 얻을 수 있는 것이다.
REST API Documentation을 위한 Swagger 사용
Step 22 - Configuring Auto Generation of Swagger Documentation
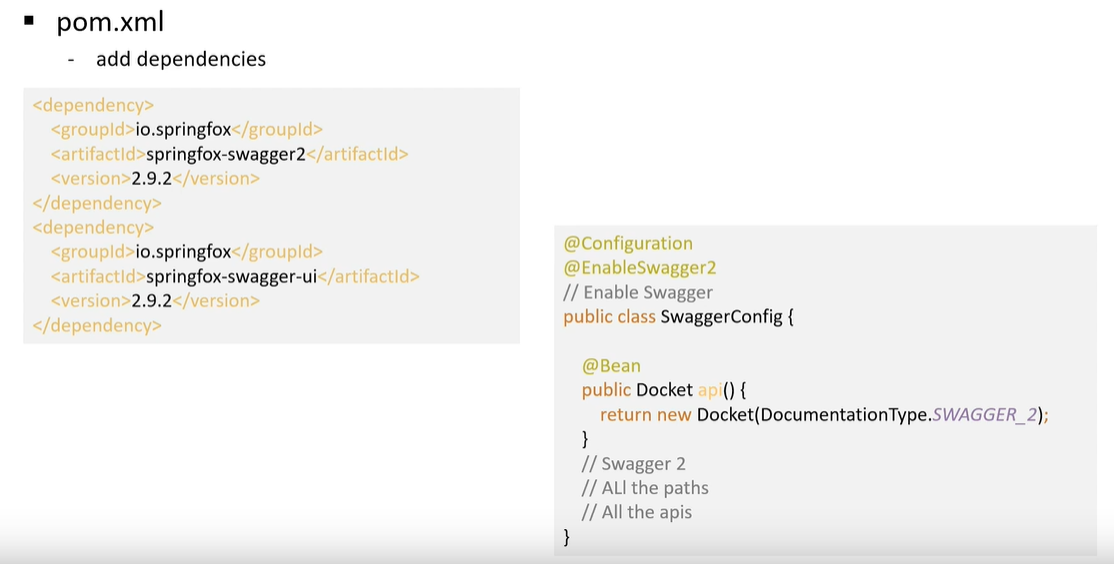
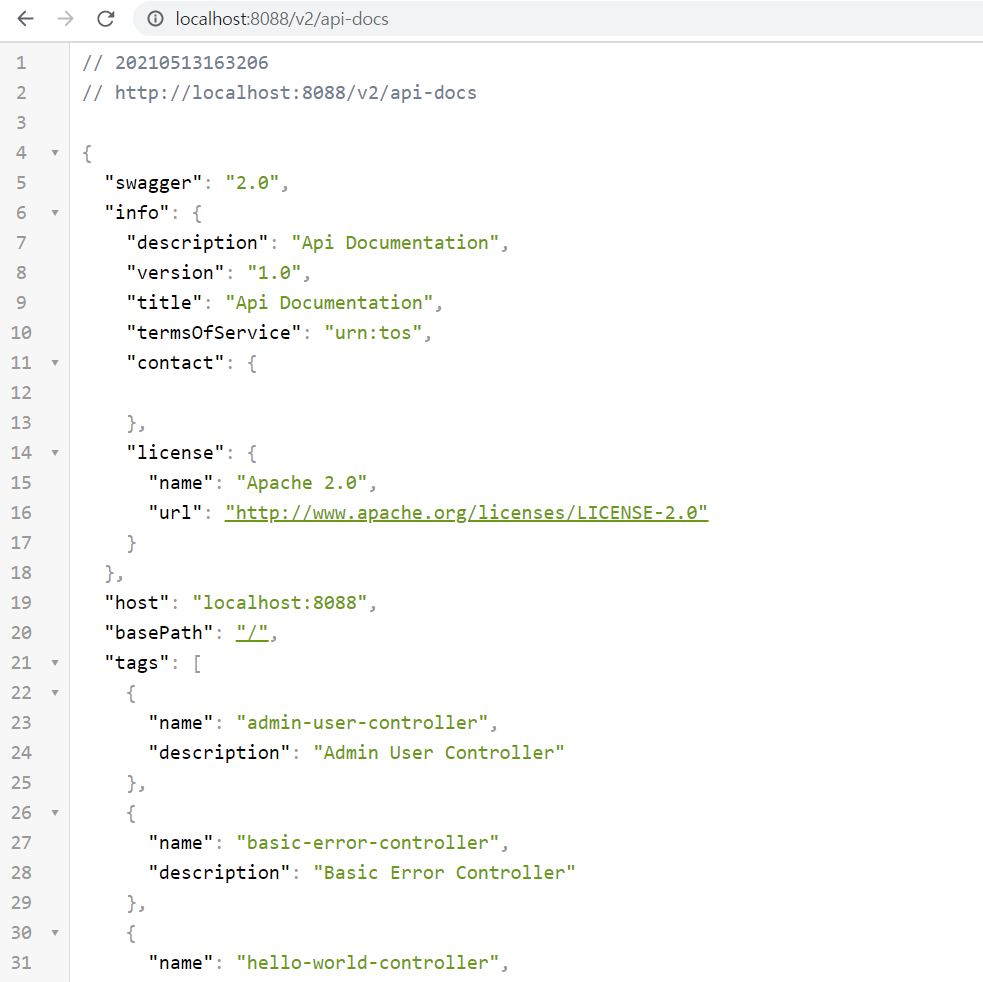
swagger는 처음에는 json표현을 위해 만들어졌다가, API 문서화, 클라이언트 SDK 생성과정 자동화 등을 위해 사용된다.
		<dependency>
			<groupId>io.springfox</groupId>
			<artifactId>springfox-boot-starter</artifactId>
			<version>3.0.0</version>
		</dependency>
SwaggerConfig
package com.example.restfulwebservice.config;

import org.springframework.context.annotation.Bean;
import org.springframework.context.annotation.Configuration;
import springfox.documentation.spi.DocumentationType;
import springfox.documentation.spring.web.plugins.Docket;
import springfox.documentation.swagger2.annotations.EnableSwagger2;

@Configuration
@EnableSwagger2
public class SwaggerConfig {

    @Bean
    public Docket api() {
        return new Docket(DocumentationType.SWAGGER_2);
    }
}
강의와 조금 다르게 URI 끝에 /를 붙여주면 API에 대한 문서가 나온다.
Swagger Documentation 구현 방법
SwaggerConfig
package com.example.restfulwebservice.config;

import java.util.ArrayList;
import java.util.Arrays;
import java.util.HashSet;
import java.util.Set;
import org.springframework.context.annotation.Bean;
import org.springframework.context.annotation.Configuration;
import springfox.documentation.service.ApiInfo;
import springfox.documentation.service.Contact;
import springfox.documentation.spi.DocumentationType;
import springfox.documentation.spring.web.plugins.Docket;
import springfox.documentation.swagger2.annotations.EnableSwagger2;

@Configuration
@EnableSwagger2
public class SwaggerConfig {


    private static final Contact DEFAULT_CONTACT = new Contact("Kenneth Lee", "https://joneconsulting.co.kr", "edowon@joneconsulting.co.kr");
    private static final ApiInfo DEFAULT_API_INFO = new ApiInfo("Awesome API title",
        "My User management REST API service", "1.0", "urn:tos", DEFAULT_CONTACT, "Apache 2.0",
        "https://www.apache.org/license", new ArrayList<>());

    private static final Set<String> DEFAULT_PRODUCES_AND_CONSUMES = new HashSet<>(
        Arrays.asList("application/json", "application.xml"));

    @Bean
    public Docket api() {
        return new Docket(DocumentationType.SWAGGER_2)
            .apiInfo(DEFAULT_API_INFO)
            .produces(DEFAULT_PRODUCES_AND_CONSUMES)
            .consumes(DEFAULT_PRODUCES_AND_CONSUMES);
    }
}
Users
package com.example.restfulwebservice.user;
import com.fasterxml.jackson.annotation.JsonFilter;
import com.fasterxml.jackson.annotation.JsonIgnore;
import com.fasterxml.jackson.annotation.JsonIgnoreProperties;
import io.swagger.annotations.ApiModel;
import io.swagger.annotations.ApiModelProperty;
import java.util.Date;
import javax.validation.constraints.Past;
import javax.validation.constraints.Size;
import lombok.AllArgsConstructor;
import lombok.Data;
import lombok.NoArgsConstructor;
@Data
@AllArgsConstructor
//@JsonIgnoreProperties(value = {"password", "ssn"})
@NoArgsConstructor
//@JsonFilter("UserInfo")
@ApiModel(description = "사용자 상세 정보를 위한 도메인 객체")
public class User {
private Integer id;
@Size(min = 2, message = "Name은 2글자 이상 입력해 주세요.")
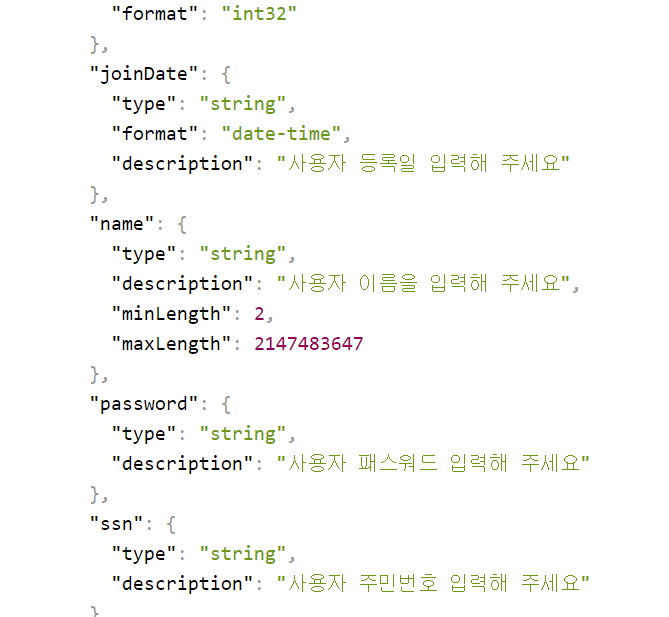
@ApiModelProperty(notes = "사용자 이름을 입력해 주세요")
private String name;
@Past
@ApiModelProperty(notes = "사용자 등록일 입력해 주세요")
private Date joinDate;
@ApiModelProperty(notes = "사용자 패스워드 입력해 주세요")
private String password;
@ApiModelProperty(notes = "사용자 주민번호 입력해 주세요")
private String ssn;
}ApiModel description을 추가했다.
REST API Monitoring을 위한 Actuator 설정
Step25 - Monitoring APIs with Spring Boot Actuator
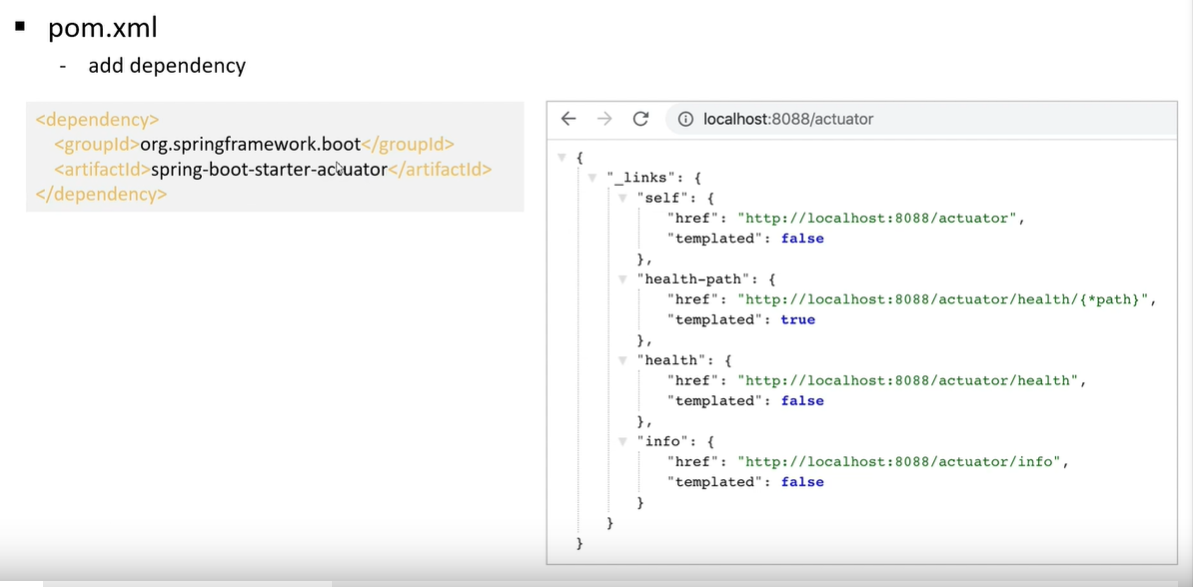
		<dependency>
			<groupId>org.springframework.boot</groupId>
			<artifactId>spring-boot-starter-actuator</artifactId>
		</dependency>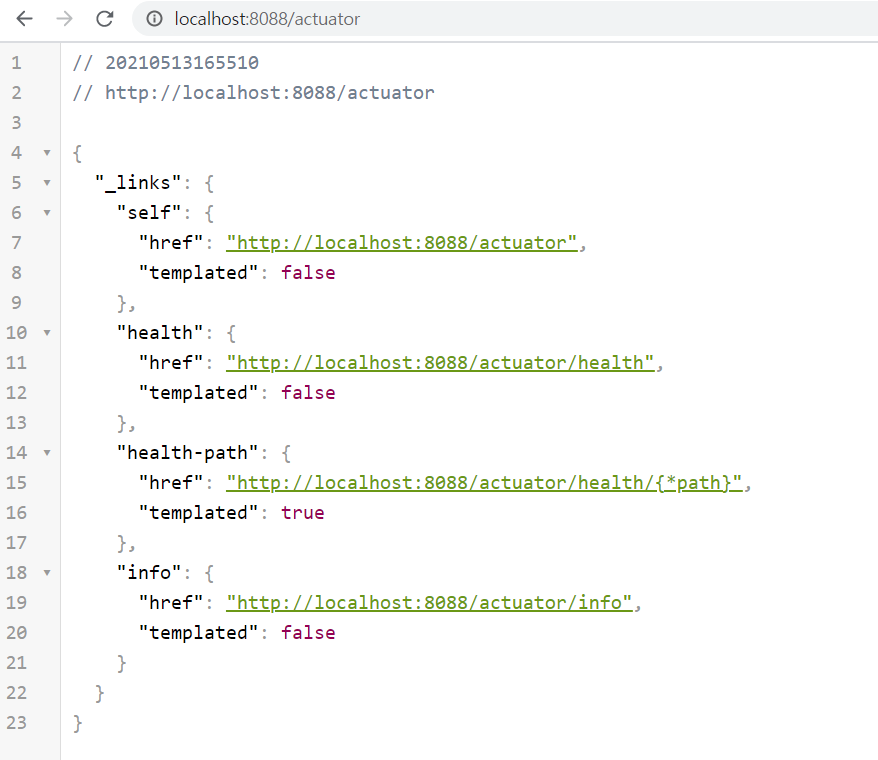
그 중에서 http://localhost:8088/actuator/health 를 가보자.

서버의 현재 상태가 UP이라는 것을 알려준다.
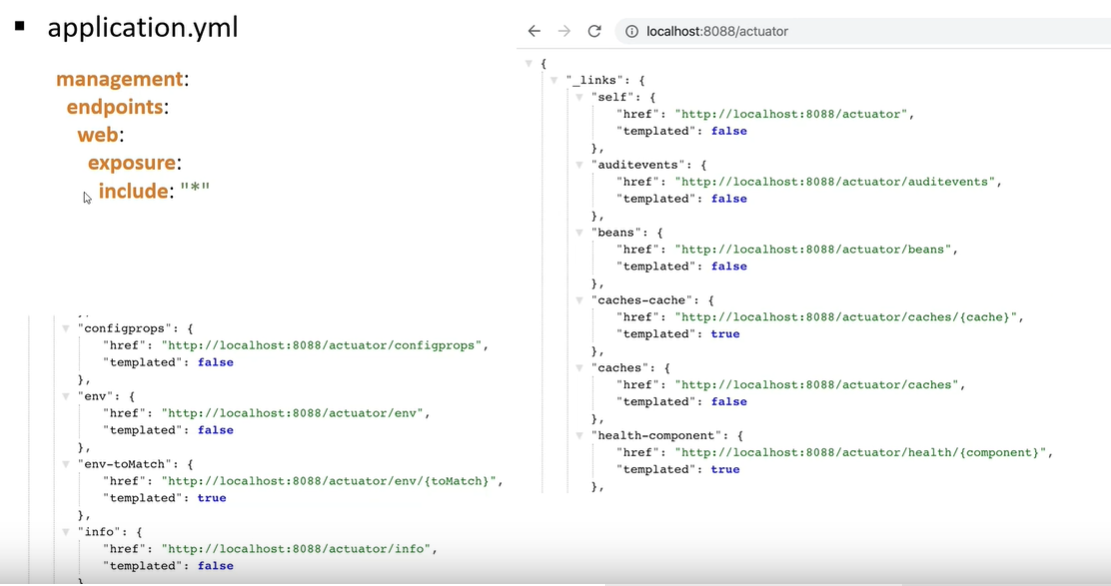
application.yml
server:
  port: 8088

logging:
  level:
    org.springframework: DEBUG
spring:
  messages:
    basename: messages

management:
  endpoints:
    web:
      exposure:
        include: "*"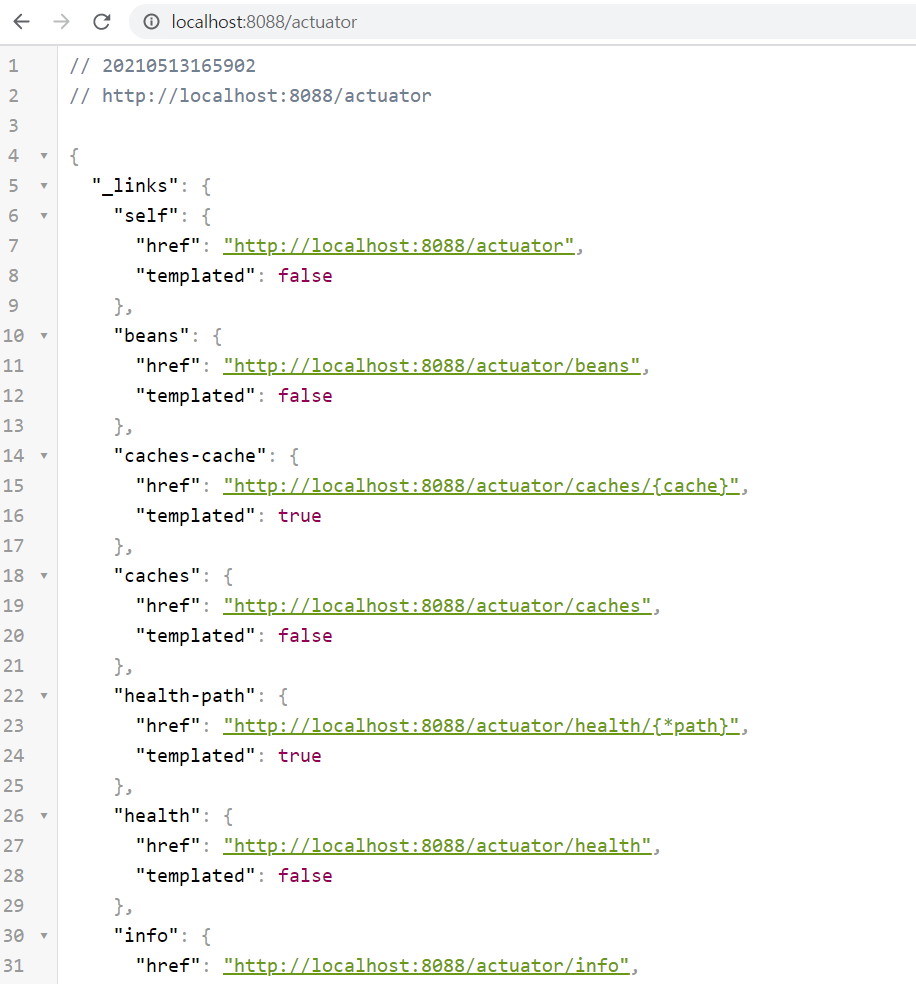
이전보다 정보가 더 많다. 커스타마이징해서 서버 모니터링 도구로 사용하면 좋다.
HAL Browser를 이용한 HATEOAS 기능 구현
Step 25 - Monitoring APIs with Spring Boot Actuator
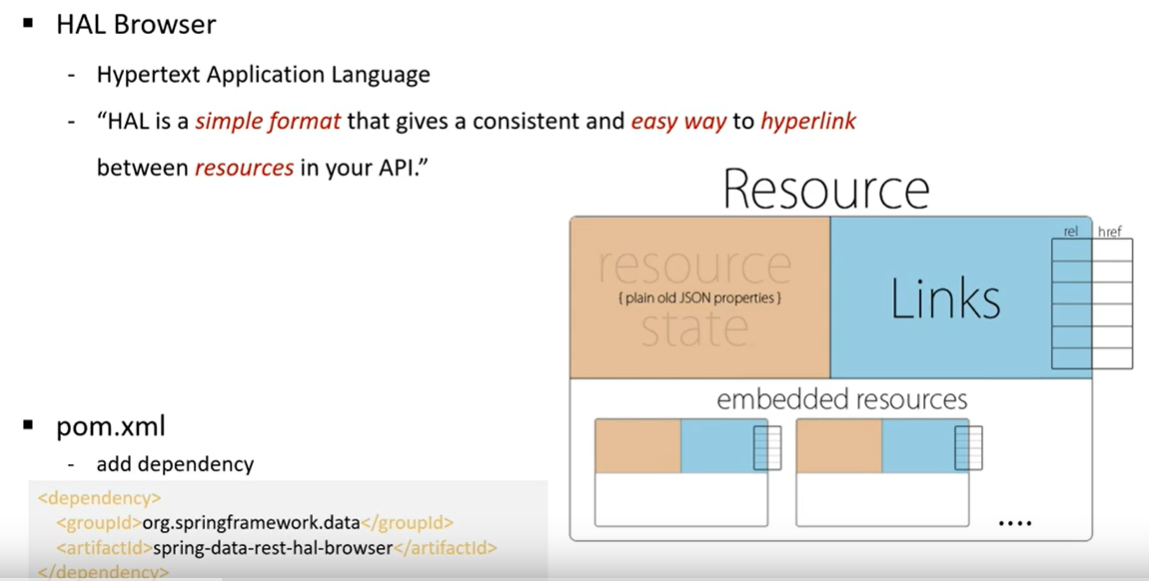
HAL Broswer는 하이퍼텍스트로 어플리케이션의 부가적인 정보를 제공하는 것이다.
HHAL을 사용하면 API간 쉽게 검색이 가능하다.