Cloudnet@에서 진행하는 쿠버네티스 실무 실습 스터디를 진행하면서 작성한 글입니다.
스터디에서 사용하는 교재는 24단계 실습으로 정복하는 쿠버네티스 입니다.
Cloudnet@
24단계 실습으로 정복하는 쿠버네티스
실습 환경 배포
aws cloudformation deploy \
--template-file kops-oneclick-f1.yaml \
--stack-name mykops \
--parameter-overrides
KeyName=kops-key \
SgIngressSshCidr=$(curl -s ipinfo.io/ip)/32  \
MyIamUserAccessKeyID=AKIA... \
MyIamUserSecretAccessKey=o4... \
ClusterBaseName='imokapp.net' \
S3StateStore='imok-k8s-study' \
MasterNodeInstanceType=c5a.2xlarge \
WorkerNodeInstanceType=c5a.2xlarge \
--region ap-northeast-2
# CloudFormation 스택 배포 완료 후 kOps EC2 IP 출력
aws cloudformation describe-stacks --stack-name mykops --query 'Stacks[*].Outputs[0].OutputValue' --output text
# SSH 접속
ssh -i kops-key.pem ec2-user@$(aws cloudformation describe-stacks --stack-name mykops --query 'Stacks[*].Outputs[0].OutputValue' --output text)
# EC2 instance profiles 에 IAM Policy 추가(attach)
aws iam attach-role-policy --policy-arn arn:aws:iam::$ACCOUNT_ID:policy/AWSLoadBalancerControllerIAMPolicy --role-name masters.$KOPS_CLUSTER_NAME
aws iam attach-role-policy --policy-arn arn:aws:iam::$ACCOUNT_ID:policy/AWSLoadBalancerControllerIAMPolicy --role-name nodes.$KOPS_CLUSTER_NAME
# 메트릭 서버 확인 : 메트릭은 15초 간격으로 cAdvisor를 통하여 가져옴
kubectl top node도커 엔진 설치 확인
# default NS 진입
kubectl ns default

# 도커 설치
amazon-linux-extras install docker -y
systemctl start docker && systemctl enable docker

# 설치된 패키지 확인 : 도커 엔진 확인
yum list installed

# 도커 정보 확인 : client - server, Docker Root Dir, Registry
docker info

# 도커 정보 확인 : Docker Engine - Community
docker version

# 도커 서비스 상태 확인
systemctl status docker

# 모든 서비스의 상태 표시 - 링크
systemctl list-units --type=service

# 도커 루트 디렉터리 확인
tree -L 3 /var/lib/docker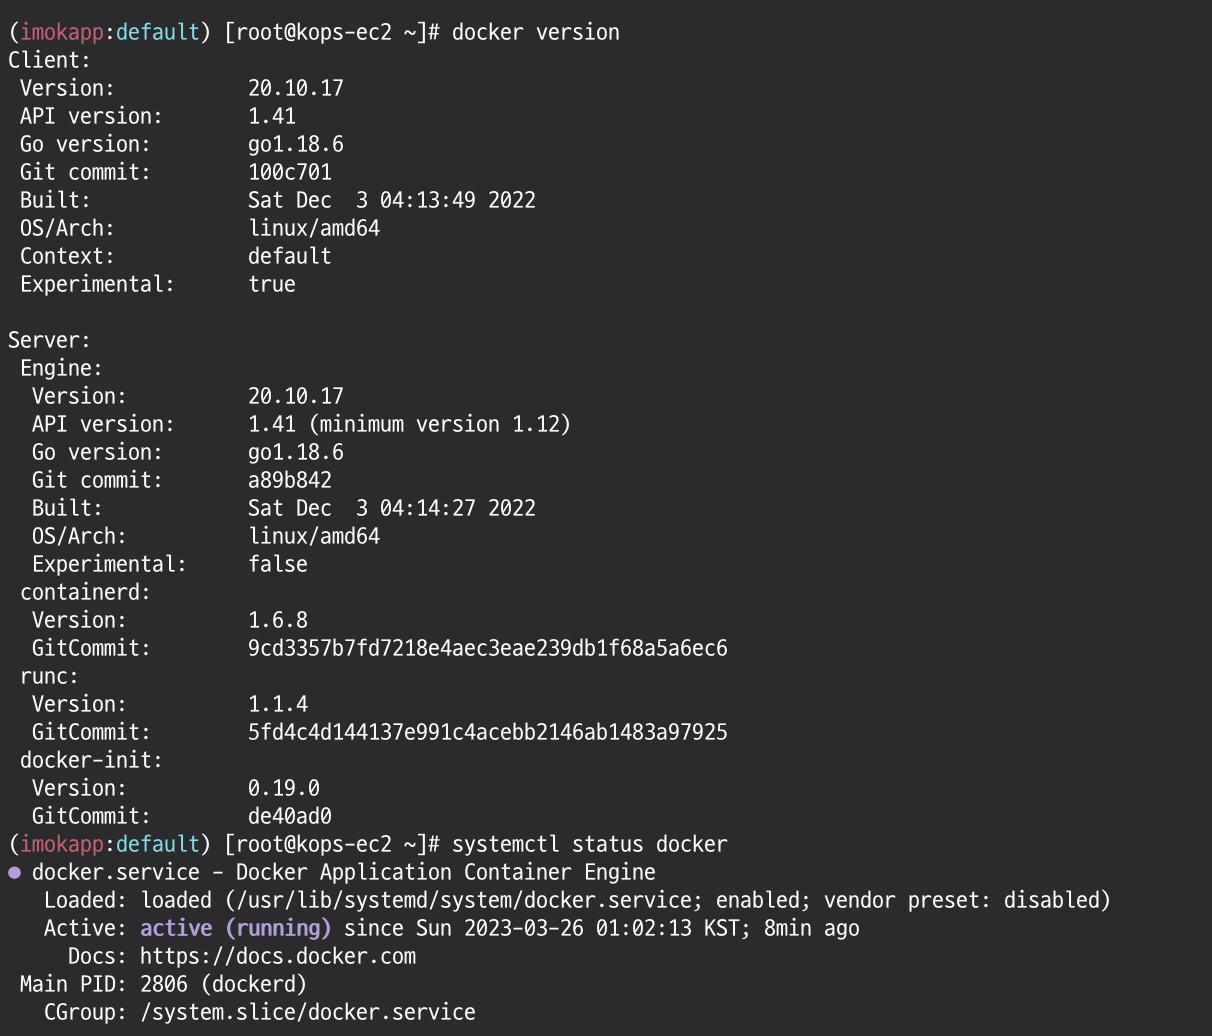
하버(Harbor)를 이용하여 로컬 컨테이너 이미지 저장소 구축하기
🎯 Harbor 에 아무 이미지나 태그해서 업로드하고 다운로드 해보고, 파드/디플로이먼트 YAML 배포 시 해당 이미지 주소를 사용해보기
헬름 차트로 하버 설치
Helm Chart for Harbor
Deploying Harbor with High Availability via Helm
# 사용 리전의 인증서 ARN 확인
aws acm list-certificates --query 'CertificateSummaryList[].CertificateArn[]' --output text
CERT_ARN=`aws acm list-certificates --query 'CertificateSummaryList[].CertificateArn[]' --output text`
echo "alb.ingress.kubernetes.io/certificate-arn: $CERT_ARN"
# 하버 설치
helm repo add harbor https://helm.goharbor.io
helm fetch harbor/harbor --untar --version 1.11.0
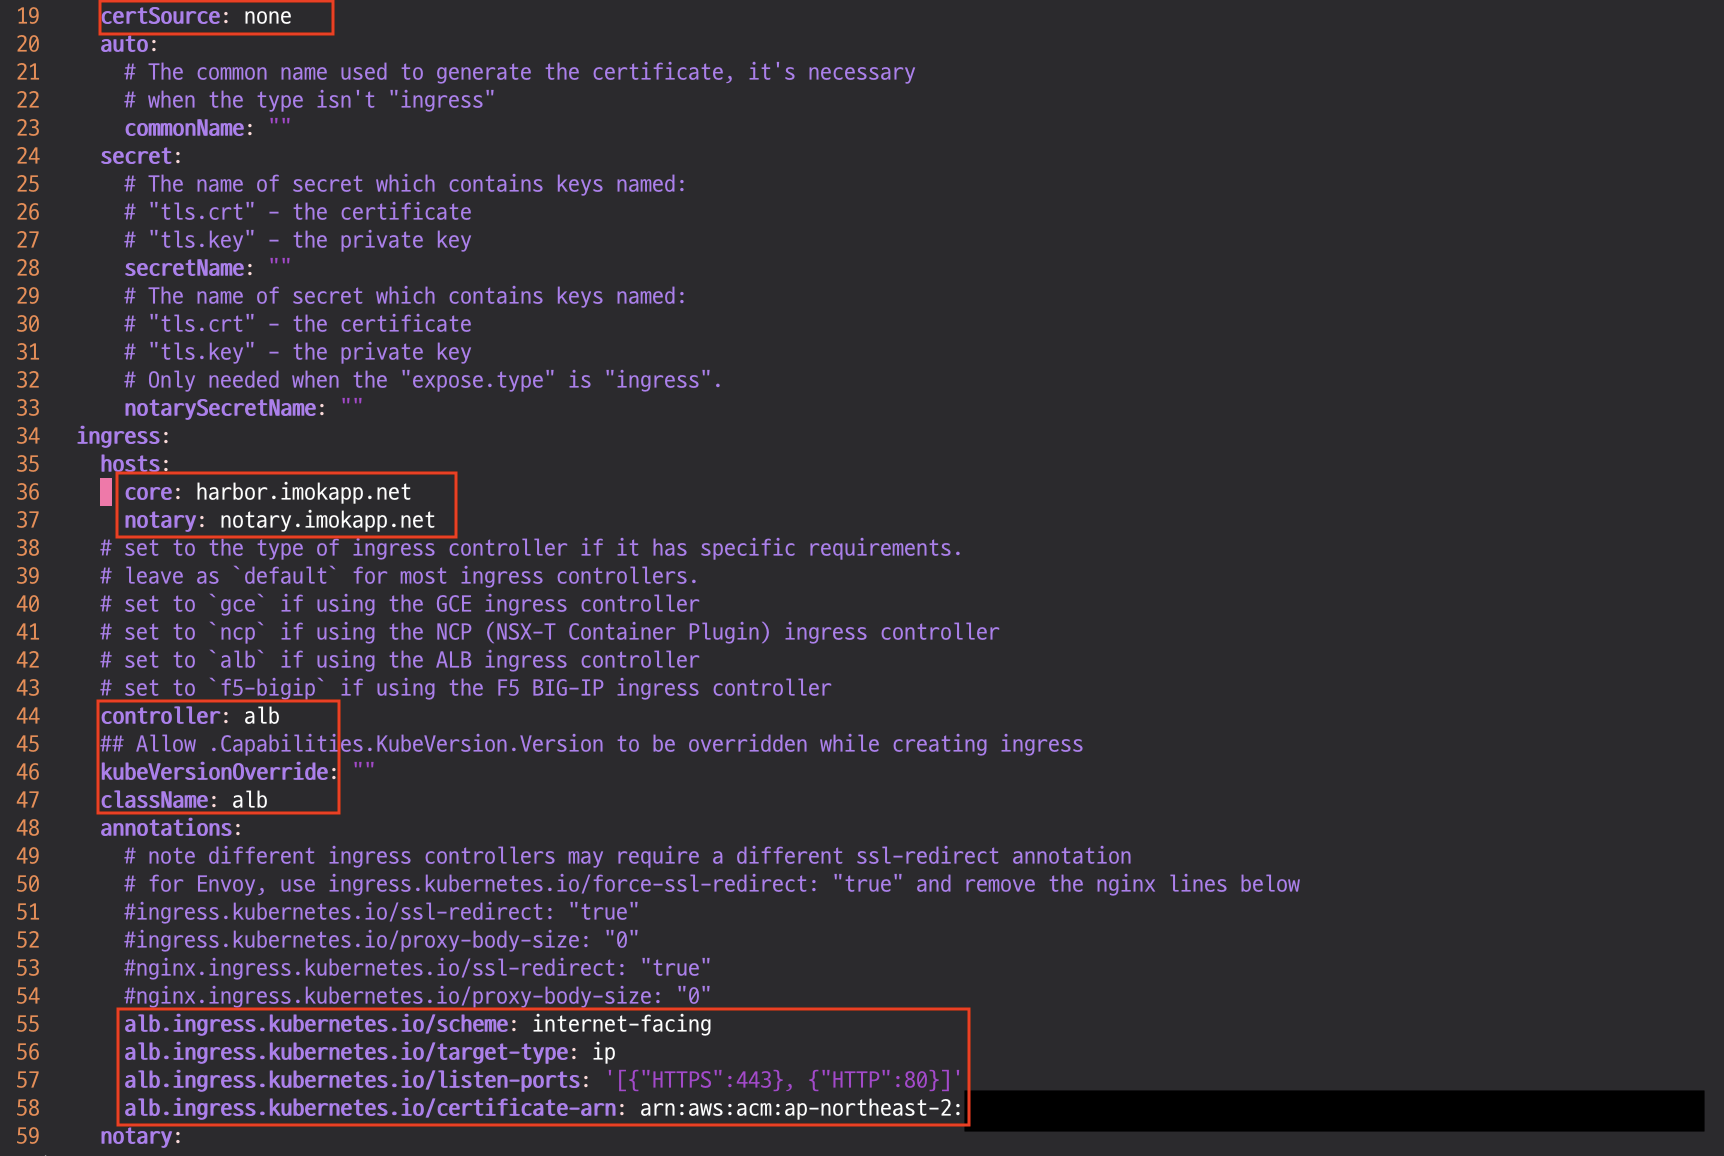
vim ~/harbor/values.yaml
----------------------
expose.tls.certSource=none # 19줄
#expose.ingress.hosts.core=harbor.<각자자신의도메인> # 36줄
#expose.ingress.hosts.notary=notary.<각자자신의도메인> # 37줄
expose.ingress.hosts.core=harbor.imokapp.net
expose.ingress.hosts.notary=notary.imokapp.net
expose.ingress.controller=alb # 44줄
expose.ingress.className=alb # 47줄
#expose.ingress.annotations=alb.ingress.kubernetes.io/scheme: internet-facing # 51줄
#expose.ingress.annotations=alb.ingress.kubernetes.io/target-type: ip
#expose.ingress.annotations=alb.ingress.kubernetes.io/listen-ports: '[{"HTTPS":443}, {"HTTP":80}]'
#expose.ingress.annotations=alb.ingress.kubernetes.io/certificate-arn: ${CERT_ARN} # 각자 자신의 값으로 수정입력
alb.ingress.kubernetes.io/scheme: internet-facing
alb.ingress.kubernetes.io/target-type: ip
alb.ingress.kubernetes.io/listen-ports: '[{"HTTPS":443}, {"HTTP":80}]'
alb.ingress.kubernetes.io/certificate-arn: ${CERT_ARN} # 각자 자신의 값으로 수정입력
#externalURL=https://harbor.<각자자신의도메인> # 131줄
externalURL=https://harbor.imokapp.net
-------------------
# 모니터링
kubectl create ns harbor
watch kubectl get pod,pvc,ingress -n harbor

# 설치
helm install harbor harbor/harbor -f ~/harbor/values.yaml --namespace harbor --version 1.11.0

# 확인
# registry : 컨테이너 이미지를 저장
# chartmuseum : 하버를 컨테이너 이미지뿐 아니라, 헬름 차트 리포지토리로도 사용
# notary : 서명이 완료된 컨테이너 이미지만 운영 환경에 사용하도록 설정. 서명이 완료된 이미지는 별도로 구분
# trivy : 컨테이너 이미지의 보안 취약점을 스캔, 스캔 기능은 별도 솔루션에서 제공하여 관리자는 보안 스캔용 도구를 선택 가능
helm list -n harbor
kubectl get-all -n harbor
kubectl get pod,pvc,ingress,deploy,sts -n harbor
kubectl get ingress -n harbor harbor-ingress -o json | jq
kubectl krew install df-pv && kubectl df-pv

# 웹 접속 주소 확인 및 접속
echo -e "harbor URL = https://harbor.$KOPS_CLUSTER_NAME"
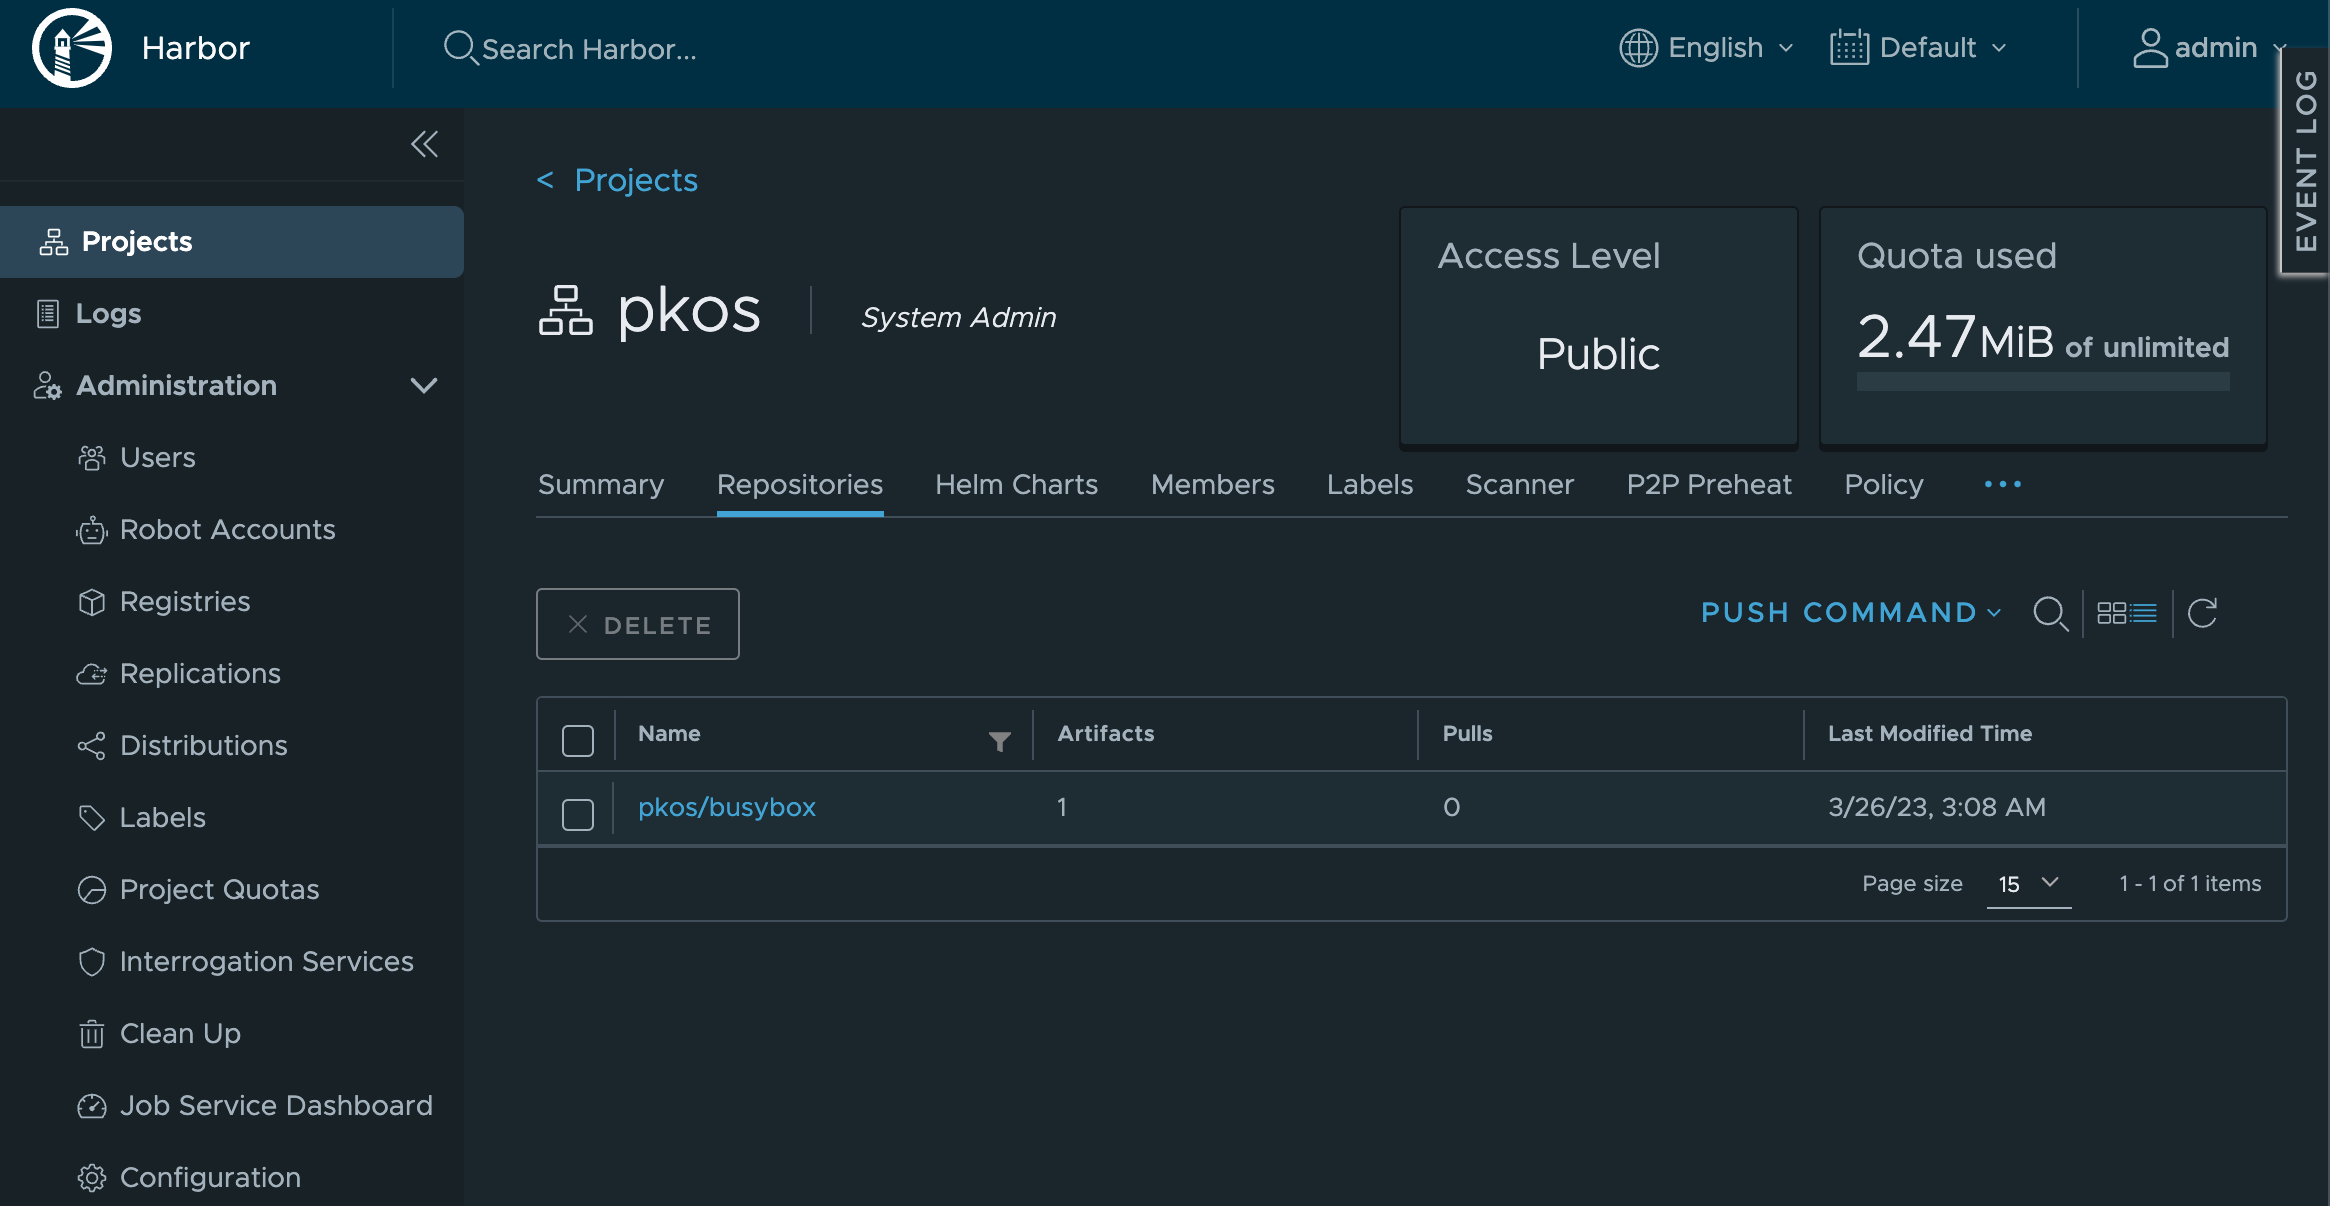
하버 웹 접속 및 로컬 이미지 업로드
- 로그인 : admin/Harbor12345
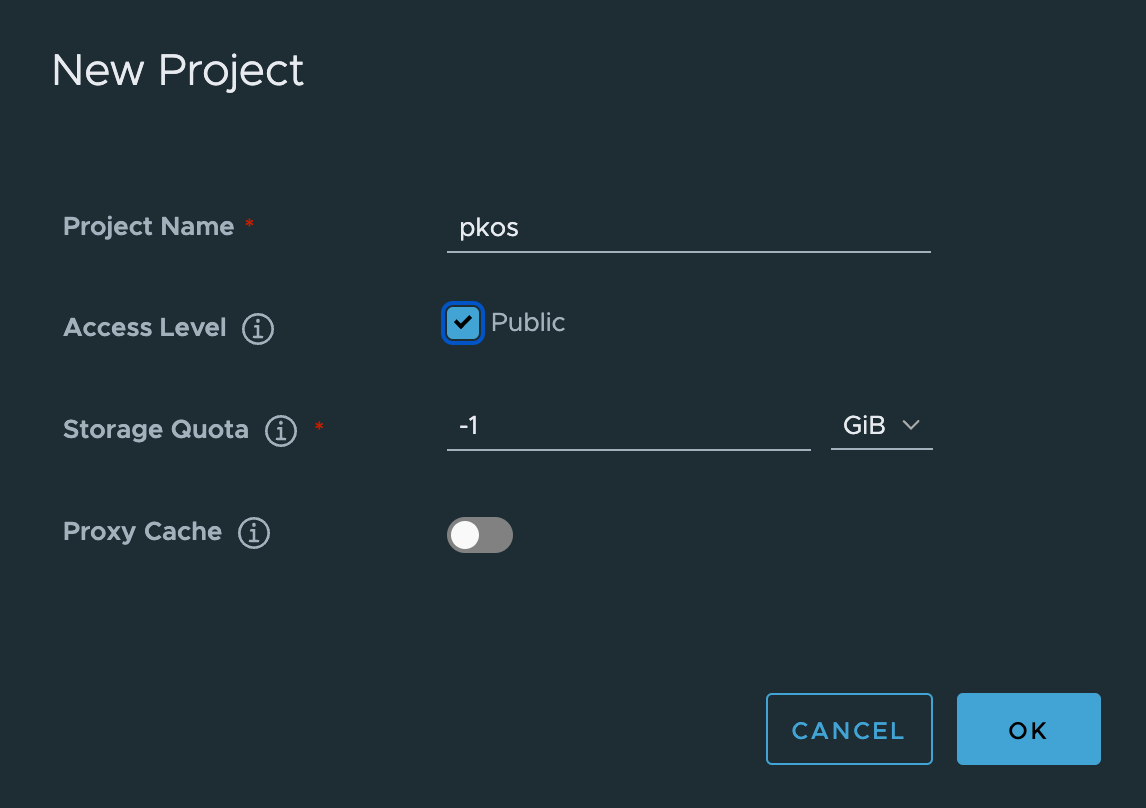
- NEW PROJECT → Name(pkos), Access Level(Public Check) ⇒ OK 클릭
# 컨테이너 이미지 가져오기
docker pull nginx && docker pull busybox && docker images

# 태그 설정
docker tag busybox harbor.$KOPS_CLUSTER_NAME/pkos/busybox:0.1
docker image ls

# 로그인 - 방안2
echo 'Harbor12345' > harborpw.txt
cat harborpw.txt | docker login harbor.$KOPS_CLUSTER_NAME -u admin --password-stdin
cat /root/.docker/config.json | jq

# 이미지 업로드
docker push harbor.$KOPS_CLUSTER_NAME/pkos/busybox:0.1
harbor 저장소 이미지를 사용하는 디플로이먼트 생성하기
쿠버네티스 YAML 파일의 컨테이너 이미지 저장소 주소를 로컬 하버로 변경
# 파드 배포
curl -s -O https://raw.githubusercontent.com/junghoon2/kube-books/main/ch13/busybox-deploy.yml
sed -i "s|harbor.myweb.io/erp|harbor.$KOPS_CLUSTER_NAME/pkos|g" busybox-deploy.yml
kubectl apply -f busybox-deploy.yml
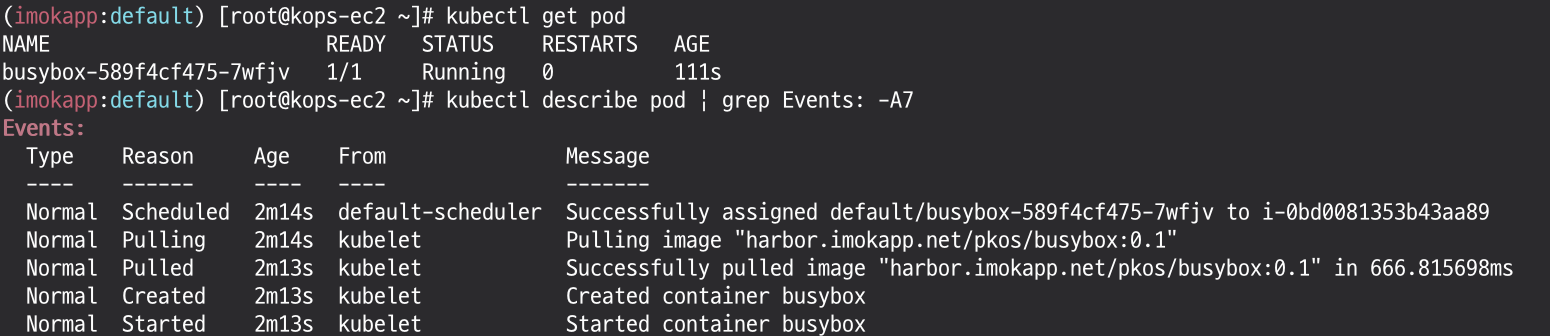
# 확인 : 정상적으로 harbor 에서 이미지 다운로드되어 파드가 동작!
kubectl get pod
kubectl describe pod | grep Events: -A7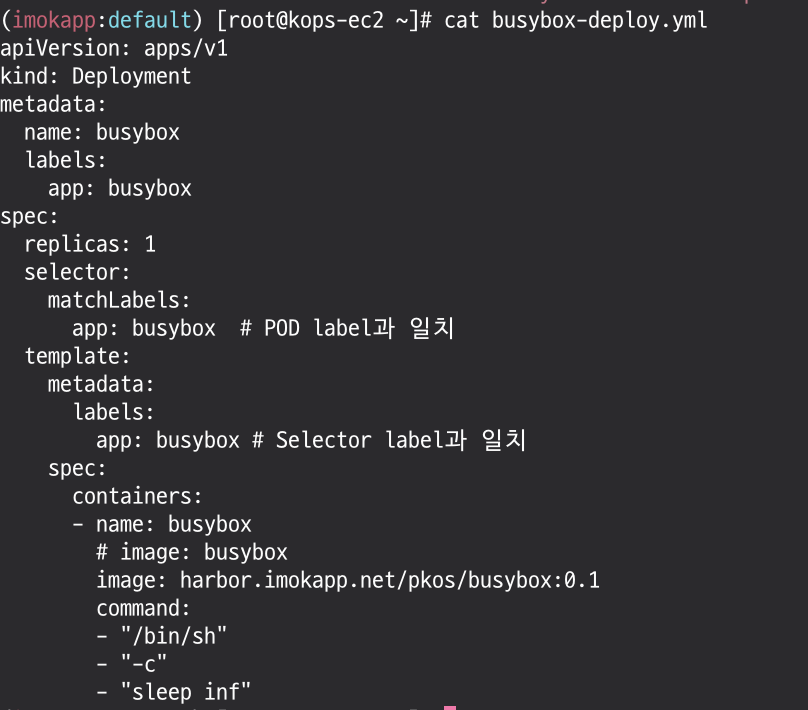
이미지 보안 스캔 기능 사용
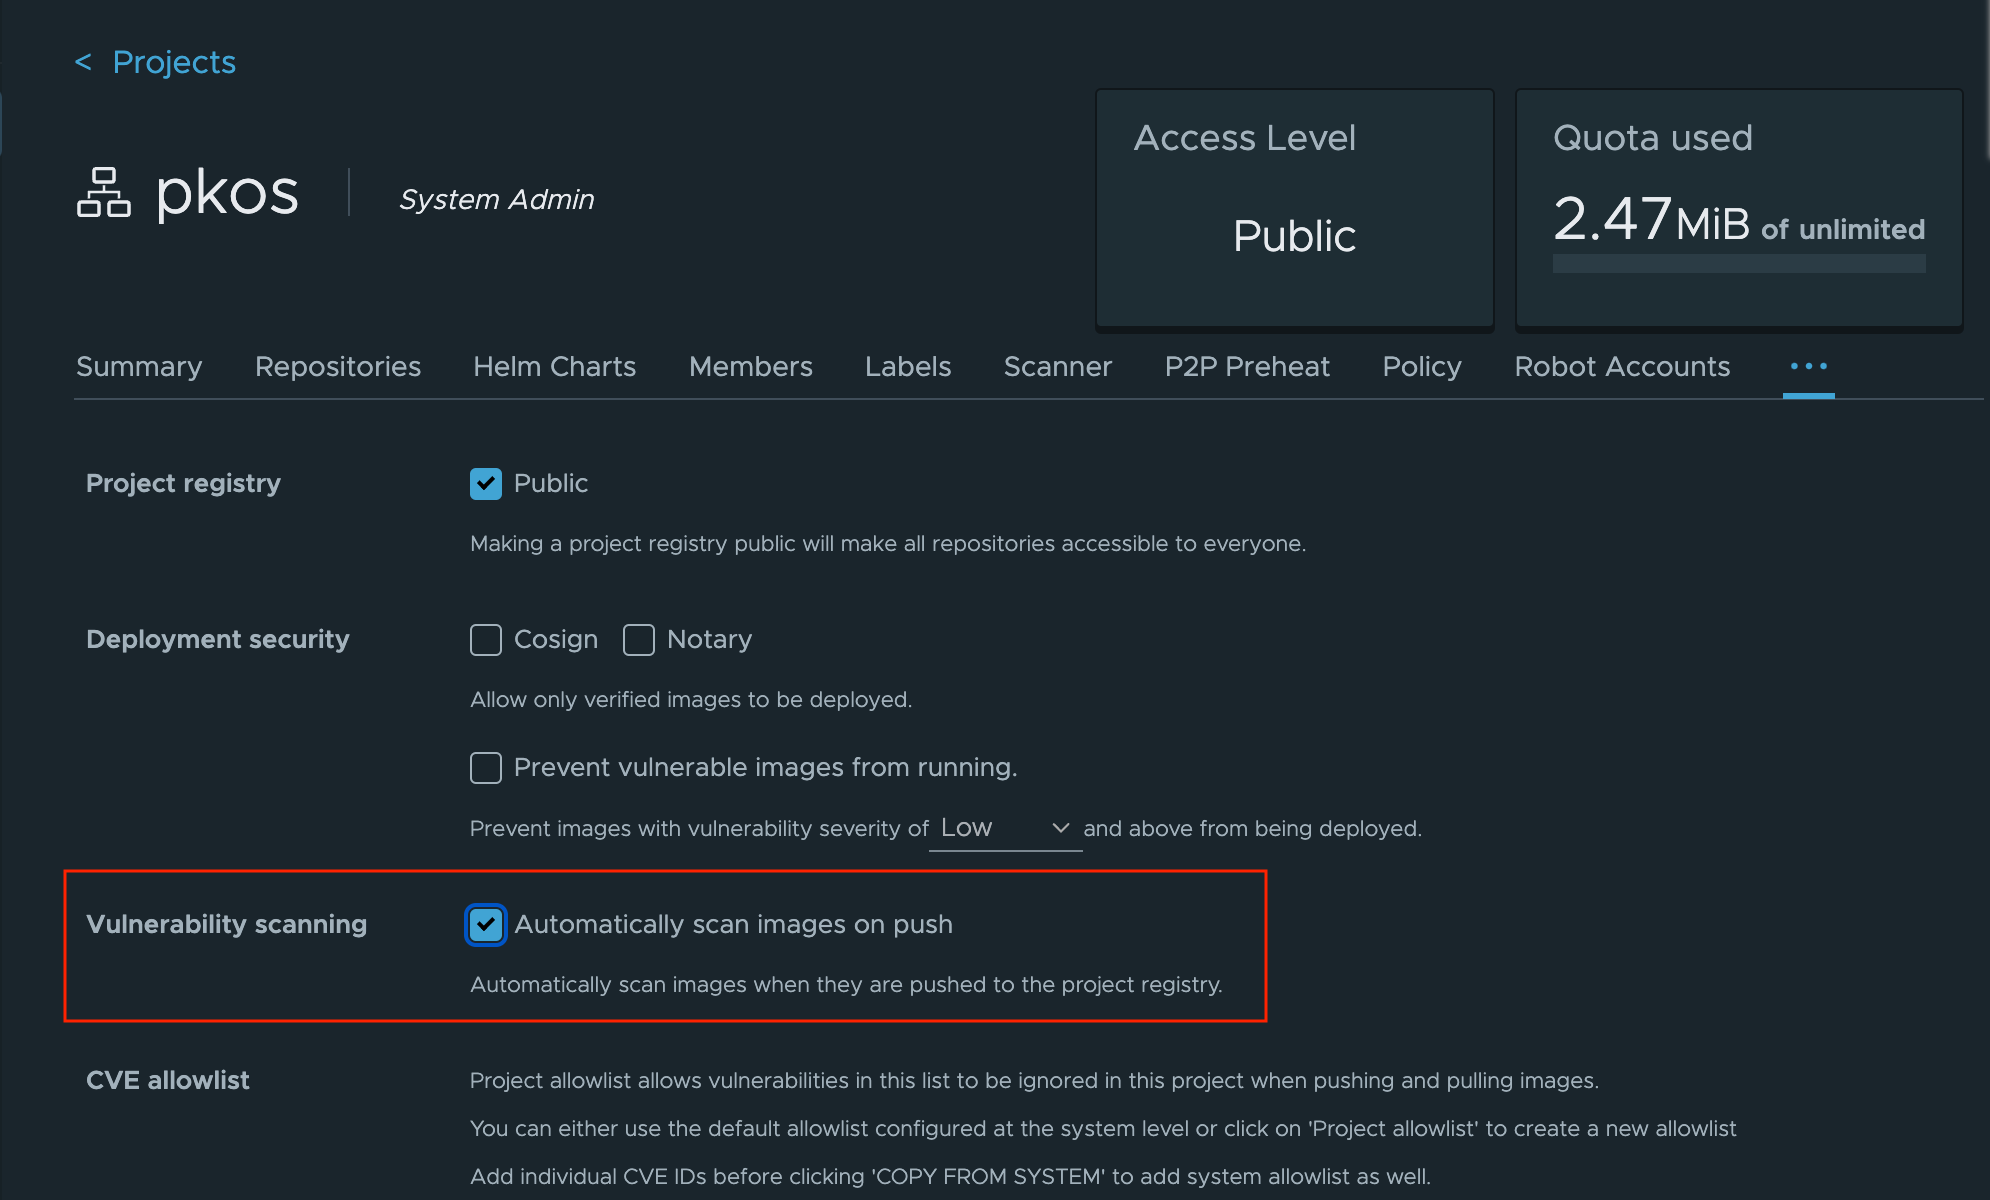
컨테이너 이미지 업로드 시 자동으로 이미지 보안 스캔 기능 사용
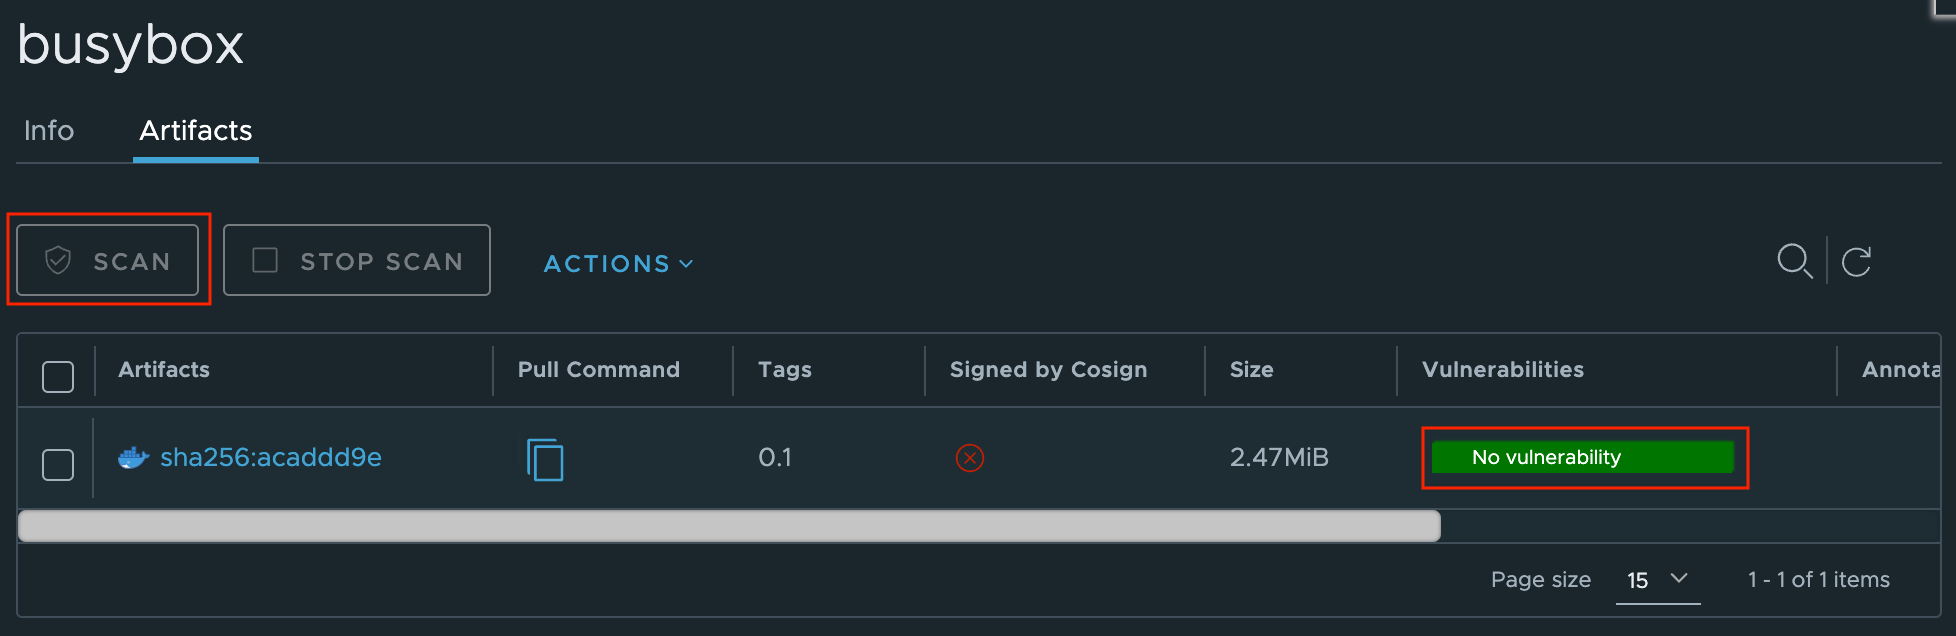
자동 보안 스캔 설정 및 확인
- 프로젝트에 > Configuration > Automatically... 클릭 > 하단 Save 선택
# 태그 설정
docker tag nginx harbor.$KOPS_CLUSTER_NAME/pkos/nginx:0.1
docker image ls
# 이미지 업로드
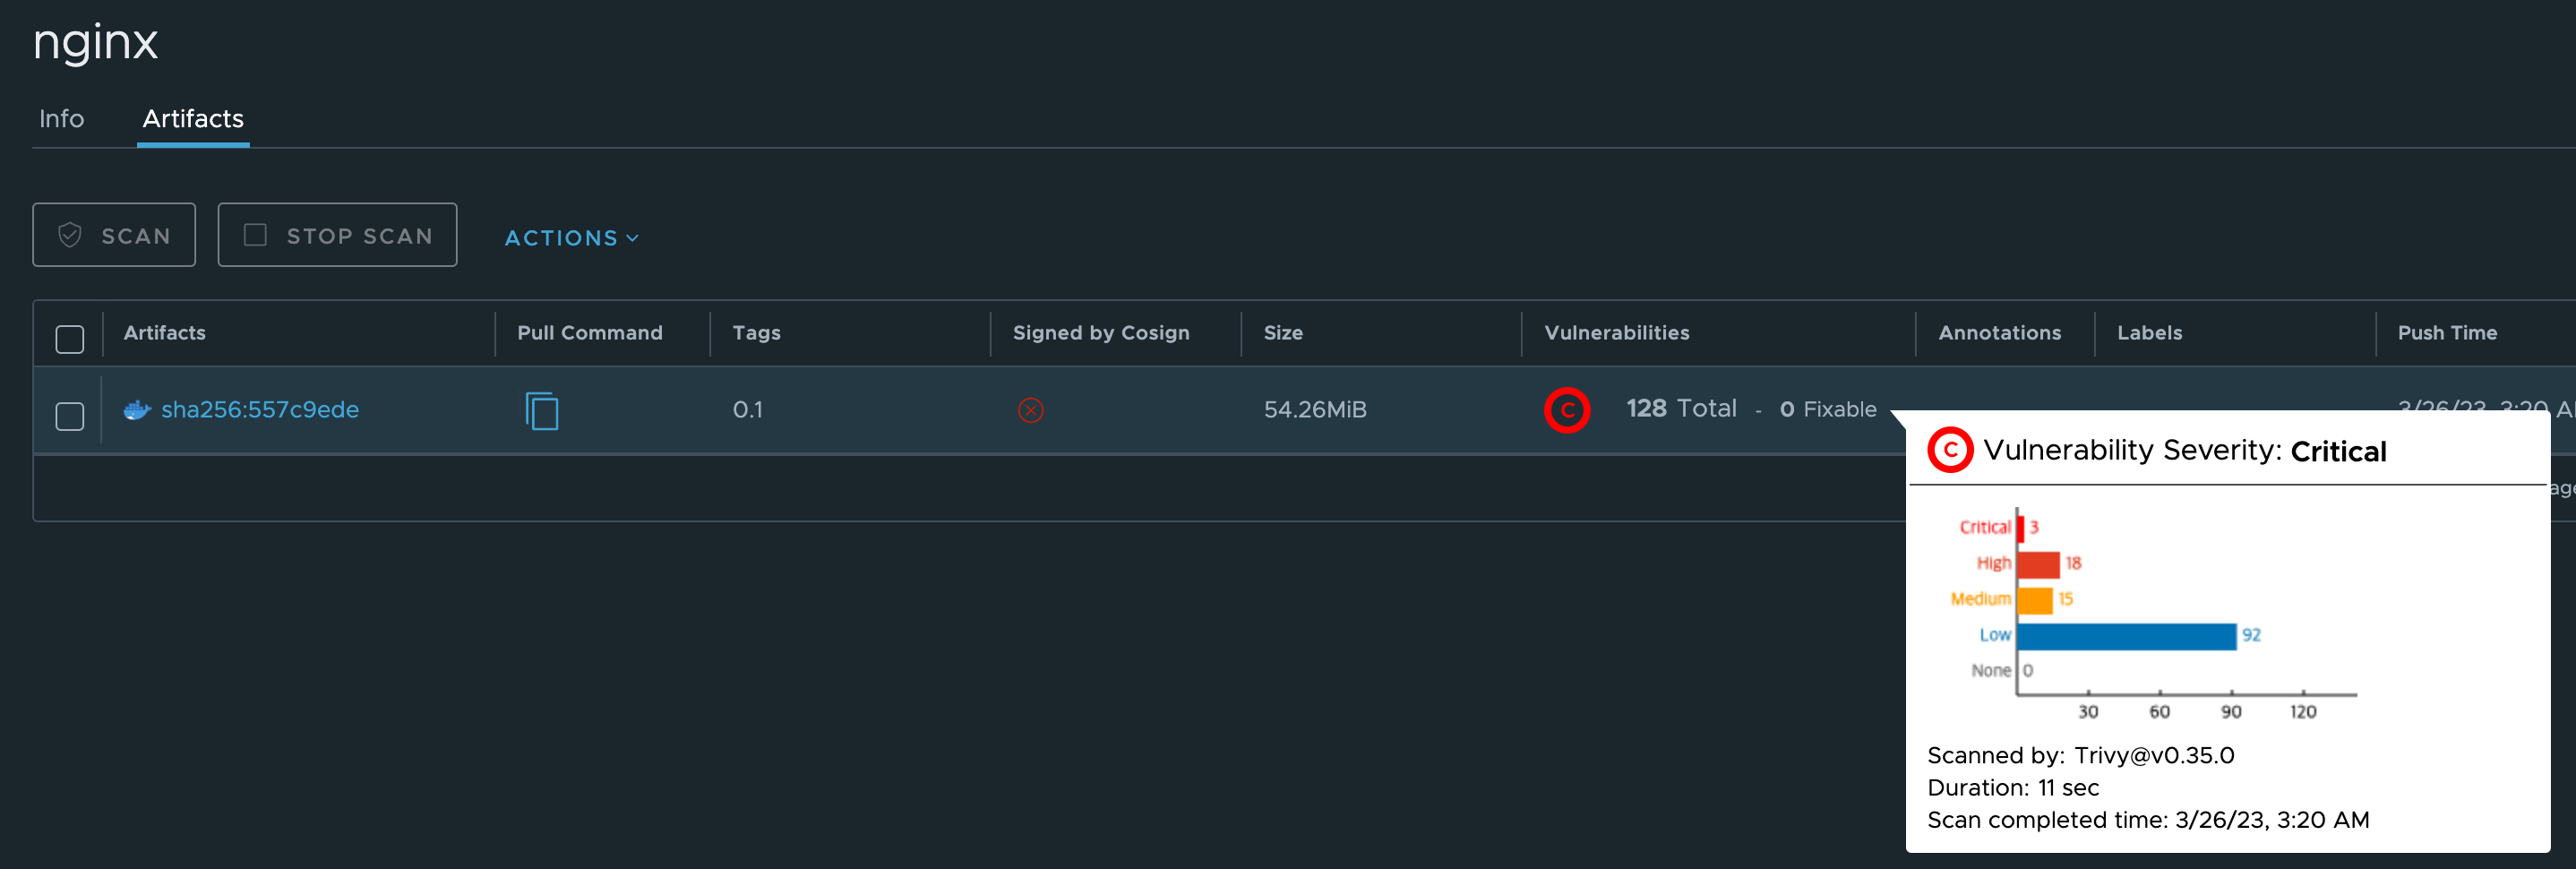
docker push harbor.$KOPS_CLUSTER_NAME/pkos/nginx:0.1harbor 웹에서 확인
- 아래 처럼 자동으로 스캔 수행됨
실습 환경 삭제
헬름 차트 삭제
helm uninstall -n harbor harbor
kubectl delete pvc --all -n harbor
kubectl delete ns harbor
kOps 클러스터 삭제 & AWS CloudFormation 스택 삭제
kops delete cluster --yes && aws cloudformation delete-stack --stack-name mykops
ImOk👌