지갑의 역할
- 암호화폐를 안전하게 보관, 송수신 가능
- 본인의 암호화폐의 보유량, 거래내역 확인
- 자산의 소유권을 암호화 방식으로 증명
- 복구 문구를 사용해서 지갑 복원
분산원장
- 금융과 반대로 거래에 참여하는 모든 참여자가 장부를 가지고 있고
거래가 발생했을 때 해당 거래내역을 각자의 장부에 기록하는 방식,
모두가 장부를 가지고 관리.
암호화 방식
1. 대칭형
- 암호화,복호화 할 때 사용하는 키(대칭키=비밀키)가 동일한 키 1개를 사용한다.
- 과정 :
1. 송신자는 데이터 암호화에 필요한 대칭키(=비밀키)를 생성한다.
2. 생성된 키로 데이터를 암호화한다.
3. 암호화된 데이터와 키를 수신자에게 전달.
4. 수신자는 암호화된 데이터와 대칭키(=비밀키)를 수신한다.
5. 키를 이용해 암호화된 데이터를 복호화한다.
6. 사용된 키는 일반적으로 폐기한다.
2. 비대칭형
- 암호화 는 상대방의 공개키를, 복호화는 상대방이 자신의 개인키를 사용한다.
- 공개키와 개인키는 쌍을 이루고, 그 공개키로 암호화된 데이터는 쌍인 개인키로만 복호화 가능 -> 데이터의 안전한 송수신 가능
- 과정:
1. 송신자는 수신자의 공개키로 데이터를 암호화 후 수신자에게 전송
2. 수신자는 암호화된 데이터를 자신의 개인키로 복호화.
개인키
- 랜덤값인 256비트(32바이트)의 2진수를 64자리의 16진수로 값으로 만든것이 개인키
- 개인키와 공개키 한쌍의 키를 생성할 때 ECC 타원 곡선을 사용하여 생성하는데 그 이유는, 공개키로 개인키를 역산하기가 현실적으로 불가능하기 때문이다.
서명 과정
- 송신자는 암호화하고 싶은 데이터를 SHA256 방식으로 해싱.
- 자신의 개인키를 통해 암호화된 데이터를 서명 생성.
-> 서명은 데이터의 무결성과 송신자의 인증을 검증 - 생성한 서명과 자신의 공개키를 수신자에게 전송.
- 수신자는 수신된 송신자의 공개키를 통해 서명이 유효한지 검증.
-> 서명이 유효하면, 데이터의 무결성과 송신자의 신원이 입증.
구현 코드
index.html
<script src="https://unpkg.com/axios/dist/axios.min.js"></script>
</head>
<body>
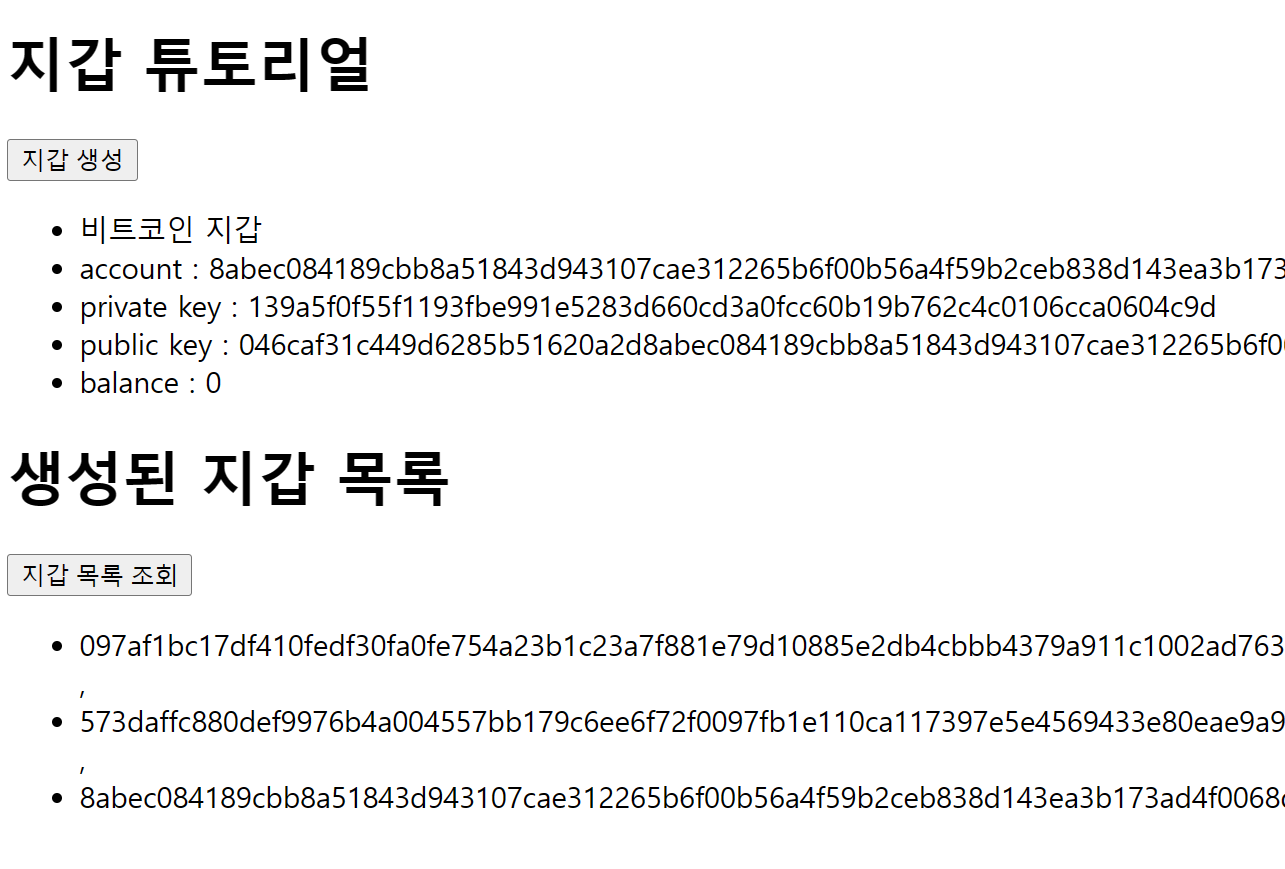
<h1>지갑 튜토리얼</h1>
<button id ="walletBtn">지갑 생성</button>
<ul id="walletList">
<li>비트코인 지갑</li>
<li>
account : <span id="account"></span>
</li>
<li>
private key : <span id = "privateKey"></span>
</li>
<li>
public key : <span id ="publicKey"></span>
</li>
<li>
balance : <span id ="balance"></span>
</li>
</ul>
<h1>생성된 지갑 목록</h1>
<button id="walletListBtn">지갑 목록 조회</button>
<div>
<ul id ="walletListData">지갑 조회</ul>
</div>
</body>
<script>
const render = (wallet) =>{
account.innerHTML = wallet.account;
privateKey.innerHTML = wallet.privateKey;
publicKey.innerHTML = wallet.publicKey;
balance.innerHTML = wallet.balance;
}
walletBtn.onclick =async()=>{
const {data : resp} = await axios.post("/newWallet",null);
console.log(resp);
render(resp);
}
const getView = async(account) =>{
console.log(account);
const {data : resp} = await axios.post("/walletSelect",{account});
console.log(resp);
render(resp)
}
walletListBtn.onclick =async()=>{
const {data : resp} = await axios.post("walletList",null);
const list = resp.map((account)=>{
return `<litoken interpolation">${account}')">${account}</li>`
})
walletListData.innerHTML = list;
}
</script>
</html>server.ts
// 지갑 서버

import express from "express";
import {Wallet} from "./index";
import path from "path";
import fs from "fs";

const app = express();

app.use(express.urlencoded({extended:false}));
app.use(express.json());

// 지갑 페이지 접속했을 때
app.get("/",(req,res)=>{

    const page = fs.readFileSync(path.join(__dirname,"/view/index.html"),"utf8");
    res.send(page);
})

// 지갑을 생성 요청
app.post("/newWallet", (req,res)=>{
    res.json(new Wallet());
})

// 지갑들 정보 불러오기
app.post("/walletList",(req,res)=>{
    const list = Wallet.getWalletList();
    res.json(list);
})

// 해당 지갑 주소로 지갑 찾기
app.post('/walletSelect',(req,res)=>{
    const {account} = req.body;
    const privateKey = Wallet.getWalletPrivateKey(account);
    res.json(new Wallet(privateKey));
})

app.listen(4000,()=>{
    console.log("server on");
})
index.ts
import { randomBytes } from "crypto";
import elliptic from "elliptic";
import { SHA256 } from "crypto-js";
import fs from "fs";
import path from "path";
// 지갑 클래스 만들고 페이지에서 지갑 생성을 한번 확인해보기
// elliptic 인스턴스 생성
const ec = new elliptic.ec("secp256k1");
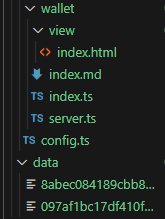
// 기본 지갑 정보 저장 경로
const dir = path.join(__dirname,"../../data");
// 지갑 클래스 정의
export class Wallet {
public account : string;
public privateKey : string;
public publicKey : string;
public balance : number;
constructor(privateKey : string =""){
// 생성단계에서 개인키값이 없으면 만들어 넣자.
this.privateKey = privateKey || this.getPrivateKey();
this.publicKey = this.getPublicKey();
this.account = this.getAccount();
this.balance = 0;
if(privateKey == "")
Wallet.createWallet(this);
}
static createWallet(myWallet : Wallet){
// fs 모듈로 파일 생성
// 지갑을 생성하면 주소를 저장할 것
// 주소안에는 개인 키 넣어보기
const filename = path.join(dir,myWallet.account);
const filecontent = myWallet.privateKey;
fs.writeFileSync(filename, filecontent);
}
static getWalletList() : string[]{
// readdirSync 폴더를 읽어서 안에있는 파일 내용을 문자열로 가져온다.
const files : string[] = fs.readdirSync(dir);
return files
}
// data폴더안에 해당하는 지갑주소를 찾아서 반환
static getWalletPrivateKey(account : string) : string {
const filename = path.join(dir,account);
const filecontent = fs.readFileSync(filename);
return filecontent.toString();
}
public getPrivateKey() : string{
return randomBytes(32).toString("hex");
}
public getPublicKey() : string {
// 개인키로 공개키를 만들자
const keyPair = ec.keyFromPrivate(this.privateKey);
return keyPair.getPublic().encode("hex",false);
}
public getAccount() : string{
return `${this.publicKey.slice(26).toString()}`
}
}코드 동작 순서
페이지 접속 시
// 🚩 server.ts
app.get("/",(req,res)=>{
  // readFileSync로 index.html 파일을 읽고, utf8로 인코딩되어 페이지 보여짐.
    const page = fs.readFileSync(path.join(__dirname,"/view/index.html"),"utf8");
    res.send(page);
})
지갑 생성 눌렀을 때
//🚩 index.html
walletBtn.onclick =async()=>{
        const {data : resp} = await axios.post("/newWallet",null);

//🚩 server.ts
  app.post("/newWallet", (req,res)=>{
    res.json(new Wallet());
})
// 🚩 index.ts
  // 생성자 함수 실행
  export class Wallet {
    public account : string;
    public privateKey : string;
    public publicKey : string;
    public balance : number;

	// new wallet()처럼 매개변수가 없을 땐 privateKey가 ""
    // new wallet(test)처럼 매개변수가 있을 땐 privateKey에 매개변수 값을 넣음
    constructor(privateKey : string =""){
        // ⭐⭐⭐
        // privateKey가 비어있으면 this.getPrivateKey() 실행,
        // 비어있지 않으면, privateKey로 사용
        // ⭐⭐⭐
        this.privateKey = privateKey || this.getPrivateKey();
        this.publicKey = this.getPublicKey();
        this.account = this.getAccount();
        this.balance = 0;

        if(privateKey == "")
        Wallet.createWallet(this);

    }

    static createWallet(myWallet : Wallet){
        // fs 모듈로 파일 생성
        // 지갑을 생성하면 주소를 저장할 것
        // 주소안에는 개인 키 넣어보기
        const filename = path.join(dir,myWallet.account);
        const filecontent = myWallet.privateKey;
        fs.writeFileSync(filename, filecontent);
    }
    // 개인키 만들기
    public getPrivateKey() : string{
        // ⭐⭐⭐
        // 실제 블록체인에서 개인키는 64자리의 16진수로 설정되니깐
        // randomBytes(32)를 통해 32자리 랜덤바이트(256비트)를 생성 후 16진수 변환.
        // ⭐⭐⭐

        return randomBytes(32).toString("hex");
    }

    // 개인키로 공개키를 만들자
    public getPublicKey() : string {
        // ⭐⭐⭐
        // ec.keyFromPrivate 메서드는 elliptic 라이브러리에서 제공하는 메서드로,
        // 개인 키를 사용하여 키 쌍(공개키)을 생성하는 역할
        const keyPair = ec.keyFromPrivate(this.privateKey);

        // keyPair는 키의 내부구조를 객체로 생성해주기때문에, encode()를 통해서
        // 16진수로 변환하고, false 의 의미는 높은 바이트 순으로 먼저 저장하겠다는 뜻.
        // true 이면 낮은 바이트 순으로 먼저 저장.
        // ⭐⭐⭐
        return keyPair.getPublic().encode("hex",false);
    }

    public getAccount() : string{
        return `${this.publicKey.slice(26).toString()}`
    }

}
        render(resp);

const render = (wallet) =>{
        account.innerHTML = wallet.account;
        privateKey.innerHTML = wallet.privateKey;
        publicKey.innerHTML = wallet.publicKey;
        balance.innerHTML = wallet.balance;
    }
    }
지갑 목록 조회 버튼을 눌렀을 때
//🚩index.html
walletListBtn.onclick =async()=>{
        const {data : resp} = await axios.post("walletList",null);

//🚩server.ts
  app.post("/walletList",(req,res)=>{
    const list = Wallet.getWalletList();

//🚩index.ts
static getWalletList() : string[]{
  // readdirSync 폴더를 읽어서 안에있는 파일 내용을 배열로, 요소들은 문자열로 가져온다.
  // files는 배열이지만 안에 요소들이 문자열이여야 함.
        const files : string[] = fs.readdirSync(dir);
        return files
    }
 //-----------------------
    res.json(list);
})
//------------------------
        const list = resp.map((account)=>{
            return `<litoken interpolation">${account}')">${account}</li>`
        })

        walletListData.innerHTML = list;
    }
조회된 지갑 목록을 눌렀을 때
//🚩index.html
const getView = async(account) =>{
        const {data : resp} = await axios.post("/walletSelect",{account});
        render(resp)
    }

//🚩server.ts
app.post('/walletSelect',(req,res)=>{
    const {account} = req.body;
    const privateKey = Wallet.getWalletPrivateKey(account);

//🚩index.ts
  static getWalletPrivateKey(account : string) : string {
        const filename = path.join(dir,account);
 		// filename과 fs.readFileSync 메서드로 파일의 내용을 읽음.
    	// 파일의 내용이 곧 개인키
        const filecontent = fs.readFileSync(filename);
        return filecontent.toString();
    }
  // 위의 new wallet()과 과정은 동일하지만 privateKey 매개변수에 ""가 아닌
  // new wallet(privateKey)로 매개변수를 넣은 값이 privateKey에 담김
  // 개인키로 지갑 정보 가져오기
    res.json(new Wallet(privateKey));
})
한걸음씩