코드캠프를 다니면서 React Native를 속성으로 3일 간 배웠던 기억이 있다. 태그 이름만 React랑 다를 뿐 동작 원리는 거의 비슷했던 기억이 있어 React Native 공식문서를 보면서 하나씩 공부 및 정리해보려 한다!
Core Components
React에서 사용하던 태그가 React Native에선 무슨 이름으로 쓰이는지 비교해서 살펴보자!
- non-scrolling
<div>:<View> <p>:<Text><img>:<Image><div>:<ScrollView><input type="text">:<TextInput>
Handling Text Input
<TextInput>은 사용자가 텍스트를 입력할 수 있게 해주는 핵심 컴포넌트이다. 텍스트가 변경될 때마다 호출되는 함수를 관리하는 onChangeTextprops와 텍스트가 제출될 때마다 호출되는 함수를 관리하는 onSubmitEditingprops가 있다.
import {useState} from 'react'
import {Text, TextInput, View} from 'react-native'

const PizzaTranslator = () => {
  const [text, setText] = useState("")

  return (
    <View style={{padding: 10}}>
    	<TextInput
			style={{height: 40}}
            placeholder="Type here to translate!"
			onChangeText={newText => setText(newText)}
            defaultValue={text}
		/>
        <Text style={{padding: 10, fontSize: 42}}>
          {text
           	.split(' ')
            .map(word => word && '🍕')
			.join('')}
        </Text>
	</View>
  );
};

export default PizzaTranslator;
Using a ScrollView
ScrollView는 여러 컴포넌트와 뷰를 포함할 수 있는 일반적인 스크롤 컨테이너이다.
horizontal 속성을 설정하여 수직 및 수평으로 모두 스크롤 할 수 있다.
ScrollView는 pagingEnabled props를 사용하여 스와이프 동작과 함께 뷰를 페이징할 수 있도록 구성할 수 있다.
ScrollView의 모든 요소와 뷰는 현재 화면에 표시되지 않더라도 렌더링되기 때문에 제한된 크기의 소수의 항목을 표시하는데 가장 적합하다. 화면에 다 담을 수 없는 긴 항목 목록이 있는 경우 ScrollView 대신 FlatList를 사용해야 한다.
import {Image, ScrollView, Text} from 'react-native'

const logo = {
  uri: 'https://reactnative.dev/img/tiny_logo.png',
  width: 64,
  height: 64,
};

const App = () => {
  <ScrollView>
    <Text style={{fontSize: 96}}>Scroll me plz</Text>
    <Image source={logo} />
    <Image source={logo} />
    <Image source={logo} />
    <Image source={logo} />
    <Image source={logo} />
    <Text style={{fontSize: 96}}>If you like</Text>
    <Image source={logo} />
    <Image source={logo} />
    <Image source={logo} />
    <Image source={logo} />
    <Image source={logo} />
    <Text style={{fontSize: 96}}>Scrolling down</Text>
    <Image source={logo} />
    <Image source={logo} />
    <Image source={logo} />
    <Image source={logo} />
    <Image source={logo} />
    <Text style={{fontSize: 96}}>What's the best</Text>
    <Image source={logo} />
    <Image source={logo} />
    <Image source={logo} />
    <Image source={logo} />
    <Image source={logo} />
    <Text style={{fontSize: 96}}>Framework around?</Text>
    <Image source={logo} />
    <Image source={logo} />
    <Image source={logo} />
    <Image source={logo} />
    <Image source={logo} />
    <Text style={{fontSize: 80}}>React Native</Text>
  </ScrollView>
);

export default App;
Using List Views
React Native에서 데이터 목록을 표시하기 위해서는 FlatList 또는 SectionList를 사용하는 것이 좋다.
FlatList
FlatList는 구성 요소는 변경되지만 구조는 유사한 데이터의 스크롤 목록을 표시한다. 시간이 지남에 따라 항목수가 변경될 수 있는 긴 데이터 목록에 적합하다.
ScrollView와 달리 FlatList는 모든 요소를 한 번에 렌더링하지 않고 현재 화면에 표시되는 요소만 렌더링한다.
FlatList는 data와 renderItem이라는 두 가지 props가 필요하다.
data는 리스트를 위한 정보 출처이며, renderItem은 data에서 항목 하나를 가져와 렌더링할 형식이 지정된 구성 요소를 반환한다.
import {FlatList, StyleSheet, Text, View} from 'react-native'

const styles = StyleSheet.create({
  container: {
    flex: 1,
    paddingTop: 22,
  },
  item: {
    padding: 10,
    fontSize: 18,
    height: 44,
  }
});

const FlatListBasics = () => {
  return (
    <View style={styles.container}>
      <FlatList
        data={[
          {key: 'Devin'},
          {key: 'Dan'},
          {key: 'Dominic'},
          {key: 'Jackson'},
          {key: 'James'},
          {key: 'Joel'},
          {key: 'John'},
          {key: 'Jillian'},
          {key: 'Jimmy'},
          {key: 'Julie'},
        ]}
        renderItem={({item}) => <Text style={styles.item}>{item.key}</Text>}
      />
    </View>
  );
};

export default FlatListBasics;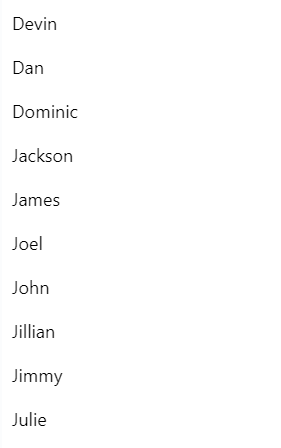
SectionList
섹션 헤더를 사용하여 논리 섹션으로 구분된 데이터 세트를 렌더링하려는 경우엔 SectionList를 사용하면 된다.
import {SectionList, StyleSheet, Text, View} from 'react-native';

const styles = StyleSheet.create({
  container: {
    flex: 1,
    paddingTop: 22,
  },
  sectionHeader: {
    paddingTop: 2,
    paddingLeft: 10,
    paddingRight: 10,
    paddingBottom: 2,
    fontSize: 14,
    fontWeight: 'bold',
    backgroundColor: 'rgba(247,247,247,1.0)',
  },
  item: {
    padding: 10,
    fontSize: 18,
    height: 44,
  },
});

const SectionListBasics = () => {
  return (
    <View style={styles.container}>
      <SectionList
        sections={[
          {title: 'D', data: ['Devin', 'Dan', 'Dominic']},
          {
            title: 'J',
            data: [
              'Jackson',
              'James',
              'Jillian',
              'Jimmy',
              'Joel',
              'John',
              'Julie',
            ],
          },
        ]}
        renderItem={({item}) => <Text style={styles.item}>{item}</Text>}
        renderSectionHeader={({section}) => (
          <Text style={styles.sectionHeader}>{section.title}</Text>
        )}
        keyExtractor={item => `basicListEntry-${item}`}
      />
    </View>
  );
};

export default SectionListBasics;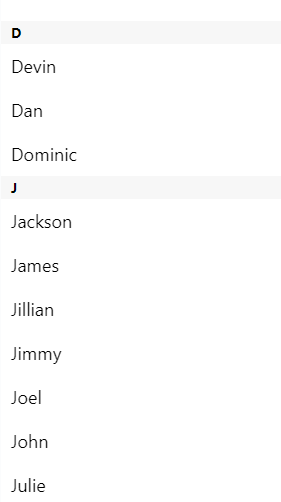
Platform-Specific Code
크로스 플랫폼 앱을 구축할 때 최대한 많은 코드를 재사용하고 싶지만, 플랫폼에 따라 코드가 달라져야 하는 상황이 생길 수 있다.
React Native는 플랫폼을 구분하는 두 가지 방법을 제공한다.
platform module사용platform-specific file extensions사용
특정 요소에는 하나의 플랫폼에서만 작동하는 속성이 있을 수 있다. 이러한 모든 컴포넌트에는@platform주석이 추가되어 있으며, 웹사이트에 작은 배지로 표시된다.
platform module
React Native는 앱이 실행되는 플랫폼을 감지하는 모듈을 제공한다. 이를 사용하여 플랫폼별 코드를 구현할 수 있으며, 컴포넌트의 작은 부분만 platform-specific할 때 이 옵션을 사용한다.
import {Platform. StyleSheet} from 'react-native'

const styles = StyleSheet.create({
  height: Platform.OS === 'ios' ? 200 : 100
});Platform.OS는 iOS를 실행할 땐 ios, Android를 실행할 땐 android가 된다.
Platform.select 메서드는 키가 'ios' | 'android' | 'native' | 'default' 중 하나일 수 있는 플랫폼에 가장 적합한 값을 반환한다.
휴대전화에서 실행 중인 경우 ios 및 android 키가 우선 적용되며, 이를 지정하지 않으면 native 키 또는 default 키가 사용된다.
import {Platform, StyleSheet} from 'react-native';

const styles = StyleSheet.create({
  container: {
    flex: 1,
    ...Platform.select({
      ios: {
        backgroundColor: 'red',
      },
      android: {
        backgroundColor: 'green',
      },
      default: {
        // 다른 플랫폼들 (예를 들면 웹)
        backgroundColor: 'blue',
      },
    }),
  },
});
이렇게 구현할 경우 컨테이너는 모든 플랫폼에서 flext: 1 속성을 가지며, ios에서는 빨간색 배경색, android에서는 녹색 배경색, 기타 플랫폼에서는 파란색 배경색이 된다.
any value를 허용하므로 아래와 같이 플랫폼 맞춤 컴포넌트를 반환할 수도 있다.
const Component = Platform.select({
  ios: () => require('ComponentIOS'),
  android: () => require('ComponentAndroid'),
})();

<Component />;
const Component = Platform.select({
native: () => require('ComponentForNative'),
default: () => require('ComponentForWeb'),
})();
<Component />;Detecting the Android version
Android에서는 Platform 모듈을 사용하여 앱이 실행되는 Android 플랫폼 버전을 감지할 수도 있다.
import {Platform} from 'react-native'

if(Platform.Version === 25) {
  console.log('Running on Nougat!')
}
Version은 Android OS 버전이 아닌 Android API 버전으로 설정된다.
Detecting the iOS version
iOS에서 Version은 운영체제의 현재 버전이 포함된 문자열인 -[UIDevice systemVersion]의 결과이다.
시스템 버전이 10.3인 경우 다음과 같이 버전 번호를 감지해야 한다.
import {Platform} from 'react-native'

const majorVersionIOS = parseInt(Platform.Version, 10);

if(majorVersionIOS <= 9) {
  console.log('Work around a change in behavior');
}
Platform-specific extensions
React Native는 파일에 .ios. 또는 .android. 확장자가 있는 경우를 감지하고 다른 컴포넌트에서 필요할 때 관련 플랫폼 파일을 로드한다.
예를 들어 BigButton.ios.js, BigButton.android.js 파일이 있는 경우 다음과 같이 가져올 수 있습니다.
import BigButton from './BigButton'React Native는 실행 중인 플랫폼에 따라 올바른 파일을 자동으로 선택한다.
Native-specific extensions (i.e. sharing code with NodeJS and Web)
NodeJS/Web과 React Native 간에 모듈을 공유해야 하지만, Android/iOS 차이가 없는 경우엔 .native.js 확장 프로그램을 사용할 수 있다. 이는 React Native와 ReactJS 간에 공통 코드가 공유되는 프로젝트에 특히 유용하다.
예를 들어 Container.js(webpack, Rollup 또는 기타 웹 번들러에서 선택됨) , Container.native.js(Android 및 iOS용 React Native 번들러에서 선택됨) 파일이 있는 경우 다음과 같이 .native 확장 없이 가져올 수 있다.
import Container from './Container'