SignUp
src/views/SignupView.vue
<template>
  <div class="signup container d-flex flex-column align-items-center">
    <h1 class="title fw-bold my-5">Signup</h1>
    <form
      class="w-50 d-flex flex-column align-items-center"
      @submit.prevent="submitForm"
    >
      <div class="mb-3 w-100">
        <input
          type="email"
          class="form-control"
          id="email"
          aria-describedby="emailHelp"
          placeholder="E-mail"
          v-model="email"
        />
        <div id="emailHelp" class="form-text">
          We'll never share your email with anyone else.
        </div>
      </div>
      <div class="mb-3 w-100">
        <input
          type="password"
          class="form-control"
          id="password1"
          placeholder="Password"
          v-model="password1"
        />
      </div>
      <div class="mb-3 w-100">
        <input
          type="password"
          class="form-control"
          id="password2"
          placeholder="Password Check"
          v-model="password2"
        />
      </div>
      <button
        type="submit"
        class="btn w-50 my-3"
        style="
          font-size: 20px;
          font-weight: 600;
          background-color: rgb(45, 126, 250);
          color: white;
          border-radius: 40px;
          height: 60px;
        "
      >
        회원가입
      </button>
      <!-- 결과 메시지 출력 -->
      <p>{{ logMessage }}</p>
    </form>
  </div>
</template>

<script>
import { registerUser } from '@/api/index'

export default {
  data() {
    return {
      // form
      email: '',
      password1: '',
      password2: '',
      // log
      logMessage: ''
    }
  },
  methods: {
    async submitForm() {
      // API 요청시 전달할 userData 객체
      const userData = {
        email: this.email,
        password1: this.password1,
        password2: this.password2
      }
      const { data } = await registerUser(userData)

      this.logMessage = `${data.email} 님이 가입되었습니다.`

      // 가입 후 폼 초기화
      this.initForm()
    },
    initForm() {
      this.email = ''
      this.password1 = ''
      this.password2 = ''
    }
  }
}
</script>
src/api/index.js
import axios from 'axios'

function registerUser(userData) {
  // 요청할 URL
  const url = 'http://127.0.0.1:8000/api/accounts/v1/registration/'
  console.log('userData :', userData)
  return axios.post(url, userData, {
    'Content-Type': 'application/json'
  })
}

// 함수 export
export { registerUser }
@submit.prevent="submitForm"
form 내부에 위의 코드를 입력하여
새로 고침을 막고submit으로 함수를 실행시킨다.
.prevent 사용 이유: Form태그는 submit되면서 창을 새로 고치게 되므로 SPA의 특징인 비동기가 의미 없어진다.
initForm
.prevent로 새로고침을 막았으므로 post 요청을 마치면 폼을 초기화시켜 주어야 한다.
src/api 분리
axios 요청 부분을 script 태그가 아닌 src/api/index.js로 따로 분리시켰다.
기능별로 분리하여 유지 관리가 쉽고 vue 파일 코드가 훨씬 줄어든다.
개발자 도구 잘 활용하기
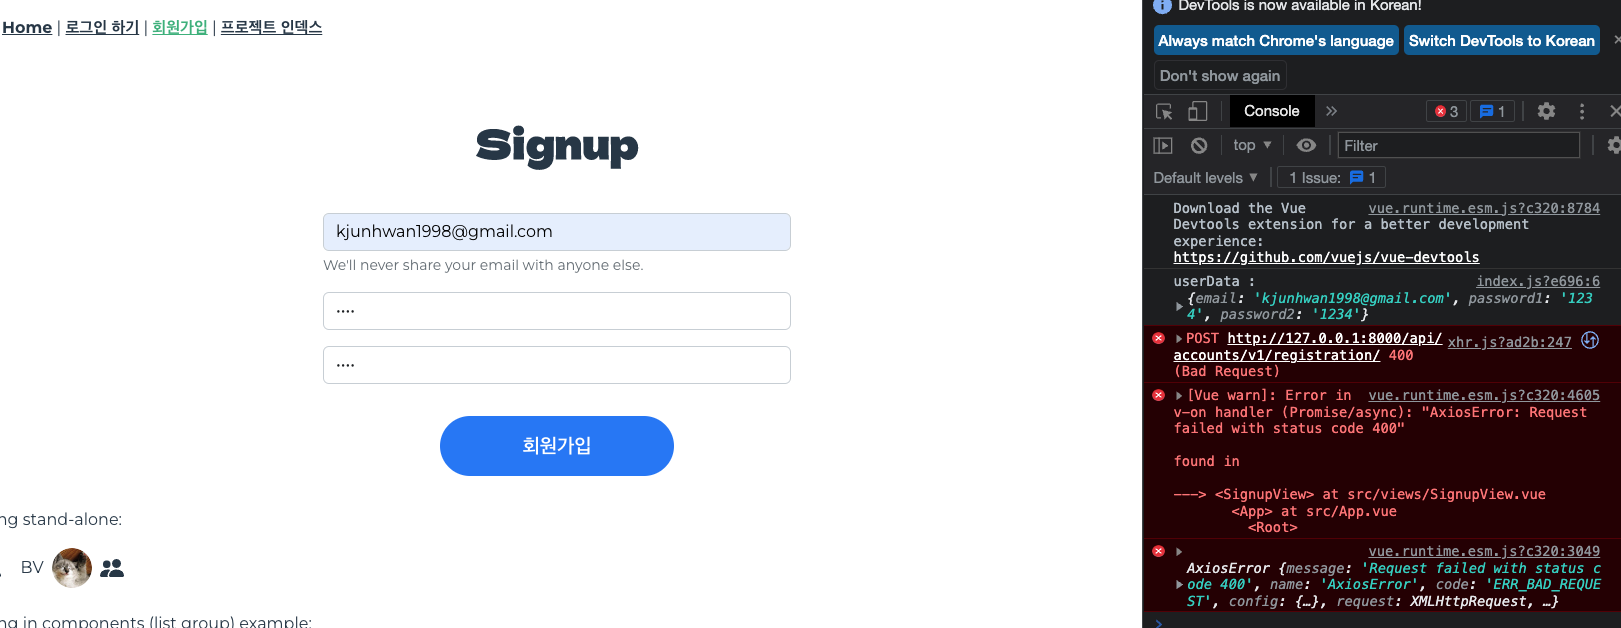
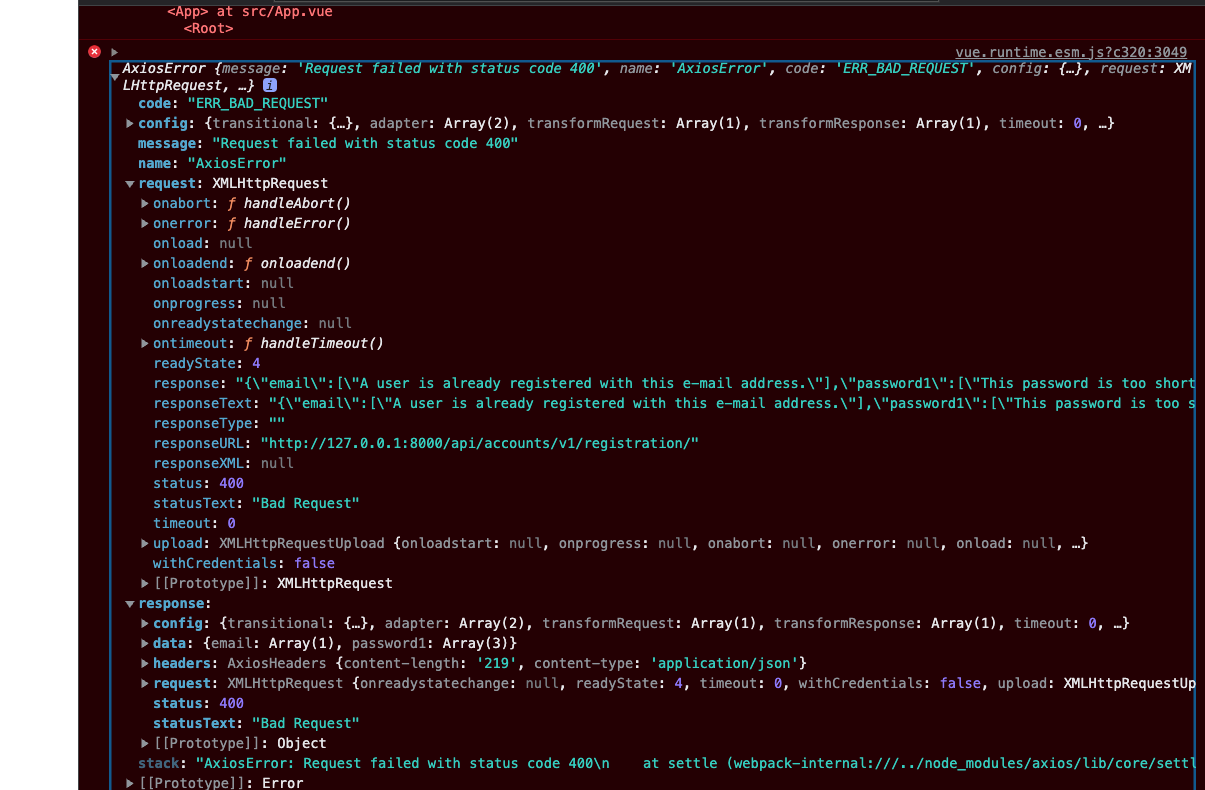
왜 에러가 나는지 request와 response를 눌러보면 알 수 있다! 정보가 잘 전달되고 있는지, 어떤 오류가 발생하였는지 찍어보면 다 나온다!
Login
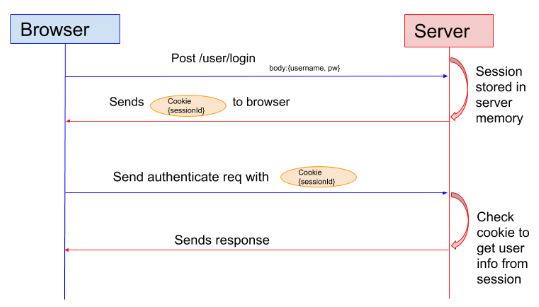
아이디 비번 => 토큰 요청 => 토큰 제공 => 요청 보낼 때 header에 토큰과 함께 요청 => 원하는 데이터 응답
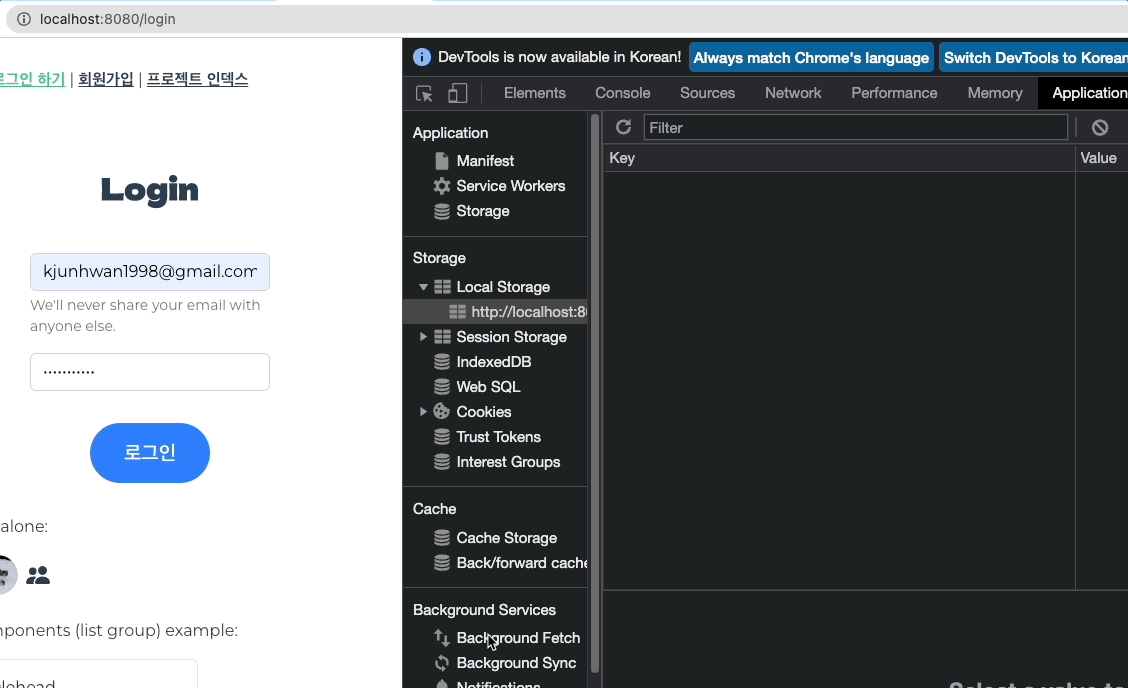
access token 저장 방법
-
Local Storage: 해당 도메인에 영구 저장 -
Session Storage: 해당 도메인의 한 세션에서만 저장. 창 닫으면 날라감 -
Cookie: 날짜를 설정하고 기간을 정하는 방법. 기간 지나면 날라감
src/views/LoginView.vue
<template>
  <div class="signup container d-flex flex-column align-items-center">
    <h1 class="title fw-bold my-5">Login</h1>
    <form
      class="w-50 d-flex flex-column align-items-center"
      @submit.prevent="onSubmit(email, password)"
    >
      <div class="mb-3 w-100">
        <input
          type="email"
          class="form-control"
          id="email"
          aria-describedby="emailHelp"
          placeholder="E-mail"
          v-model="email"
        />
        <div id="emailHelp" class="form-text">
          We'll never share your email with anyone else.
        </div>
      </div>
      <div class="mb-3 w-100">
        <input
          type="password"
          class="form-control"
          id="password"
          placeholder="Password"
          v-model="password"
        />
      </div>
      <button
        type="submit"
        class="btn w-50 my-3"
        style="
          font-size: 20px;
          font-weight: 600;
          background-color: rgb(45, 126, 250);
          color: white;
          border-radius: 40px;
          height: 60px;
        "
      >
        로그인
      </button>
      <!-- 결과 메시지 출력 -->
      <p>{{ msg }}</p>
    </form>
  </div>
</template>

<script>
export default {
  data() {
    return {
      email: '',
      password: '',
      msg: ''
    }
  },
  methods: {
    onSubmit() {
      // LOGIN 액션 실행
      this.$axios
        .post(
          'http://127.0.0.1:8000/api/accounts/v1/login/',
          { email: this.email, password: this.password },
          {
            headers: {
              'Content-Type': 'application/json'
            }
          }
        )
        .then((response) => {
          console.log(response)
          if (response.data.access_token) {
            localStorage.setItem('wtw-token', response.data.access_token)
          }
          if (response.data.refresh_token) {
            localStorage.setItem('wtw-ref-token', response.data.refresh_token)
          }
        })
    }
  }
}
</script>
개발자 도구에서 토큰 확인

Just Do It