
오늘은 UITableView 에서 그냥 있는줄만 알고 써보진 않았던 헤더, 푸터, 섹션을 쫌 연습해봤다
UITableView
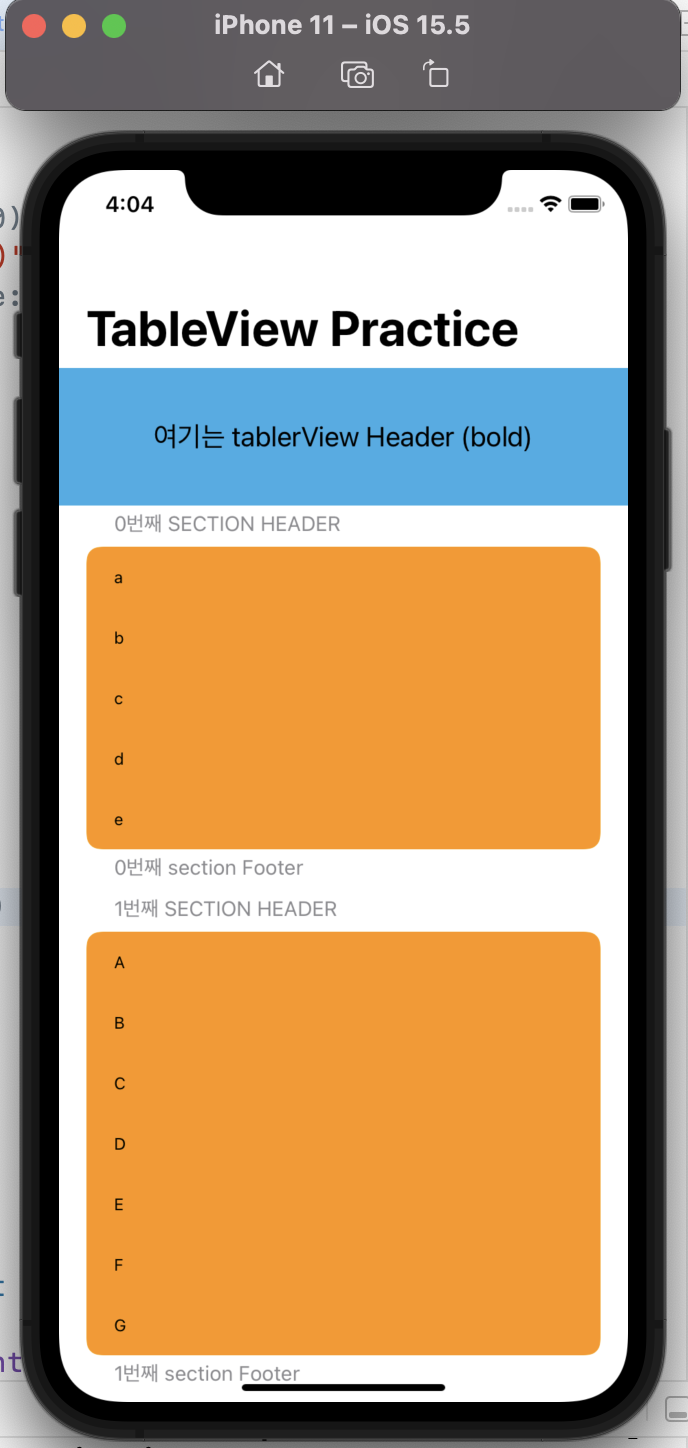
tableview는 tableHeaderView, section, tableFooterView로 이뤄져있고,
section에는 각 cell이 들어가게 되는데, 각 section에는 상단의 header section과 하단의 footer section이 존재한다.
tableHeaderView
// tableHeaderView를 UIView 인스턴스로 생성함
let header = UIView(frame: CGRect(x: 0, y: 0, width: view.bounds.width, height: 100))
// header view에 들어갈 detail config
let headerLabel = UILabel(frame: header.bounds)
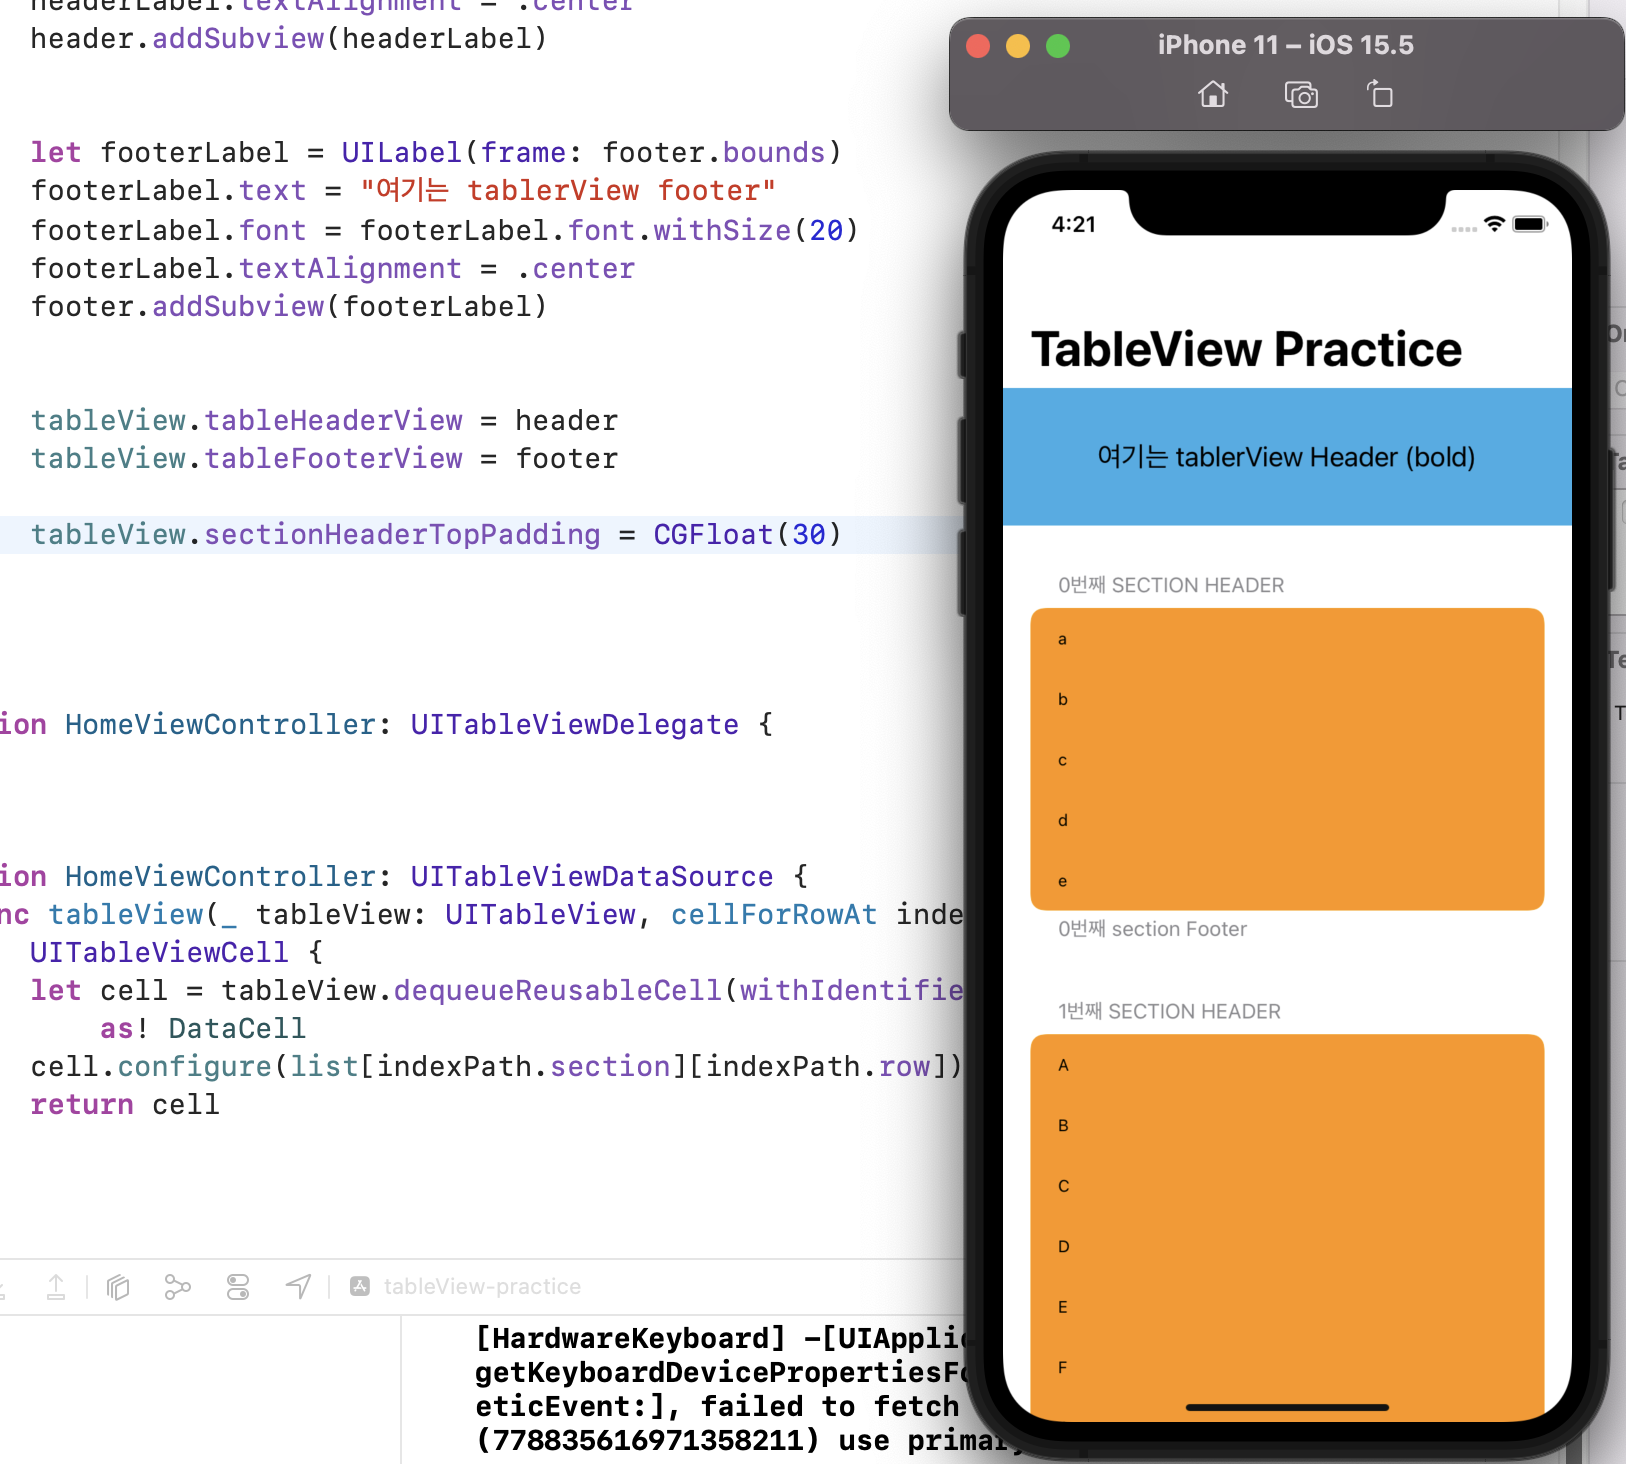
headerLabel.text = "여기는 tablerView Header (bold)"
headerLabel.font = headerLabel.font.withSize(20)
headerLabel.textAlignment = .center
// header 인스턴스에 추가
header.addSubview(headerLabel)
// tableView의 HeaderView로 위에서 만든 인스턴스를 지정함
tableView.tableHeaderView = header
tableFooterView
// 위와 동일한 방식으로 tableFooterView를 설정할 수 있음section의 header
// UITableViewDataSource에서 불러올 수 있음

// section header Title 설정
func tableView(_ tableView: UITableView, titleForHeaderInSection section: Int) -> String? {
	return "\(section)번째 section Header"
}

// section header Height 설정
func tableView(_ tableView: UITableView, heightForHeaderInSection section: Int) -> CGFloat {
	return CGFloat(30)
}
section의 footer
// 위와 동일한 방식으로 각 section의 footer 를 설정할 수 있음section간 간격 조절 ?
이건 뭐가 좋은 방법인지 아직 잘 모르겠다.
1. 당장 위의 heightForHeaderInSection 메서드를 조절해주면 해결할 수 있음
2. tableView의 "sectionHeaderTopPadding" 을 지정해 주어도 해결 가능!
2번에 의한 결과
tableView.sectionHeaderTopPadding = CGFloat(30)"sectionHeaderTopPadding" 이걸 지정해 줬더니 첫번째 결과보다는 좀 나은것 같기두..
(그냥 1번의 "heightForHeaderInSection" 의 값을 크게 설정해도 똑같아 보이는데.. 차이점을 아직 잘 모르겠음)
대충 헤더 푸터 섹션들은 다뤘으니
이제 diffableDataSource도 공부해야지

완씨의 개발기록