
Next.js 로 진행한 프로젝트에 Sentry 를 도입해보게 되어 정리하게되었다.
Sentry란 ?
Sentry: Application 에러 트래킹 서비스입니다. 에러가 발생하면 알림을 받을 수 있고 에러에 대한 상세 정보 파악이 가능합니다. (Slack에 연동 가능 !)
프론트엔드 개발자 입장에서 클라이언트 단의 오류를 파악하는 가장 확실한 방법은 해당 브러우저의 개발자 도구 콘솔을 통해 오류를 파악하는 것이다.
이럴 경우 통상적으로 서비스를 이용중인 사람에게 에러가 발생했다면, 상황을 듣고 직접 확인해본다거나, 콘솔에 찍은 오류내용을 캡쳐해달라는 요구를 해야한다.
Sentry 를 사용하면 이런 번거로운 상황을 만들지 않고 개발자가 직접 클라이언트단의 오류를 트래킹 할 수 있다.
Sentry로 확인할 수 있는 에러 정보
Sentry 로 에러에 대하여 아래와 같은 정보를 확인할 수 있다.
- Exception & Message: 이벤트 로그 메시지 및 코드 라인 정보 (source map 설정을 해야 정확한 코드라인을 파악할 수 있습니다.)
- Device: 이벤트 발생 장비 정보 (name, family, model, memory 등)
- Browser: 이벤트 발생 브라우저 정보 (name, version 등)
- OS: 이벤트 발생 OS 정보 (name, version, build, kernelVersion 등)
- Breadcrumbs: 이벤트 발생 과정
Next.js에 Sentry 적용하기
- https://sentry.io 사이트에서 회원가입하고 프로젝트를 생성하여 DSN 키 발급받는다.
- DSN키는 Sentry 사이트 setting -> project 선택 -> Client Keys (DSN)에서 확인 가능 !
- 패키지 매니저를 사용해서
Sentry를 설치해준다.
yarn add @sentry/nextjsSentry에서 발급 받은DSN 키와Auth Token을.env에 작성해준다.
(Auth Token을 빠뜨리면 prod 환경에서 오류가남)
NEXT_PUBLIC_SENTRY_DSN={{DSN 키}}
NEXT_PUBLIC_SENTRY_AUTH_TOKEN={{AUTH_TOKEN}}- root 폴더에
sentry.client.config.ts파일을 생성해준다.
// This file configures the initialization of Sentry on the browser.
// The config you add here will be used whenever a page is visited.
// https://docs.sentry.io/platforms/javascript/guides/nextjs/

import * as Sentry from '@sentry/nextjs';

const SENTRY_DSN = process.env.SENTRY_DSN || process.env.NEXT_PUBLIC_SENTRY_DSN;

Sentry.init({
  dsn: SENTRY_DSN || {{DSN 키}},
  // Adjust this value in production, or use tracesSampler for greater control
  tracesSampleRate: 1.0,
  // ...
  // Note: if you want to override the automatic release value, do not set a
  // `release` value here - use the environment variable `SENTRY_RELEASE`, so
  // that it will also get attached to your source maps
});
- root 폴더에
sentry.server.config.ts파일을 생성해준다.
// This file configures the initialization of Sentry on the server.
// The config you add here will be used whenever the server handles a request.
// https://docs.sentry.io/platforms/javascript/guides/nextjs/

import * as Sentry from '@sentry/nextjs';

const SENTRY_DSN = process.env.SENTRY_DSN || process.env.NEXT_PUBLIC_SENTRY_DSN;

Sentry.init({
  dsn: SENTRY_DSN || {{DSN 키}},
  // Adjust this value in production, or use tracesSampler for greater control
  tracesSampleRate: 1.0,
  // ...
  // Note: if you want to override the automatic release value, do not set a
  // `release` value here - use the environment variable `SENTRY_RELEASE`, so
  // that it will also get attached to your source maps
});
next.config.js를 추가 설정해준다.
const nextConfig = {
	// 이하 생략
  	sentry: {
      hideSourceMaps: true,
    },
  	...
};

const sentryWebpackPluginOptions = {
  // Additional config options for the Sentry Webpack plugin. Keep in mind that
  // the following options are set automatically, and overriding them is not
  // recommended:
  //   release, url, org, project, authToken, configFile, stripPrefix,
  //   urlPrefix, include, ignore

  silent: true, // Suppresses all logs
  authToken: process.env.NEXT_PUBLIC_SENTRY_AUTH_TOKEN,
  // For all available options, see:
  // https://github.com/getsentry/sentry-webpack-plugin#options.
};

module.exports = withSentryConfig(nextConfig, sentryWebpackPluginOptions)
이렇게 Sentry 를 설정해주게된다면, 에러발생시 아래와 같이 Sentry 프로젝트에서 확인할 수 있다 !
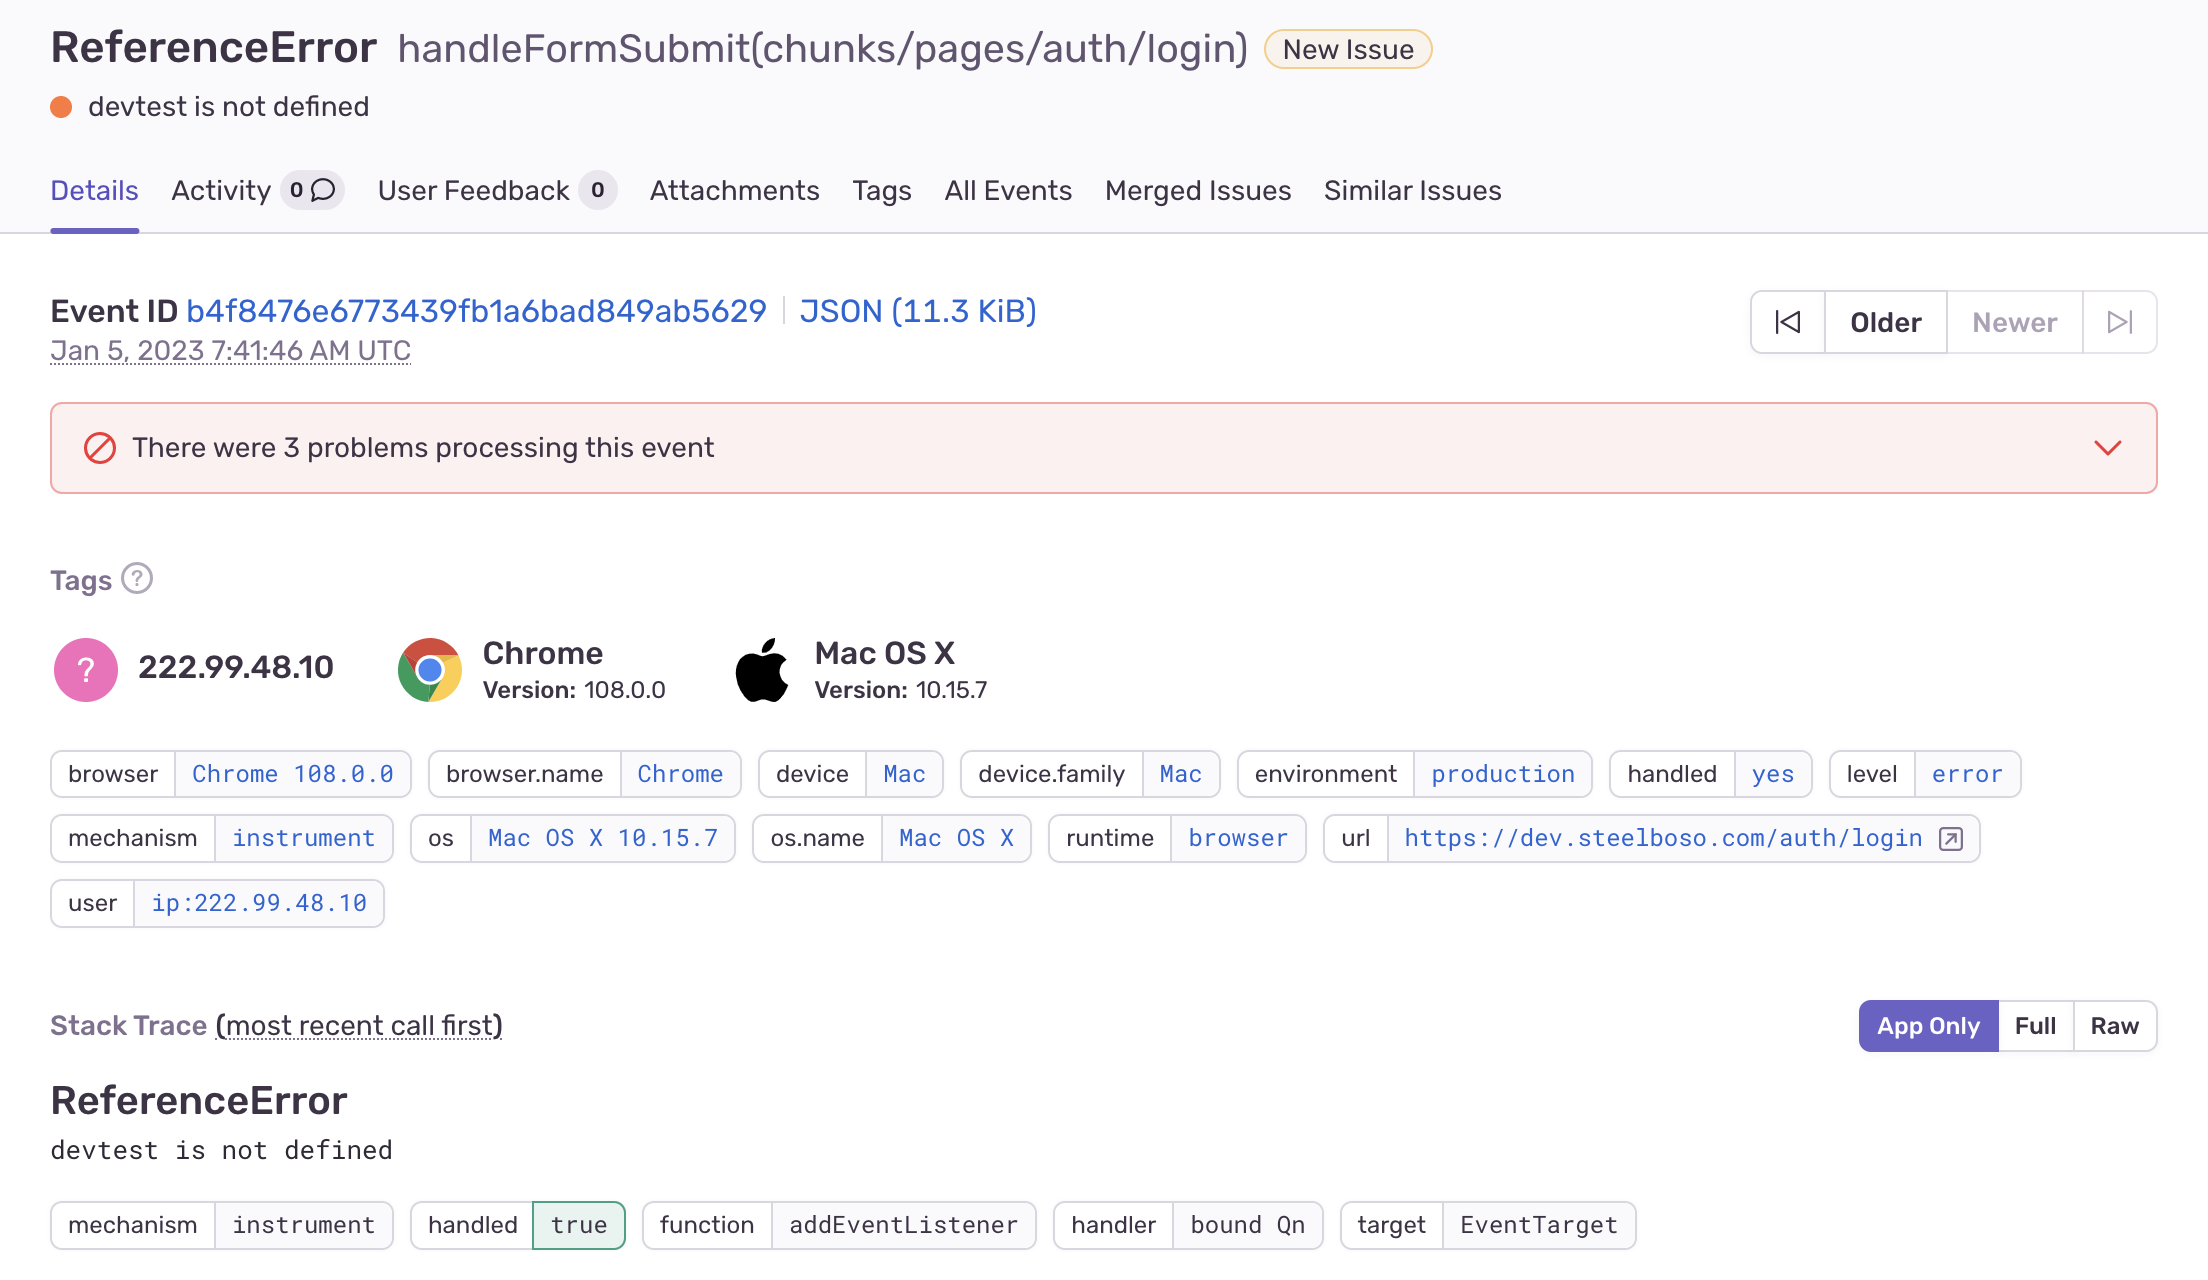
위의 기본설정으로도 기본적인 에러 정보를 수집할 수는 있지만, Sentry 에서 제공하는 여러 함수를 사용하면 좀 더 확장성 있는 에러 추적이 가능하다.
이에 대한 정리는 다음에 기회가 된다면 추가로 할 예정 !

개발자 Hoon입니다