
React-Quill 사용하기
1. 설치
yarn add react-quill 또는 npm install react-quill
2. 사용
- 기본적인 사용방법입니다.
import React, { Component } from 'react';
import ReactQuill from 'react-quill';
import 'react-quill/dist/quill.snow.css';

class EditorComponent extends Component{
    constructor(props){
        super(props);
    }

    modules = {
        toolbar: [
          //[{ 'font': [] }],
          [{ 'header': [1, 2, false] }],
          ['bold', 'italic', 'underline','strike', 'blockquote'],
          [{'list': 'ordered'}, {'list': 'bullet'}, {'indent': '-1'}, {'indent': '+1'}],
          ['link', 'image'],
          [{ 'align': [] }, { 'color': [] }, { 'background': [] }],          // dropdown with defaults from theme
          ['clean']
        ],
      }

      formats = [
        //'font',
        'header',
        'bold', 'italic', 'underline', 'strike', 'blockquote',
        'list', 'bullet', 'indent',
        'link', 'image',
        'align', 'color', 'background',
      ]

    render(){
        const { value, onChange } = this.props;
        return(
            <div style={{height: "650px"}}>
                <ReactQuill
                    style={{height: "600px"}}
                    theme="snow"
                    modules={this.modules}
                    formats={this.formats}
                    value={value || ''}
                    onChange={(content, delta, source, editor) => onChange(editor.getHTML())} />
            </div>
        )
    }
}
export default EditorComponent- 커스텀해서 사용하는 방법입니다. 먼저
CustomToolbar를 다음과 같이 생성해줍니다.
const CustomToolbar = () => (
  <div id="toolbar">
    <select className="ql-header">
      <option value="1"></option>
      <option value="2"></option>
    </select>
    <button className="ql-bold"></button>
    <button className="ql-italic"></button>
    <select className="ql-color">
      <option value="red"></option>
      <option value="green"></option>
      <option value="blue"></option>
      <option value="orange"></option>
      <option value="violet"></option>
      <option value="#d0d1d2"></option>
      <option selected></option>
    </select>
    <select className="ql-background"></select>
    <button className="ql-link"></button>
    <button className="ql-image"></button>
  </div>
);- modules에
CustomToolbar의 최상단div의 id 값을 선언해줍니다. 그리고 toolbar의 formats도 사용할 기능에 대해 선언해줍니다.
function Home() {
  const modules = {
    toolbar: {
      container: "#toolbar",
    },
  };

  const formats = [
    "header",
    "font",
    "size",
    "bold",
    "italic",
    "underline",
    "list",
    "bullet",
    "align",
    "color",
    "background",
    "image",
  ];

  const [text, setText] = useState<string>("");

  const handleText = (value: any) => {
    console.log(value);
    setText(value);
  };
  return (
    <div>
      <div className="text-editor">
        <CustomToolbar />
        <ReactQuill modules={modules} formats={formats} value={text} onChange={handleText} />
      </div>
    </div>
  );
}

export default Home;
✅ 그러면 다음과 같이 CustomToolbar를 확인할 수 있습니다.

3. Editor 내부 값 확인해보기
- 다음과 같이 textEditor에 글을 썼습니다. 글자 크기는 크게하고 글자의 배경색은 각기 다르게 작성했습니다.

-
이를 html tag로 출력하면 다음과 같이 결과물을 볼 수 있습니다.

4. 이미지 업로드 하기
- 이제 이미지를 업로드하고 어떻게 표현되는지 알아보겠습니다.
- 이미지를 다음과 같이 업로드합니다.
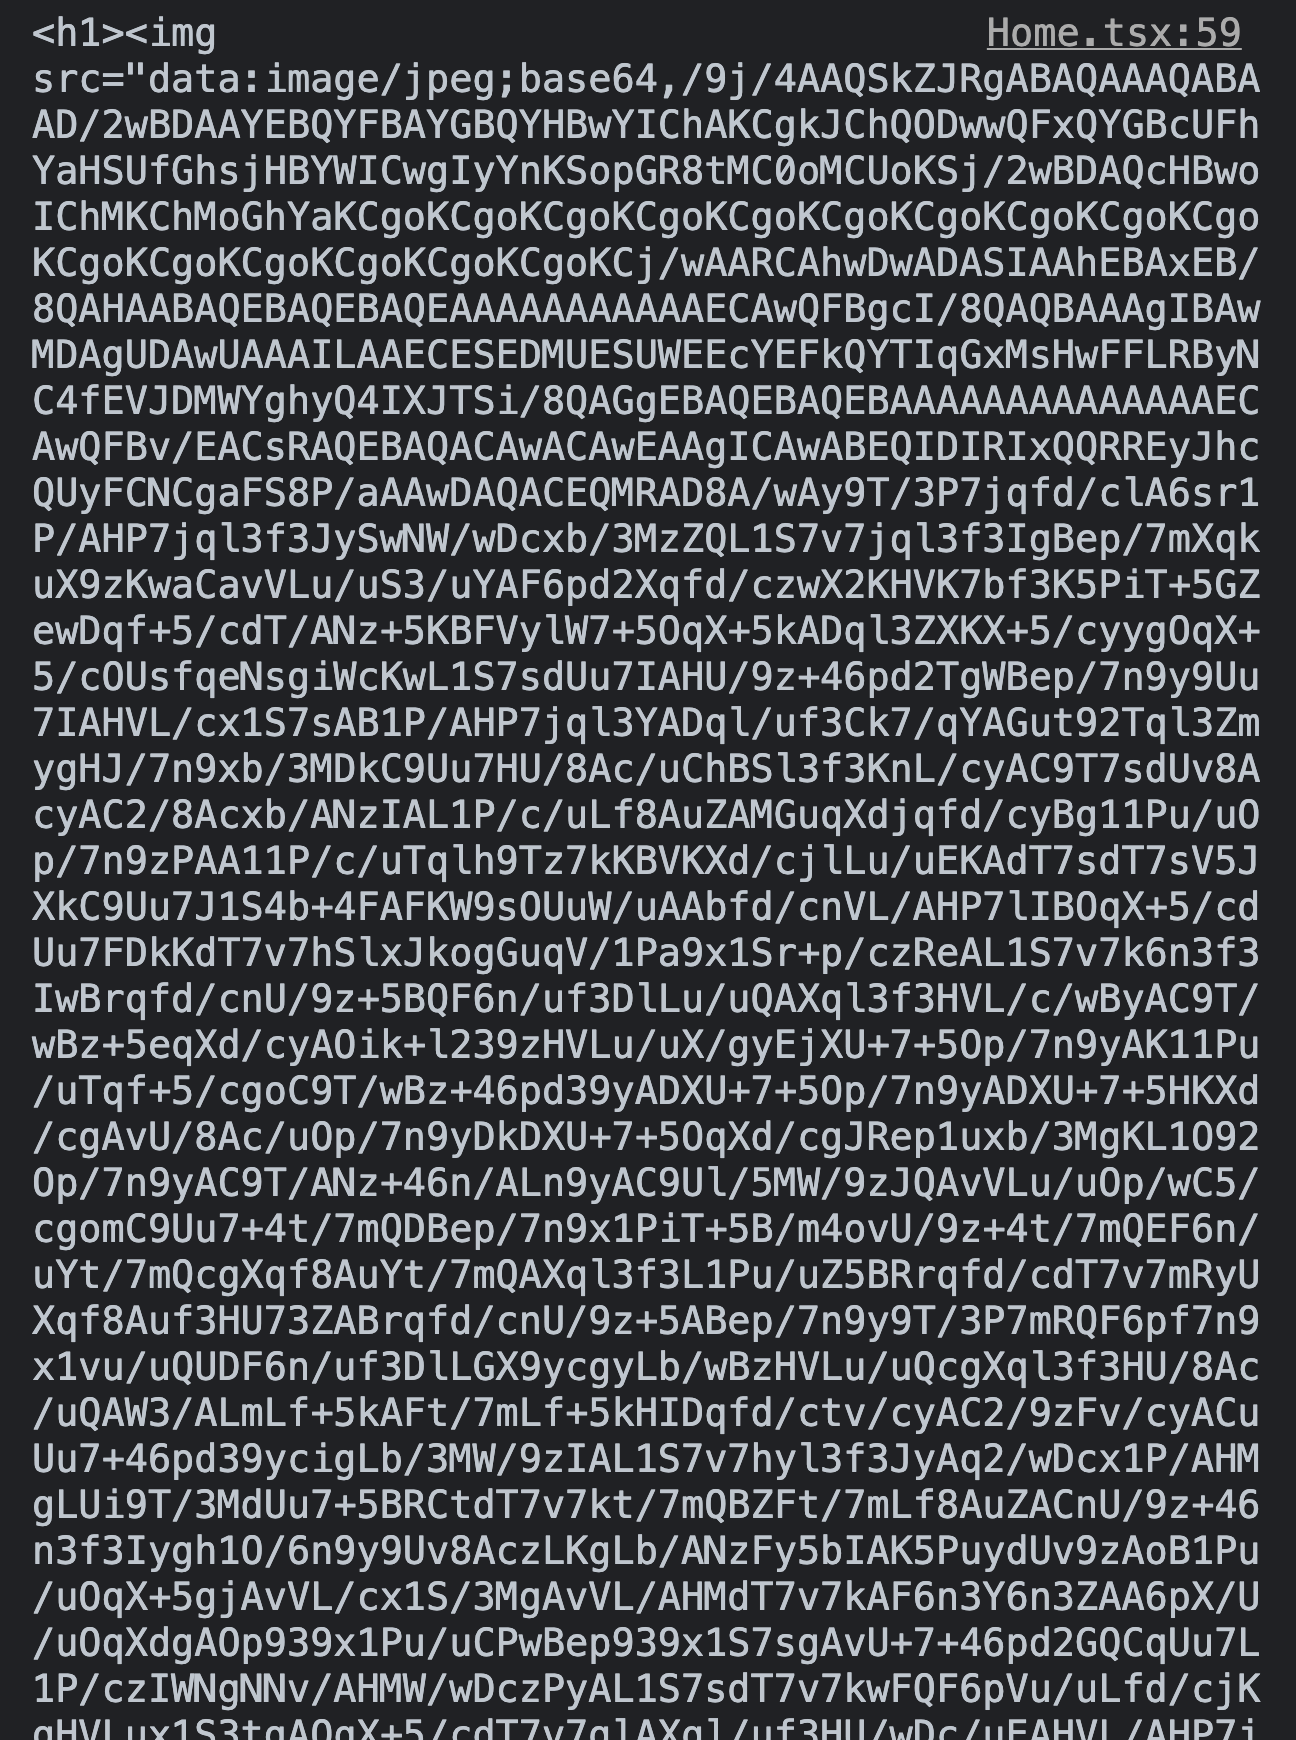
➡️ 그러면 html tag로 다음과 같이 이미지 파일이 표현됩니다. 너무 길어서 이를 서버에 저장하는 것은 좋지 않은 방법입니다.
✅ 그래서 다른 방식으로 이미지를 처리해야합니다.
4. formData로 이미지 처리
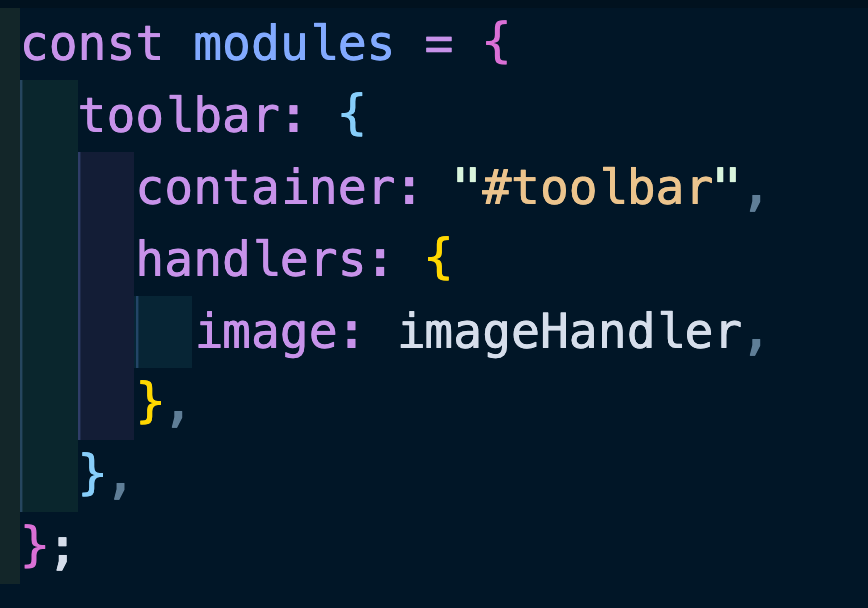
- handlers를 선언하고 image를 다루는 함수를 할당해줍니다.
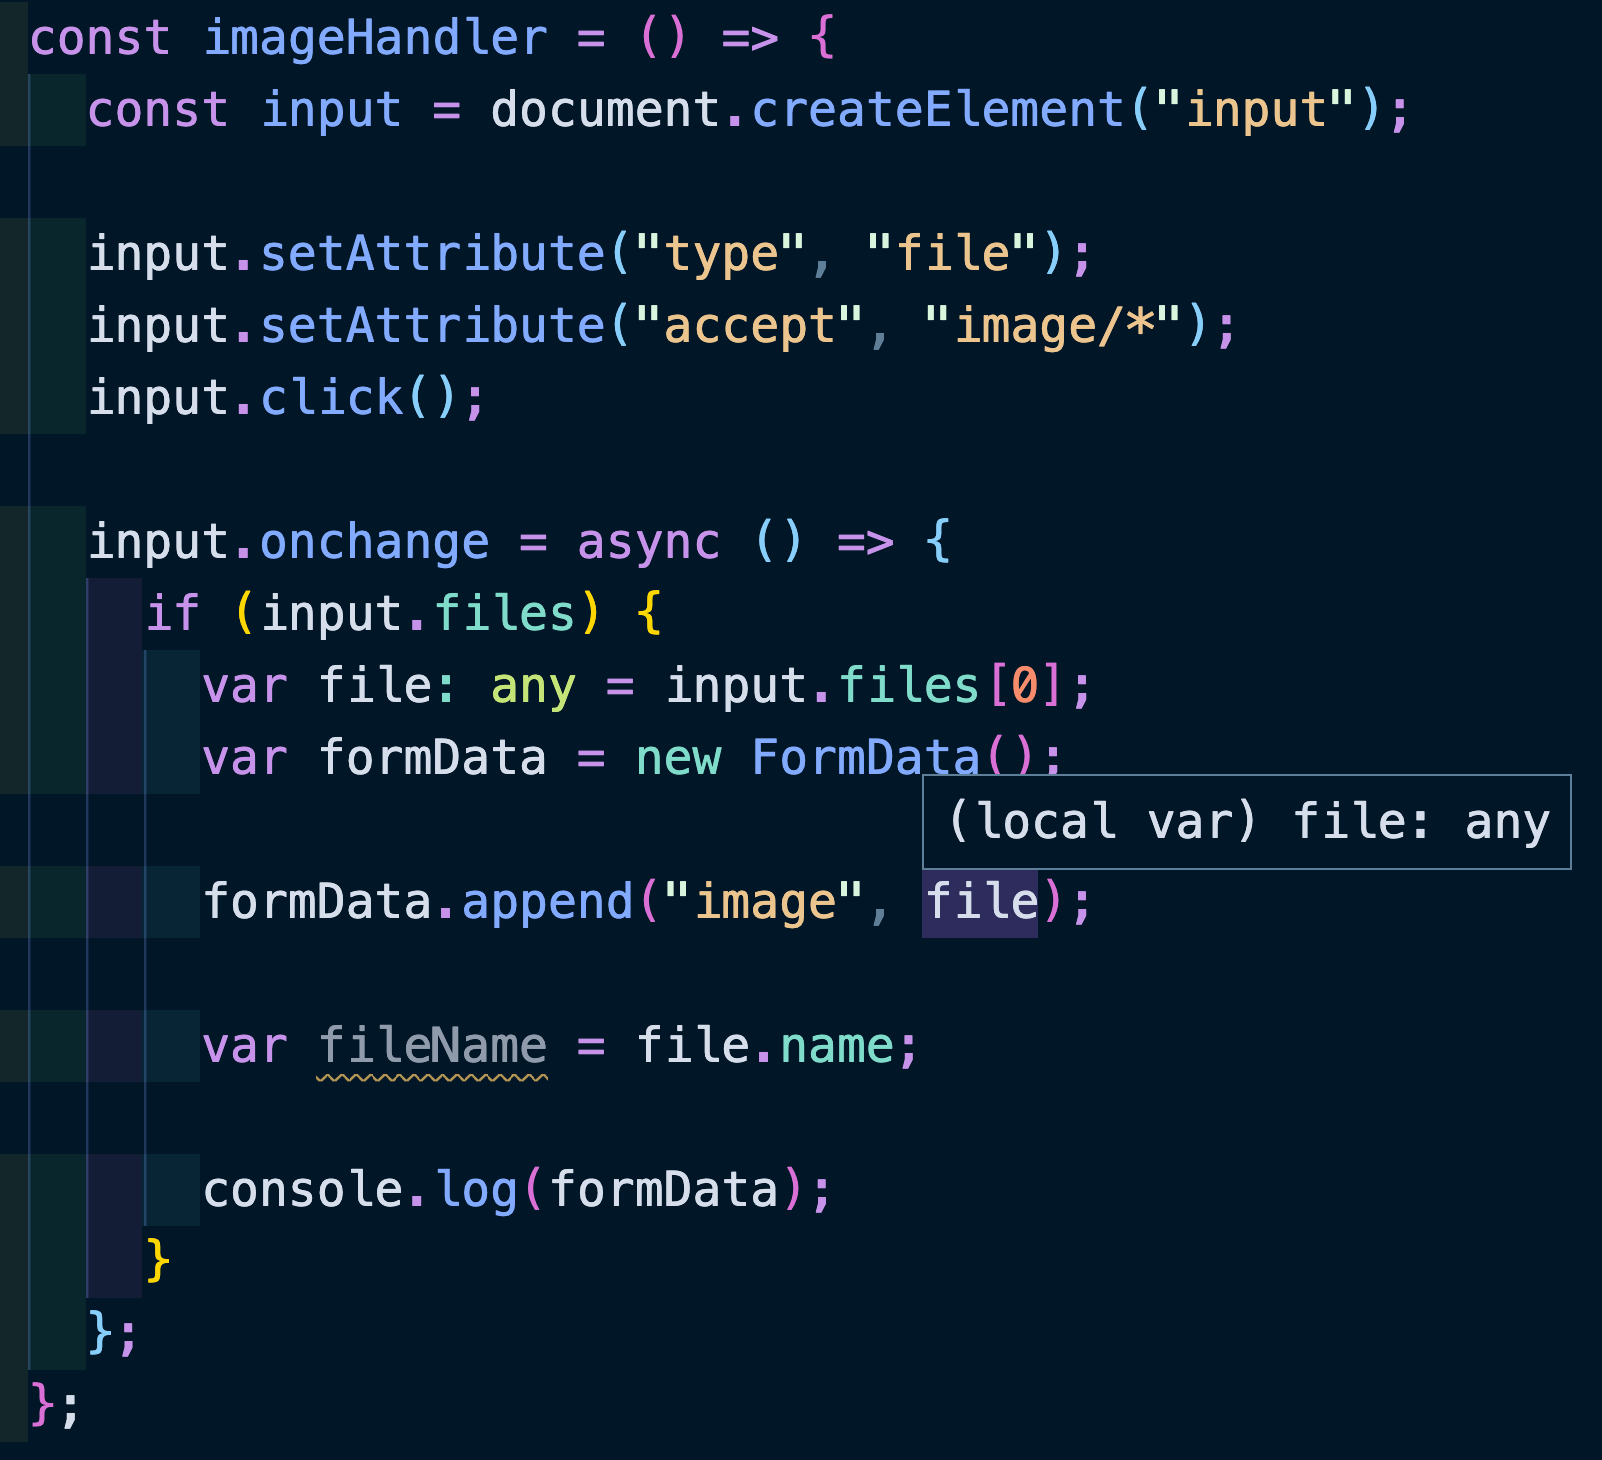
- imageHandler는 다음과 같습니다.

알려주신 방법으로 이미지 업로드를 해봤는데 작동하지 않는 것 같은데 혹시 작성자분께서 테스트하실 떄는 잘 됐었나요?