심화과정 과제 lv2
오늘 해야할 작업내용
- redux를 이용해서 todo의 state 관리
- Router를 사용하여 페이지 이동
두가지 작업을 위해 필요한 폴더와 파일을 먼저 정리해주었다.
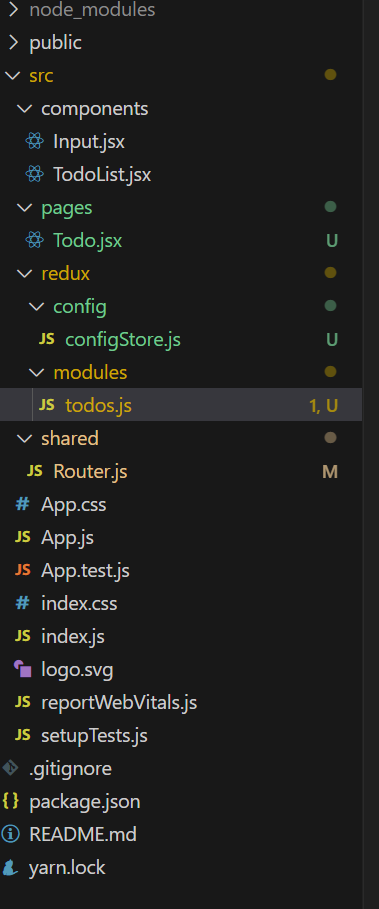
redux - config, modules 폴더는 상태 관리를 위한 Reducer와 중앙관리 파일이 위치하는 곳이다.
pages, shared는 페이지 이동을 위해 Router로 관리되는 부분이다.
Redux 작업
-
index.js
Provider 모듈로 app태그를 감싸줘야 한다.
그것을 store 속성에 중앙 데이터 관리소 store를 할당해준다. -
config 폴더
configStore.js 파일// 중앙 데이터 관리소 store 설정 import { createStore } from "redux"; import { combineReducers } from "redux"; import todos from "../modules/todos"; const rootReducer = combineReducers({ // modules key: value todos, }); // 리듀서를 가져와야 함 const store = createStore(rootReducer); // reducer의 묶음 export default store; ``` -
modules 파일
Reducer들의 집합이다. 사용하는 데이터는 todos밖에 없기 때문에 todos 데이터들을 작업해주자.
// 초기값
const initialState = [
    {
        id: uuid(),
        title: '제목1',
        contents: '내용1',
        isDone: false,
      },
      {
        id: uuid(),
        title: '제목2',
        contents: '내용2',
        isDone: true,
      },
      {
        id: uuid(),
        title: '제목3',
        contents: '내용3',
        isDone: false,
      },
      {
        id: uuid(),
        title: '제목4',
        contents: '내용4',
        isDone: false,
      },
];

// 리듀서
const todos = (state = initialState, action) => {
    switch (action.type) {
        default:
            return state;
    }
}
여기에서 action을 해야하는 것은
1) input값이 입력 버튼에 의해 입력되었을 때 todos에 add
2) 완료/취소 버튼이 눌렸을 때 isDone값의 처리
3) 삭제 버튼이 눌렸을 때 해당 값을 제외하고 return
TodoList 컴포넌트에서는 useDispatch, useSelector를 import하여 데이터를 다뤄주어야 한다.
기존에 liseIsDone(boolean)을 제외하고는 지워주고 setTodos와 각종 함수들 대신 action을 작업해준다.
변수명들을 선언해주고 TodoList 컴포넌트에서 todos가 잘 들어오는지 확인해보았다.
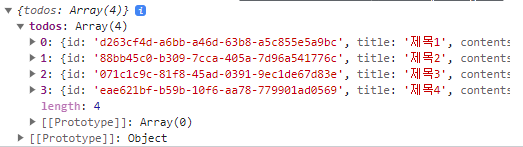
데이터가 잘 들어오는데 filter를 사용하면 todos.filter is not a function에러가 발생한다.
-> 지금 todos는 그냥 객체로 되어있기 때문에 todos의 todos를 불러와주어야 한다.
const todos = useSelector(todos => todos.todos);todos.js
// action creator
export const addTodo = (payload) =>{
    return {
        type: ADD_TODO,
        payload
    };
};

export const completeStateToto = (payload) =>{
    console.log(payload);
    return {
        type: COMPLETE_STATE_TODO,
        payload: payload
    };
};

export const deleteTodo = (payload) =>{
    return {
        type: DELETE_TODO,
        payload
    };
};

// 리듀서
const todos = (state = initialState, action) => {

    switch (action.type) {
        case ADD_TODO:
            return state = [...state, action.payload]

        case COMPLETE_STATE_TODO:
            return state = state.map((todo) => {
                if (todo.id === action.payload.id) {
                    return {
                        ...todo, isDone: !todo.isDone
                    }
                } else {
                    return todo;
                }
            });

        case DELETE_TODO:
            return state = state.filter((todo) => {
                return todo.id !== action.payload.id
            });

        default:
            return state;
    }

}- 각각의 payload
ADD_TODO : 입력된 새로운 객체
COMPLETE_STATE_TODO : 클릭된 todo
DELETE_TODO : 클릭된 todo
상세 페이지 작업
- index.js
<Provider store={store}>
    <Router>
    </Router>
  </Provider>
index.js에서 라우터를 동작하고
Router에서는 메인 페이지를 App.js로 동작하게 만들었다.
- Router.js
const Router = () => {
    return (
        <BrowserRouter>
            <Routes>
                <Route path="/" element={<App />} />
                <Route path="/todo/:id" element={<Todo />}/>
            </Routes>
        </BrowserRouter>
    )
};- TodoList.jsx
페이지를 이동하는 링크를 걸어주었다.
<Link to={`/todo/${todo.id}`}>상세보기</Link>- Todo.jsx
function Todo() {
  const params = useParams();
  const todos = useSelector(todos => todos.todos);
  const foundData = todos.find((item) => item.id === params.id);

  console.log(foundData);
  return (
    <div>
      <h3>TODO</h3>
    </div>
  )
}
Link vs useNavigate
Link : 클릭 시 바로 이동하는 로직 구현 시
ex) list -> 상세 페이지
useNavigate : 추가로 처리하는 로직 필요할 때
ex) 로그인 버튼 눌렀을 때 -> 회원가입o 일때 Main페이지
회원가입x 일때 SignUp 페이지
남은 과제
style
메인 페이지 스타일 최대넓이 1200px, 최소넓이 800px, 가운데 배치 -> 스타일 컴포넌트 만들어보기
상세 페이지 스타일 만들기
styled Component Warning
컴포넌트 내에 styled는 적용하면 안된다. -> 컴포넌트는 계속 리렌더링 되기 때문이다.
Prettier 적용 안되는 이유
설정 에서 Default Formatter 를 확인한다. Prettier로 설정되어야 한다.
Vercel로 배포하기
github 연동해서 project추가하면 된다.
심화과제 Lv3
요구사항
-
Modal : 2개
취소, 확인, overlay 클릭시 닫히지 않는 것
닫기 버튼만 있고 overlay 클릭시 닫히는 것 -
Button : 6개
styled-components 이용하여 구현 props 사용
label에 선택적으로 아이콘 넣을 수 있게 -
Input : 2개
1) 일반형식
3자리 수마다 콤마(,) 찍히는 input
form 구현, 저장 버튼을 눌렀을 때 {name: '아무 텍스트', price: "콤마가 없는 금액"} 을 alert -
Select
option들이 나오고 클릭하면 select 값이 변경
부모 요소에 의해 가려지지 않게
Button
들어오는 color의 값에 따라 배경색, 선을 정해주었다.
클릭했을 때 css파일에서는 :를 사용했다면 style component에서는 &:~ 를 사용하면 된다.
export const LargeButton = styled.button`
  cursor: pointer;
  border-radius: 8px;
  color: ${(props) => props.color};
  height: 50px;
  width: 200px;
  border: 3px solid
    ${(props) =>
      props.color === "#000000" ? "rgb(85, 239, 196)" : "rgb(250, 177, 160)"};
  background-color: rgb(255, 255, 255);
  font-weight: 600;
  &:active {
    background-color: ${(props) =>
      props.color === "#000000" ? "rgb(79, 175, 148)" : "rgb(182, 131, 119)"};
  }
`;

export const MidiumButton = styled.button`
  border: none;
  cursor: pointer;
  border-radius: 8px;
  background-color: ${(props) =>
    props.color === "#000000" ? "rgb(85, 239, 196)" : "rgb(250, 177, 160)"};
  color: ${(props) => props.color};
  height: 45px;
  width: 130px;
  &:active {
    background-color: ${(props) =>
      props.color === "#000000" ? "rgb(79, 175, 148)" : "rgb(182, 131, 119)"};
  }
`;

export const SmallButton = styled.button`
  border: none;
  cursor: pointer;
  border-radius: 8px;
  background-color: ${(props) =>
    props.color === "#000000" ? "rgb(85, 239, 196)" : "rgb(250, 177, 160)"};
  color: ${(props) => props.color};
  height: 40px;
  width: 100px;
  &:active {
    background-color: ${(props) =>
      props.color === "#000000" ? "rgb(79, 175, 148)" : "rgb(182, 131, 119)"};
  }
`;
Input
가격 입력처리를 하는 것이 관건이였다.
export const Input = styled.input`
  border: 1px solid rgb(51, 51, 51);
  height: 40px;
  width: 200px;
  outline: none;
  border-radius: 8px;
  padding-left: 12px;
  padding-right: 12px;
`;
App.js
const [name, setName] = useState("");
  const [num, setNum] = useState("");

  // 가격 입력 제어, 정규표현식
  const formatNumber = (value) => {
    const onlyNum = value.replace(/[^\d]/g, "");
    const formattedNumber = onlyNum.replace(/\B(?=(\d{3})+(?!\d))/g, ",");

    return formattedNumber;
  };

  const numberHandler = (event) => {
    const value = event.target.value;
    setNum(formatNumber(value));
  };
다음주에 아이디, 비밀번호에 대해 프로젝트를 하기에 앞서 정규 표현식 공부가 필요하다.
Redux에서 payload라는 key값으로 데이터를 받을 수 있고 바깥에서 저장되어있는 상태를 사용하기 위해서는 useSelector가 필요하며 관련 함수(action)을 수행하기 위해서 useDispatch를 통해 이동한다.
