채팅을 할 수 있는 ChatView 패키지 이용하기
Flutter로 채팅을 구현해보자! 🤩
채팅하는 View를 만들어보고자 pub.dev에 있는 ChatView 패키지를 이용했다.
https://pub.dev/packages/chatview
위 사이트에서도 설명이 친절하게 되어있는 편이지만, 아직 사용한 사람이 많이 없는 것 같아서 내용을 정리해보려한다!
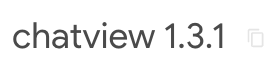
1️⃣ ChatView 설치하기🔥
- 위 사이트에서 복사하기 버튼을 클릭해서 dependencies에 추가해주거나 (제일 최근 버전으로)
dependencies:
chatview: ^1.3.1- 터미널에서 아래 코드를 실행시켜준다.
flutter pub add chatview- ChatView를 사용할 파일에서 아래 코드를 적어준다.
import 'package:chatview/chatview.dart';2️⃣ 채팅 화면 만들기🔥
나는 Scaffold의 AppBar, Drawer도 이용하고자 Scaffold의 body 부분에 ChatView를 넣어주었다. (AppBar, Drawer는 포스팅에서 다루지 않는다.)
ChatView
ChatView는 currentUser, chatController, chatViewState가 필수인 위젯이기 때문에 먼저 세 개를 선언해준다.
ChatController chatController = ChatController(
      initialMessageList: [],
      scrollController: ScrollController(),
      chatUsers: []
  );
ChatUser currentUser = ChatUser(id: '0', name: '');- chatController
: initialMessageList(이전 대화 목록), scrollController, chatUsers(채팅에 참여하는 유저 목록, ChatUser()의 List) 가 필요하다.- initialMessageList를 만들고 싶다면 아래와 같은 메시지 List를 만들어주면 된다. (서버에서 받아올 때도 Message() 로 바꿔주면 됨)
List<Message> messageList = [
  Message(
    id: '1',
    message: "Hi",
    createdAt: createdAt,
    sendBy: userId,
  ),
  Message(
    id: '2',
    message: "Hello",
    createdAt: createdAt,
    sendBy: userId,
  ),
];
- initialMessageList를 만들고 싶다면 아래와 같은 메시지 List를 만들어주면 된다. (서버에서 받아올 때도 Message() 로 바꿔주면 됨)
- currentUser
: 채팅하는 '나' 객체 (id, name 모두 String)
ChatView(
        currentUser: currentUser,
        chatController: chatController,
        chatViewState: ChatViewState.hasMessages,
)- chatViewState
: enum ChatViewState { hasMessages, noData, loading, error } 값 중 원하는 값으로 설정해주면 된다.
기본 설정
- sendMessageConfig
: 메시지 입력창 설정
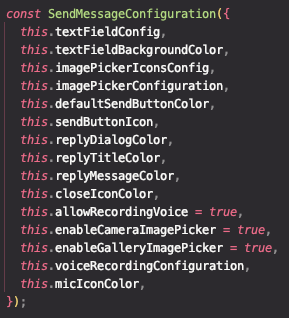
- 기본적으로 카메라/갤러리/녹음도 되도록 만들어져 있는데 필요없어서 나는 false로 설정해줬다.
- 나머지 설정은 이름만 봐도 대충 감이 온다. 위 사진이나 아래 코드를 참고해서 사용하고 싶은 것은 더 설정해주면 된다.
sendMessageConfig: SendMessageConfiguration( // 메시지 입력창 설정
          textFieldBackgroundColor: Colors.grey.shade50,
          enableCameraImagePicker: false, // 카메라 제거
          enableGalleryImagePicker: false, // 갤러리 제거,
          allowRecordingVoice: false, // 녹음(음성메시지) 제거
          sendButtonIcon: const Icon(Icons.send_rounded, color: Colors.blue,),
          textFieldConfig: TextFieldConfiguration(
            maxLines: 35,
            hintText: "메시지를 입력해주세요",
            textStyle: const TextStyle(color: Colors.black),
            borderRadius: BorderRadius.circular(10),
          ),
),- chatBubbleConfig
: 메시지 버블 설정, 내가 보낸 채팅(오른쪽)과 상대방의 채팅(왼쪽)을 나눠서 input/output으로 설정해줄 수 있다.- 거의 밑에 있는 코드에서만 조금씩 바꿔주면 된다. ( text 크기, 색상, senderName 등 )
chatBubbleConfig: ChatBubbleConfiguration(
          outgoingChatBubbleConfig: ChatBubble( // 내가 보낸 채팅
            textStyle: TextStyle(fontSize: SizeConfig.defaultSize * 1.5, color: Colors.white),
            linkPreviewConfig: const LinkPreviewConfiguration(
              backgroundColor: Color(0xff272336),
              bodyStyle: TextStyle(color: Colors.white),
              titleStyle: TextStyle(color: Colors.white),
            ),
            color: Color(0xffFF5C58),
          ),
          inComingChatBubbleConfig: ChatBubble( // 상대방 채팅
            linkPreviewConfig: const LinkPreviewConfiguration(
              backgroundColor: Color(0xff9f85ff),
              bodyStyle: TextStyle(color: Colors.black),
              titleStyle: TextStyle(color: Colors.black),
            ),
            textStyle: TextStyle(fontSize: SizeConfig.defaultSize * 1.5, color: Colors.black),
            senderNameTextStyle: const TextStyle(color: Colors.black),
            color: Colors.grey.shade100,
          ),
),- chatBackgroundConfig
: 채팅방 배경

- 배경을 컬러로 할지, 이미지로 할지 등을 설정할 수 있다.
chatBackgroundConfig: const ChatBackgroundConfiguration( // 채팅방 배경
        backgroundImage: "image URL",
        messageTimeIconColor: Colors.grey,
        messageTimeTextStyle: TextStyle(color: Colors.grey),
        defaultGroupSeparatorConfig: DefaultGroupSeparatorConfiguration(
          textStyle: TextStyle(
            color: Colors.grey,
            fontSize: 17,
          ),
        ),
        backgroundColor: Colors.white,
),- featureActiveConfig
: active한 기능들 설정, 기본적으로 아래와 같이 true, false가 설정되어 있는데, 여기서 바꾸고 싶은 것만 ChatView에서 설정해주면 된다.
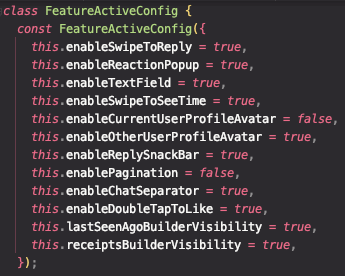
- 밀어서 답장하기, 페이지네이션, 두번 탭으로 좋아요 달기 등이 있다.
featureActiveConfig: const FeatureActiveConfig(
          enableSwipeToReply: false,
          enableReactionPopup: false,
          enableDoubleTapToLike: false,
          enableReplySnackBar: false,
          enableCurrentUserProfileAvatar: false,
          enableSwipeToSeeTime: true,
          enablePagination: true,
        ),
메시지 보내기
- onSendTap 함수를 만들어준다.
- replyMessage는 사용하면 적어주면 되고, 나머지는 Message가 작성될 때마다 Message() 객체 안에 들어갈 수 있도록 넣어주면 된다.
void onSendTap(String message, ReplyMessage replyMessage, Message messageType){
  final message = Message(
    id: '3',
    message: "How are you",
    createdAt: DateTime.now(),
    sendBy: currentUser.id,
    replyMessage: replyMessage,
    messageType: messageType,
  );
  chatController.addMessage(message);
}- ChatView에는 이렇게 설정해준다.
onSendTap: onSendTap,기타 기능
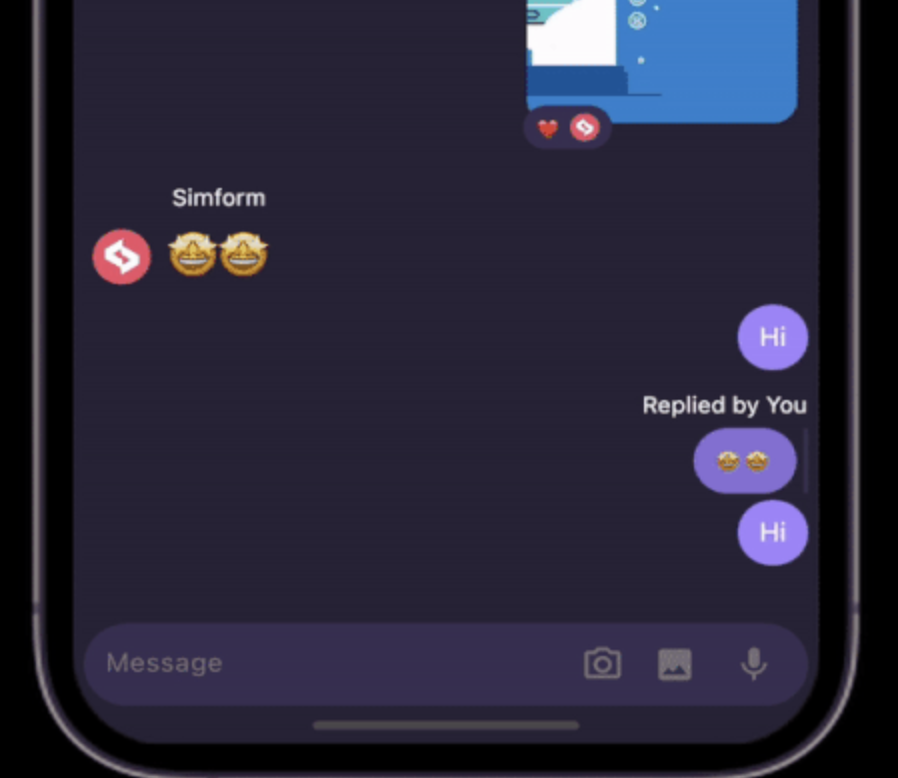
- 채팅에 추가할 이모지 선택하는 뷰
 reactionPopupConfig: ReactionPopupConfiguration(
          emojiConfig: const EmojiConfiguration(
            emojiList: [
              "❤️", "🥰", "👍🏻", "🥺", "💌", "🌟",
            ],
            size: 24,
          ),
          glassMorphismConfig: GlassMorphismConfiguration(
            backgroundColor: Colors.white,
            borderRadius: 14,
            borderColor: Colors.white,
            strokeWidth: 4,
          ),
          shadow: BoxShadow(
            color: Colors.grey.shade400,
            blurRadius: 20,
          ),
          backgroundColor: Colors.grey.shade200,
          // onEmojiTap: (emoji, messageId) =>
          //     chatController. setReaction(
          //       emoji: emoji,
          //       messageId: messageld,
          //       userId: currentUser.id,
          //     ),
),- 채팅에 달리는 이모지 뷰
messageConfig: MessageConfiguration( // 채팅 한 개에 이모지 달아주는 뷰
          messageReactionConfig: MessageReactionConfiguration(
            backgroundColor: Color(0xff383152),
            borderColor: Color(0xff383152),
            reactedUserCountTextStyle:
            TextStyle(color: Colors.white),
            reactionCountTextStyle:
            TextStyle(color: Colors.white),
            reactionsBottomSheetConfig: ReactionsBottomSheetConfiguration(
              backgroundColor: Color(0xff272336),
              reactedUserTextStyle: TextStyle(
                color: Colors.white,
              ),
              reactionWidgetDecoration: BoxDecoration(
                color: Color(0xff383152),
                boxShadow: [
                  BoxShadow(
                    color: Colors.black12,
                    offset: const Offset(0, 20),
                    blurRadius: 40,
                  )
                ],
                borderRadius: BorderRadius.circular(10),
              ),
            ),
          ),
          // imageMessageConfig: ImageMessageConfiguration(
          //   margin: const EdgeInsets.symmetric(horizontal: 12, vertical: 15),
          //   shareIconConfig: ShareIconConfiguration(
          //     defaultIconBackgroundColor: Color(0xff383152),
          //     defaultIconColor: Colors.white,
          //   ),
          // ),
        ),
위에 없는 내용은 ChatView Github 이슈에서도 찾아보면 나오는 경우도 있다!
페이지네이션 및 서버와 통신하는 부분은 추후 업데이트 해볼 예정!