
TypeScript의 클래스
class Car {
	constructor(color) {
		this.color = color; // ❌ error
	}

	start() {
		console.log("start");
	}
}

const bmw = new Car("red");
위 코드는 자바스크립트(ES6)에서 정상적으로 실행되지만 타입스크립트에서는 에러가 발생한다.
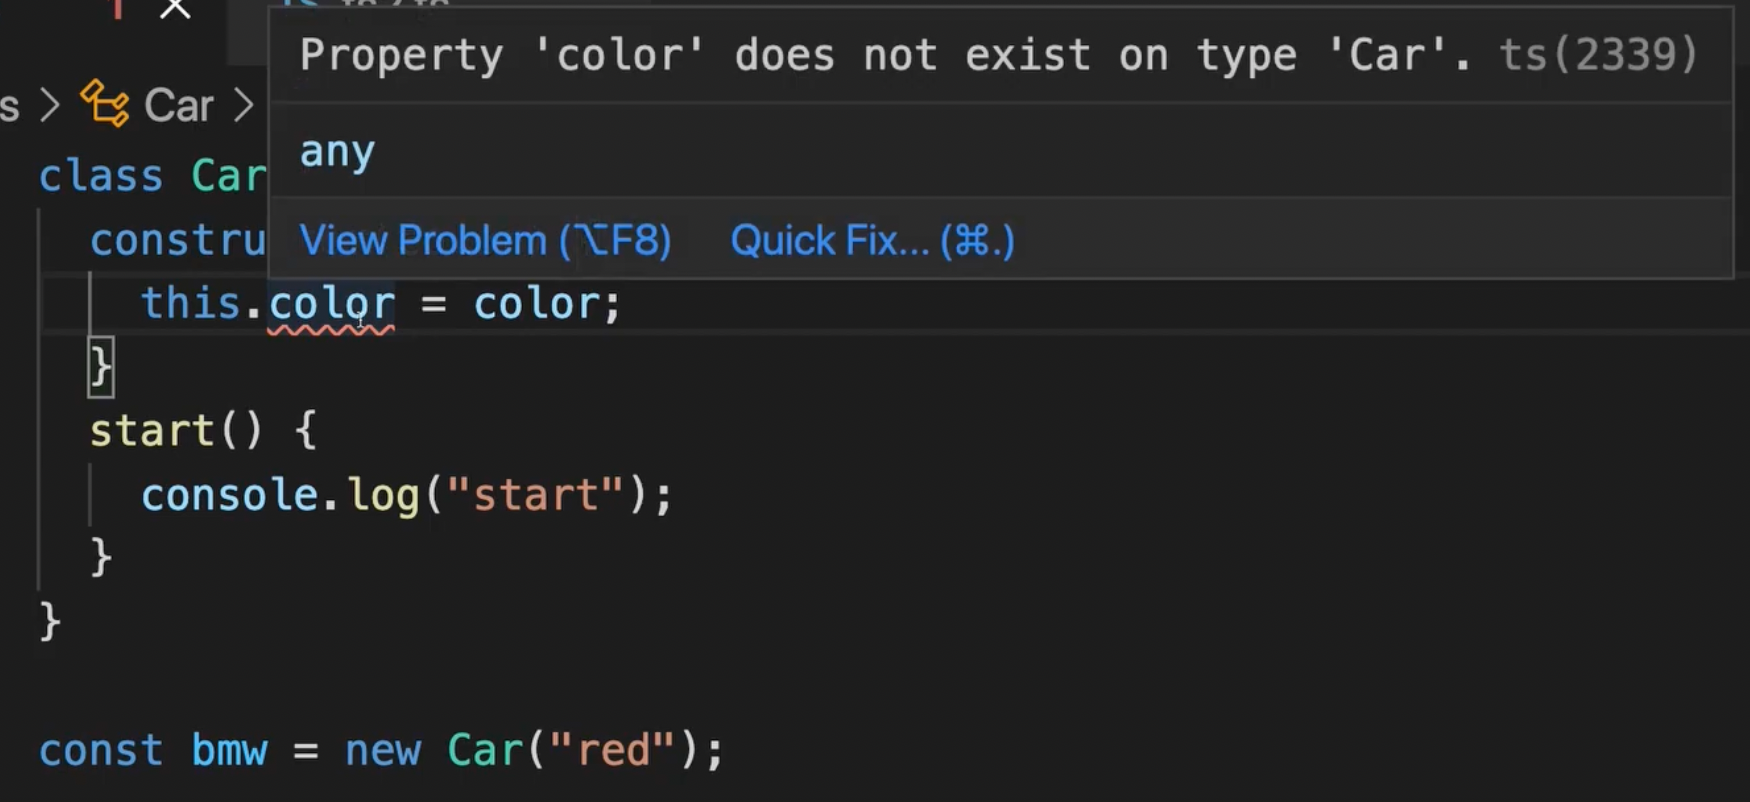
사진과 같이 color 프로퍼티가 Car 에 없다는 에러가 발생한다.
타입스크립트에서 클래스를 작성할 때는 멤버 변수를 미리 선언해야 한다.
class Car {
	// 클래스 프로퍼티를 미리 선언
	color: string;
	constructor(color: string) {
		// 클래스 프로퍼티에 값을 할당
		this.color = color;
	}

	start() {
		console.log("start");
	}
}

const bmw = new Car("red");
멤버 변수를 미리 선언하지 않아도 되는 방법도 있다.
- 접근 제한자 사용
-
접근 제한자(Access modifier) →
public,private,protectedclass Car { // color: string; constructor(public color: string) { this.color = color; } start(){ console.log("start"); } } const bmw = new Car("red");
-
readonly키워드 사용class Car { // color: string; constructor(readonly color: string) { this.color = color; } start(){ console.log("start"); } } const bmw = new Car("red");
접근 제한자 (Access modifier)
자바스크립트에서 ES6의 클래스는 다른 객체 지향 언어들처럼 접근 제한자를 지원하지 않았다.
하지만 타입스크립트에서는 접근 제한자를 지원한다.
접근 제한자는 public, private, protected 가 있다.
- public → 자식 클래스, 클래스 인스턴스 모두 접근 가능 (아무것도 표기하지 않고 작성하면 public이다. 즉, default)
class Car {
	name: string = "car"; // 현재는 public이다. 만약 private으로 바뀌면 아래 showName 메서드 내에서 super.name 에서 에러가 발생한다. (private이기 때문에 자식 클래스 내부에서 사용 불가)
	color: string;
	constructor(color: string) {
		this.color = color;
	}
	start() {
		console.log("start");
	}
}

class Bmw extends Car {
	constructor(color: string) {
		super(color); // super를 호출하지 않으면 에러가 발생한다.
	}
	showName() {
		console.log(super.name); // 멤버 변수 name을 보여주는 showName 메서드.
		// super의 name, 즉 Car의 name이 public 이기 때문에 자식 클래스 내부에서 접근해도 문제없이 사용 가능
	}
}

const z4 = new Bmw("black");
- private → 해당 클래스 내부에서만 접근 가능 (자식 클래스, 클래스 인스턴스에서 접근 불가)
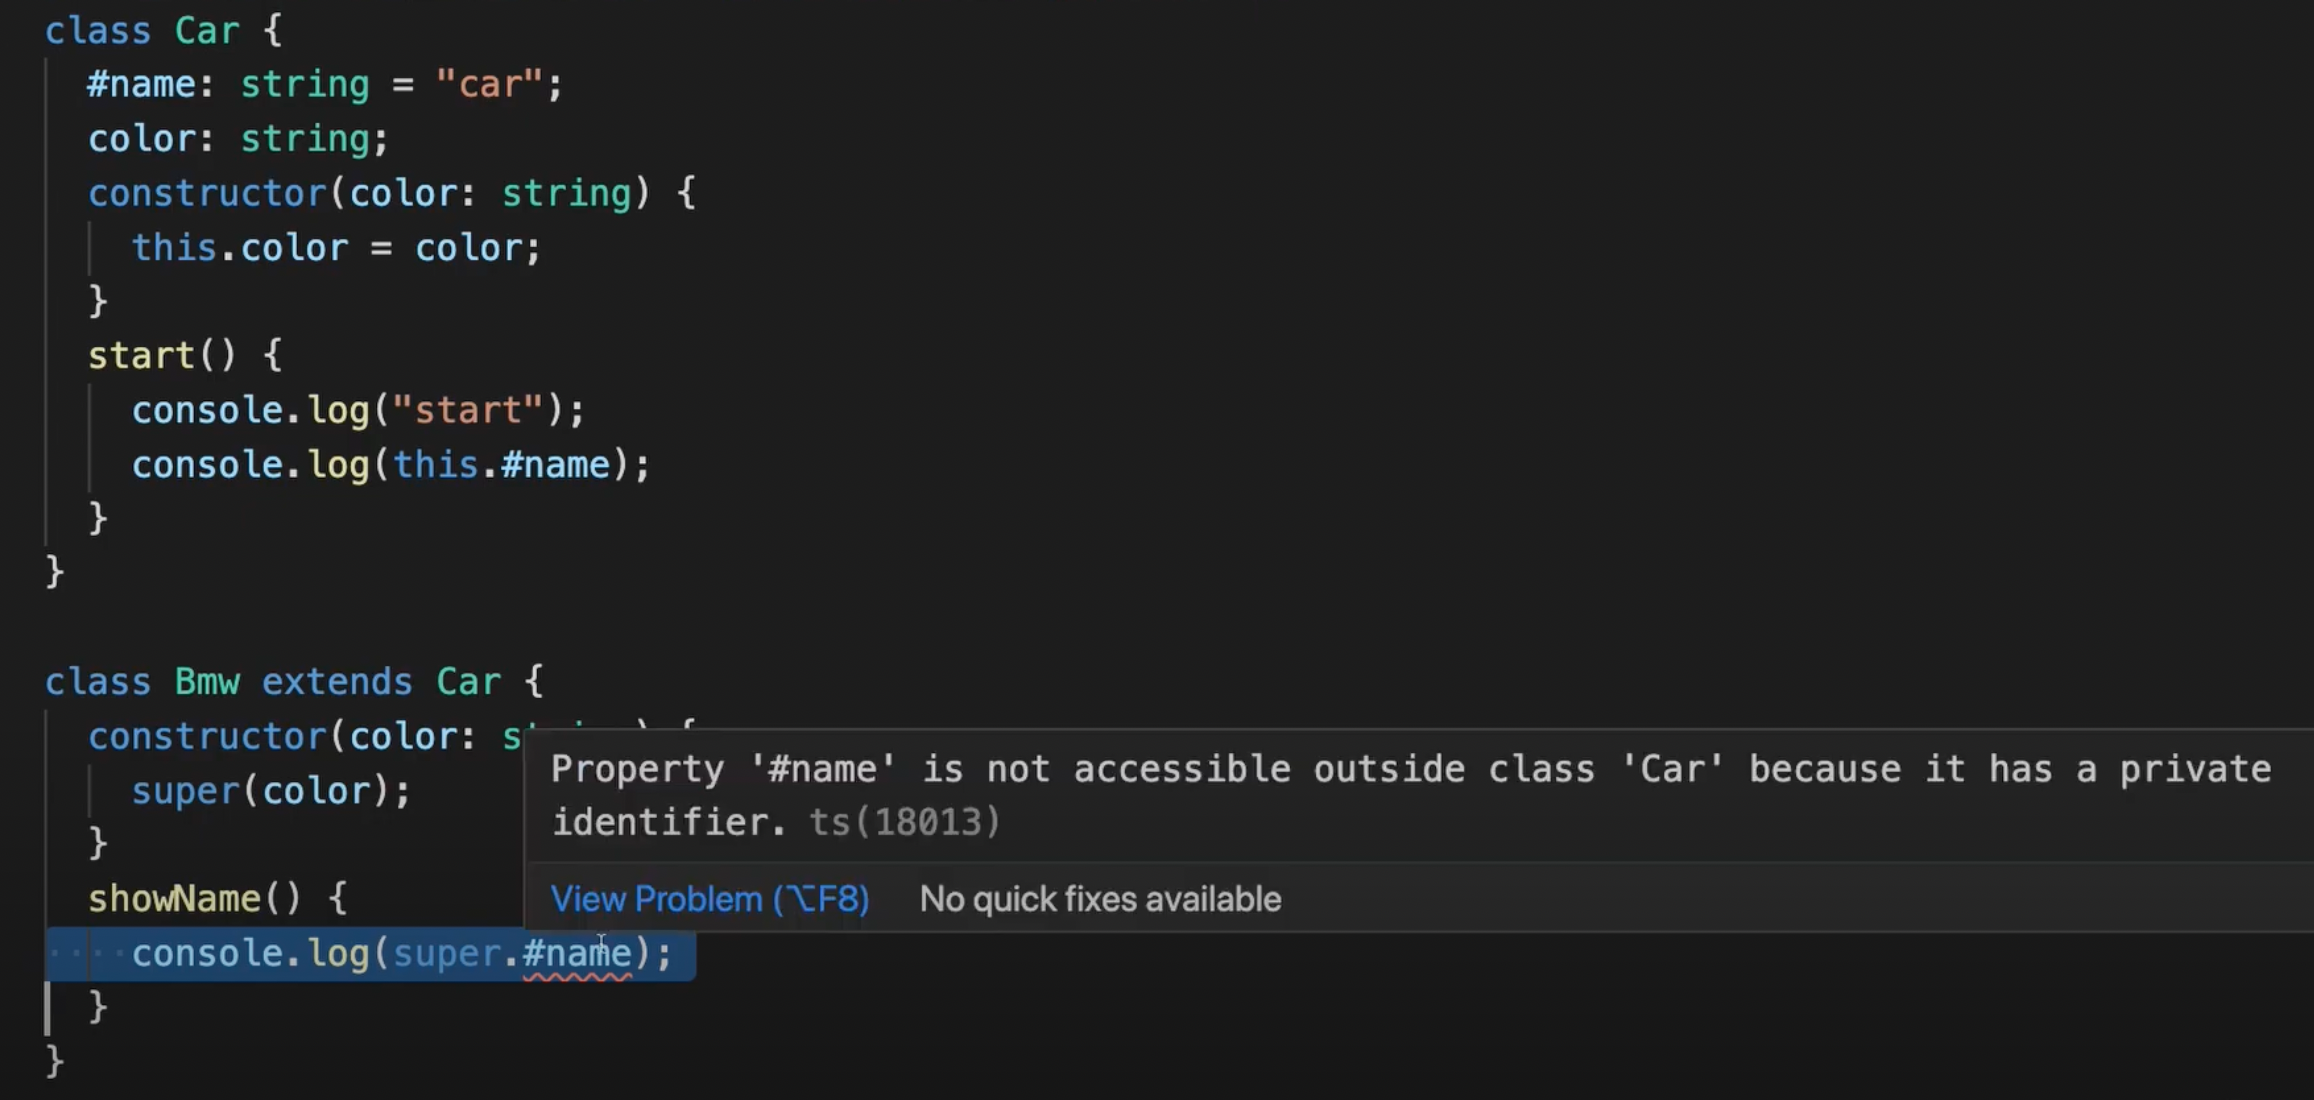
class Car { private name: string = "car"; color: string; constructor(color: string) { this.color = color; } start() { console.log("start"); console.log(this.name); // name이 private이기 때문에 Car 내부에서만 접근할 수 있다. } } class Bmw extends Car { constructor(color: string) { super(color); // super를 호출하지 않으면 에러가 발생한다. } showName() { console.log(super.name); // ❌ error // super의 name, 즉 Car의 name이 private 이기 때문에 자식 클래스 내부에서 접근 불가 } } const z4 = new Bmw("black");private키워드 대신#을 대신해서 사용할 수 있다. (기능상의 차이는 없다.)#을 사용할 경우에는 코드 내 해당 프로퍼티 전부에#을 사용한다.class Car { #name: string = "car"; color: string; constructor(color: string) { this.color = color; } start() { console.log("start"); console.log(this.#name); } } class Bmw extends Car { constructor(color: string) { super(color); // super를 호출하지 않으면 에러가 발생한다. } showName() { console.log(super.#name); // ❌ error // super의 name, 즉 Car의 name이 private 이기 때문에 자식 클래스 내부에서 접근 불가 } } const z4 = new Bmw("black");
- protected → 자식 클래스에서 접근이 가능
class Car {
	protected name: string = "car";
	color: string;
	constructor(color: string) {
		this.color = color;
	}
	start() {
		console.log("start");
		console.log(this.name); // name이 private이기 때문에 Car 내부에서만 접근할 수 있다.
	}
}

class Bmw extends Car {
	constructor(color: string) {
		super(color); // super를 호출하지 않으면 에러가 발생한다.
	}
	showName() {
		console.log(super.name);
	}
}

const z4 = new Bmw("black");
public과 protected의 차이점
public과 protected 모두 자식 클래스에서 접근이 가능하다. 그렇다면 이 둘의 차이점은 무엇일까?
public으로 선언하면 자식 클래스, 클래스 인스턴스 모두 접근이 가능하다.
protected는 자식 클래스에서 접근 가능하지만, 클래스 인스턴스에서는 접근이 불가하다.
| public | private | protected | |
|---|---|---|---|
| 해당 클래스 내부 | O | O | O |
| 자식 클래스 내부 | O | X | O |
| 클래스 인스턴스 | O | X | X |
class Car {
	protected name: string = "car";
	color: string;
	constructor(color: string) {
		this.color = color;
	}
	start() {
		console.log("start");
		console.log(this.name); // name이 private이기 때문에 Car 내부에서만 접근할 수 있다.
	}
}

class Bmw extends Car {
	constructor(color: string) {
		super(color); // super를 호출하지 않으면 에러가 발생한다.
	}
	showName() {
		console.log(super.name);
	}
}

const z4 = new Bmw("black");
console.log(z4.name); // ❌ error! 클래스 인스턴스에서 접근 불가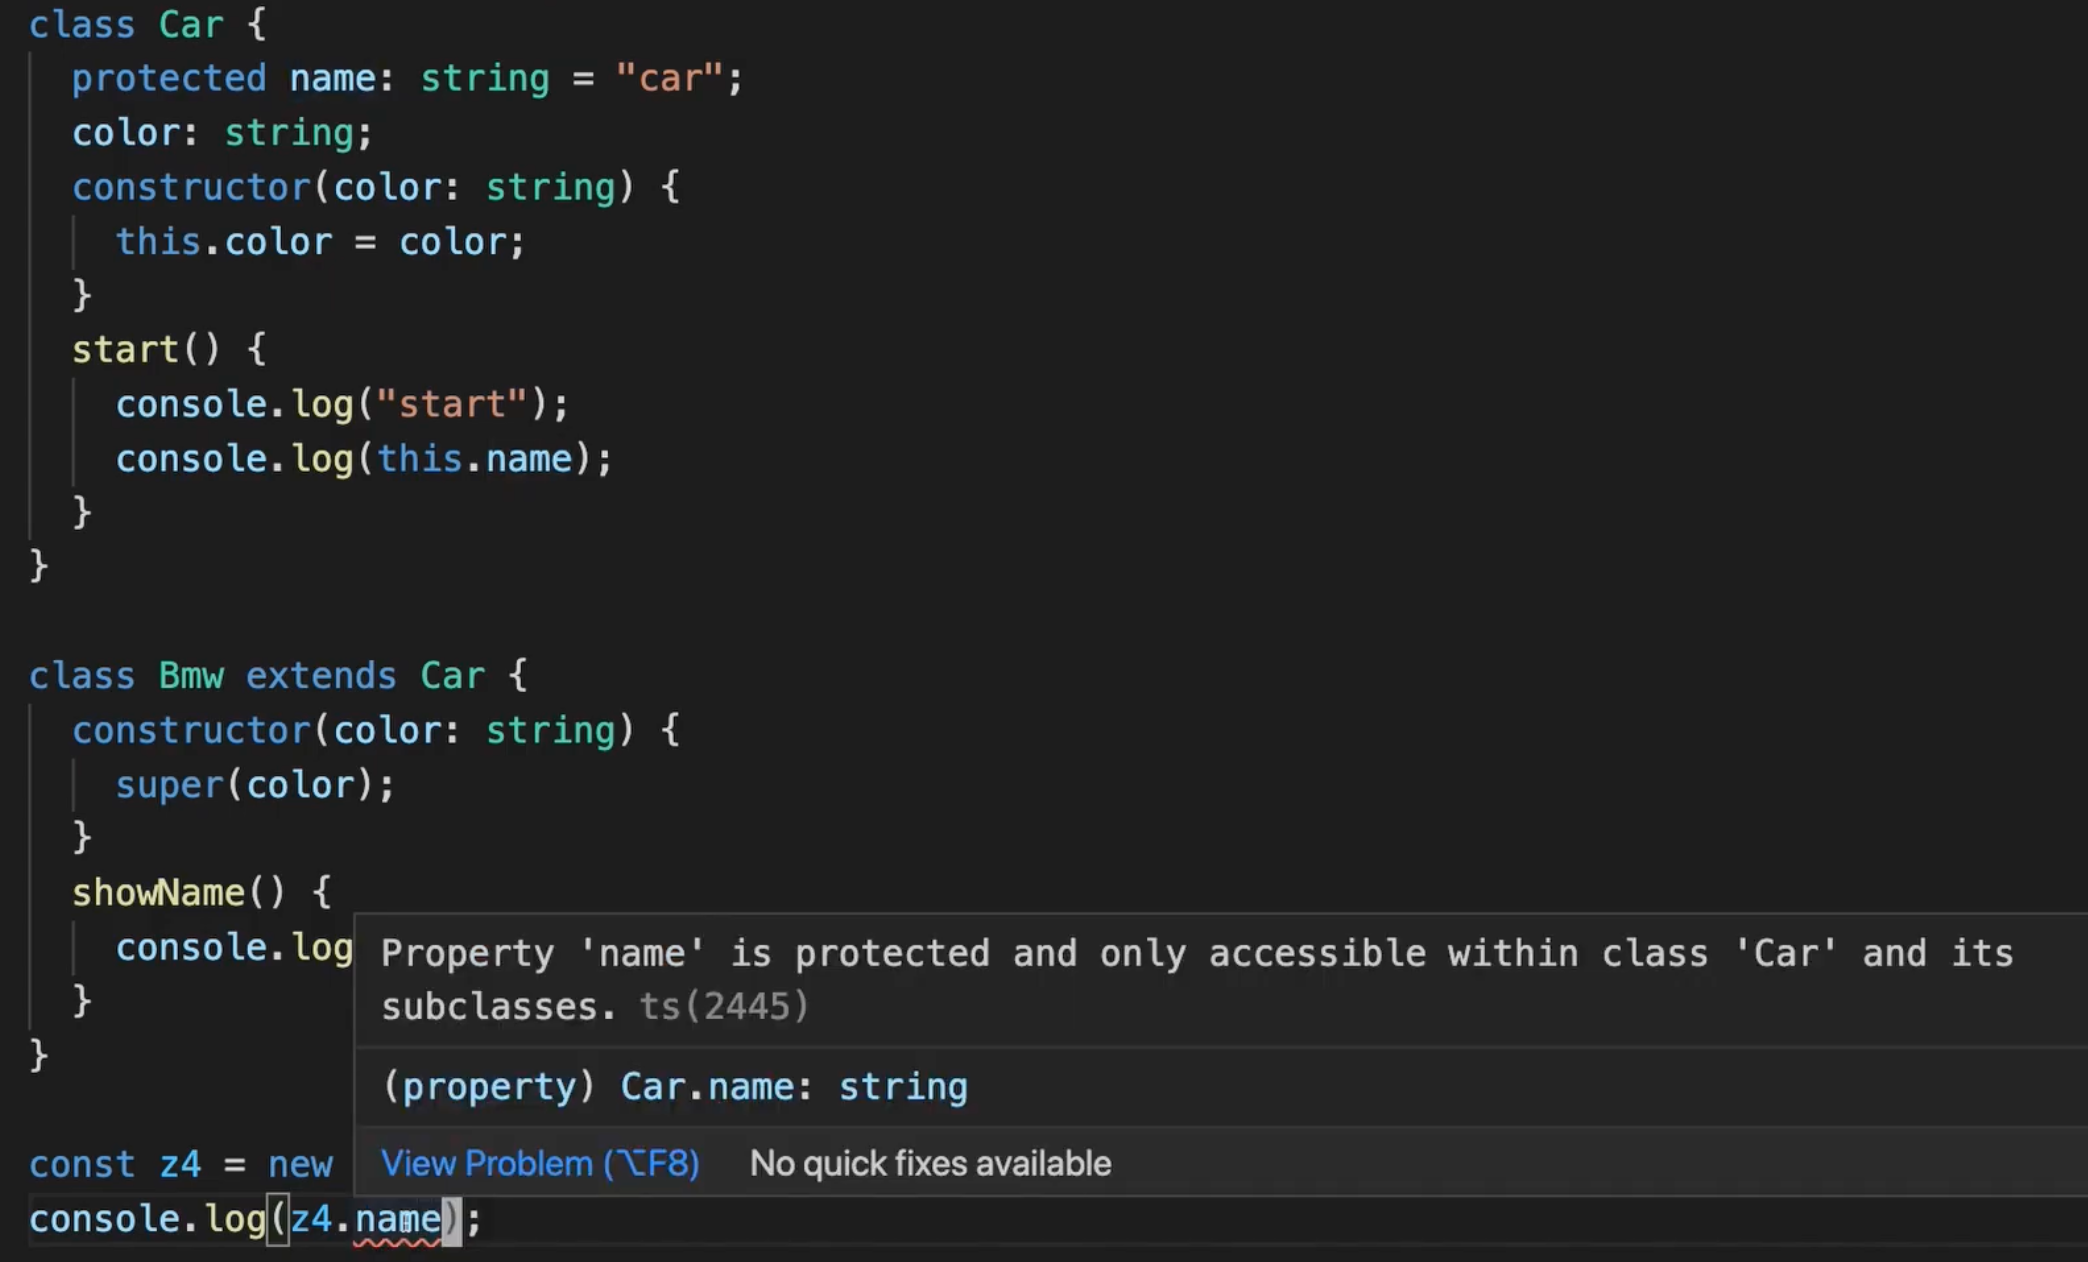
public 프로퍼티는 아래와 같이 수정할 수 있다.
class Car {
	name: string = "car"; // public 프로퍼티
	color: string;
	constructor(color: string) {
		this.color = color;
	}
	start() {
		console.log("start");
	}
}

class Bmw extends Car {
	constructor(color: string) {
		super(color);
	}
	showName() {
		console.log(super.name);
	}
}

const z4 = new Bmw("black");
console.log(z4.name);
z4.name = "zzzz4"; // 수정 가능
constructor 파라미터에 접근 제한자 사용할 경우
클래스 내부 constructor 함수에 전달되는 파라미터에도 접근 제한자를 선언할 수 있다.
접근 제한자가 사용된 생성자 파라미터는 암묵적으로 클래스 프로퍼티로 선언되고 생성자 내부에서 별도의 초기화가 없어도 암묵적으로 초기화가 수행된다.
출처: https://poiemaweb.com/typescript-class
class Car {
	constructor(public color: string) {
		// ... 생략
	}
}

const car = new Car('myCar');
console.log(car.color); // ⭕️

class Bus {
	constructor(private wheel: number) {
		// ... 생략
	}
}

const bus = new Bus('myBus');
console.log(bus.wheel); // ❌ error!
wheel 프로퍼티는 private으로 선언되었으므로, bus.wheel는 Bus 클래스 내부에서만 참조가 가능하다.
constructor 파라미터에 접근 제한자 사용하지 않을 경우
constuctor 파라미터에 접근 제한자를 사용하지 않으면 constuctor 내부에서만 참조가 가능한 지역 변수가 된다.
즉, constructor 외부에서는 접근이 불가하다.
readonly
name을 수정할 수 없게 하려면 readonly 키워드를 사용하면 된다.
class Car {
	readonly name: string = "car";
	color: string;
	constructor(color: string) {
		this.color = color;
	}
	start() {
		console.log("start");
	}
}

class Bmw extends Car {
	constructor(color: string) {
		super(color);
	}
	showName() {
		console.log(super.name);
	}
}

const z4 = new Bmw("black");
console.log(z4.name);
z4.name = "zzzz4"; // ❌ error! readonly 프로퍼티는 수정할 수 없다는 에러가 발생
만약 name을 바꾸고 싶다면 위와 같이 재할당을 할 것이 아니라constructor 내부에서 바꾸는 로직을 작성해야 한다.
class Car {
	readonly name: string = "car";
	color: string;
	constructor(color: string, name) {
		this.color = color;
		this.name = name;
	}
	start() {
		console.log("start");
		console.log(this.name);
	}
}

class Bmw extends Car {
	constructor(color: string, name) {
		super(color, name);
	}
	showName() {
		console.log(super.name);
	}
}

const z4 = new Bmw("black", "zzzz4");
console.log(z4.name);
static
static 키워드를 사용하면 변수를 정적 멤버 변수로 만들 수 있다.
클래스 이름(클래스 인스턴스 X)을 호출해서 접근이 가능하다. (클래스.프로퍼티 로 접근 가능)
class Car {
	readonly name: string = "car";
	color: string;
	static wheels = 4;
	constructor(color: string, name) {
		this.color = color;
		this.name = name;
	}
	start() {
		console.log("start");
		console.log(this.name);
		console.log(this.wheels); // ❌ error
	}
}

class Bmw extends Car {
	constructor(color: string, name) {
		super(color, name);
	}
	showName() {
		console.log(super.name);
	}
}

const z4 = new Bmw("black", "zzzz4");
console.log(z4.name);
console.log(z4.wheels); // ❌ errorstatic으로 선언된 정적 멤버 변수나 메서드는 this를 사용하는 것이 아니라 클래스 이름으로 접근해야 한다.
this나 클래스 인스턴스로 접근하면 에러가 발생한다.
아래 코드와 같이 클래스 이름으로 접근하면 에러가 사라진다.
class Car {
	readonly name: string = "car";
	color: string;
	static wheels = 4;
	constructor(color: string, name) {
		this.color = color;
		this.name = name;
	}
	start() {
		console.log("start");
		console.log(this.name);
		console.log(Car.wheels); // ⭕️
}

class Bmw extends Car {
	constructor(color: string, name) {
		super(color, name);
	}
	showName() {
		console.log(super.name);
	}
}

const z4 = new Bmw("black", "zzzz4");
console.log(z4.name);
console.log(Car.wheels); // ⭕️
추상 클래스
- 추상 클래스는 클래스 이름 앞에
abstract키워드를 사용한다. - 추상 클래스는 인스턴스를 만들 수 없고, 상속을 통해서만 사용이 가능하다.
- 추상 클래스 내부의 추상 메서드는 반드시 추상 클래스를 상속 받은 클래스에서 구현을 해야 한다.
abstract class Car {
	color: string;
	constructor(color: string) {
		this.color = color;
	}
	start() {
		console.log("start");
	}
	abstract doSomething(): void; // 추상 메서드는 추상 클래스를 상속한 클래스 내부에서 구현되어야 한다.
}

const car = new Car("red"); // ❌ error! 추상 클래스는 인스턴스를 만들 수 없다.

// 상속을 통해서만 사용이 가능하다.
class Bmw extends Car {
	constructor(color: string) {
		super(color);
	}
	doSomething() { // 추상 메서드의 이름은 같지만,
		alert(3); // 기능은 다르다.
	}
}

const z4 = new Bmw("black");
추상 클래스는 new 를 이용해서 인스턴스를 만들 수 없다.

💡 클래스에서 추상화란?
프로퍼티나 메서드의 이름만 선언하고, 구체적인 기능은 상속 받는 클래스에서 구현하는 것을 의미한다.
즉, 추상 클래스를 상속한 클래스에서 추상 프로퍼티나 추상 메서드의 이름은 동일하지만, 그 기능은 다양할 수 있다.
References