Component
Generate component
ng generate component first
ng generate component second
ng generate component child
App module
... 중략 ...

import { FirstComponent } from './first/first.component';
import { SecondComponent } from './second/second.component';

@NgModule({
  declarations: [
    AppComponent,
    FirstComponent,
    SecondComponent,
    ChildComponent,
  ],

... 중략 ...
App component
index.html
<!doctype html>
<html lang="en">
<head>
  <meta charset="utf-8">
  <title>AngluarIntro</title>
  <base href="/">
  <meta name="viewport" content="width=device-width, initial-scale=1">
  <link rel="icon" type="image/x-icon" href="favicon.ico">
</head>
<body>
  <app-root></app-root>
</body>
</html>
App component
import {Component, OnDestroy, OnInit} from '@angular/core';

@Component({
  selector: 'app-root',
  templateUrl: './app.component.html',
  styleUrls: ['./app.component.css']
})

// lifecycle OnInit, OnDestory
export class AppComponent implements OnInit, OnDestroy{
  ngOnDestroy(): void {
  }

  ngOnInit(): void {
  }
}
App template
<div style="text-align: center">
  <h1>header</h1>
</div>

<div style="text-align: center">
  <h1>bottom</h1>
</div>
Routing
Routing module setup
app level에서 라우팅 모듈 추가
ng g module app-routing --flat --module-appApp module
... 중략 ...

import { AppRoutingModule } from './app-routing.module';

  imports: [
    BrowserModule,
    AppRoutingModule,
  ],

... 중략  ...
App routing
라우터 모듈을 사용하여 기본적인 라우팅을 구성할 수 있으며 path 설정을 통해 오브젝트의 디테일 id 값을 매핑할 수 있다.
import { NgModule } from '@angular/core';
import { RouterModule, Routes } from '@angular/router';
import {FirstComponent} from "./first/first.component";
import {SecondComponent} from "./second/second.component";

// router
const routes: Routes = [
  { path: '', component: FirstComponent },
  { path: 'first', component: FirstComponent },
  { path: 'sec', component: SecondComponent},
  { path: 'sec/:id', component: SecondComponent},
];

@NgModule({
  imports: [RouterModule.forRoot(routes)],
  exports: [RouterModule]
})
export class AppRoutingModule { }
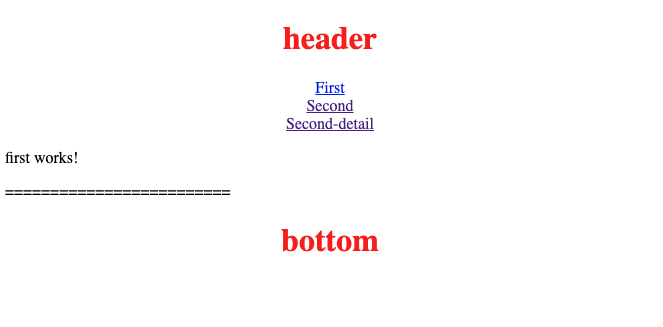
App template
<div style="text-align: center">
  <h1>header</h1>
  <nav>
    <a routerLink="first">First</a><br>
    <a routerLink="sec">Second</a><br>
    <a routerLink="sec/5">Second-detail</a>
  </nav>
</div>


<router-outlet></router-outlet>

<!-- url prams -->
<div style="text-align: center">
  <h1>bottom</h1>
</div>
Second component
import {Component, OnInit} from '@angular/core';
import {ActivatedRoute} from "@angular/router";
import {Location} from "@angular/common";

@Component({
  selector: 'app-second',
  templateUrl: './second.component.html',
  styleUrls: ['./second.component.css']
})
export class SecondComponent implements OnInit{

  constructor(private route: ActivatedRoute,
              private location: Location) { }

  ngOnInit(): void {
    // ID 값을 가져오는 코드
    let ourId:string | null = this.route.snapshot.paramMap.get('id');
    console.log(ourId);
  }
}

Binding, Directive, CSS, Pipe
First component
컴포넌트는 앵귤러에서 애플리케이션을 구성하는 기본 단위이다. 컴포넌트에 생성한 변수를 템플릿에서 바인딩하여 사용할 수 있으며 이를 통해 동적으로 변하는 변수에 대한 처리가 가능하다.
import {Component, OnInit} from '@angular/core';


// form control
@Component({
  selector: 'app-first',
  templateUrl: './first.component.html',
  styleUrls: ['./first.component.css']
})
export class FirstComponent {

  constructor() {}

  // Binding
  name = 'tester';
  today = new Date();
  counter = 0;
  myColor = 'purple'
  people = <any[]>[]

  btnInitCounter() {
    this.counter = 0;
  }

  btnConsoleLog = function () {
    console.log('this is test');
  };

  btnChangeColor(test: string) {
    console.log(test);
    this.myColor = 'red'
  }

  btnCounter() {
    this.counter++;
  }

  peopleLocal = [
    {name: 'sean', age: 24},
    {name: 'you', age: 44},
    {name: 'babo', age: 66},
  ];
}
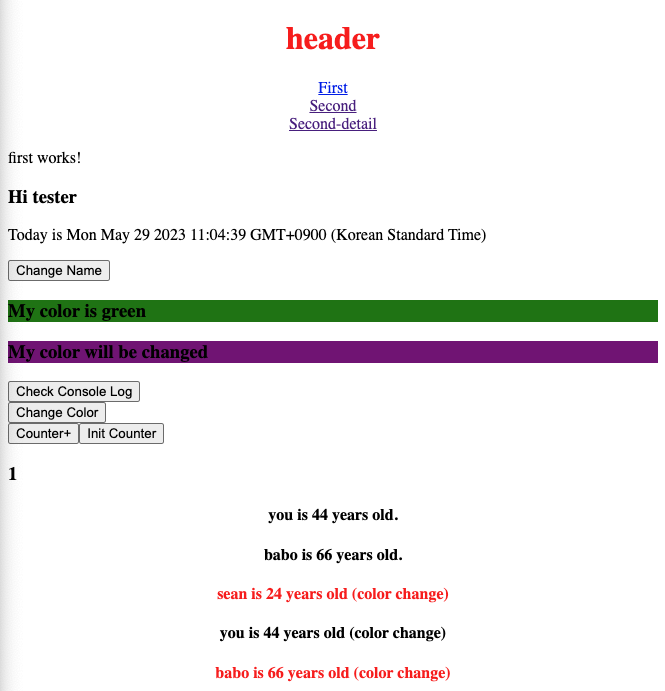
First template
<p>first works!</p>
<!-- variable binding -->
<h3>Hi {{ name }}</h3>
<p>Today is {{ today }}</p>


<!-- name change -->
<button (click)="name='new'">Change Name</button><br>

<!-- CSS directive -->
<h3 [ngStyle]="{'background-color': 'green'}">My color is green</h3>
<h3 [ngStyle]="{'background-color': myColor}">My color will be changed</h3>


<!-- function binding -->
<button (click)="btnConsoleLog()">Check Console Log</button><br>
<button (click)="btnChangeColor('things I wanted')">Change Color</button><br>
<button (click)="btnCounter()">Counter+</button>
<button (click)="btnInitCounter()">Init Counter</button><br>

<h3> {{ counter }} </h3>

<!-- directive -->
<div style="text-align: center">
  <div *ngFor="let person of peopleLocal">
    <h4 *ngIf="person.age > 30">
      {{ person.name }} is {{ person.age }} years old.
    </h4>
  </div>
</div>

<div style="text-align: center">
  <div *ngFor="let person of peopleLocal">
    <h4 *ngIf="counter > 2">
      {{ person.name }} is {{ person.age }} years old. (ngif counter)
    </h4>
  </div>
</div>

<div style="text-align: center">
  <div *ngFor="let person of peopleLocal">
<!--    <h3 [ngClass]="{'red': true}" >-->
    <h4 [ngClass]="{'red': person.age == 24 || person.age > 50}" >
      {{ person.name }} is {{ person.age }} years old (color change)
    </h4>
  </div>
</div>

<!-- pipe -->

<h1>
  my name is {{ name | uppercase}}
</h1>

<h1>
  my name is {{ name | lowercase}}
</h1>

<h1>
  my name is {{ name }}
</h1>

<h3> {{ today | date }} </h3>
<h3> {{ today | date:"short" }} </h3>
<h3> {{ today | date:"long" }} </h3>
<h3> {{ today | date:"full" }} </h3>
<h3> {{ today | date:"fullDate" }} </h3>
<h3> {{ today | date:"dd/MM/yyyy:H:m:s" }} </h3>


<h3> {{ cash | currency }} </h3>
<h3> {{ cash | currency: "EUR" }} </h3>

<p>=========================</p>
First CSS
.red {
  color: red;
}
Service
기존 배열 변수로 사용했던 personLocal을 서비스로 변환하여 사용할 수 있다. 일반적으로 백엔드 API에 데이터를 요청하는 기능을 서비스로 구현한다.
Service setup
ng generate service peopleApp module
import {PeopleService} from "./people.service";

... 중략 ...

// Service added
  providers: [
    PeopleService,
  ],

... 중략 ...
People service
import { Injectable } from '@angular/core';
import {Observable} from "rxjs";

@Injectable({
  providedIn: 'root'
})
export class PeopleService {

  people = [
    {name: 'sean', age: 24},
    {name: 'you', age: 44},
    {name: 'babo', age: 66},
    {name: 'ddd', age: 666}
  ];
  constructor() {}

  allPeople() {
    // we could call external API
    return this.people;
  }
}
First component
기존 peopleLocal 배열 변수를 이용한것과 다르게 peopleService를 통해 people 배열 변수를 호출한다.
import {Component, OnInit} from '@angular/core';
import {PeopleService} from "../people.service";

@Component({
  selector: 'app-first',
  templateUrl: './first.component.html',
  styleUrls: ['./first.component.css']
})
export class FirstComponent implements OnInit {

  constructor(private peopleService : PeopleService) {}

  ngOnInit(): void {

    console.log('component initiated');
    this.counter = 1;
    this.people = this.peopleService.allPeople();
  }

... 중략 ...
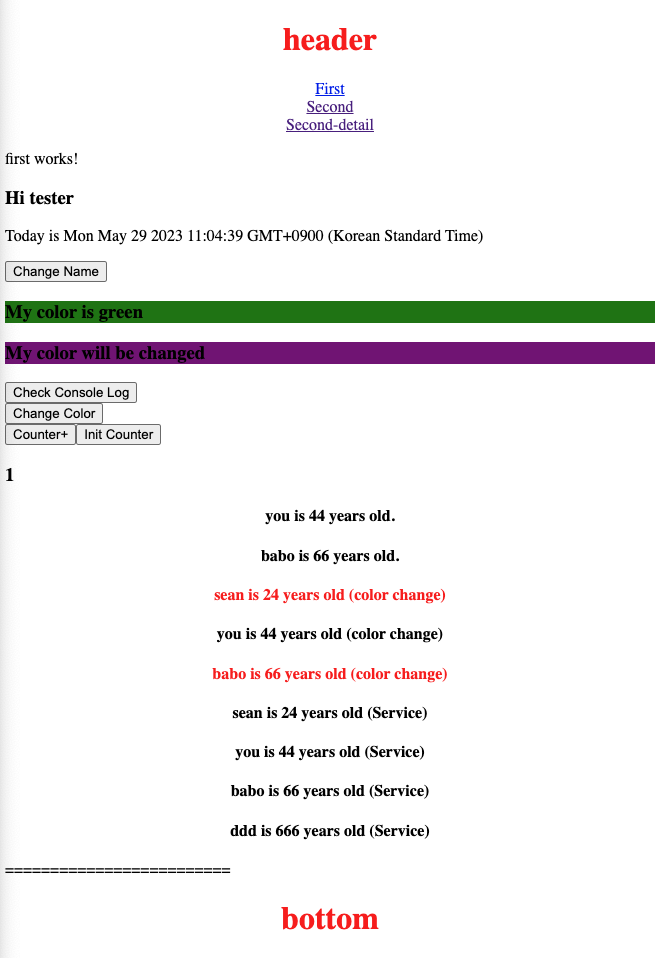
First tempate
... 중략 ...

<!-- Service -->
<div style="text-align: center">
  <div *ngFor="let person of people">
    <h4>{{ person.name }} is {{ person.age }} years old (Service)</h4>
  </div>
</div>

... 중략 ...
Observable
people 변수의 값이 계속 변경된다면 앵귤러에서 변경된 값을 감지하여 업데이트해야 하는데 옵저버블이 그 역할을 수행한다. 옵저버블은 rxjs에 존재하는 기능으로 특정 변수를 구독(subscribe)하여 변화를 감지하고 변경된 데이터를 수신할 수 있게 해준다.
Poeple service
newObservable에서 people 변수를 구독한다. (변화를 감지하여 업데이트하겠다는 의미)
import { Injectable } from '@angular/core';
import {Observable} from "rxjs";

@Injectable({
  providedIn: 'root'
})
export class PeopleService {
  // observable
  newObservable$ = new Observable(observer => {
    observer.next(this.people);
    observer.next('hi')
  });

  people = [
    {name: 'sean', age: 24},
    {name: 'you', age: 44},
    {name: 'babo', age: 66},
    {name: 'ddd', age: 666}
  ];
  constructor() {

  }

  allPeople() {
    // we could call external API
    return this.people;
  }
}
First component
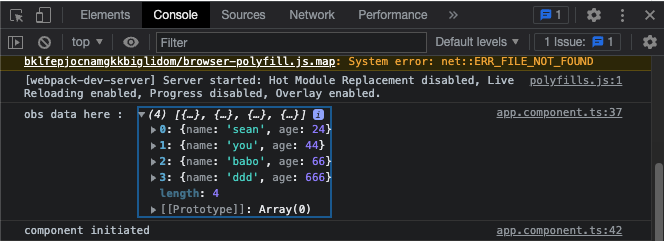
앵귤러 라이프사이클 중 가장 초기 단계인 ngOnInit 부분에 옵저버블을 추가하여 콘솔로 옵저버블이 감지한 값을 확인할 수 있다. 추후 개발 시 적절한 라이프사이클 훅을 사용하여 변화된 값을 감지할 수 있다.
export class FirstComponent implements OnInit {

  constructor(private peopleService : PeopleService) {}
  people = <any[]>[]

  ngOnInit(): void {
      // observables
      this.peopleService.newObservable$.subscribe(
        data => {
          console.log('obs data here : ', data)
        }, error => {
          console.log('error')
        }
      )
      console.log('component initiated');
      this.counter = 1;
      this.people = this.peopleService.allPeople();
    }
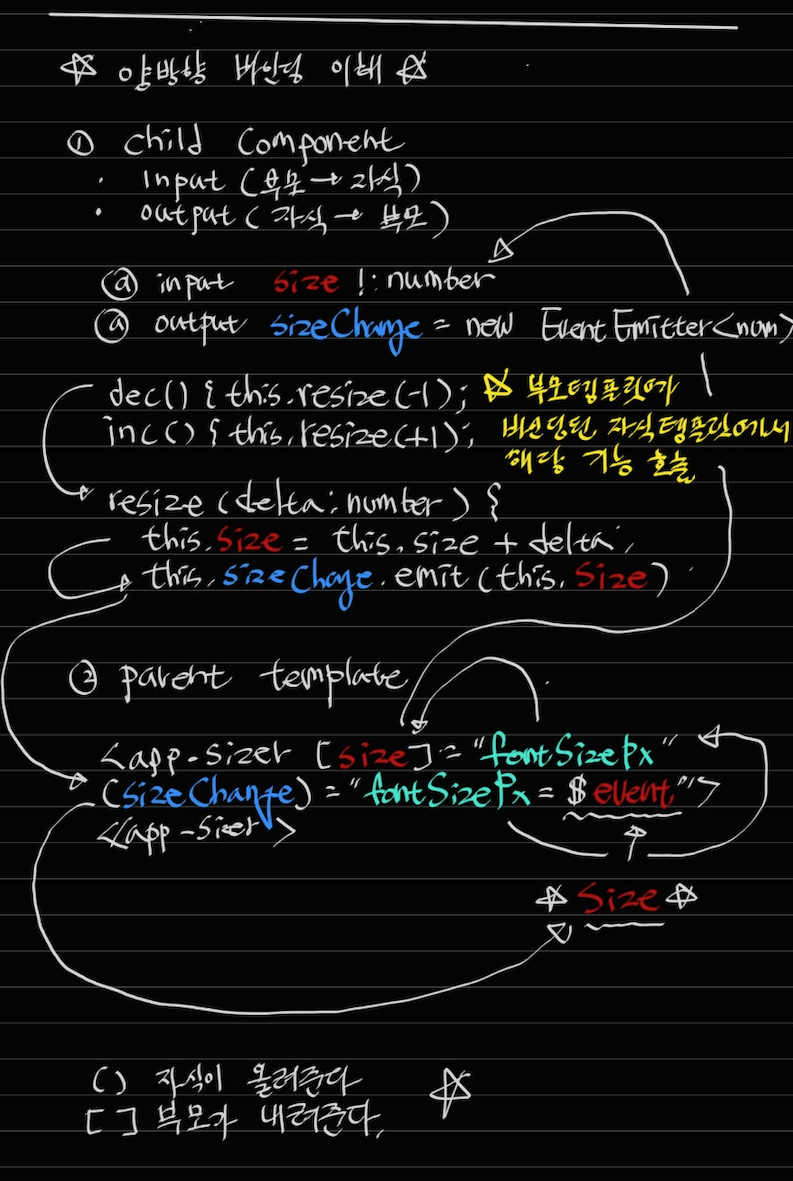
Binding (Parent - Child)
Child component
import {Component, EventEmitter, Input, OnInit, Output} from '@angular/core';

@Component({
  selector: 'app-child',
  templateUrl: './child.component.html',
  styleUrls: ['./child.component.css']
})
export class ChildComponent implements OnInit{
  @Input() animal: string | undefined;
Child tempalte
<p>child works!</p>
<p>child page : {{ animal }}</p>
Second component
import {Component, OnInit} from '@angular/core';
import {ActivatedRoute} from "@angular/router";
import {Location} from "@angular/common";

@Component({
  selector: 'app-second',
  templateUrl: './second.component.html',
  styleUrls: ['./second.component.css']
})
export class SecondComponent implements OnInit{

  constructor(private route: ActivatedRoute,
              private location: Location) { }

  ngOnInit(): void {
    let ourId:string | null = this.route.snapshot.paramMap.get('id');
    console.log(ourId);
  }
  myAnimal = 'dog';
}
Second template
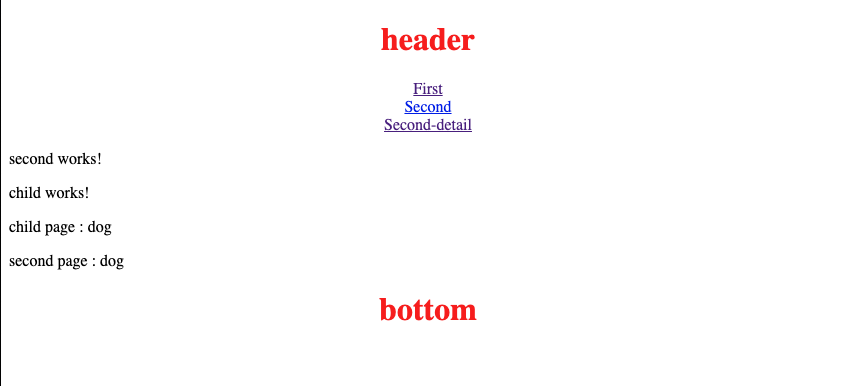
<app-child>~ 코드에서 자식 컴포넌트의 animal에 부모 컴포넌트의 myAnimal 값을 지정한다. app-child 템플릿은 second 템플릿에서 호출되어 myAnimal 값인 dog가 animal 값으로 적용되어 보여진다.
<p>second works!</p>
<app-child [animal]="myAnimal"></app-child>
<p>second page : {{ myAnimal }}</p>
Binding (Child - Parent)
Child component
import {Component, EventEmitter, Input, OnInit, Output} from '@angular/core';

@Component({
  selector: 'app-child',
  templateUrl: './child.component.html',
  styleUrls: ['./child.component.css']
})
export class ChildComponent implements OnInit{
  @Input() animal: string | undefined;
  @Output() changed = new EventEmitter();

  ngOnInit(): void {
    this.changed.emit('Horse');
  }

}
Second component
import {Component, OnInit} from '@angular/core';
import {ActivatedRoute} from "@angular/router";
import {Location} from "@angular/common";

@Component({
  selector: 'app-second',
  templateUrl: './second.component.html',
  styleUrls: ['./second.component.css']
})
export class SecondComponent implements OnInit{

  constructor(private route: ActivatedRoute,
              private location: Location) { }

  ngOnInit(): void {
    let ourId:string | null = this.route.snapshot.paramMap.get('id');
    console.log(ourId);
  }
  myAnimal = 'dog';


  childAnimal = '';
  childChanged(event: string) {
    this.childAnimal = event;
    console.log(this.childAnimal)
  }
}
Second template
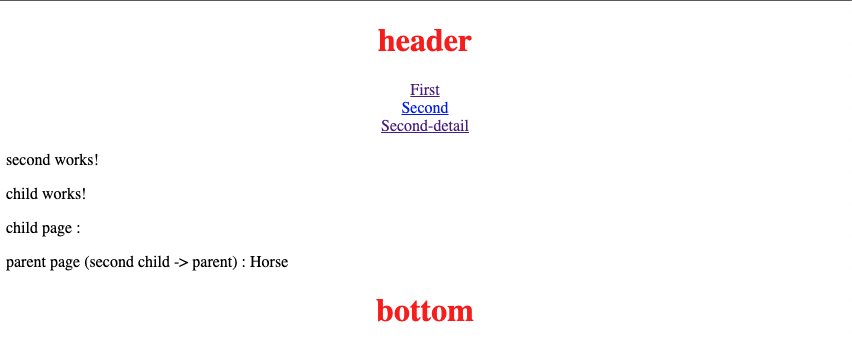
자식 컴포넌트의 changed에서 emit 이벤트가 발생하면 해당 이벤트의 값(Horse)을 부모 컴포는트의 childChanged('horse')의 인자로 전달하여 호출한다. 이를 통해 부모 컴포넌트는 childAnimal 값을 Horse로 변경한다.
<p>second works!</p>

<app-child (changed)="childChanged($event)"></app-child>
<p> parent page (second) : {{ childAnimal }} </p>
Binding (Two way binding)
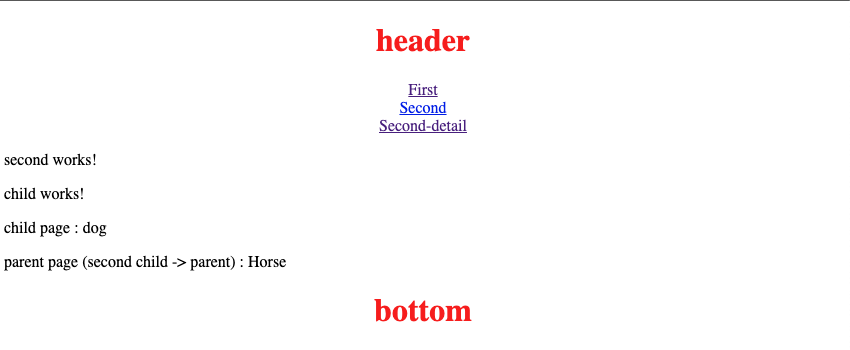
Second template
<p>second works!</p>

<app-child [animal]="myAnimal"
(changed)="childChanged($event)"></app-child>
<p> parent page (second child -> parent) : {{ childAnimal }} </p>
Second component
... 중략 ...

export class SecondComponent implements OnInit{
	name = 'show'

... 중략 ...
Second template (ngModel)
자주 사용되는 ngModel은 양방향 바인딩을 기반하여 구성되었다.
<input type="text" [(ngModel)]="name" />