
↗️이러한 아키텍쳐를 가진 간단한 웹 앱을 구축해보쟛!
1. 웹 앱 만들기
: AWS Amplify 콘솔을 사용하여 웹 애플리케이션을 위한 정적 리소스를 배포
1.2. Amplify 콘솔을 사용하여 웹 앱 만들기
index.html 작성후 zip파일로 압축
<!DOCTYPE html>
<html>
<head>
    <meta charset="UTF-8">
    <title>Hello World</title>
</head>

<body>
    Hello World
</body>
</html>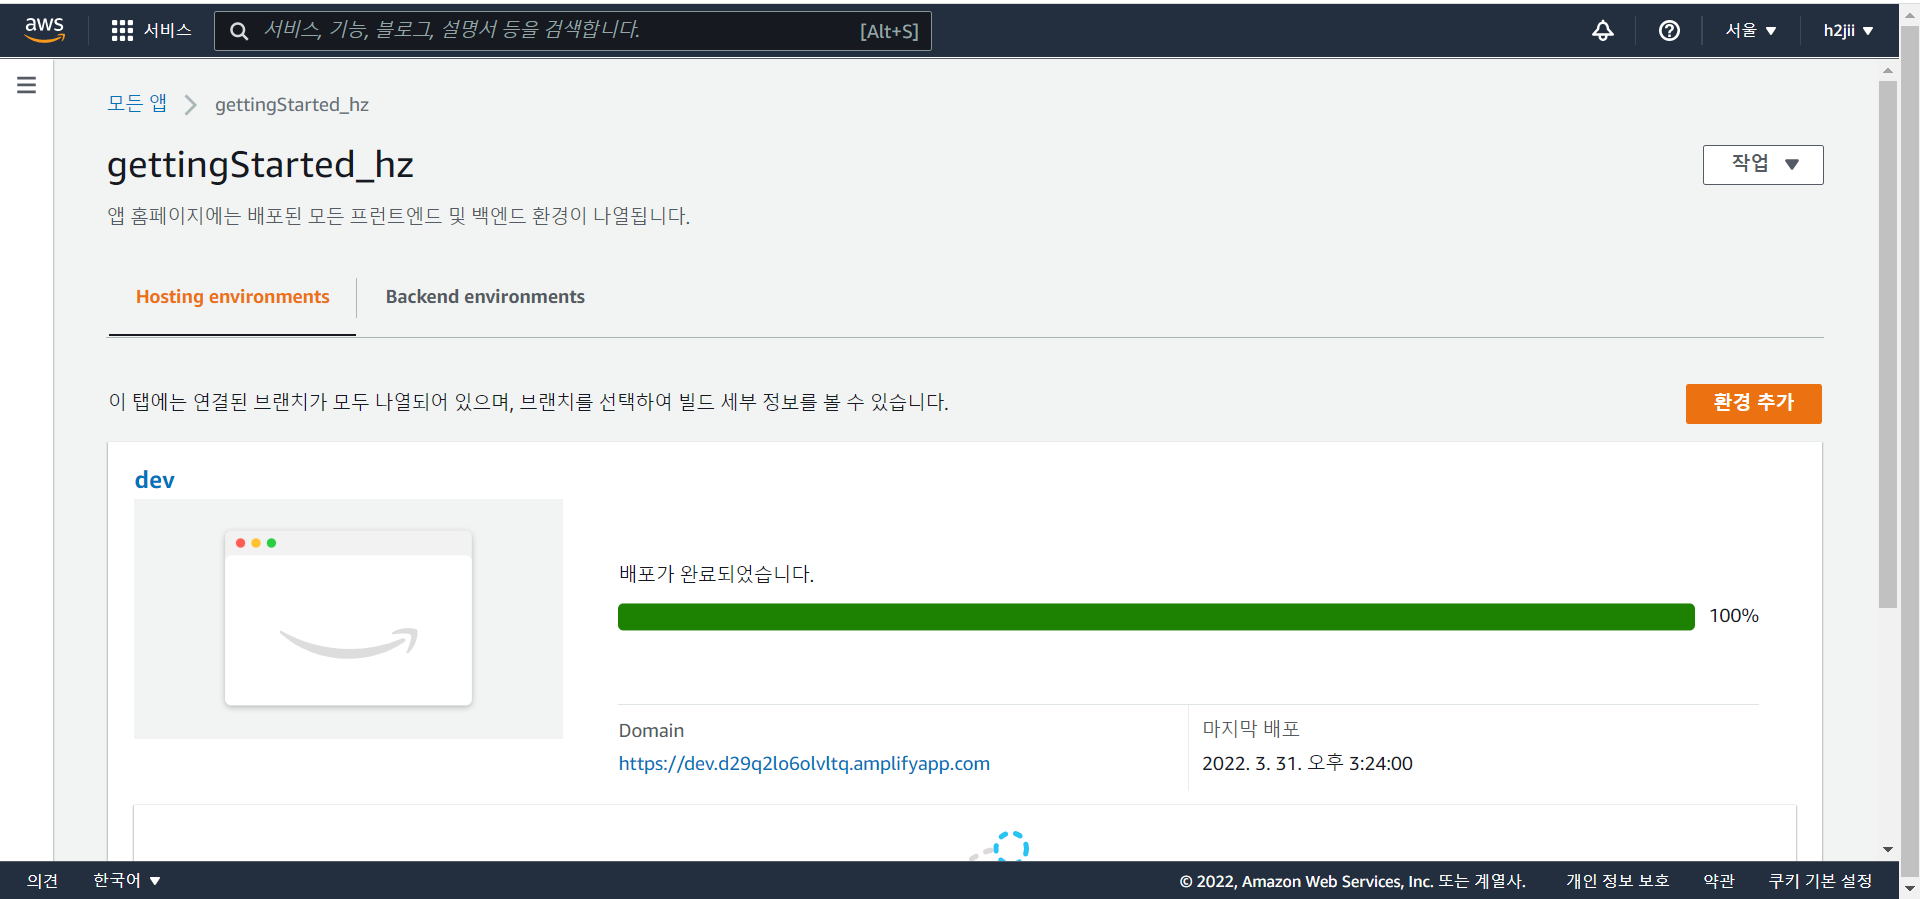
✔️ Amplify Hosting
✔️ Git 공급자 없이 배포
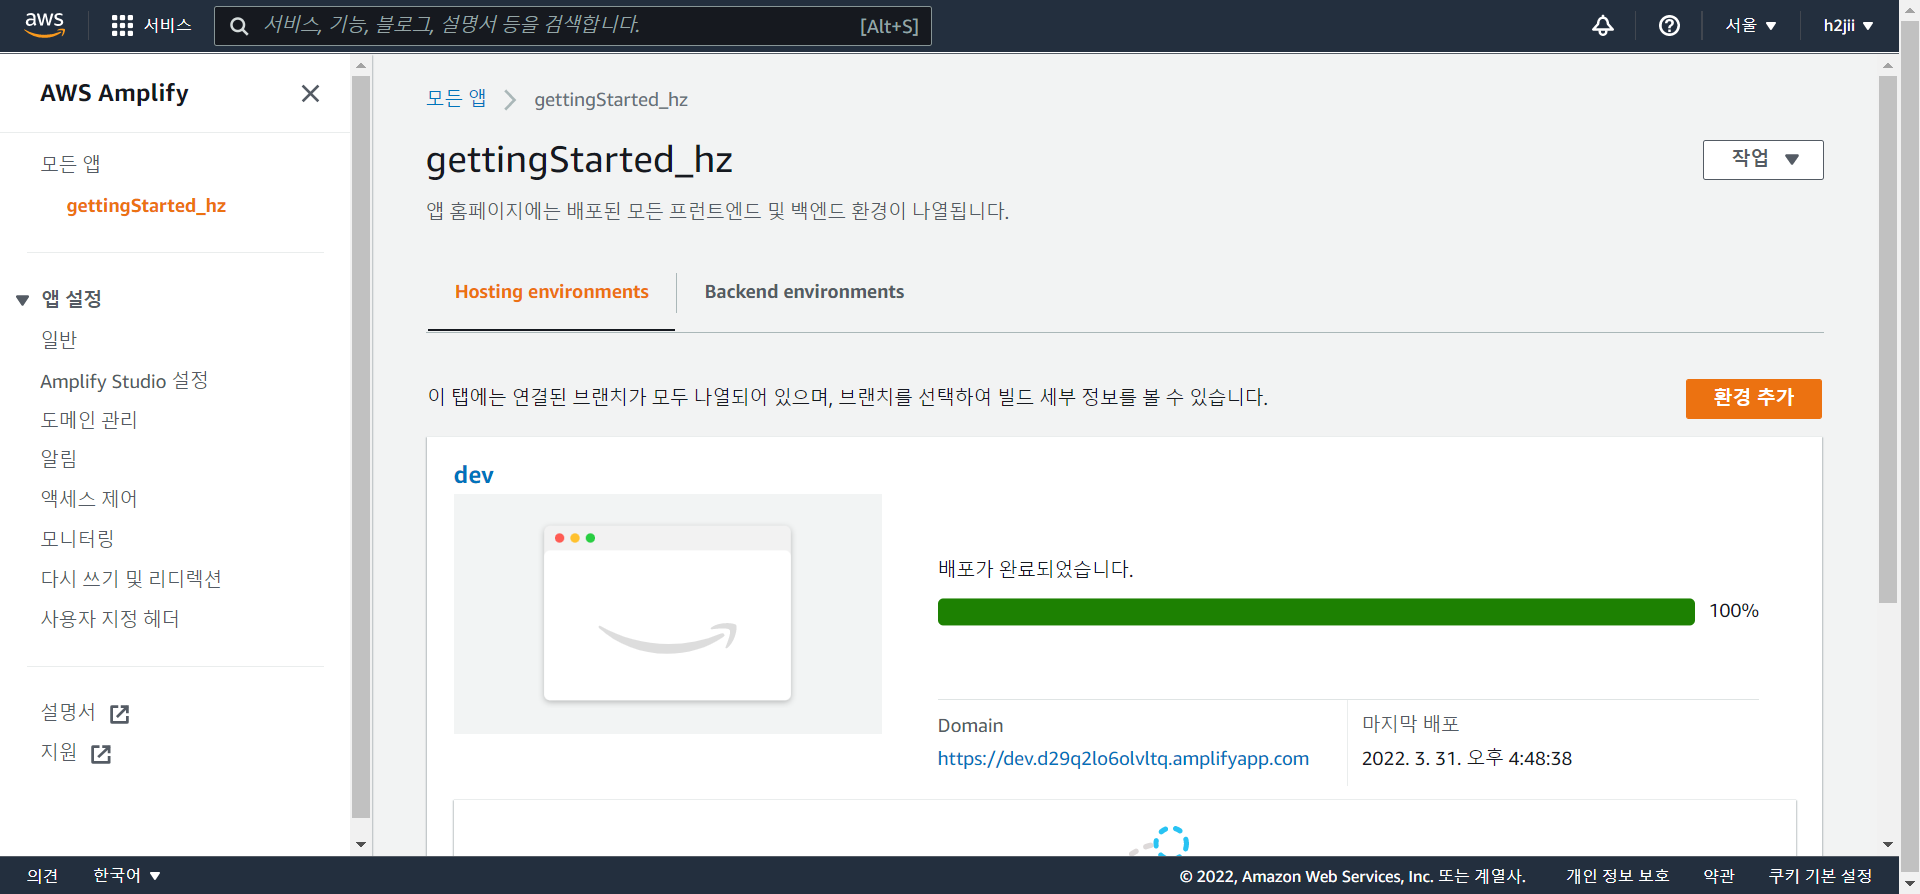
App Name : gettingStarted_hz
환경이름 : dev
drag&drop으로 html.zip 끌어넣기
도메인 클릭시 hello world 홈페이지가 나타나면 성공
2. 서버리스 함수 작성
: AWS Lambda를 사용하여 서버리스 함수를 작성
3. 서버리스 함수를 웹 앱에 연결
: API Gateway를 사용하여 서버리스 함수를 배포
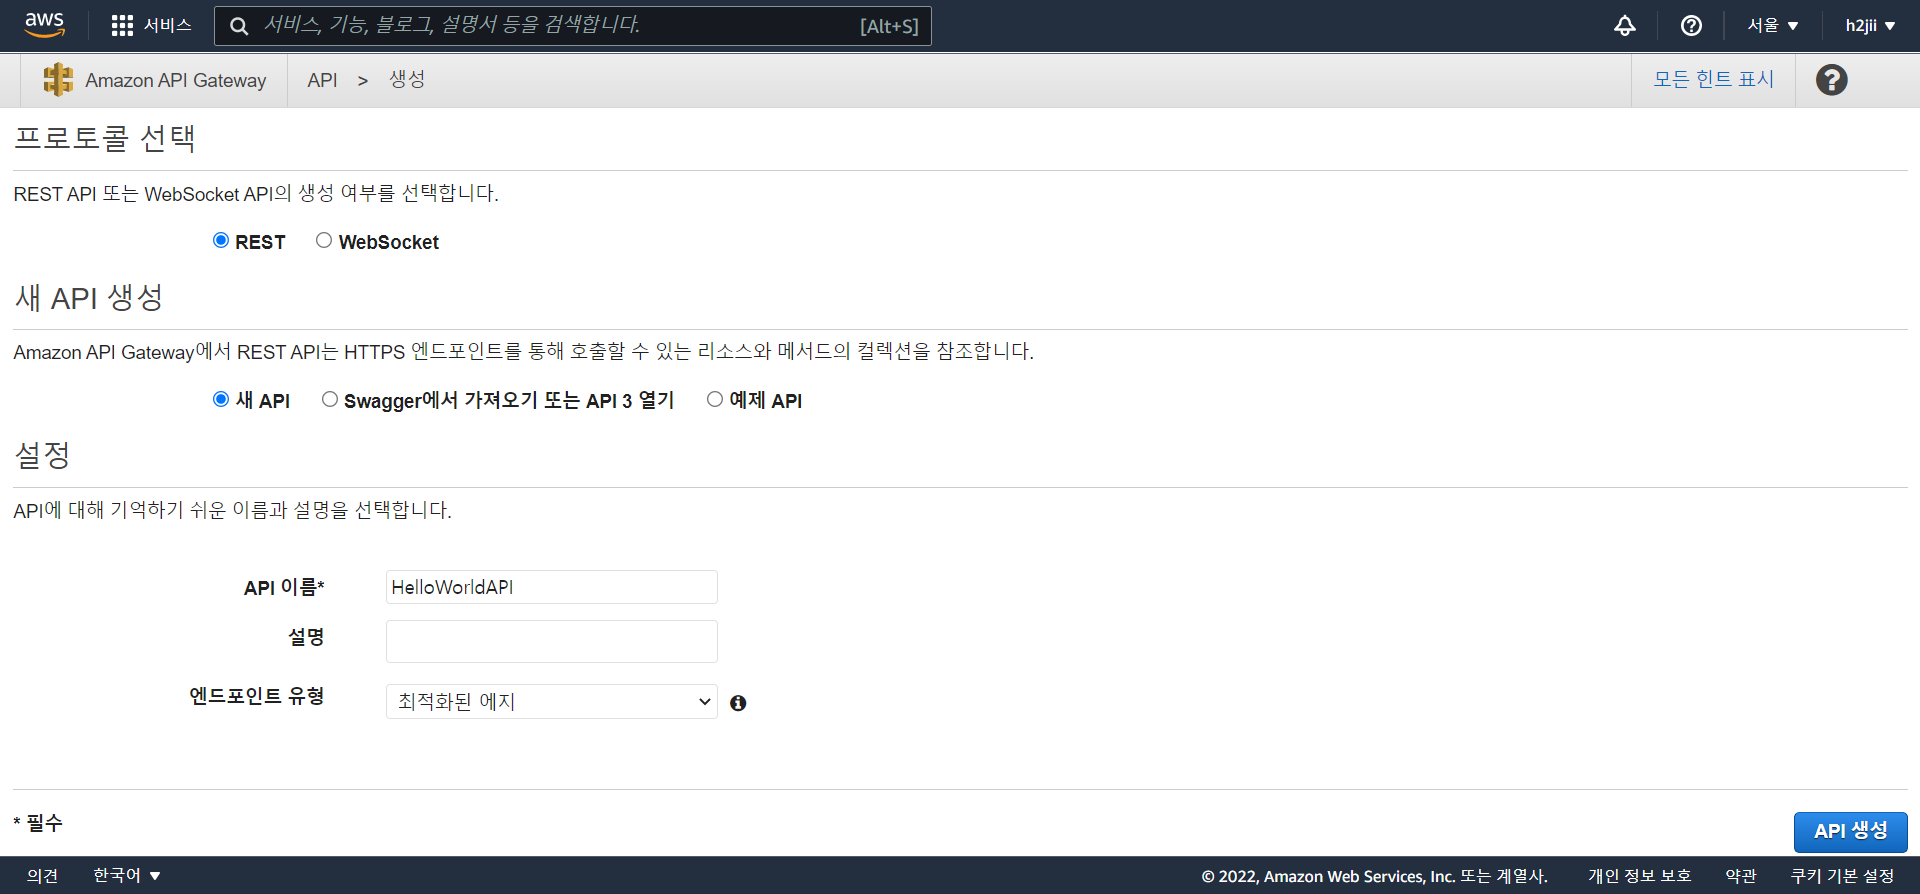
3.1. 새 REST API 생성
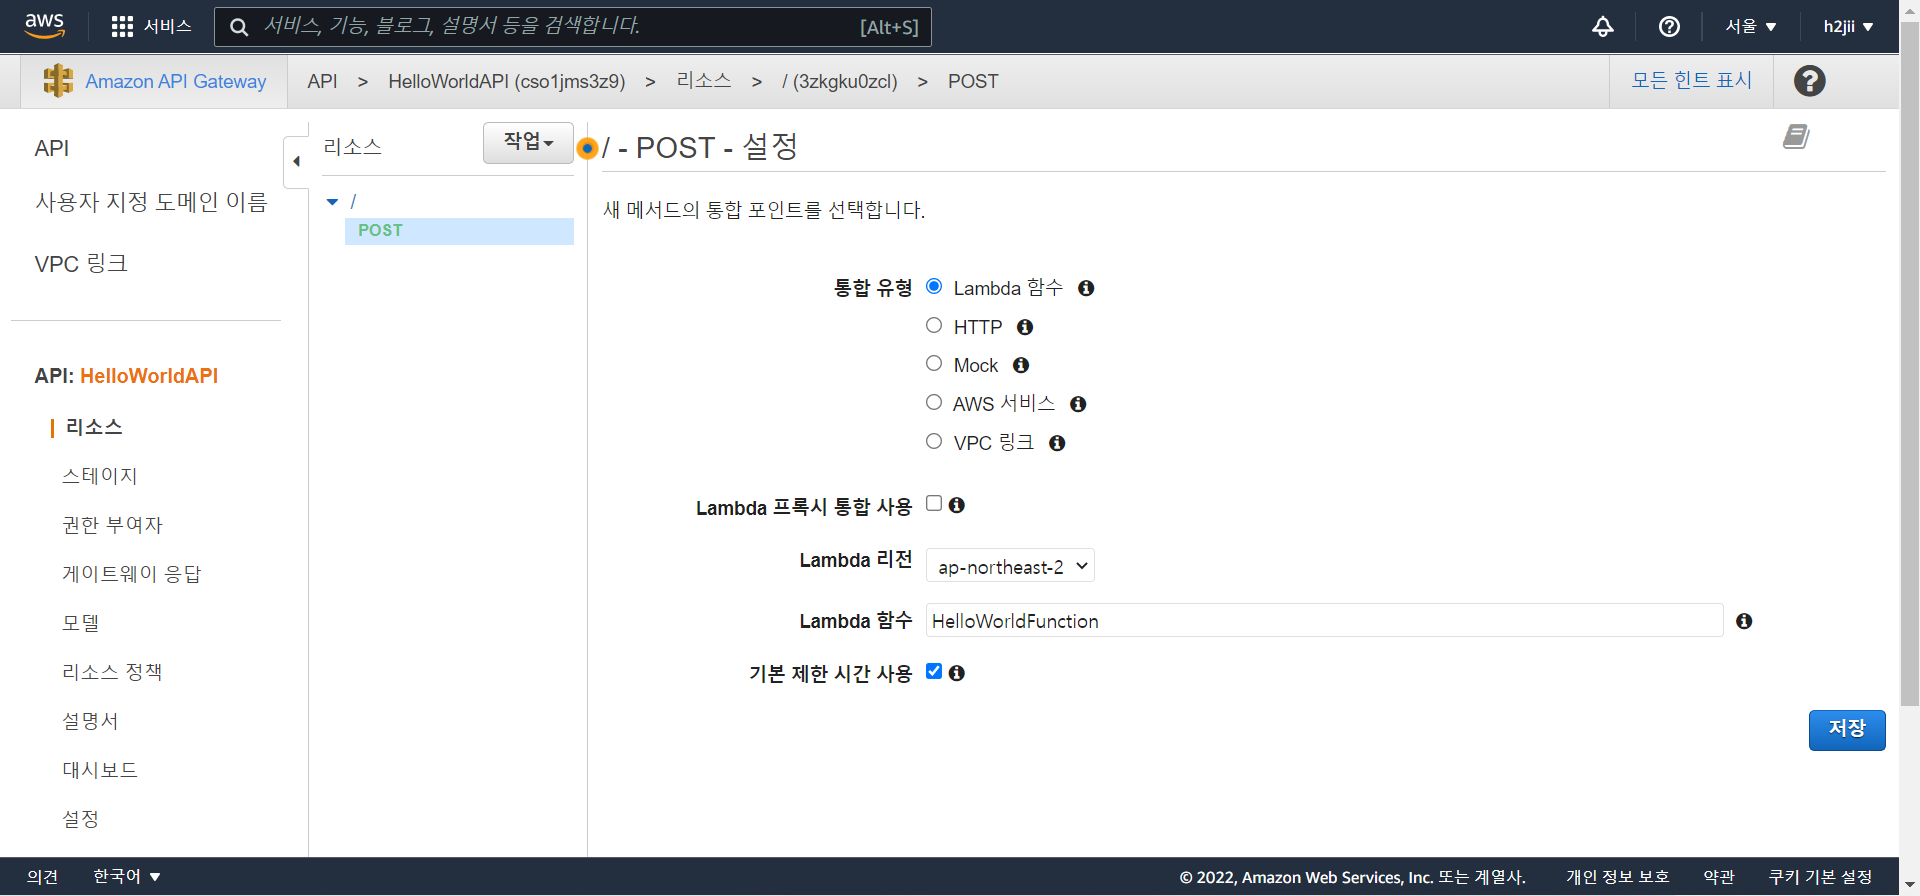
3.2. 새 리소스 및 메소드 생성
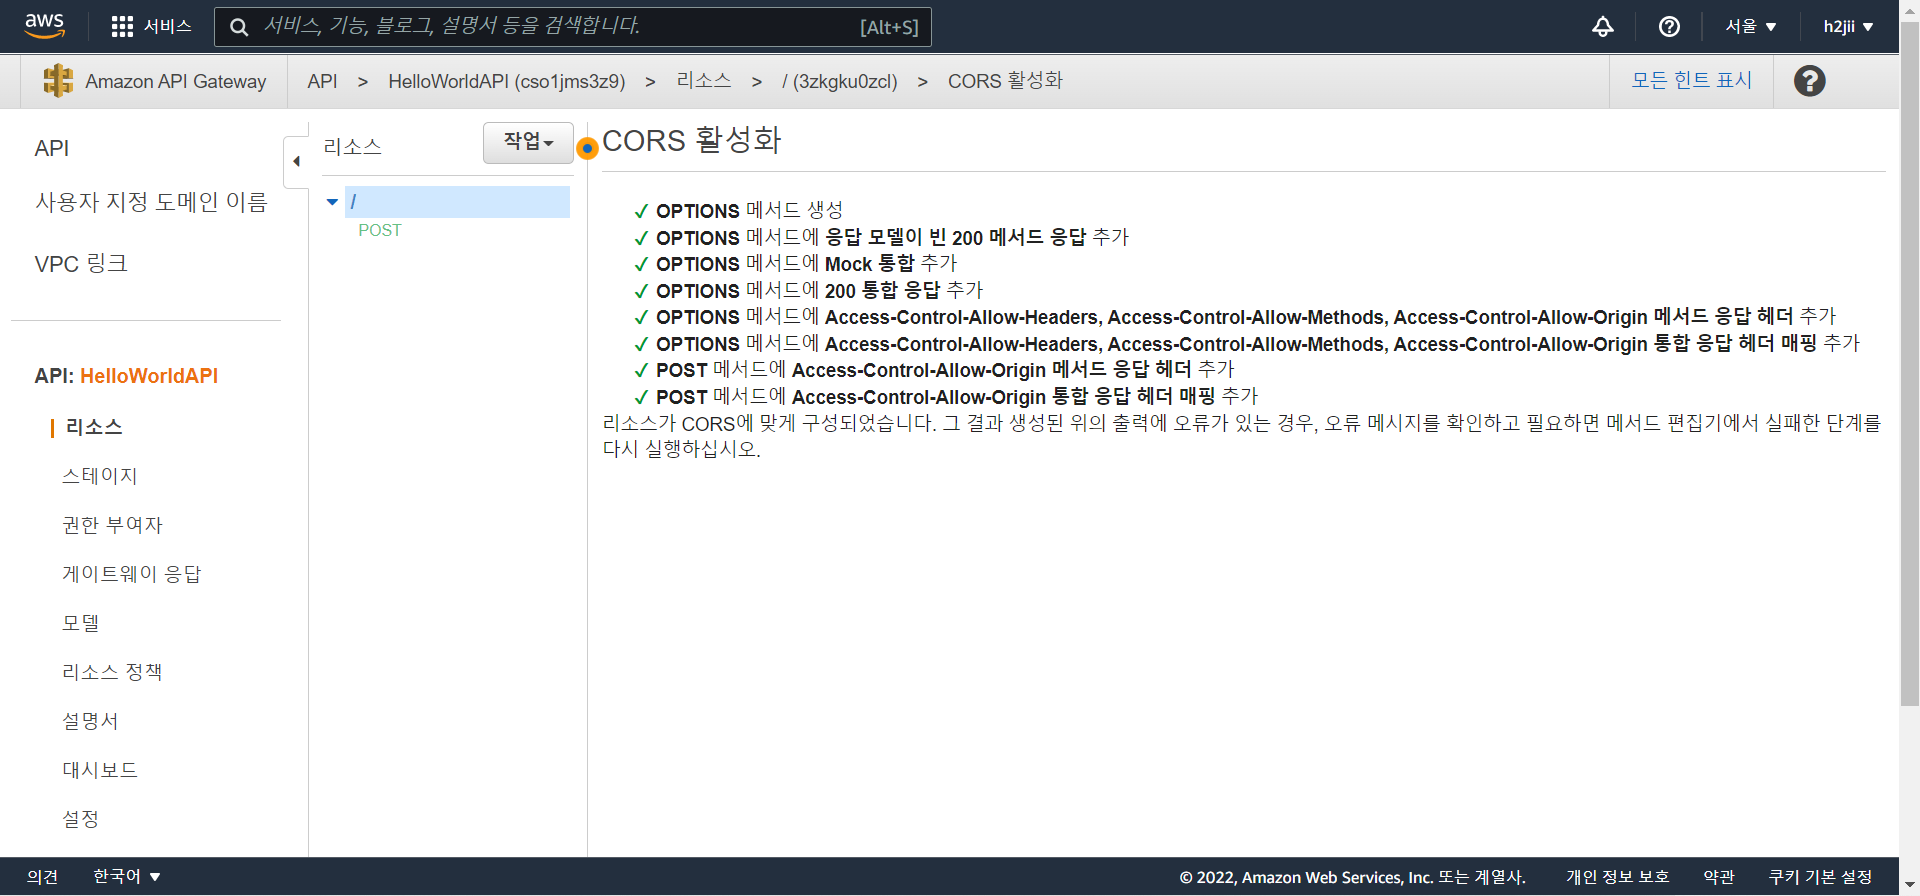
3.3. API 배포
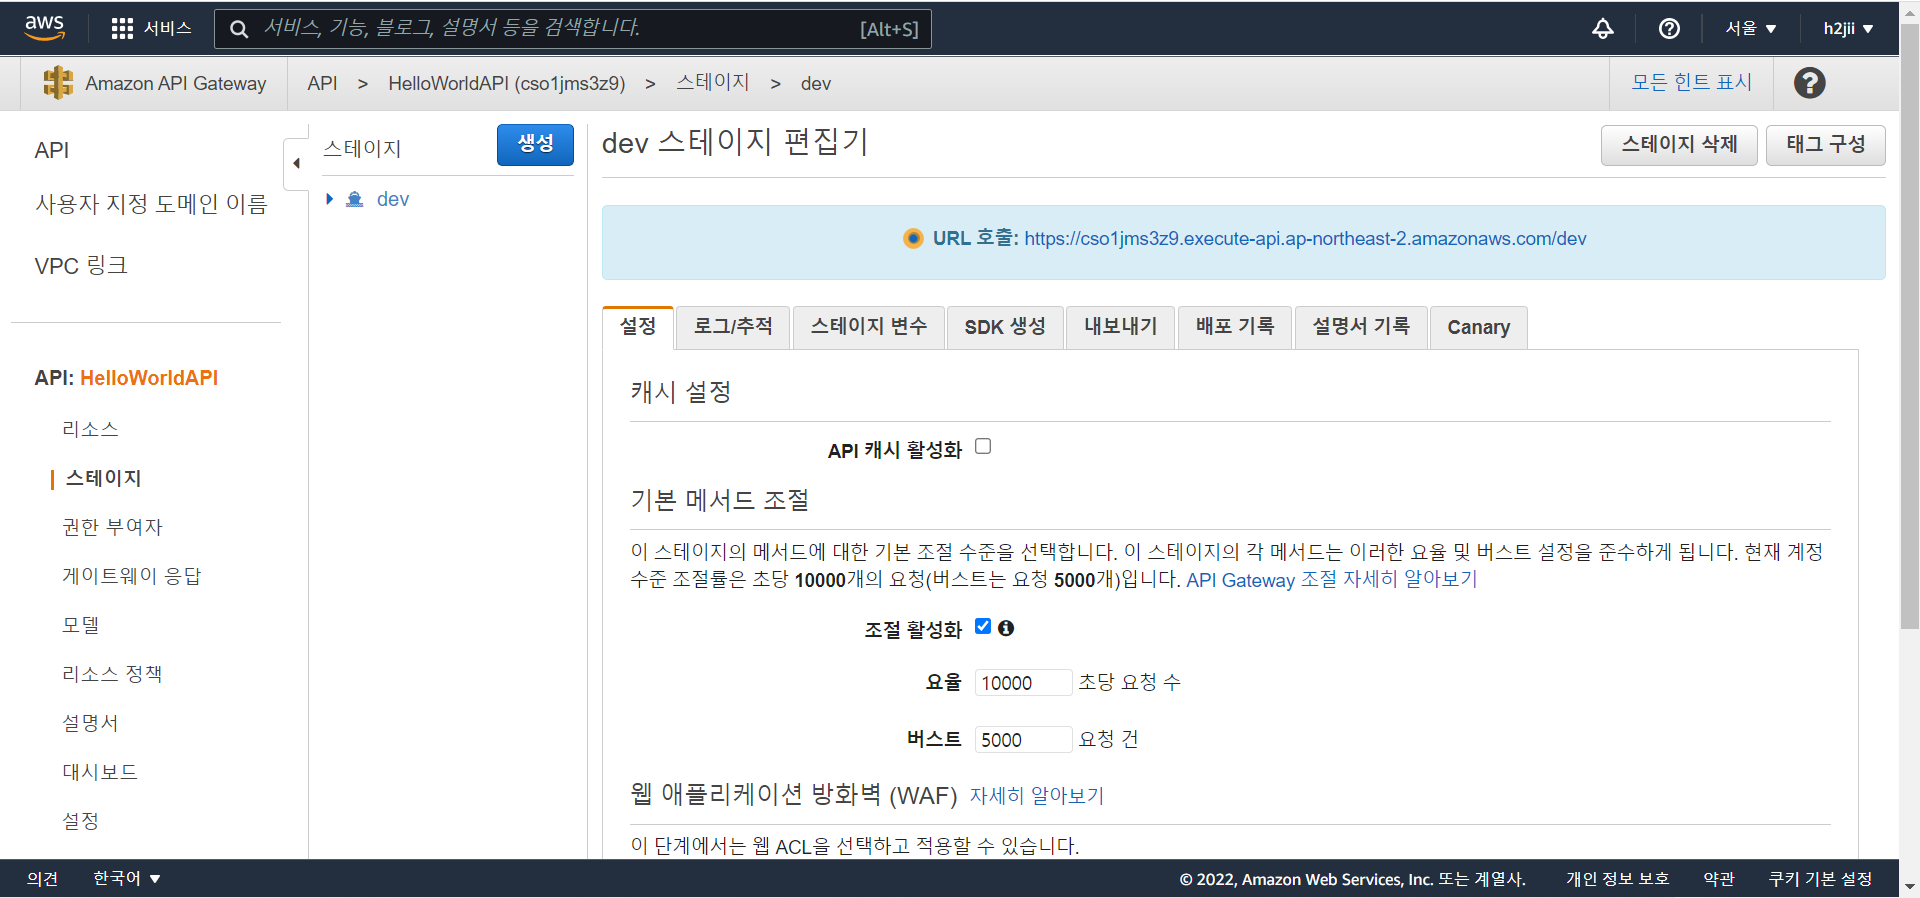
3.4. API 검증
4. 데이터 테이블 생성
: Amazon DynamoDB 테이블에 데이터를 유지
4.1. DynamoDB 테이블 생성
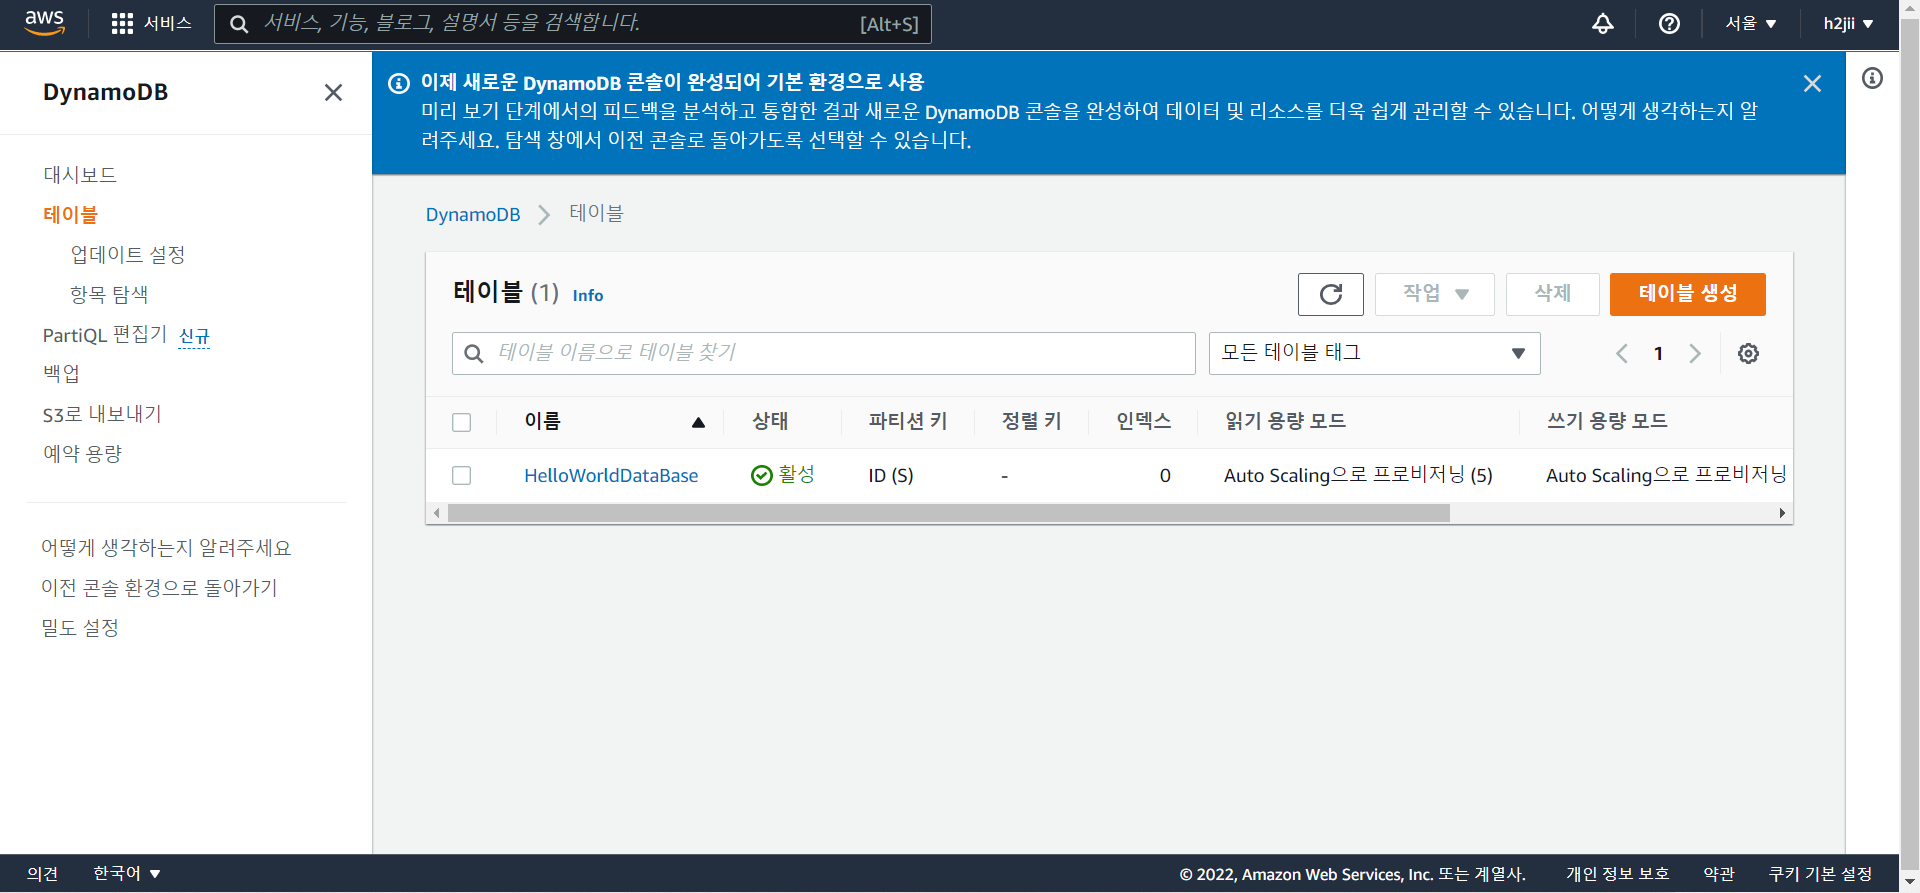
- ARN 정보 찾기
테이블 생성 후 테이블이름을 클릭하면 상세 정보 탭이 확장됨
개요 > 일반정보 > 추가정보 > Amazon 리소스 이름(ARN)
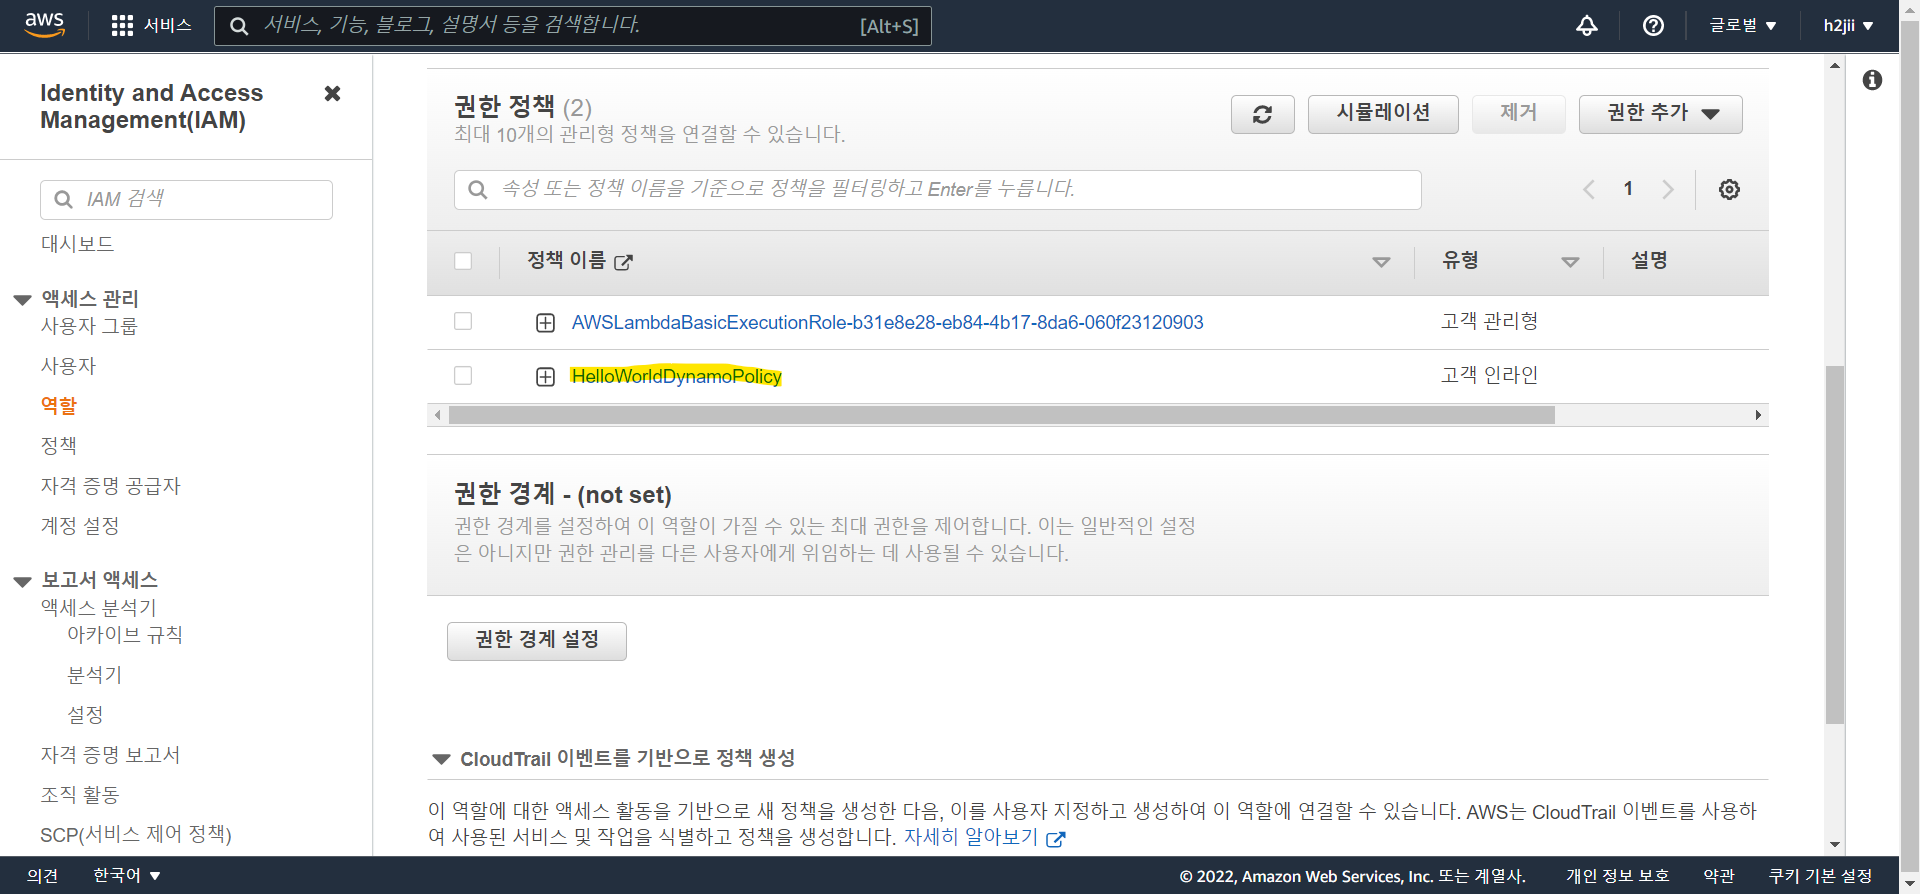
4.2. IAM 생성후 Lambda에 추가
** Lambda에서 권한 탭 찾기 : 구성 > 권한
4.3. Lambda 수정
HelloWorldFunction의 함수를 수정한다.
# import the json utility package since we will be working with a JSON object
import json
# import the AWS SDK (for Python the package name is boto3)
import boto3
# import two packages to help us with dates and date formatting
from time import gmtime, strftime

# create a DynamoDB object using the AWS SDK
dynamodb = boto3.resource('dynamodb')
# use the DynamoDB object to select our table
table = dynamodb.Table('HelloWorldDatabase')
# store the current time in a human readable format in a variable
now = strftime("%a, %d %b %Y %H:%M:%S +0000", gmtime())

# define the handler function that the Lambda service will use as an entry point
def lambda_handler(event, context):
# extract values from the event object we got from the Lambda service and store in a variable
    name = event['firstName'] +' '+ event['lastName']
# write name and time to the DynamoDB table using the object we instantiated and save response in a variable
    response = table.put_item(
        Item={
            'ID': name,
            'LatestGreetingTime':now
            })
# return a properly formatted JSON object
    return {
        'statusCode': 200,
        'body': json.dumps('Hello from Lambda, ' + name)
    }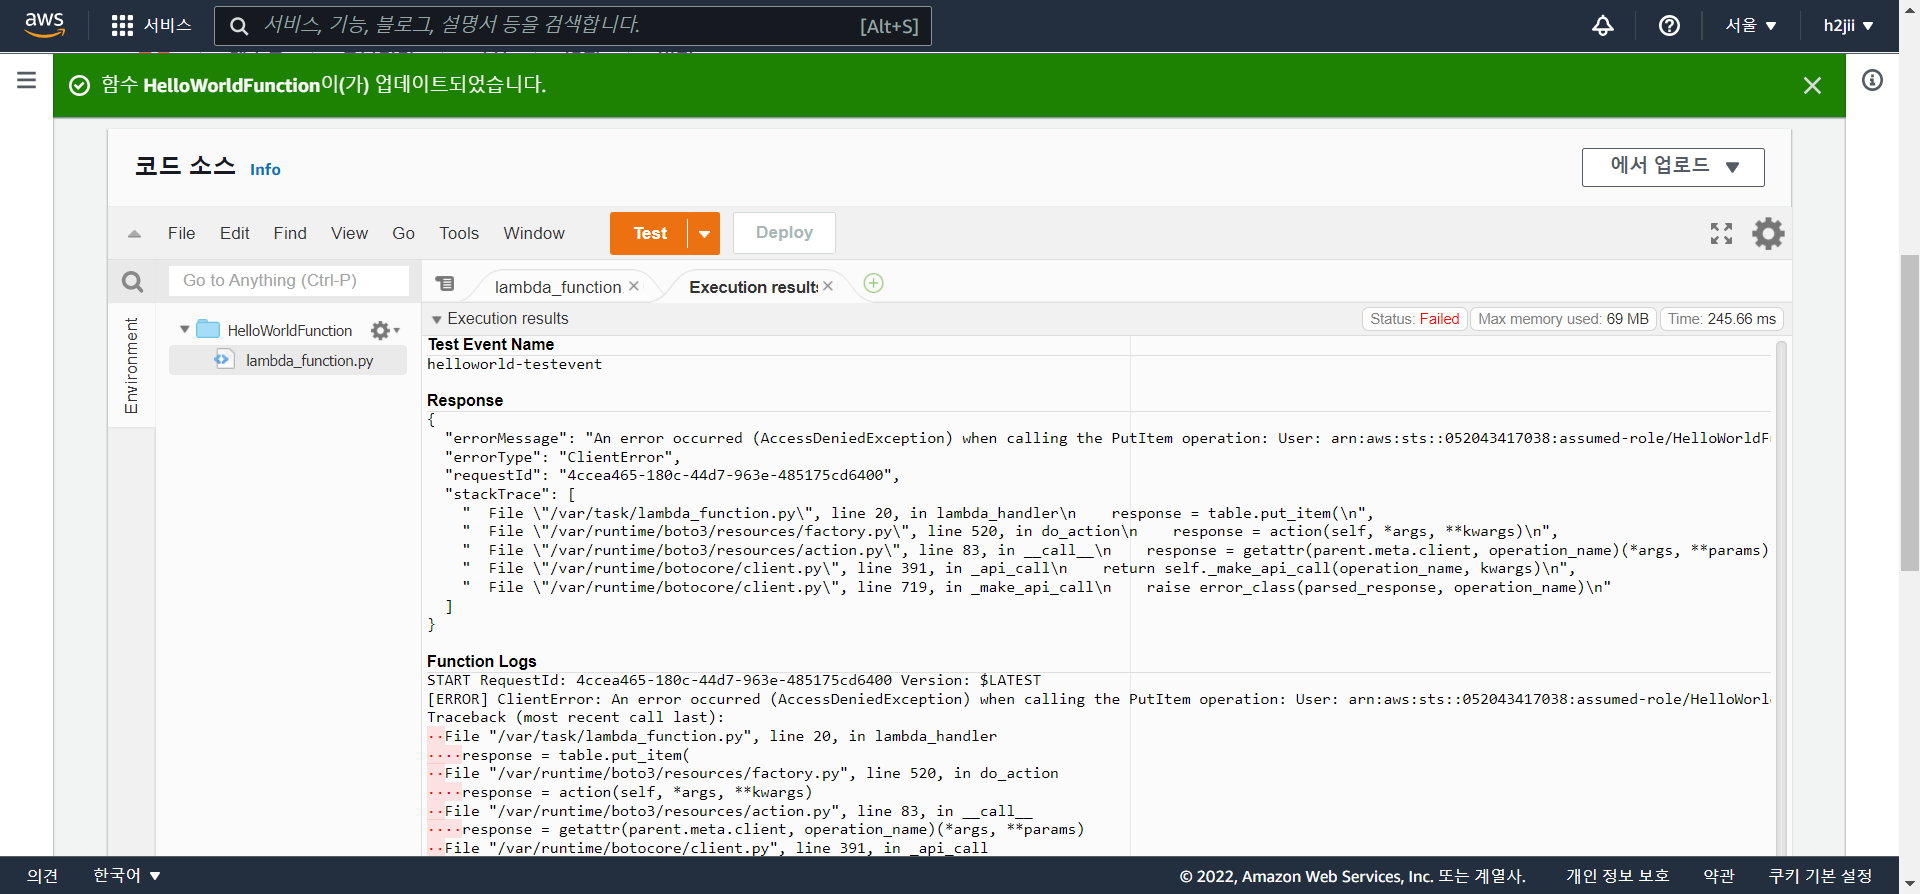
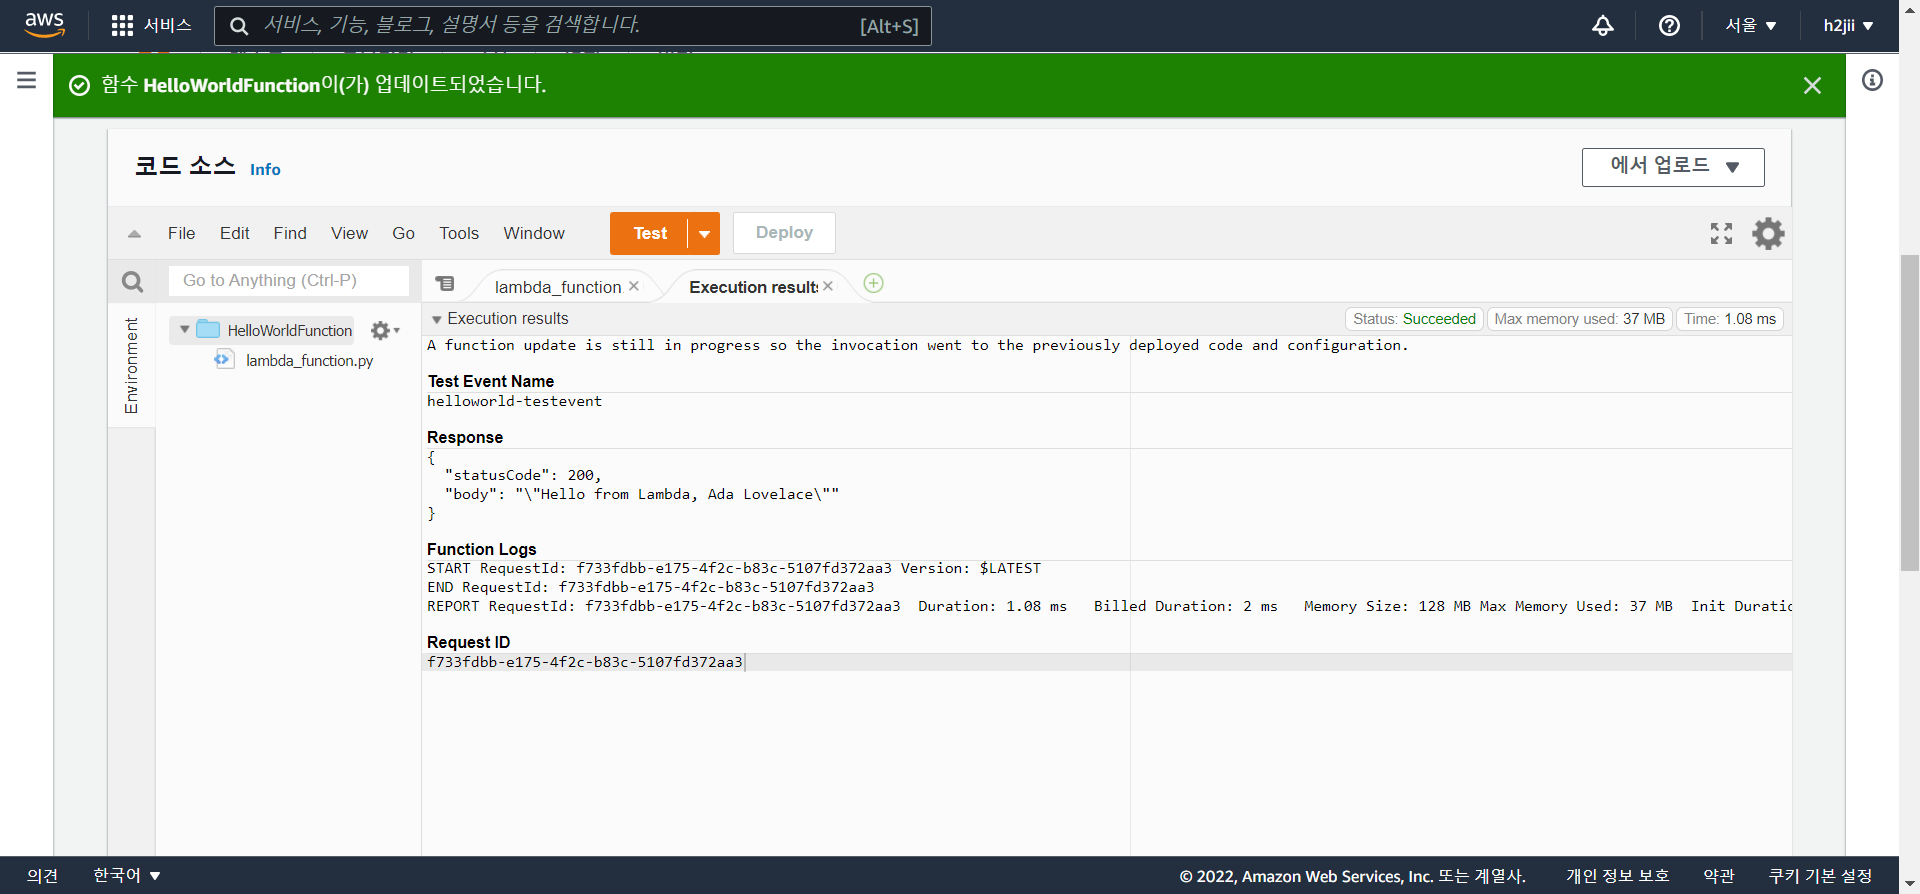
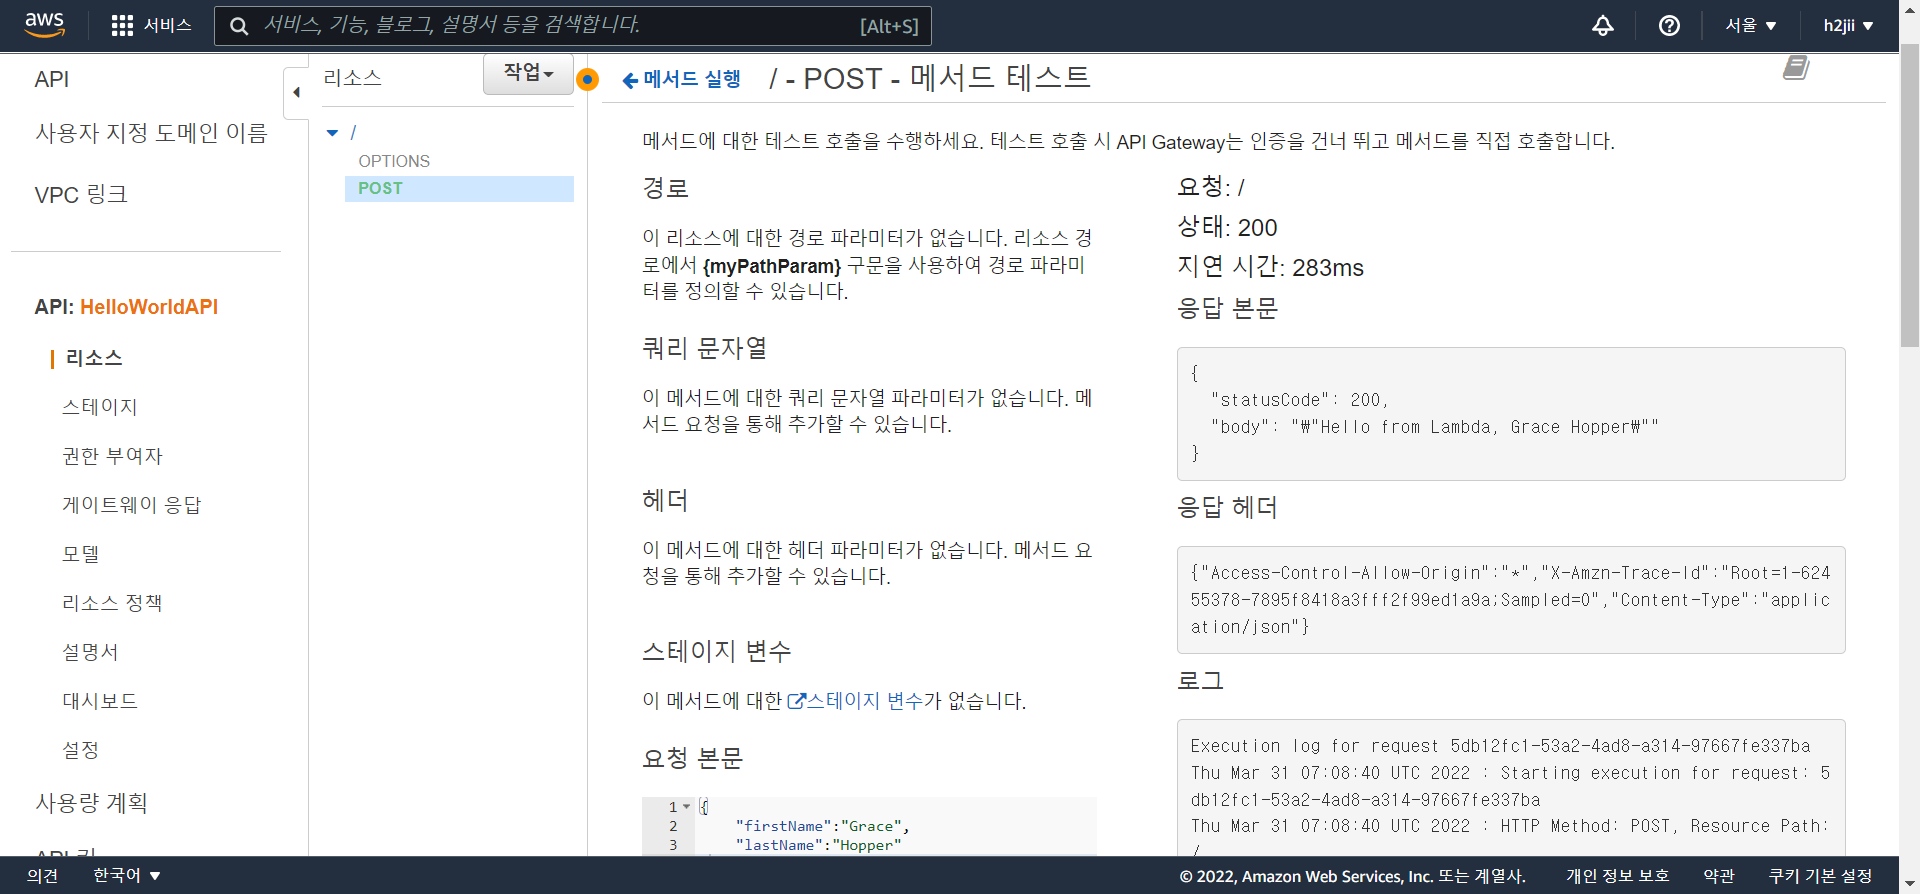
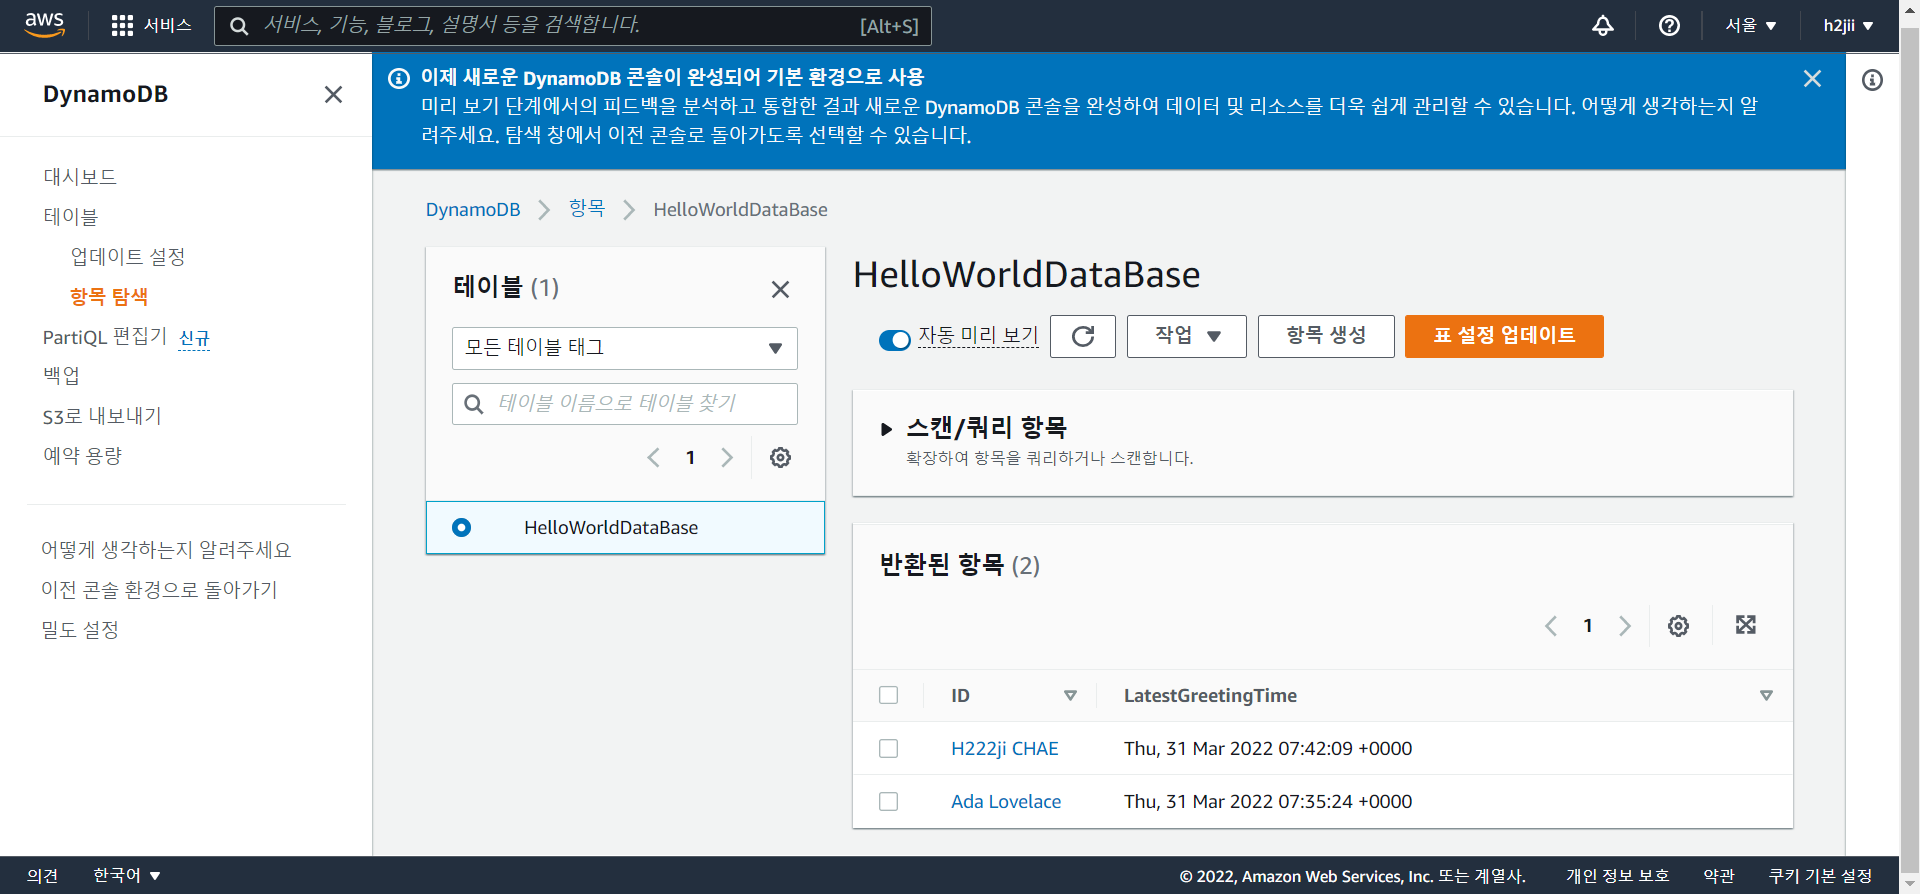
test가 failed되서 살펴보니 내 dynamodb table명이 HelloWorldDatabase가 아닌 HelloWorldDataBase이라서 오류가 났다.
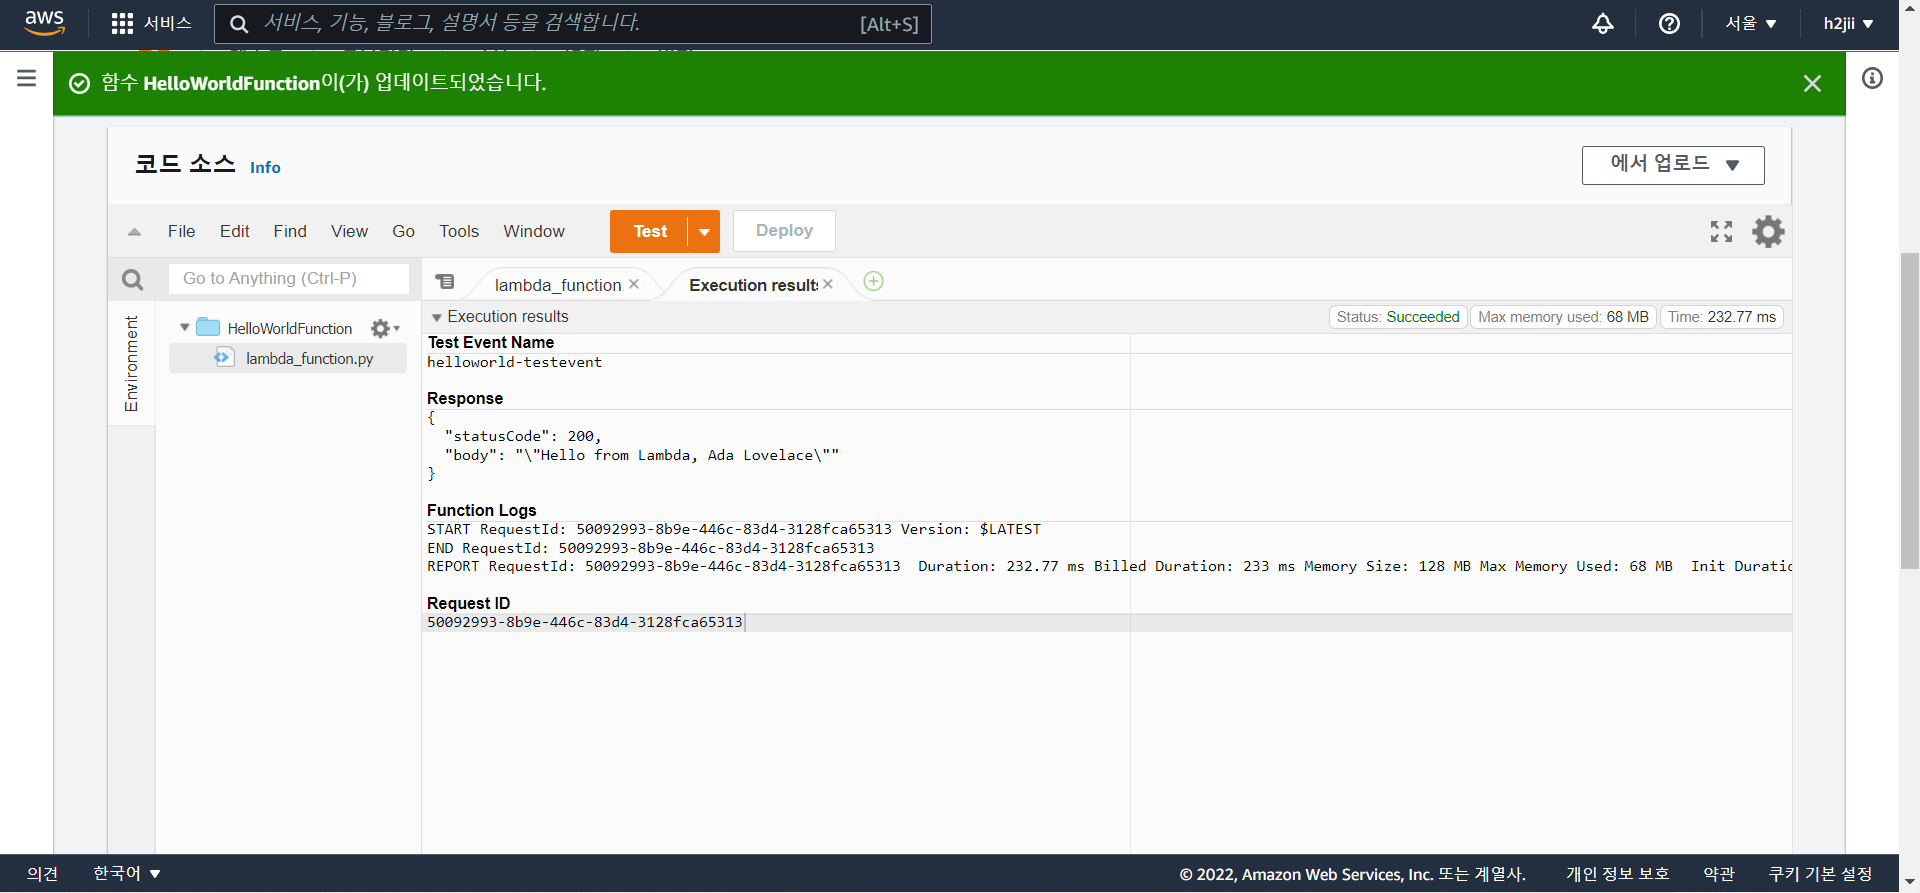
수정 후 deploy + test해보니 Succeeded!!
4.4. 변경사항 테스트
++ 새 이벤트 테스트 해보기
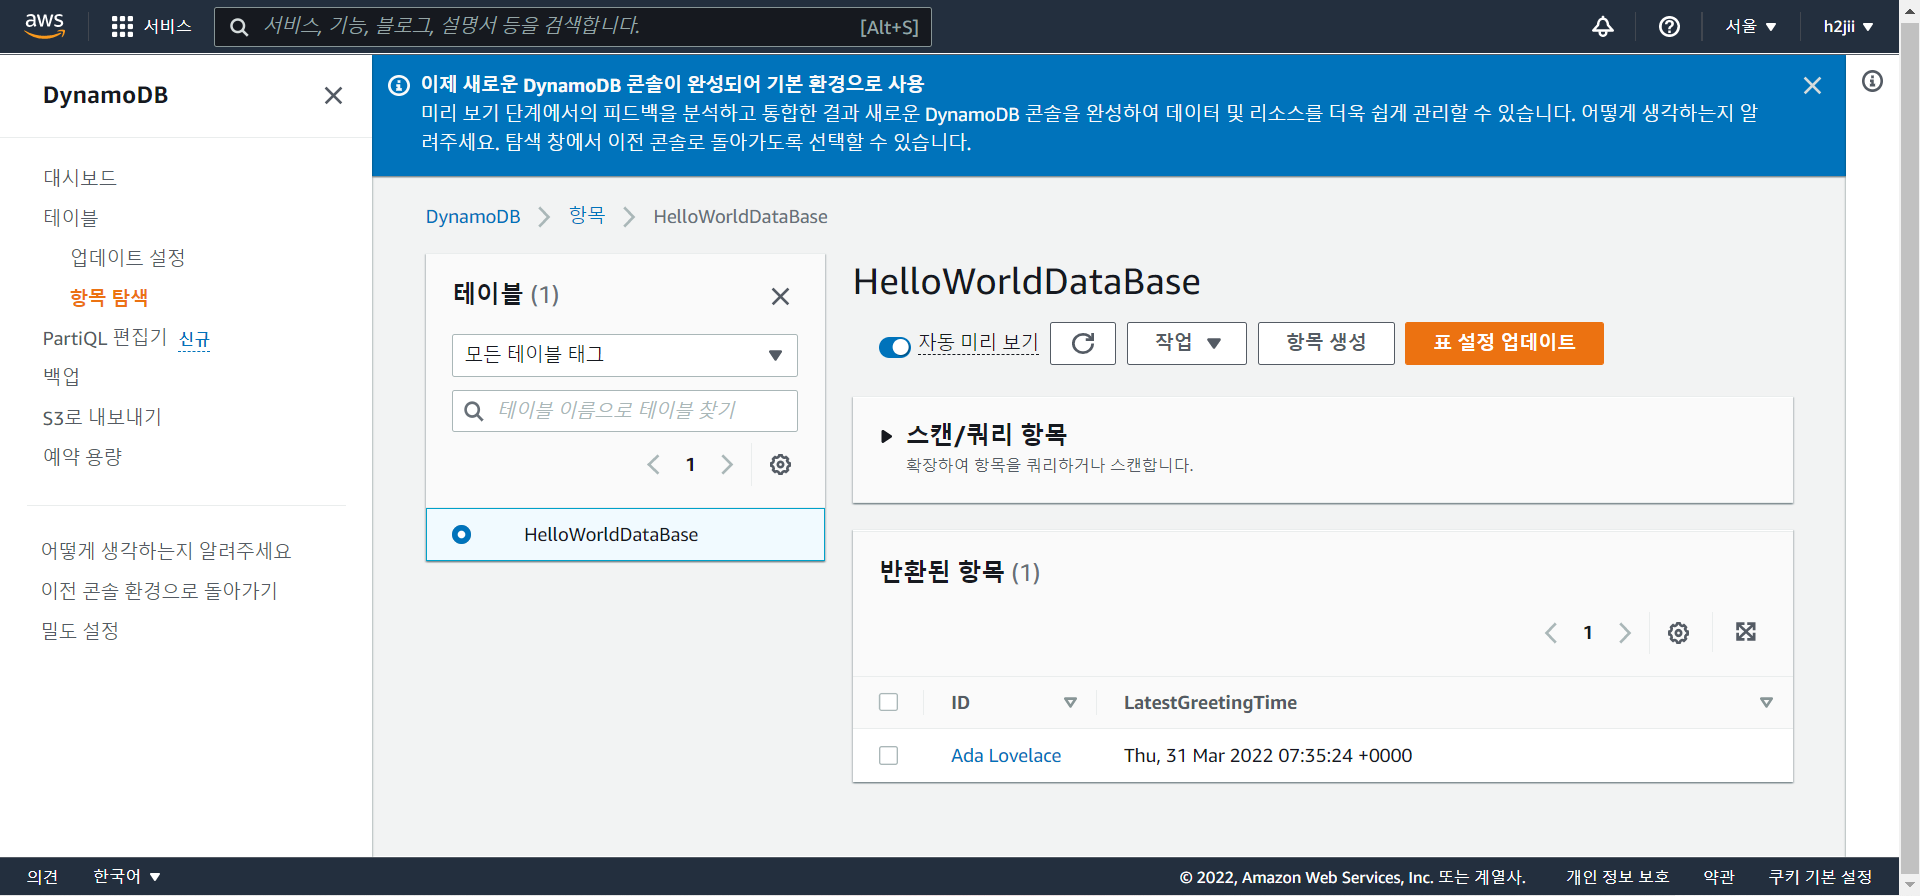
새로운 이벤트를 추가해서 DynamoDB에 추가되는지 테스트를 해보앗다!
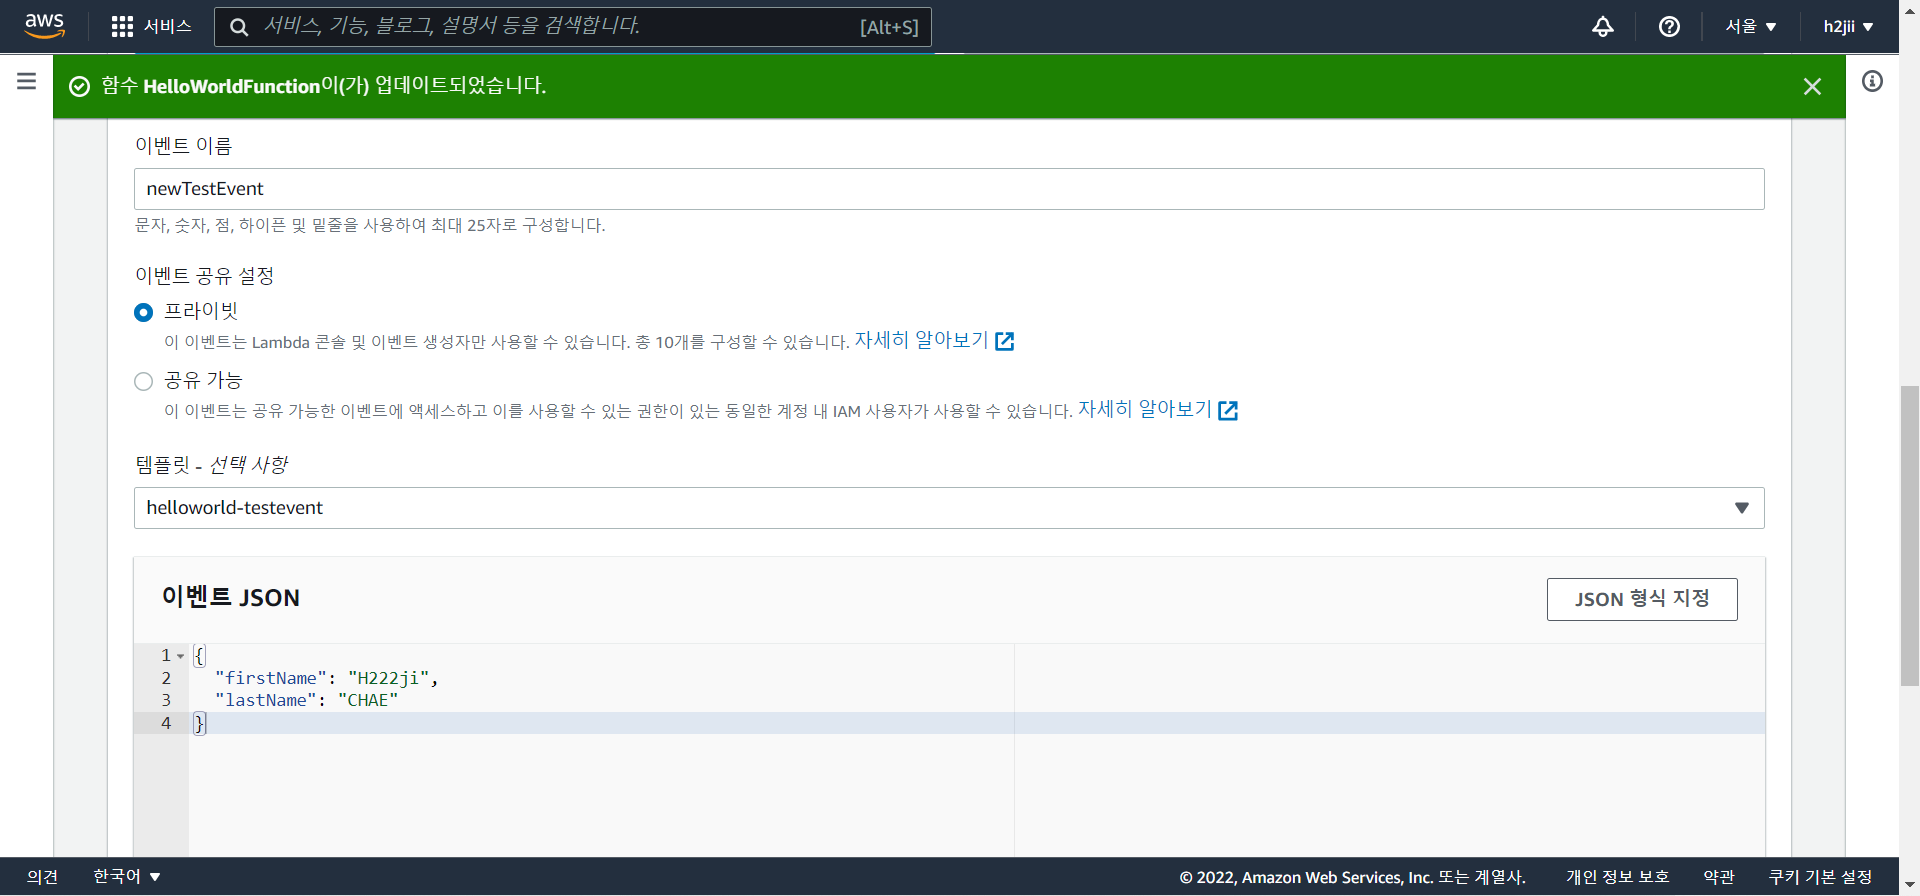
간단히 firstName과 lastName만 바꿔서 test 실행을 하였고
결과는
항목이 하나 더 추가된 것을 볼 수 있다.
5. 웹 앱에 상호 작용 기능 추가
: API를 호출하도록 웹 앱을 수정
5.1. Amplify 콘솔을 사용해 웹 앱 업데이트
index.html을 수정
✔️ 41행의 "YOUR-API-INVOKE-URL"은 자신의 API 주소로 변경
<!DOCTYPE html>
<html>
<head>
    <meta charset="UTF-8">
    <title>Hello World</title>
    <!-- Add some CSS to change client UI -->
    <style>
    body {
        background-color: #232F3E;
        }
    label, button {
        color: #FF9900;
        font-family: Arial, Helvetica, sans-serif;
        font-size: 20px;
        margin-left: 40px;
        }
     input {
        color: #232F3E;
        font-family: Arial, Helvetica, sans-serif;
        font-size: 20px;
        margin-left: 20px;
        }
    </style>
    <script>
        // define the callAPI function that takes a first name and last name as parameters
        var callAPI = (firstName,lastName)=>{
            // instantiate a headers object
            var myHeaders = new Headers();
            // add content type header to object
            myHeaders.append("Content-Type", "application/json");
            // using built in JSON utility package turn object to string and store in a variable
            var raw = JSON.stringify({"firstName":firstName,"lastName":lastName});
            // create a JSON object with parameters for API call and store in a variable
            var requestOptions = {
                method: 'POST',
                headers: myHeaders,
                body: raw,
                redirect: 'follow'
            };
            // make API call with parameters and use promises to get response
            fetch("YOUR-API-INVOKE-URL", requestOptions)
            .then(response => response.text())
            .then(result => alert(JSON.parse(result).body))
            .catch(error => console.log('error', error));
        }
    </script>
</head>
<body>
    <form>
        <label>First Name :</label>
        <input type="text" id="fName">
        <label>Last Name :</label>
        <input type="text" id="lName">
        <!-- set button onClick method to call function we defined passing input values as parameters -->
        <button type="button" onclick="callAPI(document.getElementById('fName').value,document.getElementById('lName').value)">Call API</button>
    </form>
</body>
</html>
다시 zip파일로 압축하여 재배포를 한다.
5.2. 업데이트된 웹 앱 테스트
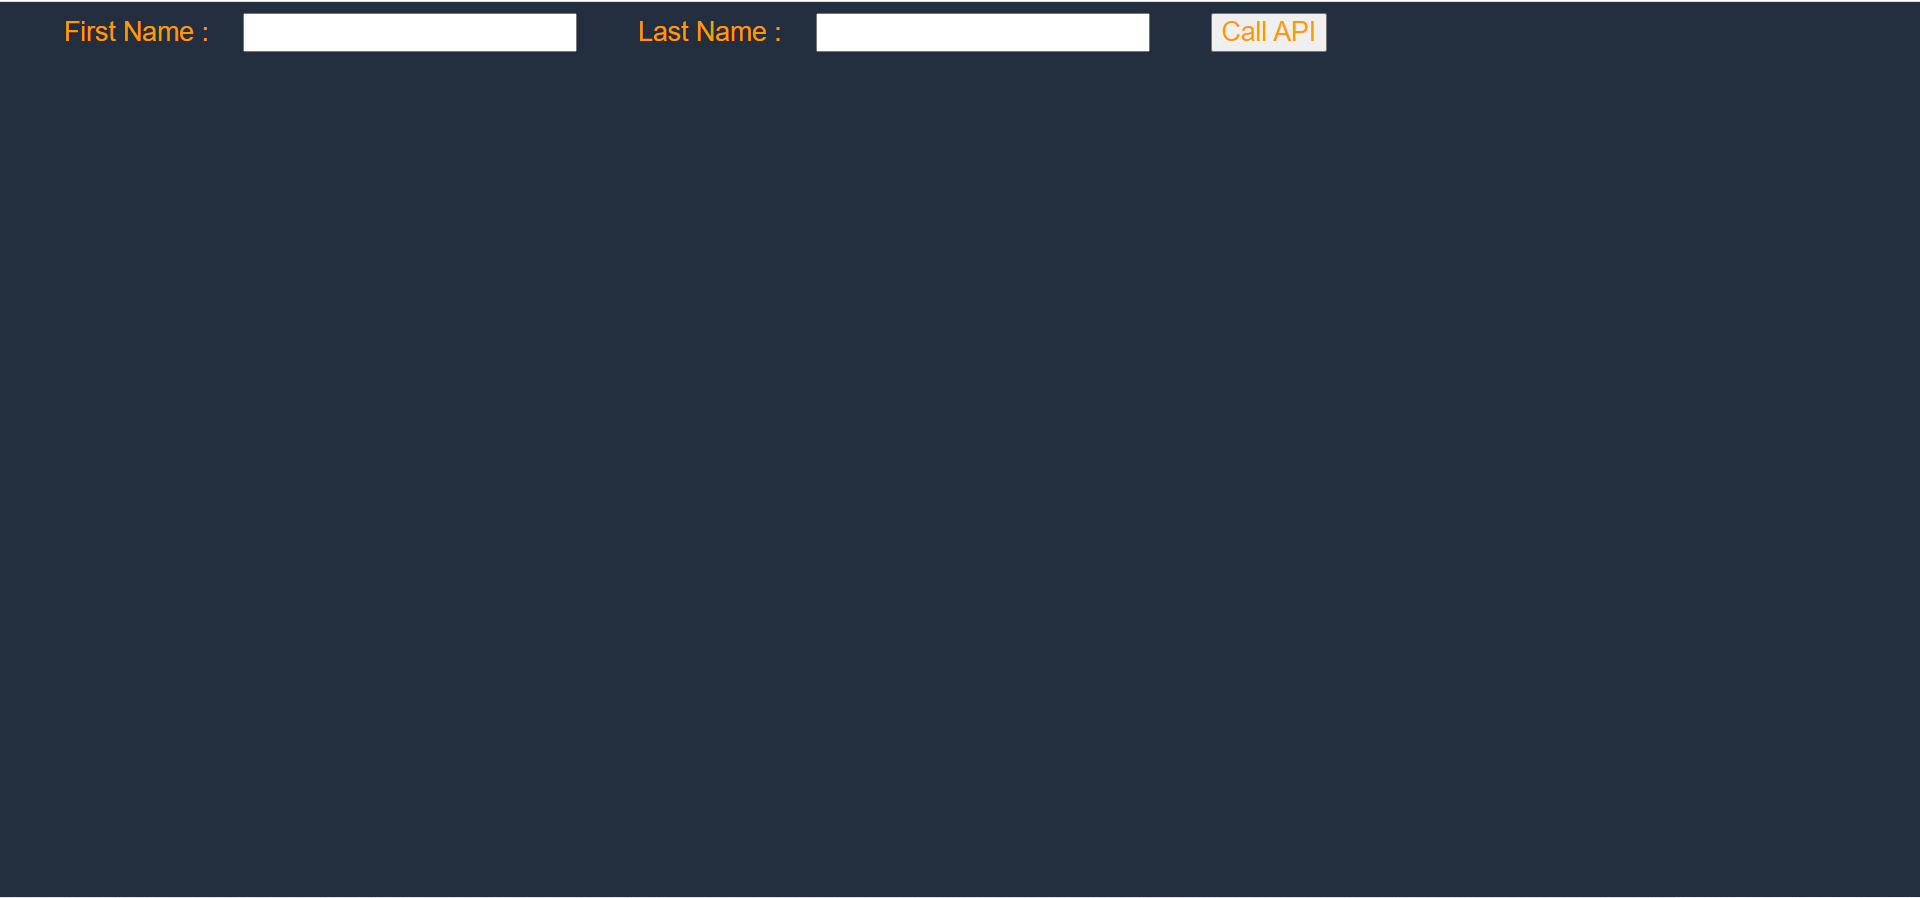
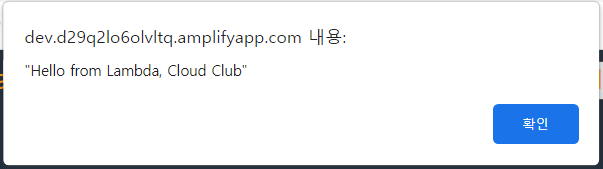
first Name = Cloud
last Name = Club 으로 작성후 call API 클릭,
⬇️이런 메세지 창⬇️이 뜨게 된다.
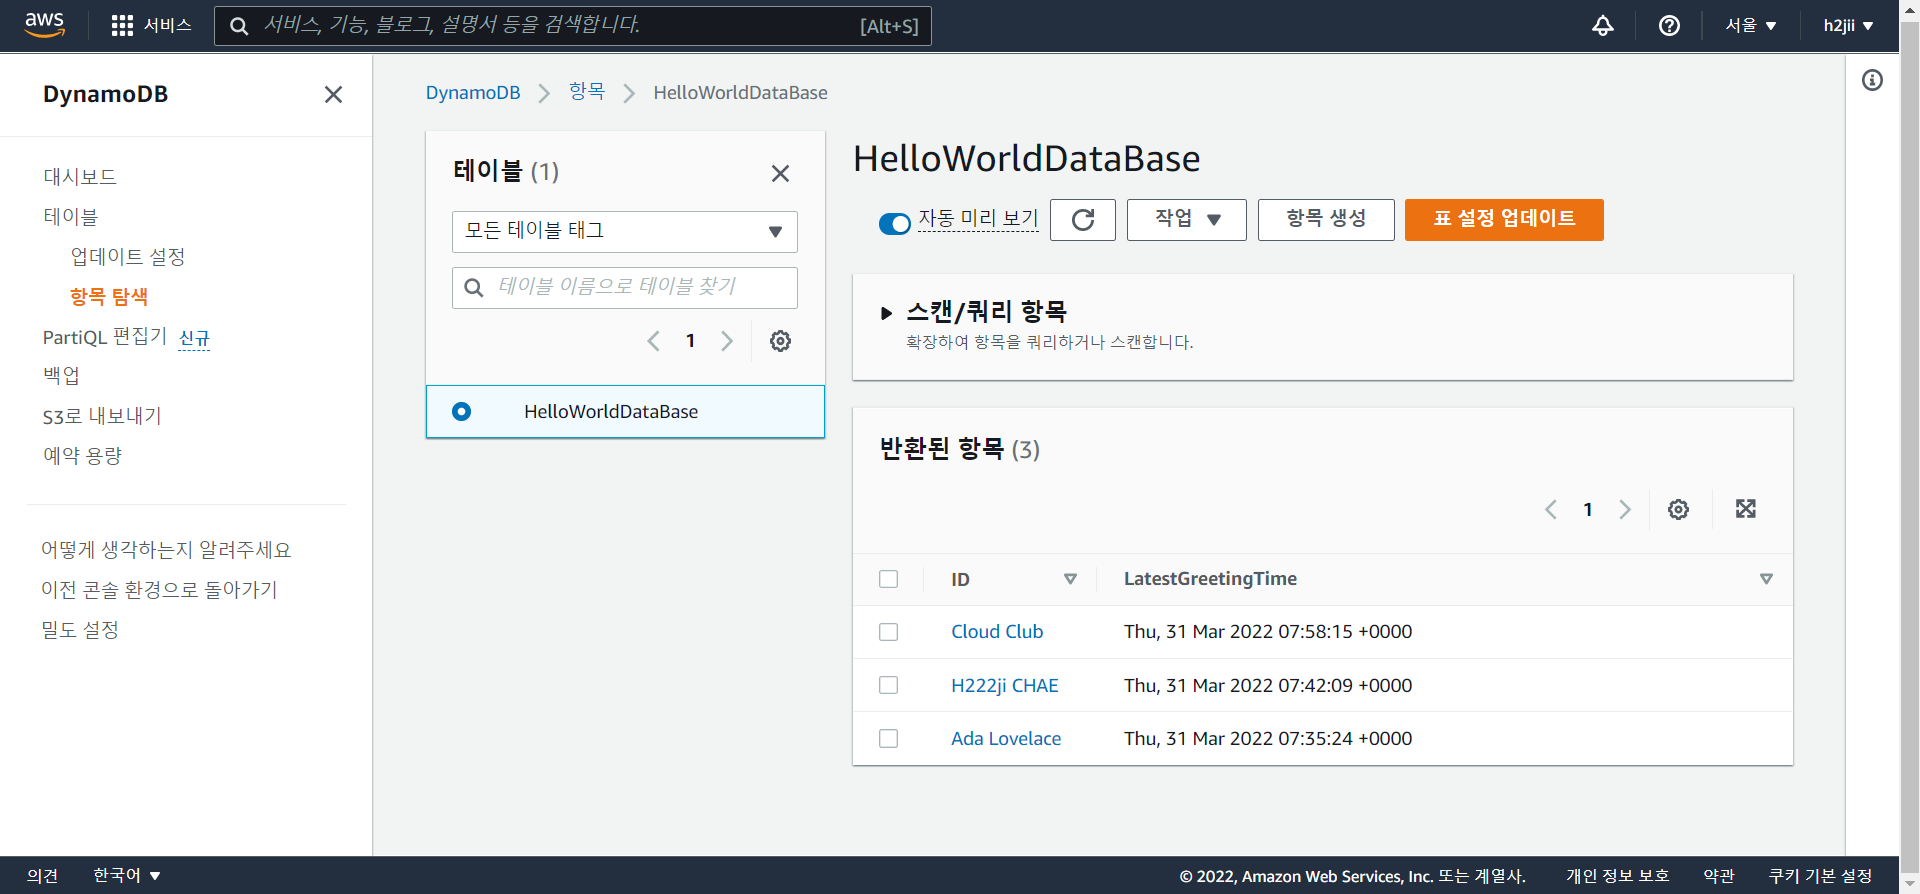
다시 DynamoDB로 돌아가서 테이블 항목을 refresh하면 잘 들어온 것을 확인할 수 있다.

희지야 블로그 좀 쓰쟈.. plz....