2주차껄 아직도 하고 있는게 레전드
어쨋든 댓글 구현위해
supabase comments 테이블 세팅해주고
Policy까지 다이렉트로 추가해주었는데,
select / insert / update / delete 다 넣어주었다.
근데 이번엔 이상하게 update에서 갑자기 team어쩌구 members 어쩌구가 기본 policy로 세팅되어 있어서 에러가 떴는데
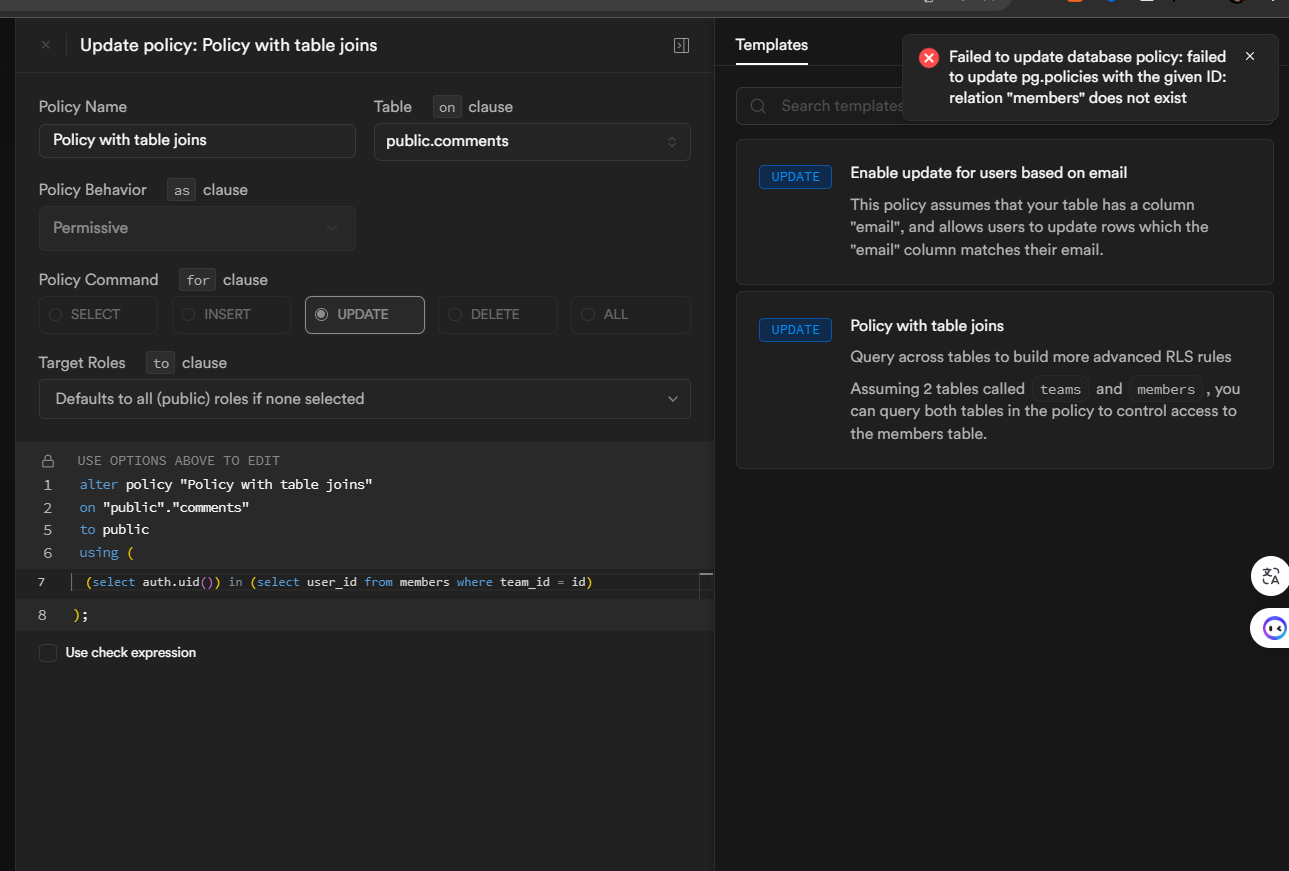
members대신 임의로 comments를 넣어주었다.
저 정책은 사용자 자신의 댓글만 수정하게 설정이고
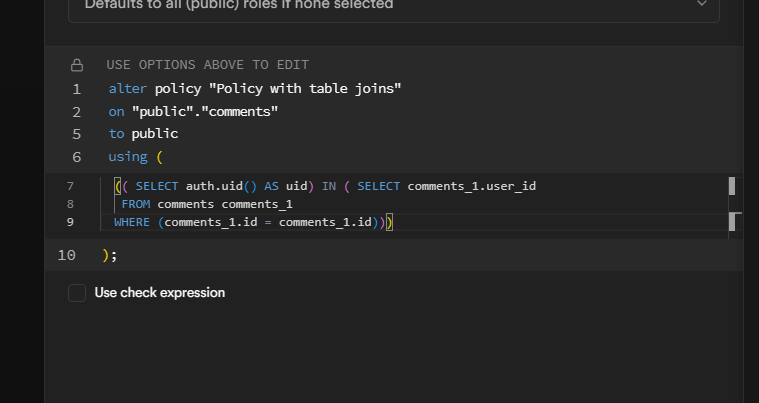
이렇게 수정해주었는데, 이게 작동에 에러를 발생시킬지는 두고보자
근데 애초에 정책에서 에러가 뜬적이 없는데 왜 떴을지 생각해보니,
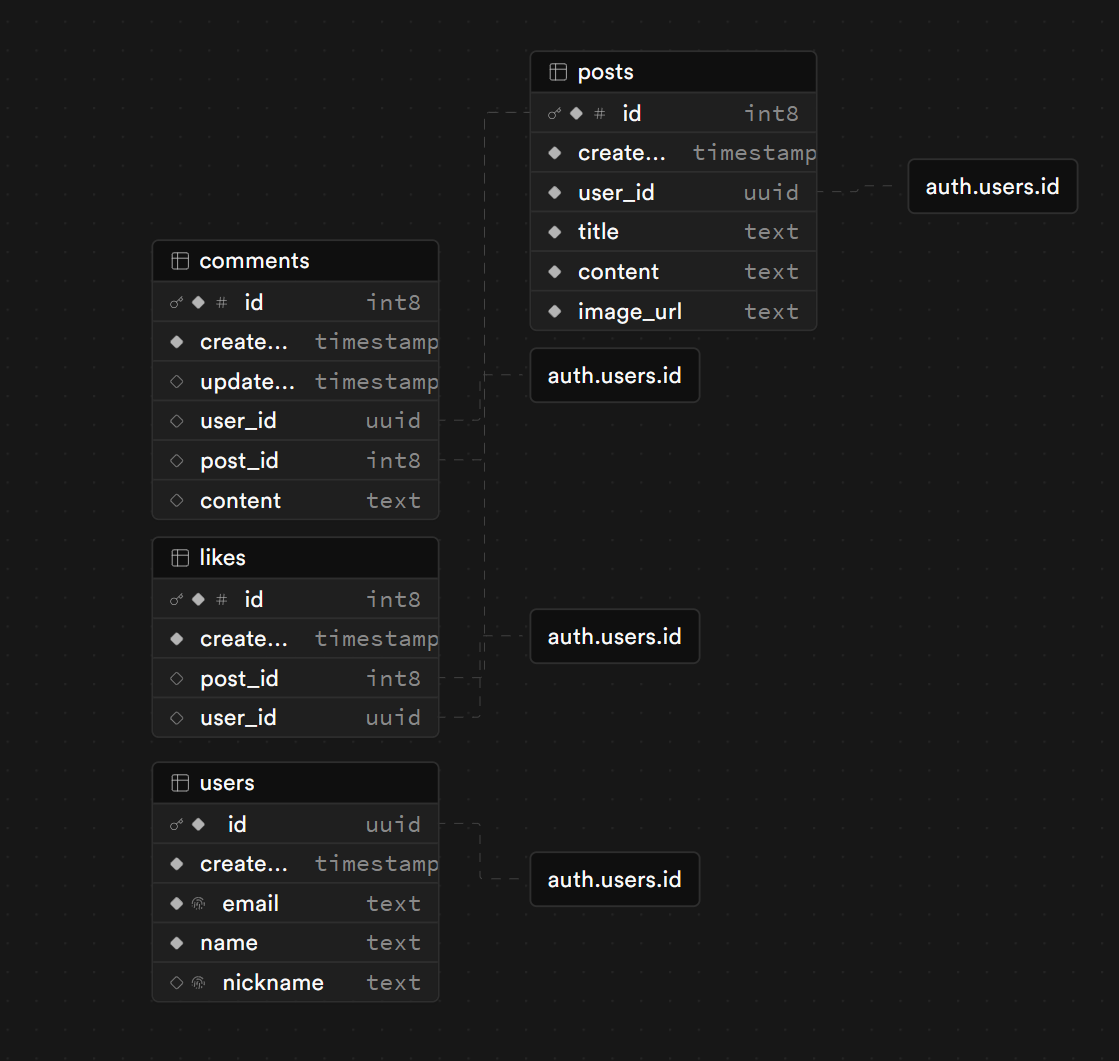
comments는 post_id를 posts의 id와 user_id를 auth.user.id와 그리고 기본 posts도 user_id를 auth.user.id로 묶어놨기 때문에 저 두 아이디값을 일치시키기 위해 members로 놔두지 않았을까 생각이 든다
(맞는지는 모르겠음)
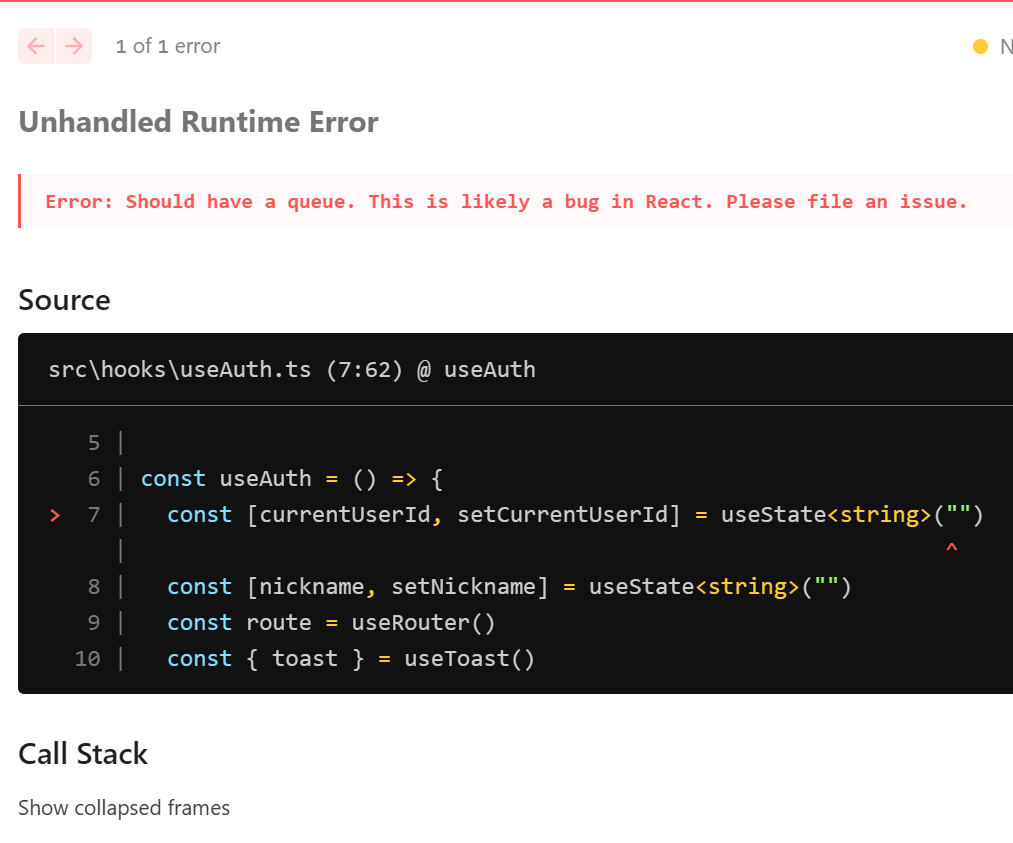
Error: Should have a queue. This is likely a bug in React. Please file an issue.
Error: Rendered more hooks than during the previous render.
1차 구현은 성공하였는데 이러한 에러가 발생하였다
원인으로는

useComments.ts 훅은 만들어서 메인페이지에 넣어줘야하는 입장이였는데,
post.id를 인수로 넣어줘야하는 상황이다보니 처음으로 jsx가 아닌 div쪽에서 훅을 넣어줬었다.
이렇게 되면 리렌더링이 자주 일어나게 되서 매우 추천하지 않는 훅 삽입 방법이여서,
컴포넌트 분리를 먼저 하고 그 컴포넌트를 메인페이지에 넣는 방식으로 바꿔서 테스트해보려한다.
그리고 조건문이나 반복문 내부에서 호출을 하면 저런 에러가 뜬다고 한다.
React에서 훅은 항상 컴포넌트 최상위 레벨에서 호출되어야 하고, 호출 순서가 매번 동일해야 한다.
그러나 반복문 내에서 훅을 호출하면 호출 순서가 달라질 수 있어서 Rendered more hooks than during the previous render 같은 오류가 발생하게 됨
그래서 지금은 거진 100~200줄이 되는 코드를 훅을 분리했음에도 메인페이지에 다 때려박았는데,
PostList - 게시물 목록 렌더링 컴포넌트
PostItem - 개별 게시물 렌더링하는 컴포넌트
PostForm - 게시물 작성 및 수정 폼 컴포넌트
Comment - 게시물 댓글 관리 및 렌더링 컴포넌트
LikeButton - 좋아요 기능 담당 컴포넌트
로 나누기로 하였다.
그러면 이제 map에서 훅 호출하는게 해결될거라 생각하여서 먼저 진행해볼텐데,
재사용성이 없는 컴포넌트라 생각하기에, src/app/home/components 에서 구현하기로 하였다.
그러나 원래상태로 복구하는 과정에서 원래 잘 되던 코드마저 이런 에러가 떠서 이것저것 살펴보다가, comments관련 즉, 댓글 관련 코드를 주석처리하니 정상적으로 가동되고 있어서 얼른 리팩토링 먼저 진행해보겠다.
좋아요 컴포넌트
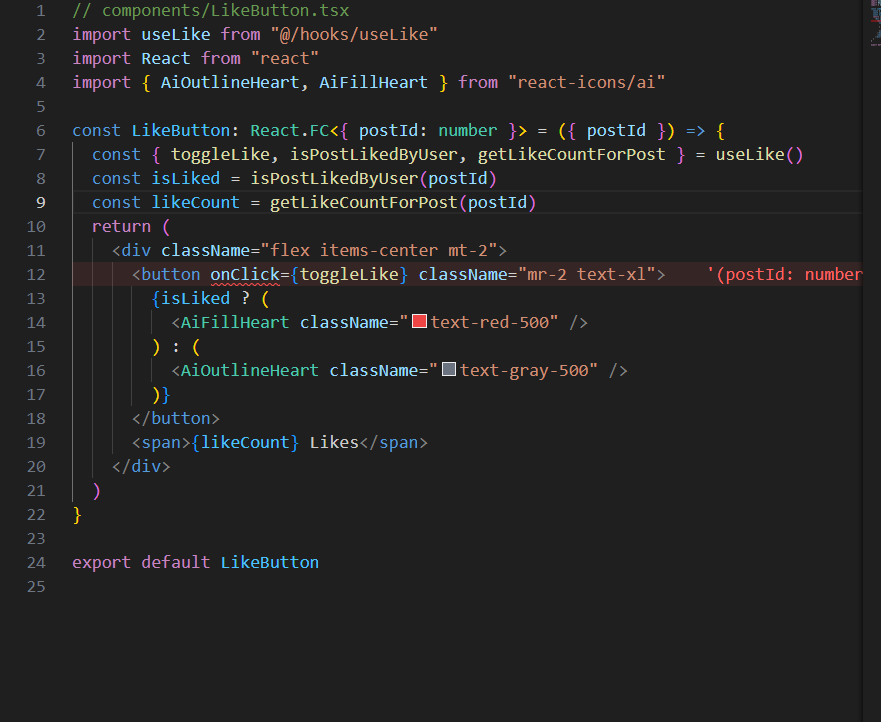
LikeButton.tsx컴포넌트 파일을 생성하고
// components/LikeButton.tsx
import useLike from "@/hooks/useLike"
import React from "react"
import { AiOutlineHeart, AiFillHeart } from "react-icons/ai"

const LikeButton: React.FC<{ postId: number }> = ({ postId }) => {
  const { toggleLike, isPostLikedByUser, getLikeCountForPost } = useLike()
  const isLiked = isPostLikedByUser(postId)
  const likeCount = getLikeCountForPost(postId)

  const handleClick = async () => {
    await toggleLike(postId) // postId를 인자로 전달
  }

  return (
    <div className="flex items-center mt-2">
      <button onClick={handleClick} className="mr-2 text-xl">
        {isLiked ? (
          <AiFillHeart className="text-red-500" />
        ) : (
          <AiOutlineHeart className="text-gray-500" />
        )}
      </button>
      <span>{likeCount} Likes</span>
    </div>
  )
}

export default LikeButton
로 구현하였는데,
인자로는 게시글의 아이디를 가져와서 그 게시글에 대한 좋아요를 보여주기 위해 인자로 가져왔다.
버튼 onClick 타입 에러
그런데
이 컴포넌트 분리 코드 이전에
onClick에 대해 타입 에러가 떴었는데,
toggleLike가
(posdId:number) => Promise<void>형식은 MouseEventHandler<HTMLButtonElement>형식에 할당할 수 없다
라는 내용이였고,
이 함수는 Promise<void> 즉 비동기 함수인데 onClick 이벤트 핸들러는 그 반환값을 사용하지 않기에, async로 비동기 처리를 해줘서 void를 반환해야 비동기 함수도 void를 반환하는 것 처럼 처리되므로 타입 오류를 막을 수 있다
이전 주석 코드를 한줄로 해결~~!
근데 코드를 짜다보니
애초에 toggleLike함수가 비동기 함수인데 굳이 한번 더 비동기 처리를 해줘야할까? 싶은 의문점이 들었다 그래서 다른 컴포넌트 분리 작업 중
<Button onClick={handleCreateOrUpdatePost} className="mt-4">여기는 비동기 함수를 바로 잘 넣어줬는데 무슨 차이가 있어서 좋아요쪽은 비동기처리를 한번 더 해줘야하나??
화살표 함수 사용 onClick{()=> toggleLike(postId)}
이 버튼은 toggleLike함수를 호출하지 않고, 함수 자체를 전달함!!!
이러한 접근 방식을 사용하는 경우는
- 함수나 컨트롤에 인수를 전달해야할 경우(postId)
직접 함수 참조있는 버튼 사용
<Button onClick={handleCreateOrUpdatePost} >
함수에 대한 참조를 제공함.
함수가 즉시 호출되지는 않고 클릭 이벤트가 발생할때 호룰
이 접근 방식을 사용하는 경우
- 함수에 인수를 전달할 필요가 없거나 함수를 호출하기 전 추가 코드 실행할 필요 없는 경우
- 인수나 수행할 다른 작업이 필요하지 않은 경우
그러나 나같은 신입은 이렇게만 적어도 이해가 빡세쥬~?
function handleSubmit() {
  console.log("Form submitted!");
}
이런 함수가 있다면
<Button onClick={handleSubmit}>Submit</Button>
인수가 필요없기에 그냥 함수 자체를 전달하면 함수가 호출됨
function toggleLike(postId: number) {
  console.log(`Toggled like for post with ID: ${postId}`);
}
이러한 함수가 있다면
<button onClick={() => toggleLike(1)}>Like</button>
꼭 인수가 필요하므로 toggleLike를 직접 사용할 수 없음
왜냐면 버튼 클릭할 때가 아닌 구성요소가 렌더링될때 toggleLike를 즉시 호출하기 때문
그래서 화살표함수로 나중에 호출될 함수를 생성시켜야함
즉 화살표함수로 바꿔주는게 더 옳다!
게시글 생성 및 수정 모달 컴포넌트
일단 1차원적으로 게시글 생성에 대해서 컴포넌트 분리를 진행해보았는데,
그러다보니 업데이트와 불러오는 컴포넌트 위치가 달라서 따로 컴포넌트를 2개 선언을 해보았다. 그러다보니 중복코드가 너무 많아져서 겹치는 부분은 PostModal 컴포넌트에 넣어놓고 CreatePostModal과 EditPostModal컴포넌트에서 확장해서 사용하는 방식으로 진행해보았다.
자자 이 과정에서 수많은 에러를 양산했는데,
생성과 수정 함수가 겹침
  // const handleCreateOrUpdatePost = async () => {
  //   const uploadedImageUrl = imageFile
  //     ? await uploadImage(imageFile)
  //     : imagePreview

  //   if (!uploadedImageUrl) {
  //     toast({
  //       title: "이미지를 포함하지 않았습니다",
  //       description: "이미지를 추가해주세요.",
  //     })
  //     return
  //   }

  //   const postData: NewPost = {
  //     title,
  //     content,
  //     image_url: uploadedImageUrl,
  //     user_id: currentUserId, // 현재 사용자 ID를 넣어줍니다
  //   }

  //   if (editPostId) {
  //     await updatePost(uploadedImageUrl)
  //   } else {
  //     await createPost(postData)
  //   }

  //   // 모달 닫기 및 폼 리셋
  //   resetForm()
  //   setShowModal(false)
  // }
usePosts.ts에서 가져온 코드인데,
기존에는 editPostId를 기점으로 있으면 수정 없으면 생성을 해주는 함수를 한번에 만들었는데,
실제로 컴포넌트 분리를 시도하다보니, ui위치도 다르고 조건에 따라 게시 혹은 수정을 해주기에는 게시글 생성은 Dialog를 이용해서 모달창을 열고, 수정은 Button으로 모달을 열 예정이라 아직 내 판단이 맞는지는 모르겠지만 게시글 생성과 수정을 각각 나눠서 구현하기로 하였다.
그래서 결국 위에서 PostModal에 공용 컴포넌트를 넣고 CreatePostModal과 EditPostModal 두개에서 받아서 사용하려고 하였으나 아예 전면 갈아엎고 각각 만들어주었다.
CreatePostModal
import React from "react"
import { Button } from "@/components/ui/button"
import {
  Dialog,
  DialogContent,
  DialogHeader,
  DialogTrigger,
} from "@/components/ui/dialog"
import { Input } from "@/components/ui/input"
import usePosts from "@/hooks/usePosts"
import useAuth from "@/hooks/useAuth"

const CreatePostModal: React.FC = () => {
  const {
    title,
    content,
    imagePreview,
    showModal,
    setShowModal,
    setTitle,
    setContent,
    handleFileChange,
    handleCreatePost,
  } = usePosts()

  const { nickname } = useAuth()

  return (
    <Dialog open={showModal} onOpenChange={setShowModal}>
      <DialogTrigger>{nickname}님의 일상을 남겨보세요!</DialogTrigger>
      <DialogContent>
        <DialogHeader>
          <Input
            placeholder="제목을 작성해주세요"
            value={title}
            onChange={(e) => setTitle(e.target.value)}
          />
          <Input
            placeholder={`${nickname}님, 무슨 일상을 공유하고 싶으신가요?`}
            value={content}
            onChange={(e) => setContent(e.target.value)}
            className="mt-2"
          />
          <Input type="file" accept="image/*" onChange={handleFileChange} />
          {imagePreview && (
            <img src={imagePreview} alt="Preview" className="mt-2" />
          )}
          <Button onClick={handleCreatePost} className="mt-4">
            게시
          </Button>
        </DialogHeader>
      </DialogContent>
    </Dialog>
  )
}

export default CreatePostModal
EditPostModal
import React, { useEffect } from "react"
import { Button } from "@/components/ui/button"
import { Dialog, DialogContent, DialogHeader } from "@/components/ui/dialog"
import { Input } from "@/components/ui/input"
import usePosts from "@/hooks/usePosts"
import { Post } from "../../type"

type EditPostModalProps = {
  post: Post
}

const EditPostModal: React.FC<EditPostModalProps> = ({ post }) => {
  const {
    title,
    content,
    imagePreview,
    showModal,
    handleFileChange,
    setTitle,
    setContent,
    handleUpdatePost,
    handleEditPost,
    setShowModal,
  } = usePosts()

  // 수정 버튼을 클릭하면 모달을 열기 위한 함수
  const handleOpenModal = () => {
    handleEditPost(post) // 선택한 게시글의 데이터를 설정
    setShowModal(true) // 모달을 열기
  }

  return (
    <>
      <Button onClick={handleOpenModal} className="mt-2">
        수정
      </Button>

      <Dialog open={showModal} onOpenChange={setShowModal}>
        <DialogContent>
          <DialogHeader>
            <Input
              placeholder="제목을 수정해주세요"
              value={title}
              onChange={(e) => setTitle(e.target.value)}
            />
            <Input
              placeholder="내용을 수정해주세요"
              value={content}
              onChange={(e) => setContent(e.target.value)}
              className="mt-2"
            />
            <Input type="file" accept="image/*" onChange={handleFileChange} />
            {imagePreview && (
              <img src={imagePreview} alt="Preview" className="mt-2" />
            )}
            <Button onClick={handleUpdatePost} className="mt-4">
              수정
            </Button>
          </DialogHeader>
        </DialogContent>
      </Dialog>
    </>
  )
}

export default EditPostModal
이후
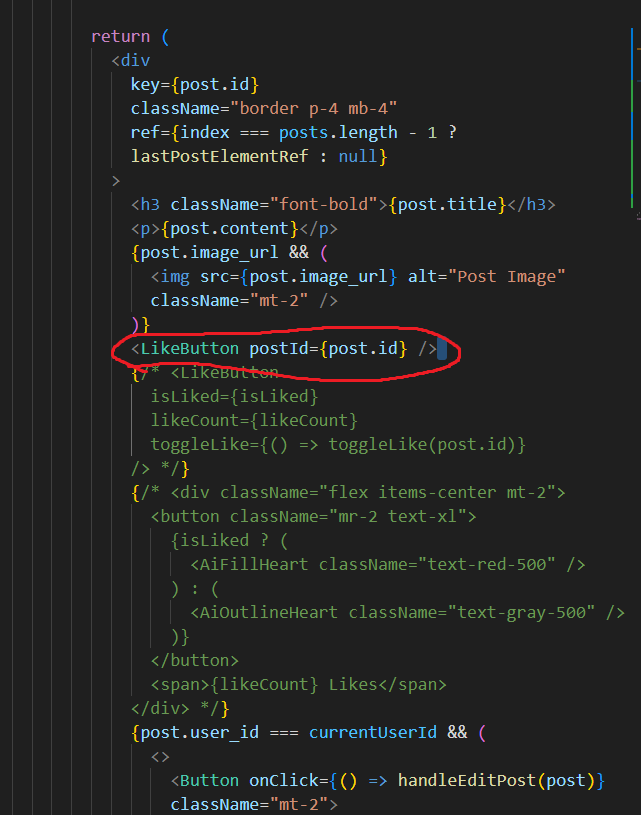
<CreatePostModal /> <EditPostModal post={post} />이렇게 넣어줬는데,
하다보니 이게 겹치는 함수가 있고, 한 컴포넌트에서만 쓰는 함수가 있는데 너무 다 usePosts.ts에 넣어서 사용한게 아닌가 싶어서 나중에 꼭 리팩토링 해볼 예정
React.FC ??
React Functional Component의 약자로 함수형 컴포넌트를 정의할 때 사용하는 타입
이걸 사용하면 children이라는 props를 기본적으로 받을 수 있게 됨
게시글 삭제 컴포넌트 분리
이미 함수를 잘 구현해놔서 삭제 자체는 컴포넌트 분리가 생성 수정을 겪었기 때문에 어렵지 않았다.
import React from "react"
import { Button } from "@/components/ui/button"
import usePosts from "@/hooks/usePosts"
import { Post } from "../../type"

type DeletePostModalProps = {
  post: Post
}

const DeletePostModal: React.FC<DeletePostModalProps> = ({ post }) => {
  const { deletePost } = usePosts()

  return (
    <>
      <Button onClick={() => deletePost(post.id)} className="mt-2">
        삭제
      </Button>
    </>
  )
}

export default DeletePostModal
기존 함수를 통해 자기 게시글만 삭제 버튼이 보임!!
댓글 분리
자 이거때문에 리펙토링 진행했었죠??
기존에 div쪽에서 훅을 선언해서 postId를 가져오다보니 훅이 대한 에러가 떴어서 겸사겸사 너무 긴 200줄의 page.tsx에 대해 댓글 분리 작업을 해서 jsx에 쪽에서 훅을 선언해서 댓글을 남기는 방향으로 진행하려 한다.
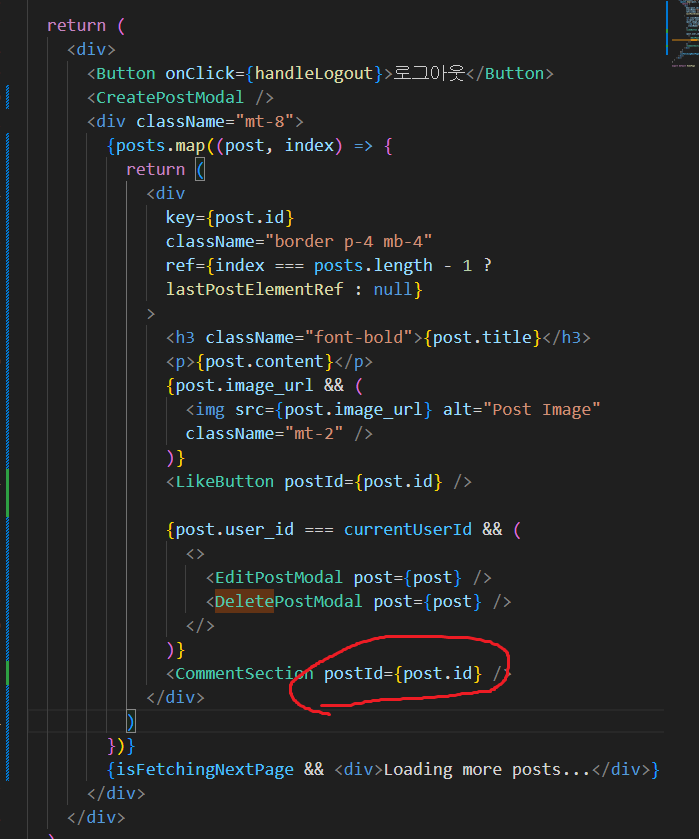
이 처럼 postId를 인수로 받아오면 끝!!
// components/CommentSection.tsx
import React from "react"
import { Button } from "@/components/ui/button"
import { Input } from "@/components/ui/input"
import useComments from "@/hooks/useComments"
import useAuth from "@/hooks/useAuth"

type CommentSectionProps = {
  postId: number
}

const CommentSection: React.FC<CommentSectionProps> = ({ postId }) => {
  const {
    comments,
    comment,
    setComment,
    handleCreateOrUpdateComment,
    handleEditComment,
  } = useComments(postId)
  const { currentUserId } = useAuth()
  return (
    <div className="mt-4">
      <Input
        placeholder="댓글을 입력하세요"
        value={comment}
        onChange={(e) => setComment(e.target.value)}
      />
      <Button onClick={handleCreateOrUpdateComment} className="mt-2">
        댓글 작성
      </Button>
      <div className="mt-4">
        {comments.map((comment) => (
          <div key={comment.id} className="border p-2 mt-2">
            <p>{comment.content}</p>
            {comment.user_id === currentUserId && (
              <Button
                onClick={() => handleEditComment(comment)}
                className="mt-1"
              >
                수정
              </Button>
            )}
          </div>
        ))}
      </div>
    </div>
  )
}

export default CommentSection
물론 추후 기능적 분리를 더 진행하긴 해야하지만 아직 구현해야할 갈 길이 멀기에 일단 이정도만 구현해놓고 추후 리펙토링하면서 좀 더 신경쓰도록 하자
댓글 기능 코드 분석
type CommentSectionProps = {
  postId: number
}
일단 props로 받아올 postId에 대해 타입 선언
const CommentSection: React.FC<CommentSectionProps> = ({ postId }) => {
  const {
    comments,
    comment,
    setComment,
    handleCreateOrUpdateComment,
    handleEditComment,
  } = useComments(postId)

  const { currentUserId } = useAuth()
그리고 comment관련 훅 가져옴
comments - 게시글에 대한 댓글 리스트
comment - 사용자가 작성 중인 댓글 내용
setComment - 사용자 입력 댓글 내용 업데이트하는 함수
handleCreateOrUpdateComment - 댓글을 새로 작성하거나, 기존 댓글 업데이트하는 함수
handleEditComment - 댓글 수정할 때 호출되는 함수
return (
  <div className="mt-4">
    <Input
      placeholder="댓글을 입력하세요"
      value={comment}
      onChange={(e) => setComment(e.target.value)}
    />
    <Button onClick={handleCreateOrUpdateComment} className="mt-2">
      댓글 작성
    </Button>
    <div className="mt-4">
      {comments.map((comment) => (
        <div key={comment.id} className="border p-2 mt-2">
          <p>{comment.content}</p>
          {comment.user_id === currentUserId && (
            <Button
              onClick={() => handleEditComment(comment)}
              className="mt-1"
            >
              수정
            </Button>
          )}
        </div>
      ))}
    </div>
  </div>
)
input에서 입력한 댓글을 button으로 함수 전달을 시키면 mapping에서 댓글을 화면에 렌더링 해줌
대신 수정 버튼은 현재 사용자와 댓글작성자가 일치할 경우만 수정 버튼이 나타남
물론 아직 수정해야겠지만 기본코드는 이정도까지만 구현하기로!
