

react + next.js + typescript 조합에서 협업 시 사용하는 eslint + prettier + stylelint 세팅에 대해 총정리한 글입니다.
- eslint에서 plugins, extends, rules, settings, env, ignorePatterns, parser가 무엇을 의미하는지 서술하였습니다
- eslint의 rules의 각 요소가 무엇을 의미하는지 서술하였습니다.
1. .eslintrc 파일의 구성
{
  "plugins": [
    "react",
    "@typescript-eslint",
    "react-hooks",
    "import",
    "simple-import-sort",
    "prettier",
    "jsx-a11y"
  ],
  "extends": [
    "eslint:recommended",
    "plugin:react/recommended",
    "plugin:@typescript-eslint/recommended",
    "plugin:jsx-a11y/recommended",
    // "react-app",
    "prettier/prettier",
    "plugin:import/recommended"
  ],
  "rules": {
    "react-hooks/rules-of-hooks": "error",
    "react-hooks/exhaustive-deps": "warn",
    "prettier/prettier": "error",
    "simple-import-sort/imports": "error",
    "simple-import-sort/exports": "error",
    "import/no-anonymous-default-export": 0,
    "no-multiple-empty-lines": ["error", { "max": 1 }],
    "eol-last": ["error", "always"],
    "comma-dangle": ["error", "always-multiline"],
    "object-curly-spacing": ["error", "always"],
    "space-in-parens": ["error", "never"],
    "computed-property-spacing": ["error", "never"],
    "comma-spacing": ["error", { "before": false, "after": true }],
    "quotes": ["error", "single"],
    "no-tabs": ["error", { "allowIndentationTabs": true }],
    "semi": ["error", "always"],
    "object-shorthand": "error",
    "padding-line-between-statements": [
      "error",
      { "blankLine": "always", "prev": "*", "next": "return" },
      { "blankLine": "always", "prev": ["const", "let", "var"], "next": "*" },
      { "blankLine": "any", "prev": ["const", "let", "var"], "next": ["const", "let", "var"] }
    ]
  },
  "settings": {
    "import/resolver": {
      "typescript": {}
    },
    "import/parsers": {
      "@typescript-eslint/parser": [".ts", ".tsx"]
    }
  },
  "parser": "@typescript-eslint/parser",
  "env": {
    "browser": true,
    "es2021": true,
    "commonjs": true
  }
}
.eslintrc.json
eslint에서 code convention은 plugins와, extends와 rules에 의해 주로 정해진다. plugins 와, extends 와 rules의 관계 파악이 중요하다.
plugins 는 무엇인가?
타인이 만들어둔 plugin을 다운로드 함으로써 컨벤션을 사용할 수 있다. 하지만 추가할 이를 다운로드 하는 것만으로 적용되는 것이 아니다. yarn이나 npm을 통해 다운로드 한 다음에, eslintrc.json 파일 내 plugins에 추가해주어야한다. 다른 사람이 만든 규칙을 가지고 오겠다는 의미다. 단순히 가지고 오겠다는 것이고, plugins에 추가한다고 해서, E또한 바로 적용되는 것이 아니다. extends 또는 rules에 추가해주어야 한다.
extends 는 무엇인가?
다른 사람이 만들어둔 plugin package의 콘벤션을 그대로 따르고 싶을 때, plugin에서 다운 받은 것을 그대로 적어준다.
rules 는 무엇인가?
다른 사람이 만들어둔 plugin package 에서 몇개의 콘벤션 규칙을 취사선택하여 사용하고 싶을 때, rules에 추가해준다.
2. ESLint - plugin and config
plugin - eslint는 서드파티 플러그인 사용을 지원한다.
플러그인 패키지를 설치하고 해당 플러그인을 plugins 에 추가하여 사용할 수 있다. 플러그인을 사용할 때 eslint-plugin 접두사는 생략이 가능하다.
{
  "plugins": [
    "eslint-plugin-react" // === "react"
  ]
}
각 패키지 설치 방법
yarn add -D [package_name]-D 옵션으로 설치하는데, 이는 개발단에서만 사용하는 라이브러리를 의미한다. 이 서비스가 배포되고, 사용자에 의해 실용될 필요가 없는 라이브러리들은 -D를 붙여 설치한다.
이번에 진행한 Kyrics Project에서 사용하는 10가지 패키지에 대하여 알아보자.
1. "eslint-config-prettier": "^8.3.0",
2. "eslint-plugin-prettier": "^3.4.0",
3. "eslint-plugin-react": "^7.24.0",
4. "eslint-plugin-react-hooks": "^4.2.0",
5. "eslint-import-resolver-typescript": "^2.4.0"
6. "eslint-plugin-jsx-a11y": "^6.4.1",
7. "eslint-plugin-import": "^2.23.4",
8. "eslint-plugin-simple-import-sort": "^7.0.0",
9. "@typescript-eslint/eslint-plugin": "^4.28.1",
10. "@typescript-eslint/parser": "^4.28.1",
yarn add -D eslint-config-prettier eslint-plugin-prettier eslint-plugin-react eslint-plugin-react-hooks eslint-plugin-jsx-a11y eslint-plugin-import eslint-plugin-simple-import-sort @typescript-eslint/eslint-plugin @typescript-eslint/parser
이렇게 한번에 설치할 수 있다. resolver-typescript는 필요하지 않아 빼두었다.
2.1. eslint-config-prettier
eslint와 prettier 모두 formatting 기능을 가지고 있다. 우리는 prettier의 formatting 기능을 사용할 것이고, eslint는 코드 에러를 잡아주는 기능만을 하게 할 것이다. eslint-config-prettier는 eslint의 formatting 기능을 없애준다.
2.2. eslint-plugin-prettier
eslint가 prettier 포맷팅 기능을 사용하도록 하는 패키지다.
2.3. eslint-plugin-react
eslint가 react 코드를 알아먹고 문제점을 알려준다.
plugins 에만 적어준다고 하여, 아무일도 일어나지 않는다. rules를 추가해주거나 (일일이 많은 규칙을 추가해줘야하니 귀찮다) or extends (한번에 정해진 규칙을 가지고 온다는 것) 에 추가한다.
// rules 로  react 적용
module.exports = {
    "plugins": [
        "react"
    ],
    "rules": {
        "react/display-name": true,
        "react/jsx-key": true,
        "react/jsx-no-duplicate-props": true
        ...
    }
};
// extends 로 react 적용
module.exports = {
"plugins": [
"react"
],
"extends": [
"eslint:recommended",
"plugin:react/recommended"
]
};2.4. eslint-plugin-react-hooks
React는 Hook이 호출되는 순서에 의존한다
(공식문서)
Hook은 Javascript 함수입니다. 하지만 Hook을 사용할 때는 두 가지 규칙을 준수해야합니다. 우리는 이러한 규칙들을 자동으로 강제하기 위한 plugin을 제공하고 있습니다.
-
최상위에서만 Hook을 호출해야 한다.
반복문, 조건문, 혹은 중첩된 함수 내에서 Hook을 호출하지 마세요.대신 early return이 실행되기 전에 항상 React 함수의 최상위(at the top level)에서 Hook을 호출해야 합니다. 이 규칙을 따르면 컴포넌트가 렌더링 될 때마다 항상 동일한 순서로 Hook이 호출되는 것이 보장됩니다.🐱 이러한 점은 React가 useState 와 useEffect 가 여러 번 호출되는 중에도 Hook의 상태를 올바르게 유지할 수 있도록 해줍니다. -
오직 React 함수 내에서 Hook을 호출해야 한다.
Hook을 일반적인 Javascript 함수에서 호출하지 마세요. 대신 아래와 같이 호출할 수 있습니다. -
React 함수 컴포넌트에서 Hook을 호출하세요.
-
Custom Hook에서 Hook을 호출하세요.
이 플러그인은 CRA에 기본적으로 포함되어 있다.
next 에도 기본적으로 포함되어 있다.
그러므로 사용하려면 plugin에 추가해주면 된다.
eslint 설정 파일
{
  "plugins": [
    // ...
    "react-hooks"
  ],
  "rules": {
    // ...
    "react-hooks/rules-of-hooks": "error", // Checks rules of Hooks
    "react-hooks/exhaustive-deps": "warn" // Checks effect dependencies
  }
}
react-hooks/rules-of-hooks
리액트 훅의 순서를 지키게끔 한다. React는 Hook이 호출되는 순서에 의존하기 때문에, 매 랜더링마다 다른 순서로 Hook이 호출된다면, 프로젝트에 문제가 발생할 것이다. 이것을 막아주기 위한 rule이다.
react-hooks/exhaustive-deps
exhaustive-deps can be configured to validate dependencies of custom Hooks with the additionalHooks option. This option accepts a regex to match the names of custom Hooks that have dependencies.
We suggest to use this option very sparingly, if at all. Generally saying, we recommend most custom Hooks to not use the dependencies argument, and instead provide a higher-level API that is more focused around a specific use case.
2가지 기능을 모두 사용하도록 한다.
2.5. eslint-import-resolver-typescript
typescript 프로젝트에서 절대경로를 사용할 때, eslint가 인식하지 못 하는 에러를 해결.
→ 절대경로를 사용한다면 필요할 것이다.
절대경로란 무엇이고, 상대경로란 무엇인가?
// 상대경로
import module from '../../../service/user';

// 절대경로
import module from '@service/user';
상대경로 : 현재 파일을 기준으로, import 할 파일의 위치를 파악
절대경로 : 현재 파일에 상관없이, import 할 파일의 위치를 파악
- 장점
- 코드가 외관적으로 깔끔해보인다.
- depth가 깊어질 때, 용이하다.
소견
- skeleton extention 을 사용하면, 상대경로 import에 어려움이 없음.
- 프로젝트의 depth가 깊지 않기 때문에, 엄청나게 필요하진 않다.
⇒ 경험용으로 사용해보고 싶다면, 적용해도 괜찮아보인다. 하지만, 우리 프로젝트에 적용하였을 때 많이 편해질 것이냐? 그것은 아니다.
우리는 경험삼어 사용하기로 했다.
2.6. eslint-plugin-jsx-a11y
웹사이트의 접근성을 높여주는 패키지이다. img 태그에 alt-text를 넣도록 강제하거나, href를 #로 대체하지 못하게 하는 등 여러 콘벤션을 지키도록 한다. 까다로울 수 있으나, 웹사이트의 접근성을 높이기 위하여 필요할 것이다. 필수적으로 쓰자.
2.7. eslint-plugin-import
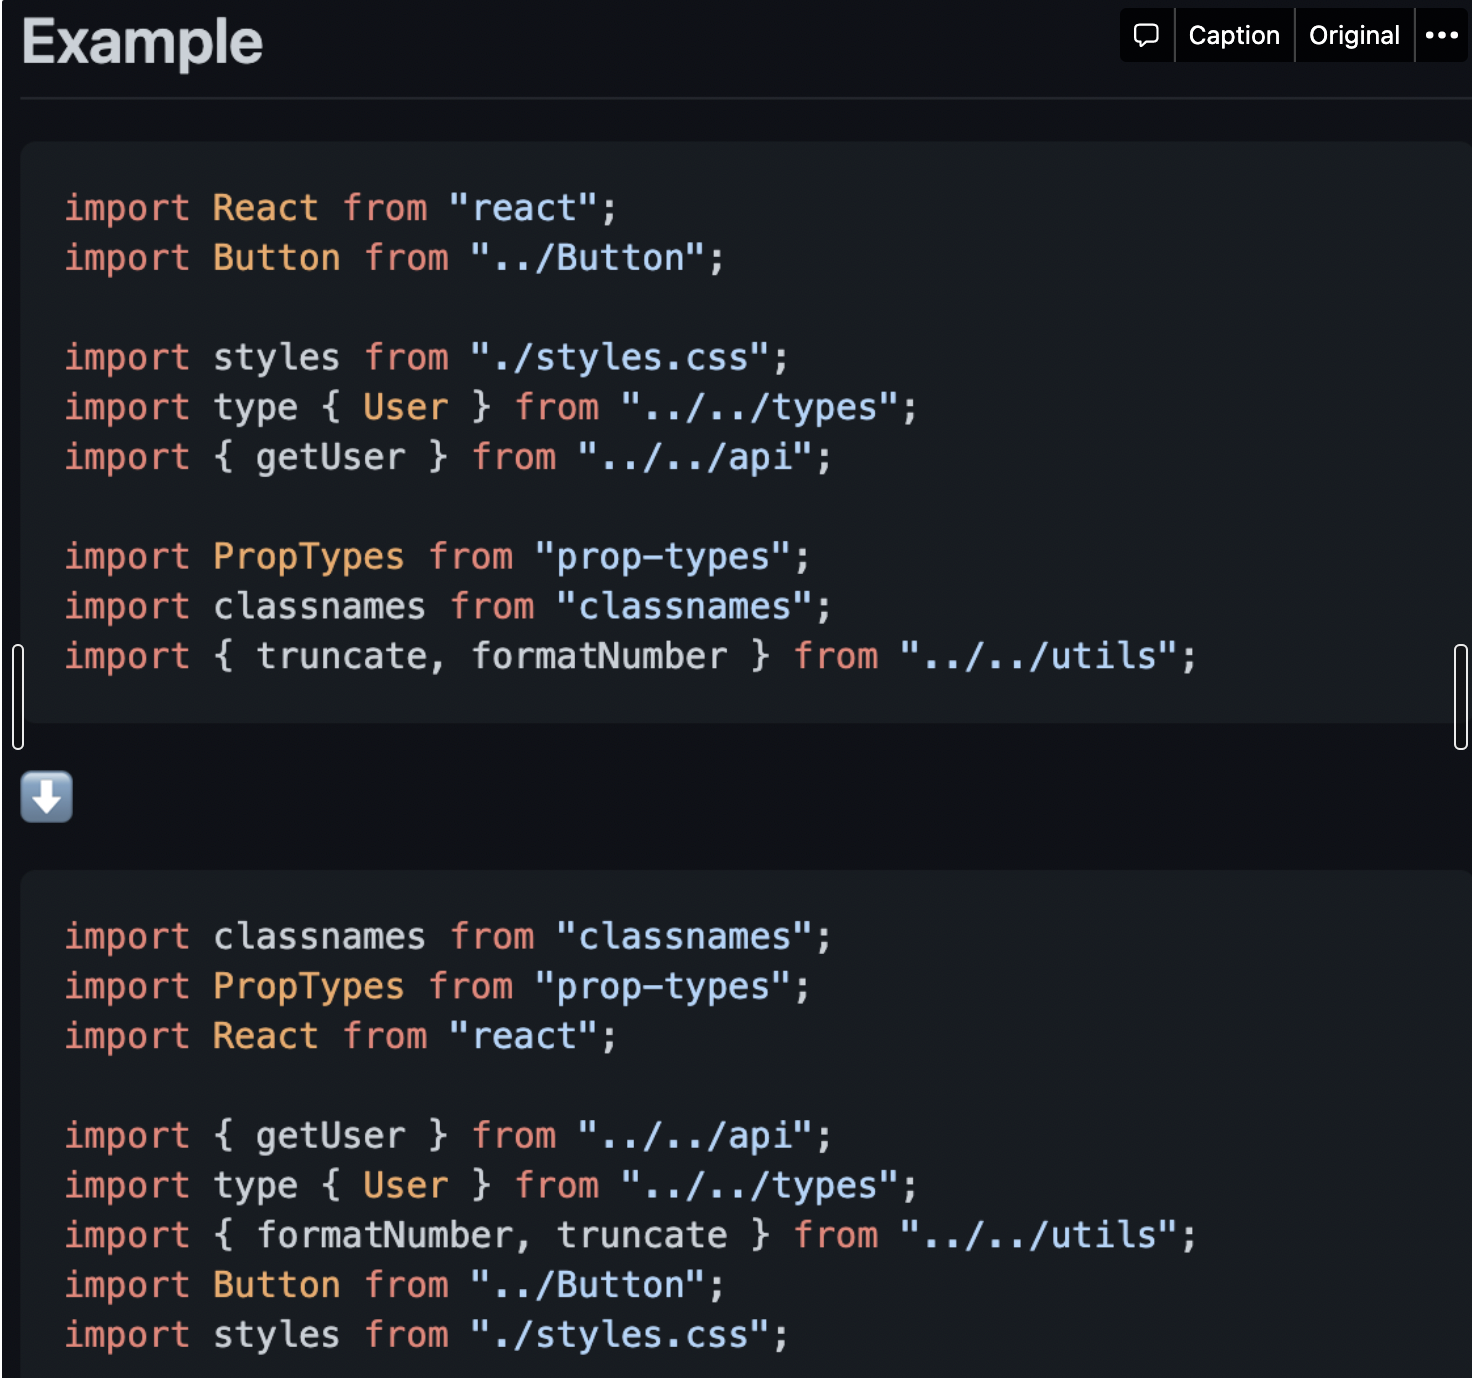
2.8. eslint-plugin-simple-import-sort
import, export 를 정렬해준다.
{
  "rules": {
    "simple-import-sort/imports": "error",
    "simple-import-sort/exports": "error"
}
2.9. @typescript-eslint/eslint-plugin
typescript 에서 tslint 라는 extension을 사용하기도 했다. 하지만, eslint가 강하게 자리 잡았고, eslint가 typescript 에 호환 되도록 하기 위하여 이 패키지를 쓴다.
2.10. @typescript-eslint/parser
javacript parser로 babel을 쓰는데, typescript 에서는 이 parser가 더욱 적합하다.
3. eslint - rules
3.1. 사용법
프로젝트에서 사용하는 규칙을 수정
- off or 0 - 규칙을 사용하지 않음
- warn or 1 - 규칙을 경고로 사용
- error or 2 - 규칙을 오류로 사용
규칙에 추가 옵션이 있는 경우, 배열 리터럴 구문을 사용하여 지정
{
  "rules": {
    "comma-spacing": ["error", { "before": false, "after": true }],,
  }
}
plugin에서 규칙을 지정할 때는 eslint-plugin을 반드시 생략하고 적어야 한다.
eslint-plugin-simple-import-sort사용하려면
{
  "plugins": ["simple-import-sort"]
}
{
  "rules": {
    "simple-import-sort/imports": "error",
    "simple-import-sort/exports": "error"
  }
}
3.2. 어떤 rules를 적용할까?
{
  "extends": ["react-app", "prettier/prettier"],
  "plugins": ["react-hooks", "simple-import-sort", "prettier", "import"],
  "rules": {
    "prettier/prettier": "error", (필수)
    "react-hooks/rules-of-hooks": "error", (필수)_
    "simple-import-sort/imports": "error", (보류)
    "simple-import-sort/exports": "error", (보류)
    "import/no-anonymous-default-export": 0, (import 에서 뭐 쓰고, off 할지 정해와주세요. 간단하게.)

    "no-multiple-empty-lines": ["error", { "max": 1, "maxEOF": 0 }],
// 최대 줄바꿈 수는 1, 마지막 줄바꿈 없이
    "comma-dangle": ["error", "always-multiline"],
// 후행 쉼표.
// always : 항상 쉼표가 필요
// always-multiline : 2줄 이상일때, 마지막에 쉼표 필요. 한줄일때는 후행쉼표 x (좋다)
    "object-curly-spacing": ["error", "always"],
// object 괄호 앞 뒤로 공백 추가 여부
// always (채택)
// never
    "space-in-parens": ["error", "never"],
// ( , ) 괄호 앞뒤로 공백 추가
// always
// never (채택)
    "computed-property-spacing": ["error", "never"],
// obj[key] 에서 [ key ] 로 적을지, [key]로 적을지
// alway
// never (채택)
    "comma-spacing": ["error", { "before": false, "after": true }],
// comma 앞뒤로 공백 - 앞에는 없고, 뒤에는 있도록
    "eol-last": ["error", "always"],
// end of lines, 파일의 맨 마지막에 줄바꿈을 넣을것이냐?
// always (채택)
// never
// Benefits of trailing newlines include the ability to concatenate or
// append to files as well as output files to the terminal without interfering with shell prompts.
    "quotes": ["error", "single"],
// single or double - 싱글 선호
// single (채택)
    "no-tabs": ["error", { "allowIndentationTabs": true }],
// \t 사용을 금지한다. (채택)
    "semi": ["error", "always"],
// semi colon (always 채택)
    "object-shorthand": "error",
// es6에서 나온 객체를 간편하게 쓰는 문법으로 강제한다.
// 하단 참고
    "padding-line-between-statements": [
      "error",
      { "blankLine": "always", "prev": "*", "next": "return" },
      { "blankLine": "always", "prev": ["const", "let", "var"], "next": "*" },
      { "blankLine": "any", "prev": ["const", "let", "var"], "next": ["const", "let", "var"] }
    ]
// prev : 이전에 무엇이 왔을때 blankline을 넣을것인가? // const,let,var, case
// next : 다음에 무엇이 왔을때 blankline을 넣을 것인가?  // return
  }
}
"object-shorthand": "error",// properties
var foo = {
x: x,
y: y,
z: z,
};
// methods
var foo = {
a: function() {},
b: function() {}
};/*eslint-env es6*/
// properties
var foo = {x, y, z};
// methods
var foo = {
a() {},
b() {}
};4. settings -모든 규칙에 의해 공유되는 설정
"settings": {
    "import/resolver": {
      "typescript": {}
    },
  },
절대경로를 사용하는 경우에, typescript에서 인식하지 못 할 수 있다. 이를 위해서 eslint-import-resolver-typescript 를 설치하고, 위와 같이 settings를 설정한다.
5. env - 사전 정의된 전역 변수 사용을 정의
"env": {
    "browser": true, // console.log를 에러 없이 사용
    "es2021": true,
    "commonjs": true // module.exports 구문, require 구문 지원
  }
6. ignorePatterns - eslint를 적용하지 않을 폴더나 파일 명시
{
  "ignorePatterns": ["node_modules/"]
}
아직까진 필요 없을 듯 하다.
7. parser
Babel을 사용하는 경우 : @babel/eslint-parser
typescript를 사용하는 경우 : @typescript-eslint/parser
module.exports = {
    "parser": "esprima" // 기본 parser
    // "parser": "babel-eslint",
    // "parser": "@typescript-eslint/parser"
};
8. prettier
{
  "printWidth": 100,
  "semi": true,
  "singleQuote": true,
  "trailingComma": "all",
  "tabWidth": 2,
  "bracketSpacing": true,
  "endOfLine": "auto",
  "useTabs": false
}
prettier는 eslint와 호환을 위해 동일하게 설정해준다.
9. stylelint
9.1. VS Code의 settings.json에서 다음과 같이 추가해줍니다.
"editor.codeActionsOnSave": {
    "source.fixAll.stylelint": true
}
command + , 를 통해서도 settings.json에 들어갈 수 있어요
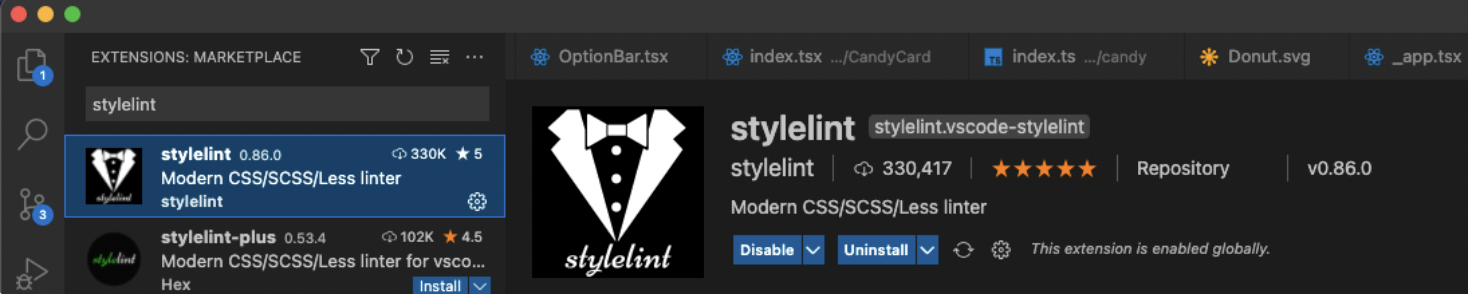
9.2. VS Code 익스텐션을 설치합니다.
9.3. .stylelintrc
{
  "extends": ["stylelint-config-concentric-order"]
}
참고자료
[공식 문서] eslint-plugin-react-hooks 를 사용하는 이유
eslint 설정들 자세한 설명1
eslint 설정들 자세한 설명2
eslint 설정들 자세한 설명3
제로초의 eslint
상대경로 vs 절대경로


의진님 총종리 잘봤습니다 ~^^