3. createReducer
- reducer를 더 간결하고 직관적으로 생성해주고
- 내부적으로 state mutation을 용이하게 해주는 기능을 제공한다.
(※ 특히 기존 reducer의 switch 분기처리를 대신하여 코드를 간결하게 구성 가능)
const reducer = (state=[], action) => {
    switch(action.type){
        case addFunc.type:
            console.log(action)
            return [...state, {text : action.payload, id : Date.now()}]
        case deleteFunc.type:
            return state.filter(deletedList => deletedList.id !== action.payload)
        default :
            return state
    }
}
switch-case 분기처리를 createAction 함수를 활용하여 직관화
const reducer = createReducer([], {
    [addFunc] : (state, action) => {
        state.push({text : action.payload, id : Date.now()})
    }, //no return
    [deleteFunc] : (state, action) => state.filter(deletedList => deletedList.id !== action.payload)
    //return
}
일단 createReducer를 활용하면 위와 같이 분기처리를 action trigger 함수로 바로 처리할 수 있다(※이때 []은 initial state).
즉 switch - case 문을 createAction을 통해 정의한 함수를 그대로 활용할 수 있고, callback을 통해 현재 dispatch하여 받아온 state와 action 인자를 활용할 수 있다.
이전보다 코드가 좀 더 간결해지고, 직관적인 분기처리를 해줄 수 있다.
내부 state를 직접 mutation하고 이를 return
const reducer = createReducer([], {
    [addFunc] : (state, action) => {
        state.push({text : action.payload, id : Date.now()})
    }, //no return
    [deleteFunc] : (state, action) => state.filter(deletedList => deletedList.id !== action.payload)
    //return
}
createReducer의 가장 강력한 기능으로, state를 직접 mutation할 수 있게 된다.
위 코드에서 볼 수 있듯이 state.push를 통해 직접 현재 state에 대한 mutation을 진행할 수 있고, 물론 state.filter와 같은 새로운 객체를 return할 수도 있다.
또한 createAction을 통해 생성한 함수를 그대로 활용하여, payload를 통해 받아온 인자를 사용한다(redux의 가장 큰 장점인 data 흐름을 일관화하는 효과가 발휘).
4. configureStore
middleWare가 장착된 store를 생성하여 state, API 관리 등을 해줄 수 있다.

configureStore는 GraphQL처럼 store내 reducer를 통한 state 변화, action dispatch 등의 흐름을 UI를 통해 관리해주는 기능을 제공한다.
이는 GraphQL처럼 data가 저장되어있는 곳이 하나이며, endpoint도 유일하기 때문에 가능한 것으로 보인다.
const store = configureStore({reducer})위와 같이 store를 configureStore를 통해 생성해주고, Redux DevTools를 실행하면 된다.
data 흐름을 보여주고 이를 관리
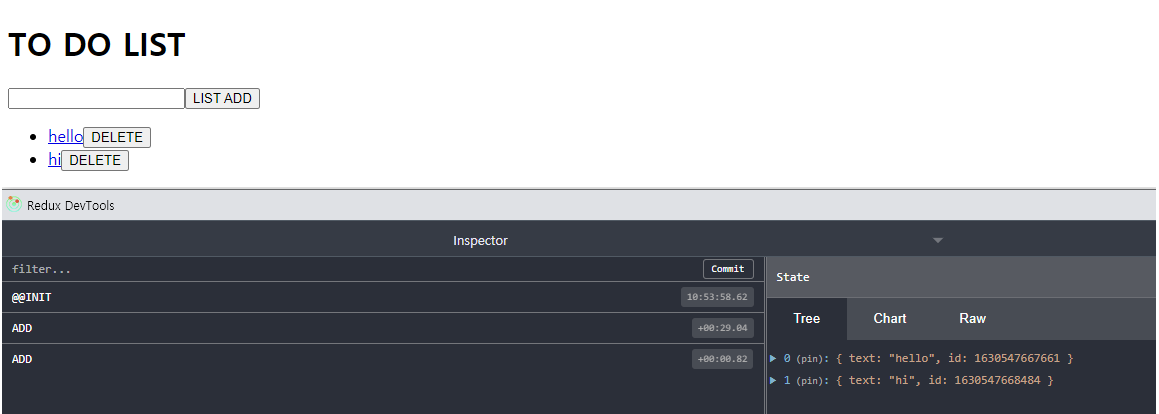
configureStore를 통해 생성한 store는 위와 같이 redux DevTools를 통해
- state 관리
- API(createAction 등) 관리
데이터 흐름이나 관리 등을 GraphQL처럼 인터페이스를 통해 진행할 수 있다.
UI 상에서 action dispatch 가능

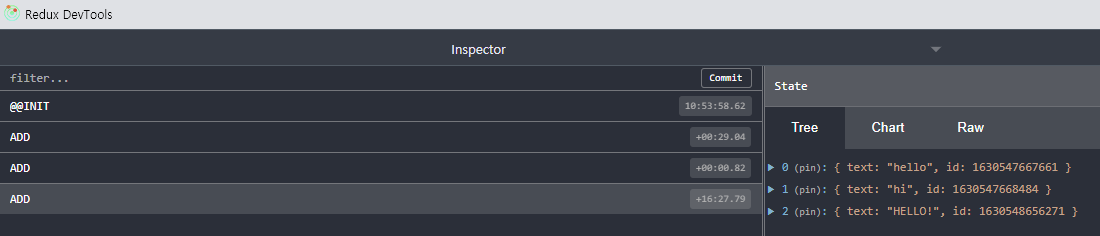
Redux DevTools 내에서 직접 action을 dispatch할 수 있다.
(물론 action은 미리 정의한 구조로 전달되어야 가능)
Redux로 만들어진 웹사이트를 DevTools를 이용하여 그 구조를 살펴볼 수 있다.
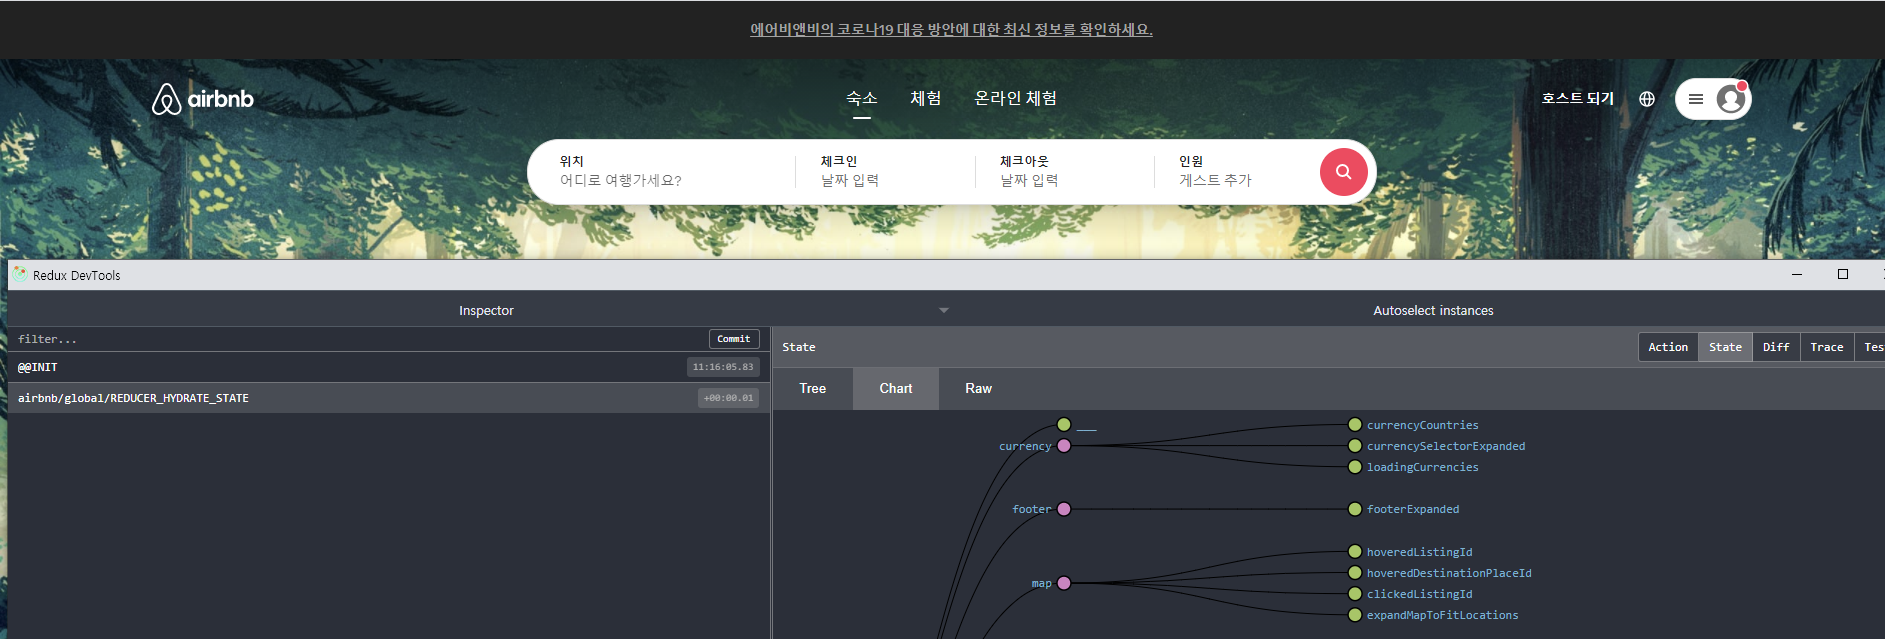
위 그림은 airbnb의 예시이고, 해당 웹사이트의 redux 구조를 devtools로 확인할 수 있다.
5. createSlice
action과 reducer를 따로 생성하지 않고, 한번에 같이 생성해주도록 해줄 수 있다.
const addFunc = createAction("ADD")
const deleteFunc = createAction("DELETE")

const reducer = createReducer([], {
    [addFunc] : (state, action) => {
        state.push({text : action.payload, id : Date.now()})
    }, //no return
    [deleteFunc] : (state, action) => state.filter(deletedList => deletedList.id !== action.payload)
    //return
})
기존의 reducer logic은 action을 dispatch하기 위한 별도의 함수를 따로 생성하였고,
action에 따른 객체를 createReducer 내부에서 return하고 mutation하는 구조로 진행하였다.
const makeLists = createSlice({
    name : 'makeLists',
    initialState: [],
    reducers: {
        addFunc : (state, action) => {
            state.push({text : action.payload, id : Date.now()})
        },

        deleteFunc : (state, action) => state.filter(deletedList => deletedList.id !== action.payload)
    }
}
위와 같이 createSlice를 사용하면 기본적으로 action에 대한 별도 함수 설정, 해당 함수에 따른 객체 return 및 state mutation logic(reducer 내부)을 따로 작성하지 않아도 된다.
즉 createSlice 내부에서 모든 작업을 한번에 수행할 수 있다.
- initialState를 통해 state의 처음 상태를 정의한다.
- reducers 내부에서 action을 dispatch할 함수와, 이에 따른 action을 한번에 정의한다(state mutation / state return 등).
- ※ 참고로 createSlice 내부의 reducer는 말 그대로 state와 action을 가지는 reducer이며, 내부 함수가 받아오는 인자는(state/action) 이 reducer로부터 받아온 것이다.
이후 추가 store 생성하면서 reducer 연결해주기(makeLists.reducer)
const store = configureStore({reducer : makeLists.reducer})store와 연결되는 reducer를 createSlice를 통해 생성한 reducer와 연결해준다.
createSlice 내부에서 정의한 함수들은 더이상 action trigger가 아닌, 그 자체로 action으로써 활용할 수 있다.
console.log(makeLists.actions)위 코드를 통해 createSlice를 정의한 actions를 살펴본다.

위 log를 통해 살펴볼 수 있듯이 내부적으로 설정한 addFunc, deleteFuc 함수는 reducer 내부의 actions로 정의되어 있다(actionCreater로 정의되어 있음).
※ remind) 함수들은 action을 호출하는 actionCreator이고, 실제 action은 해당 함수에 설정된 state mutation / return logic이다.
export const {
    addFunc,
    deleteFunc
} = makeLists.actions
import {addFunc, deleteFunc} from '../store'따라서 위와 같이 비구조화해서 사용할 수 있다.
※ 함수를 하나의 변수를 통해 export하는 방식이 아닌, 그 자체로 비구조화하여 기존보다는 간편하게 사용가능
※ createSlice 하나로 createAction, createReducer 사용하지 않아도 된다.
6. (참조) arrow function의 소괄호(), 중괄호{}
arrow function의 중괄호 사용 시 return 문을 사용하지 않는 이상 return 해주지 않는다.
[addFunc] : (state, action) => {
        state.push({text : action.payload, id : Date.now()})
    }
위 코드처럼 arrow function에서 중괄호를 사용할 경우, return을 별도 기재하지 않으면 return하는 값이 생기지 않는다.
[addFunc] : (state, action) => {
        state.push({text : action.payload, id : Date.now()})
  	return state
    }
만약 return 해야하는 값이 있어야 할 경우, return value를 명시해주어야 한다.
arrow function의 소괄호 사용 시 자동적으로 return 한다.
[deleteFunc] : (state, action) => state.filter(deletedList => deletedList.id !== action.payload)arrow function에서 소괄호를 사용할 경우, return을 별도 기재하지 않아도 자동 return 한다.
7. 참조링크
redux toolkit 공식문서
https://redux-toolkit.js.org/introduction/getting-started
allow function의 return 관련 유의해야할 점
https://velog.io/@bigbrothershin/JavaScript-%ED%99%94%EC%82%B4%ED%91%9C-%ED%95%A8%EC%88%98-%EC%82%AC%EC%9A%A9-%EC%8B%9C-%EC%99%80-%EC%82%AC%EC%9A%A9%EC%83%81-%EC%A3%BC%EC%9D%98%ED%95%A0-%EC%A0%90