layout
android:layout_width="wrap_content"		//포함된 내용 크기에 맞춤
android:layout_height="match_parent"	//부모 크기에 맞춤
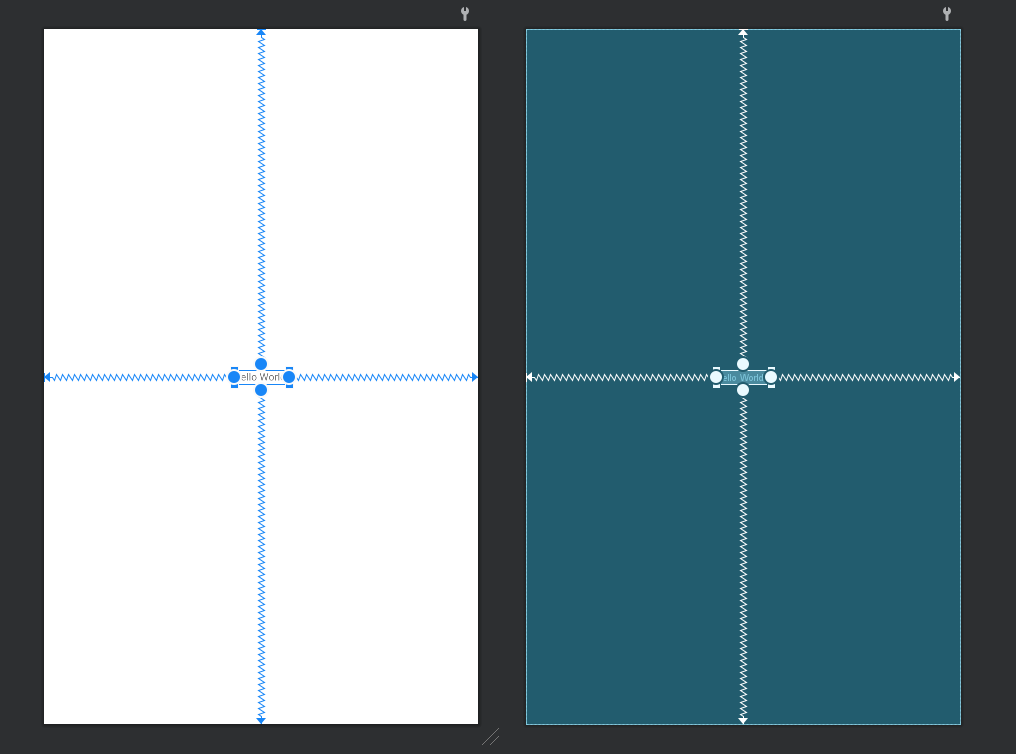
✔️ ConstraintLayout
- 연결 선을 이용해서 위치를 결정한다.
- 가장 간단하고 쉬운 방법이라고 생각한다.
- 선을 제대로 연결하지 않으면 한쪽에 붙어있는 경우가 발생하므로 최소 상, 하 중 하나와 좌, 우 중 하나는 무조건 연결해야 한다.
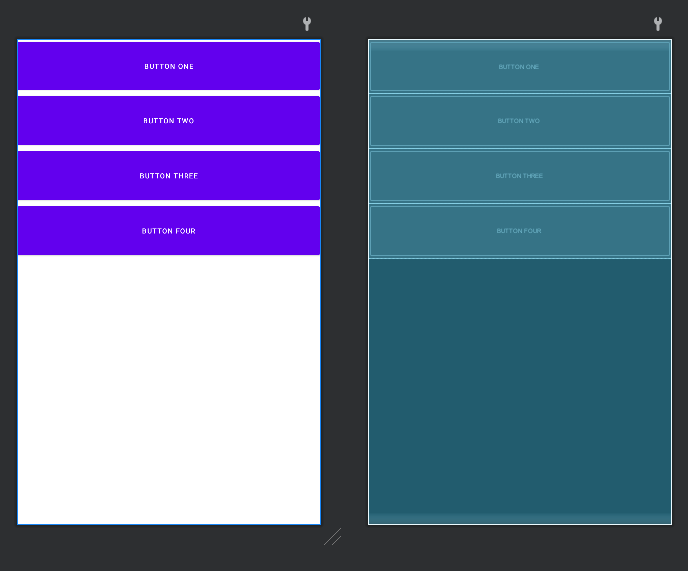
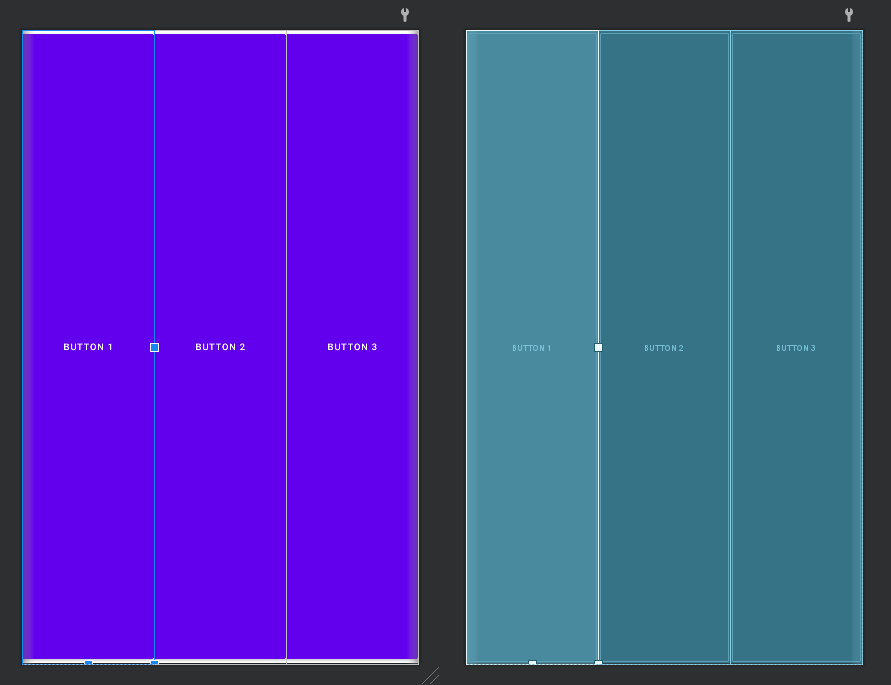
✔️ LinearLayout
- vertical, horizontal 두 종류가 있다.
- 위의 ConstraintLayout보다 배치가 힘들지만 해상도에 따라서 다르게 할 필요가 없다는 장점이 있다.
✅ vertical
✅ horizontal
✔️ RelativeLayout
- 상대적으로 위치가 결정되는 레이아웃이다.
- 해상도가 달라져도 위치가 변하지 않는다.
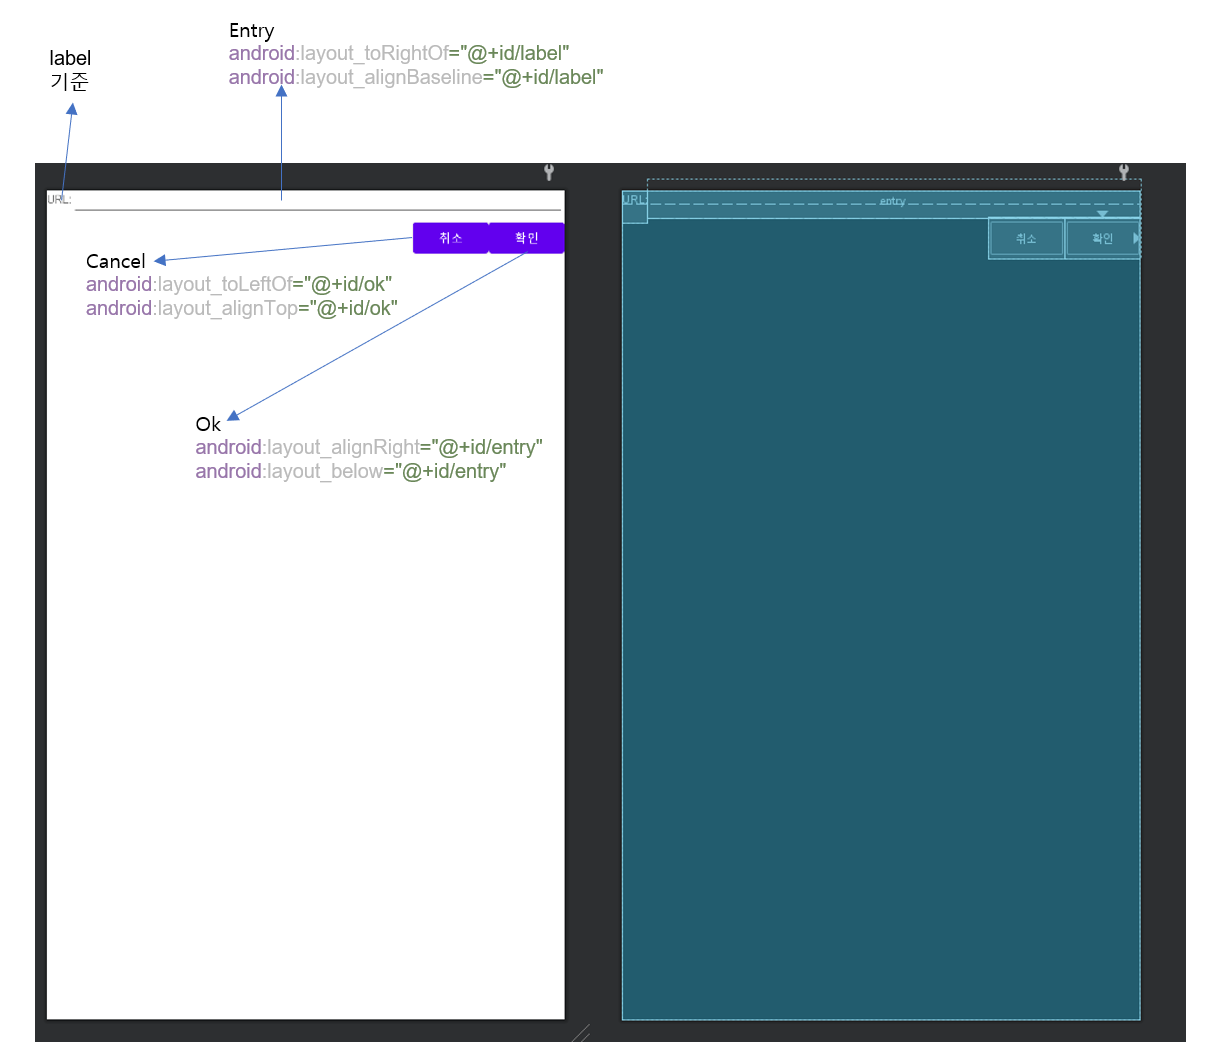
	<TextView
            android:id="@+id/label"
            android:layout_width="wrap_content"
            android:layout_height="37dp"
            android:text="URL:"/>
    <EditText
            android:id="@+id/entry"
            android:layout_width="match_parent"
            android:layout_height="wrap_content"
            android:layout_toRightOf="@+id/label"
            android:layout_alignBaseline="@+id/label"
            android:layout_marginLeft="0dp"/>
    <Button
            android:text="확인"
            android:layout_width="wrap_content"
            android:layout_height="wrap_content"
            android:id="@+id/ok"
            android:layout_alignRight="@+id/entry"
            android:layout_below="@+id/entry"/>
    <Button
            android:text="취소"
            android:layout_width="wrap_content"
            android:layout_height="wrap_content"
            android:layout_toLeftOf="@+id/ok"
            android:layout_alignTop="@+id/ok"
            android:id="@+id/cancel"/>
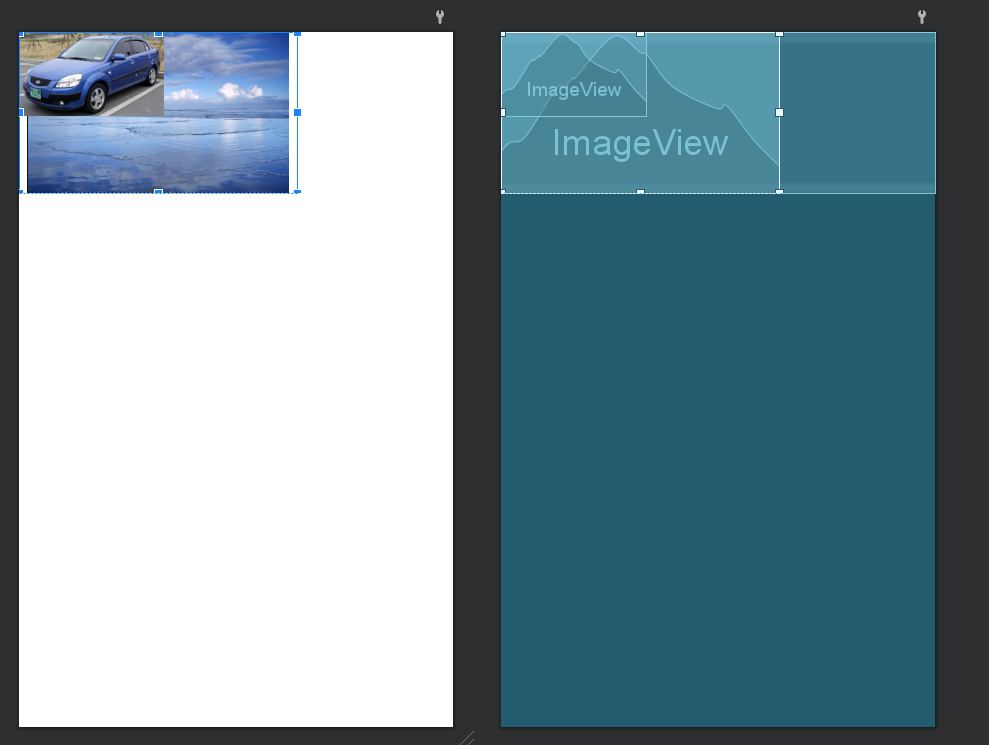
✔️ FrameLayout
- 액자처럼 쌓여있는 형태이다.
- 가장 위에 놓여있는 컨텐츠가 보이는 형태로 구성한다.
✔️ TableLayout
- 행과 열로 구분된 table 형태로 구성한다.
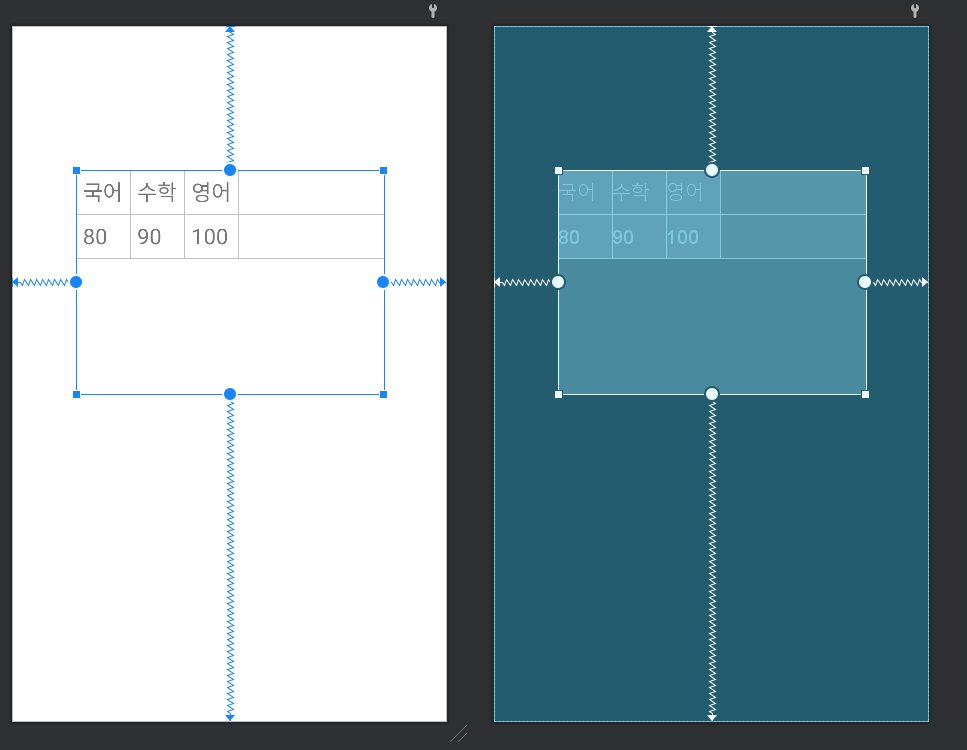
✅ TableLayout내부에 TableRow를 추가해서 구성한다.
    <TableLayout
            android:layout_width="425dp"
            android:layout_height="310dp"
            app:layout_constraintStart_toStartOf="parent" app:layout_constraintEnd_toEndOf="parent"
            app:layout_constraintTop_toTopOf="parent" app:layout_constraintBottom_toBottomOf="parent"
            app:layout_constraintHorizontal_bias="0.502" app:layout_constraintVertical_bias="0.306">
        <TableRow android:layout_width="match_parent" android:layout_height="match_parent">
            <TextView android:text="국어" android:textSize="30sp" android:padding="10dp"></TextView>
            <TextView android:text="수학" android:textSize="30sp" android:padding="10dp"></TextView>
            <TextView android:text="영어" android:textSize="30sp" android:padding="10dp"></TextView>
        </TableRow>
        <TableRow android:layout_width="match_parent" android:layout_height="match_parent">
            <TextView android:text="80" android:textSize="30sp" android:padding="10dp"></TextView>
            <TextView android:text="90" android:textSize="30sp" android:padding="10dp"></TextView>
            <TextView android:text="100" android:textSize="30sp" android:padding="10dp"></TextView>
        </TableRow>
    </TableLayout>
✔️ GridLayout
- 격자 형태로 위의 tableLayout과 비슷하다.
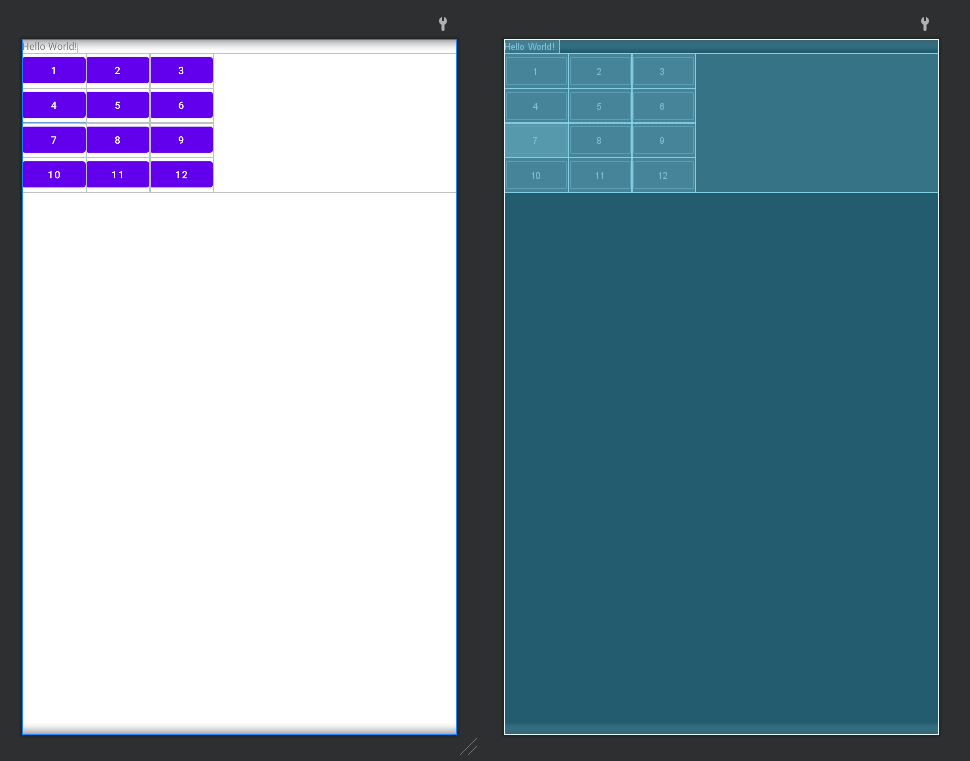
    <GridLayout
            android:layout_width="match_parent"
            android:layout_height="wrap_content"
            android:columnCount="3"
            android:rowCount="4"
            android:orientation="horizontal">
        <Button android:text="1"/>
        <Button android:text="2"/>
        <Button android:text="3"/>

        <Button android:text="4"/>
        <Button android:text="5"/>
        <Button android:text="6"/>

        <Button android:text="7"/>
        <Button android:text="8"/>
        <Button android:text="9"/>

        <Button android:text="10"/>
        <Button android:text="11"/>
        <Button android:text="12"/>

    </GridLayout>
