
현재 혼잡도 검색 시스템 프로젝트 진행 초기상태라서 시스템이 기획한대로 구현이 가능한지 확인할 필요가 있었습니다. 그래서 아주 핵심적인 기능인 서버가 이미지를 받아서 사람 수를 카운팅 해서 결과값을 클라이언트에게 보여주는 플로우가 가능한지, 문제점은 없는지 등을 보기 위한 아주 작은 프로토타입을 구현해보았습니다.
🚶 시스템 플로우
혼잡도 검색 시스템은 관광지, 주차장, 카페 등과 같이 많은 사람들이 모이는 곳에 혼잡도를 카메라로 측정해서 소비자에게 원하는 장소의 혼잡도에 대한 정보를 제공하는 서비스입니다.
가장 핵심적인 기능을 그림으로 나타내면 다음과 같습니다.
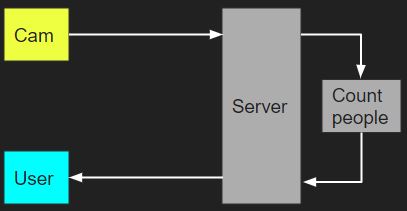
Cam에서는Server로 이미지 데이터를 보냅니다. 그리고Server에서는 해당 이미지를Count people과정을 거쳐서 혼잡도 데이터를 얻습니다. 혼잡도 데이터는User에게 보내집니다.
🌅 flask로 서버 구현
이전에 만들었던 PeopleCounter 모듈을 사용하기 위해서 디렉토리 구조는 다음과 같이 만들었습니다.
crowd-search-system/
│
├─object_detection
│  ├─darknetyolov4
│  │ __init__.py
│  │ personcounter.py
│
├─build
├─uploads
│ server.py-
object_detection안에personcounter.py모듈이 있고server.py에서는 이를import할 수 있습니다. -
build폴더는 정적 파일들 입니다. -
uploads는 클라이언트에서 업로드된 자료를 저장하는 폴더입니다.
server.py는 어떻게 구현되었는지 살펴보겠습니다.
📌 React 웹 어플리케이션 배포
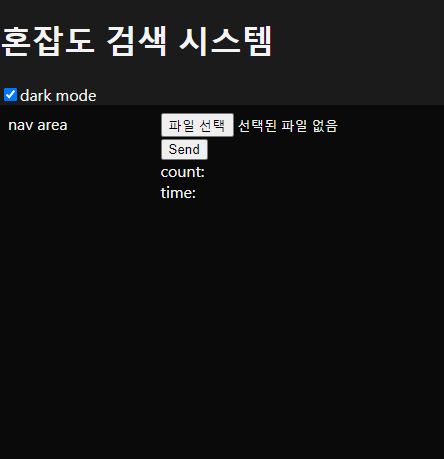
React 앱은 예전에 하던 토이 프로젝트에서 가져와서 수정해서 썼습니다. 웹앱의 대략적인 모습
기존의 코드에서 수정및 추가한 주요 부분은 서버에 이미지 업로드 기능, 서버로 부터 받은 혼잡도 데이터를 출력하는 기능입니다.
// path: frontend/src/components/MainSection.js

import React from 'react';
import axios from 'axios';
import './MainSection.css'

class MainSection extends React.Component {
    constructor(){
        super();
        this.state = {
            selectedFile:'', // 업로드할 파일
            peopleCount:'', // 서버로부터 받아온 검출된 사람의 수
            timeCount:'', // 서버로부터 받은 걸린 시간
            filechanged:false // 업로드할 파일이 새롭게 갱신되었는가
        }

        //업로드할 파일을 선택하면 호출되는 함수
        this.handleInputChange = this.handleInputChange.bind(this);
    }

    handleInputChange(event) {
        this.setState({
            selectedFile: event.target.files[0],
            filechanged: true
          });
    }

    submit(){
        //서버에 전송할 데이터 만들기
        const data = new FormData();
        data.append('file', this.state.selectedFile);
        console.log(this.state.selectedFile);
        let url = "/upload";

        if(this.state.filechanged) {
            // 서버로부터 응답을 받기 전까지는 ... 출력
            this.setState({filechanged: false, peopleCount:'...', timeCount:'...'});
            axios.post(url, data, {
            })
            .then(res => {
                // 사람 수 검출에 성공했을 경우
                this.setState({peopleCount:res.data[0], timeCount:res.data[1]});
            })
            .catch(error => {
                // 사람 수 검출에 실패했을 경우
                console.error(error);
                this.setState({peopleCount:'?', timeCount:'?'});
            });
        }
        else {
            console.warn('already sent.');
        }
    }

    render() {
        return (
        <section id="section">
            <nav>
                nav area
            </nav>
            <article>
                <input type="file" className="form-control" name="upload_file" onChange={this.handleInputChange} />
                <br/>
                <button type="submit" className="btn" onClick={()=>this.submit()}>Send</button>
                <br/>
                <span>count: {this.state.peopleCount}</span>
                <br/>
                <span>time: {this.state.timeCount}</span>
            </article>
        </section>
        );
    }
}

export default MainSection;
axios를 이용해서 http통신을 했으며 이미지를 올리고 검출된 사람 수와 걸린 시간을 받는 로직을 구현했습니다.
수정한 모습은 다음과 같습니다.
구현할려고 하는 핵심기능은 이미지 파일을 선택하고 Send 버튼을 누르면 그 이미지의 사람 수와 걸린 시간을 출력하는 것입니다.
React로 빌드된 파일들은 build에 저장되어 있습니다. 모두 정적 웹페이지로써 배포합니다.
from flask import Flask

app = Flask(__name__, static_url_path='/', static_folder='build')


@app.route('/')
def index_html(): # 루트에서는 index.html을 response로 보냄
     return app.send_static_file('index.html')

@app.errorhandler(404)
def not_found(e):  # SPA 이므로 404 에러는 index.html을 보냄으로써 해결한다.
    return index_html()

if __name__ == '__main__':
    app.run(debug=True)
정적파일들에 대한 url은 /루트로, 정적파일들은 build폴더 안에 있는 파일들로 배포합니다.
📌 서버에서 업로드 받기
server.py에 업로드기능 까지 구현한 전체 코드입니다.
from flask import Flask, send_from_directory, request, jsonify, Response
import os
import time
from werkzeug.utils import secure_filename
from object_detection.personcounter import PeopleCounter
import threading

sema = threading.Semaphore(1)

UPLOAD_FOLDER = os.path.dirname(os.path.abspath(__file__)) + '\\uploads'
ALLOWED_EXTENSIONS = set(['png', 'jpg', 'jpeg', 'gif'])

pplcounter = PeopleCounter()

app = Flask(__name__, static_url_path='/', static_folder='build')
app.config['UPLOAD_FOLDER'] = UPLOAD_FOLDER

def allowed_file(filename): # filename을 보고 지원하는 media type인지 판별
    return '.' in filename and \
           filename.rsplit('.', 1)[1] in ALLOWED_EXTENSIONS

@app.route('/upload', methods=['POST'])
def upload_file():
    try:
        file = request.files['file']
        if file and allowed_file(file.filename.lower()):
            sta = time.time() # 시간 측정
            sema.acquire() # 세마포어 획득

            # 파일을 a.jpg/a.png/a.jpeg 형식으로 저장
            filename = 'a.' + file.filename.rsplit('.', 1)[1]
            file.save(os.path.join(app.config['UPLOAD_FOLDER'], filename))

            # 이미지로 부터 사람 수 예측
            res = pplcounter.count_people(os.path.join(app.config['UPLOAD_FOLDER'], filename))
            sema.release() # 세마포어 릴리즈
            return jsonify([str(res), f'{time.time() - sta:.2f}'])
    except Exception as e:
        print(e)
    # unsupported media type (=http status 415)
    return Response('Error', status=415, mimetype='text/plain')

@app.route('/')
def index_html(): # 루트에서는 index.html을 response로 보냄
     return app.send_static_file('index.html')

@app.errorhandler(404)
def not_found(e):  # SPA 이므로 404 에러는 index.html을 보냄으로써 해결한다.
    return index_html()

if __name__ == '__main__':
    app.run(debug=True)
upload_file 함수에 대한 설명입니다.
- POST method로 request를 받습니다.
- 받은 파일이 적절한 media type인지 확인합니다.
- 시간 측정을 시작하고 사람 수 검출을 진행합니다.
- 성공하면 사람 수와 시간을 json형식으로 보냅니다.
- 실패하면 415 http status와 함께 Error라는 메세지를 보냅니다.
📌 멀티 쓰레드 충돌 문제
서버는 여러 클라이언트로부터 받는 요청을 비동기적으로 수행하고 이 과정에서 공유 자원의 동시 접근으로 인한 충돌을 발생시킵니다. 여기서는 객체 검출을 동시에 진행하다 보니 충돌이 발생했습니다.
이 문제를 해결하기 위해서 세마포어를 사용하였습니다. 세마포어에 대한 이해
파이썬에서는 세마포어를 간단하게 사용하기위한 모듈이 존재합니다.
import threading
sema = threading.Semaphore(1)
Semaphore 생성자에 넘겨준 1은 세마포어를 동시에 획득할 수 있는 쓰레드를 1개로 제한한다는 뜻입니다.
객체검출을 진행하는 업로드 모듈에서 세마포어를 사용한 코드입니다.
@app.route('/upload', methods=['POST'])
def upload_file():
    try:
        file = request.files['file']
        if file and allowed_file(file.filename.lower()):
            sta = time.time() # 시간 측정
            sema.acquire() # 세마포어 획득

            # 파일을 a.jpg/a.png/a.jpeg 형식으로 저장
            filename = 'a.' + file.filename.rsplit('.', 1)[1]
            file.save(os.path.join(app.config['UPLOAD_FOLDER'], filename))

            # 이미지로 부터 사람 수 예측
            res = pplcounter.count_people(os.path.join(app.config['UPLOAD_FOLDER'], filename))
            sema.release() # 세마포어 릴리즈
            return jsonify([str(res), f'{time.time() - sta:.2f}'])
    except Exception as e:
        print(e)
    # unsupported media type (=http status 415)
    return Response('Error', status=415, mimetype='text/plain')
🤗 결과
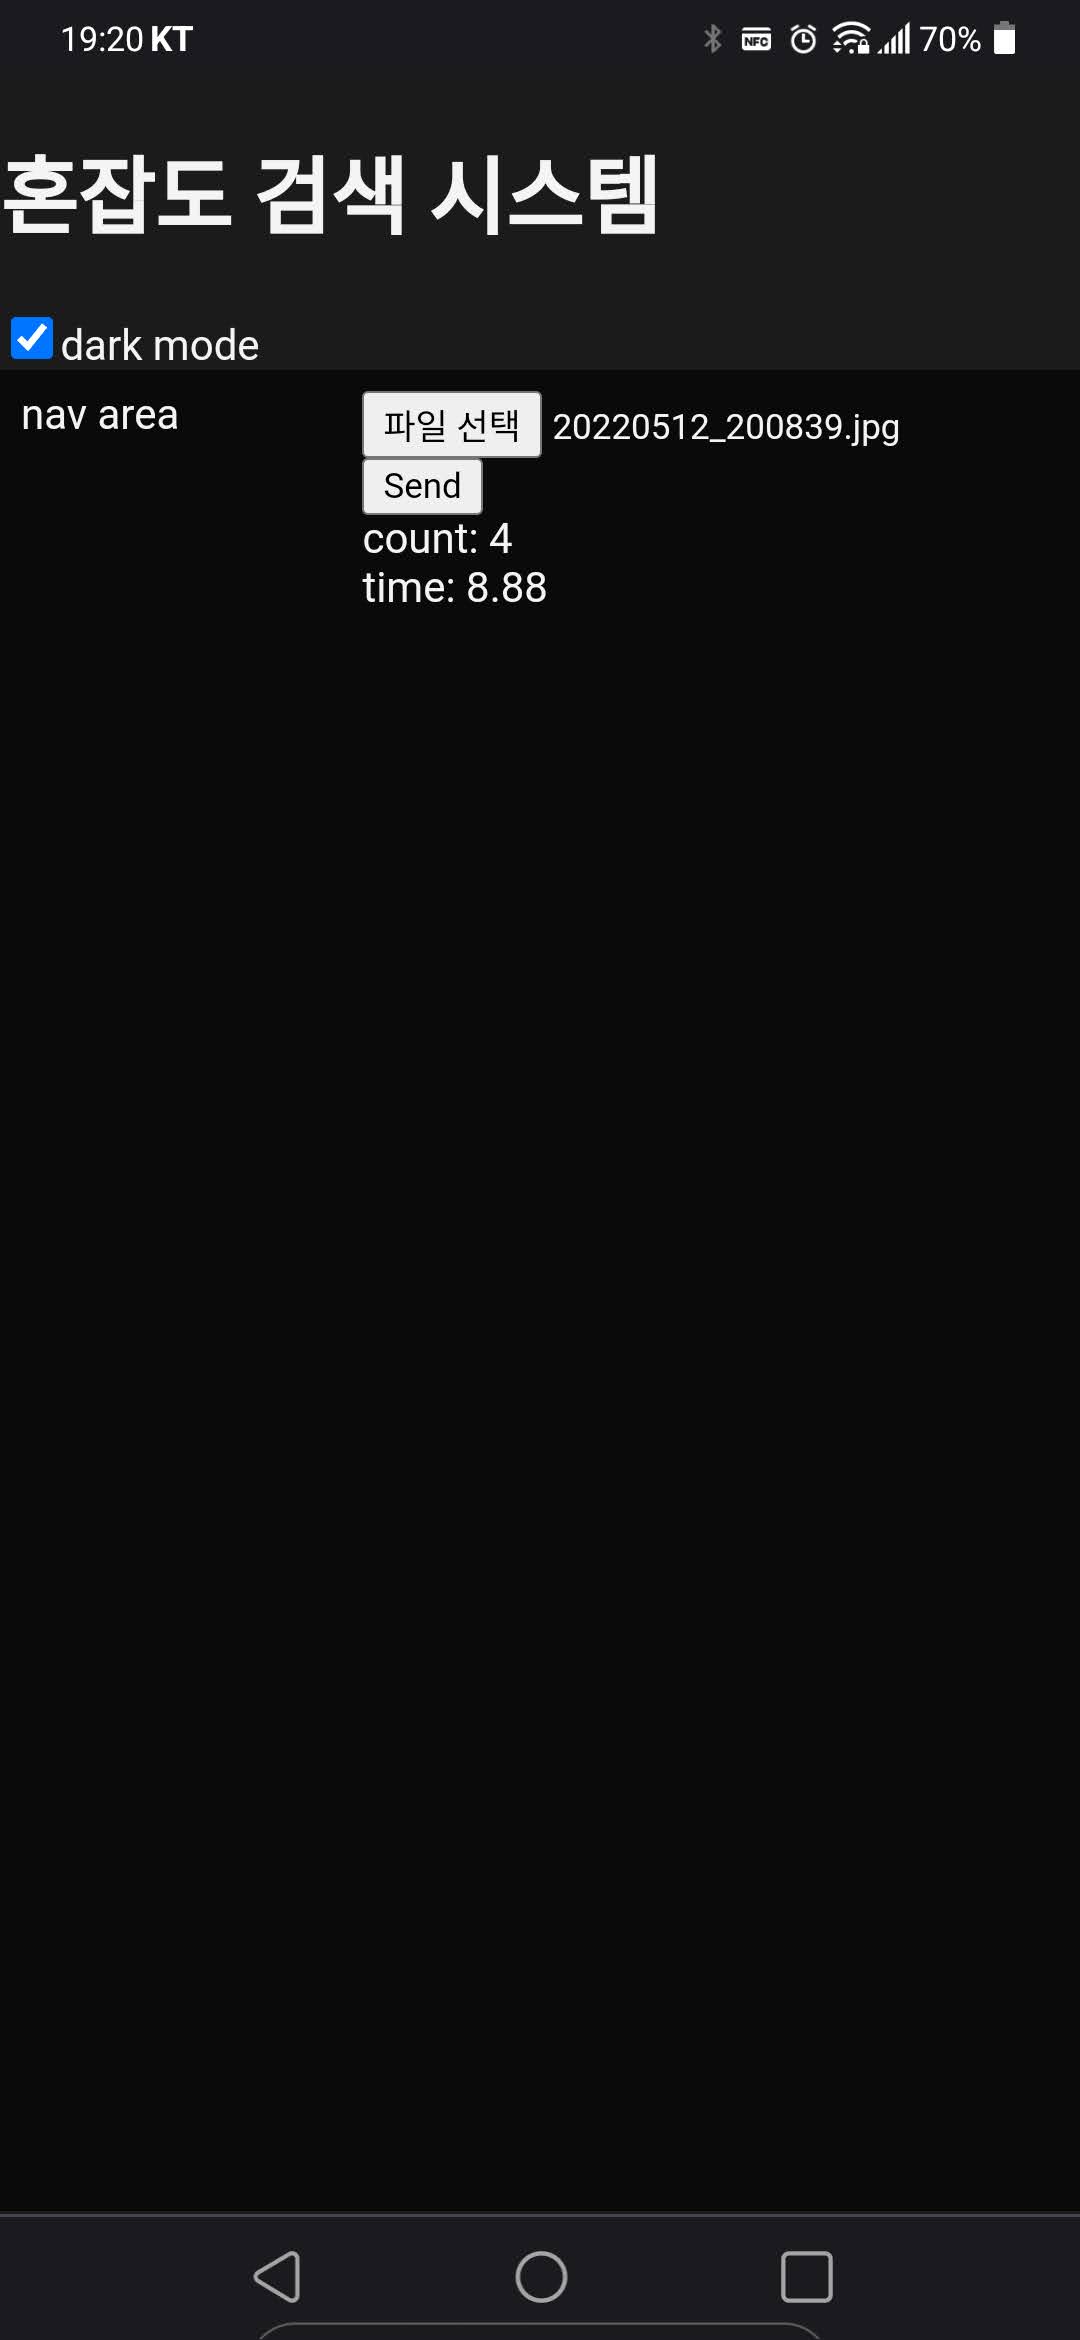
모바일 기기에서 실행시켜본 결과
😵 해결해야할 문제들
- 객체 검출을 하는데 시간이 오래 걸립니다.
- 시간이 오래 걸리면 timeout에 대한 처리도 해야합니다.
일단 제가 사용한 환경에서는 yolo가 cpu-only로 동작하고 있습니다. cpu와 gpu의 뉴럴 네트워크에서 걸리는 시간 차이는 약 6배이상입니다.->[Reference] 따라서 객체검출 시간 문제는 gpu 설정을 하면 해결될것으로 예상됩니다.
객체검출 뿐만 아니라 짧은 시간에 너무 많은 요청이 들어요면 그것 또한 문제가 됩니다. 이 때 클라이언트에서 영원히 응답을 기다릴 수는 없으므로 timeout에 대한 설정이 필요합니다.
🔥 추가 사항
yolo는 사람 뿐만 아니라 여러가지 물건, 동물을 검출할 수 있습니다. 따라서 자동차 수를 추출하도록 수정하면 주차장의 혼잡도를 구할 수 있습니다. 이런 식으로 검출 대상을 확대해서 유저에게 더 많은 정보를 제공하는 것을 추가로 고려해봐야 겠습니다.
