✅ 6주차 목표
- ListView와 RecyclerView의 차이를 이해한다.
- RecyclerView로 아이템 목록을 구성하고 클릭 이벤트 리스너를 구현할 수 있다.
- Foreground Service의 개념을 이해하고, 이를 구현할 수 있다.
ListView 또는 RecyclerView가 생소하신 분들은 아래의 링크를 참조하시기 바랍니다.
>> ListView
>> RecyclerView
1. RecyclerView OverView
RecyclerView를 적용하는 방법은 다소 복잡하기 때문에, OverView를 통해 필요한 작업들을 먼저 살펴보기로 한다. 아래의 순서를 꼭 지켜야 하는 것은 아니지만, 개인적으로는 아래의 순서대로 진행하기를 권장한다. 본 포스팅에서도 아래의 순서를 따라 설명을 진행하도록 하겠다.
① recylerview_item.xml 파일을 layout 디렉토리 하위에 추가
- 여기서 recylerview_item.xml이란, recycler view로 표시되는 아이템들에 적용될 레이아웃 파일을 말한다.
② RecyclerView를 적용할 xml 파일에 recyclerview 태그 입력
<androidx.recyclerview.widget.RecyclerView
	android:id="@+id/recyclerView"
	android:layout_width="match_parent"
	android:layout_height="200dp"
    ... />
③ Adapter 클래스 생성
- List의 Generics는 상황에 맞게 변경해야 한다.
class RVAdapter(private val items: MutableList<String>) : RecyclerView.Adapter<RVAdapter.ViewHolder>(){

}
④ ViewHolder inner class 작성
inner class ViewHolder(itemView : View) : RecyclerView.ViewHolder(itemView) {
	fun bindItems(item : String) {
		binding.rvTextId.text = item
    }
}
⑤ 메서드 오버라이딩
override fun onCreateViewHolder(parent: ViewGroup, viewType: Int): RVAdapter.ViewHolder {
	val binding : RecyclerviewItemBinding = RecyclerviewItemBinding.inflate(LayoutInflater.from(parent.context), parent, false)
	return ViewHolder(binding)
}

override fun onBindViewHolder(holder: RVAdapter.ViewHolder, position: Int) {
	holder.bindItems(items[position])
}

override fun getItemCount(): Int {
	return items.size
}
⑥ RecyclerView를 적용할 Activity 파일에 리스트 생성
val items = mutableListOf<String>()
items.add("item1")
⑦ List를 Adapter의 입력인자로 넣어 RecyclerView adapter와 연결
binding.recyclerView.adapter = RVAdapter(items)
binding.recyclerView.layoutManager = LinearLayoutManager(context)
2. RecyclerView 적용하기
1) recylerview_item.xml 파일 만들기
layout 디렉토리 하위로, item_album.xml 파일을 추가하고 아래의 내용을 입력한다.
<?xml version="1.0" encoding="utf-8"?>
<androidx.constraintlayout.widget.ConstraintLayout
    xmlns:android="http://schemas.android.com/apk/res/android"
    xmlns:app="http://schemas.android.com/apk/res-auto"
    android:layout_width="wrap_content"
    android:layout_height="wrap_content"
    android:layout_marginLeft="20dp">

    <androidx.cardview.widget.CardView
        android:id="@+id/item_album_cover_img_cardView"
        android:layout_width="150dp"
        android:layout_height="150dp"
        app:cardCornerRadius="7dp"
        app:cardElevation="0dp"
        app:layout_constraintTop_toTopOf="parent"
        app:layout_constraintStart_toStartOf="parent">
        <ImageView
            android:id="@+id/item_album_cover_img_iv"
            android:layout_width="match_parent"
            android:layout_height="match_parent"
            android:scaleType="fitCenter"
            android:src="@drawable/img_album_exp2"
            app:layout_constraintStart_toStartOf="parent"
            app:layout_constraintTop_toTopOf="parent" />
    </androidx.cardview.widget.CardView>

    <ImageView
        android:id="@+id/item_album_play_img_iv"
        android:layout_width="40dp"
        android:layout_height="40dp"
        android:layout_marginEnd="8dp"
        android:layout_marginBottom="5dp"
        android:src="@drawable/widget_black_play"
        app:layout_constraintBottom_toBottomOf="@id/item_album_cover_img_cardView"
        app:layout_constraintEnd_toEndOf="parent" />

    <TextView
        android:id="@+id/item_album_title_tv"
        android:layout_width="wrap_content"
        android:layout_height="wrap_content"
        android:layout_marginTop="10dp"
        android:text="LILAC"
        android:textColor="@color/black"
        android:textSize="20sp"
        app:layout_constraintStart_toStartOf="@id/item_album_cover_img_cardView"
        app:layout_constraintTop_toBottomOf="@id/item_album_cover_img_cardView" />

    <TextView
        android:id="@+id/item_album_singer_tv"
        android:layout_width="wrap_content"
        android:layout_height="wrap_content"
        android:layout_marginTop="3dp"
        android:text="아이유 (IU)"
        android:textColor="#a8a8a8"
        android:textSize="15sp"
        app:layout_constraintStart_toStartOf="@id/item_album_cover_img_cardView"
        app:layout_constraintTop_toBottomOf="@id/item_album_title_tv" />

</androidx.constraintlayout.widget.ConstraintLayout>- CardView: 앨범 이미지에 둥근 모서리를 적용하기 위해 사용하였다.

2) recyclerview 태그 입력하기
① 이제는 오늘 발매 음악에 띄워줄 데이터를 RecyclerView로 나타낼 것이기 때문에 fragment_home.xml 파일에서 아래의 내용을 삭제한다.
<HorizontalScrollView
    android:id="@+id/home_today_music_oversea_hs"
    android:layout_width="wrap_content"
    android:layout_height="wrap_content"
    android:layout_marginTop="10dp"
    android:layout_marginBottom="20dp"
    android:orientation="horizontal"
    android:scrollbars="none"
    android:overScrollMode="never"
    app:layout_constraintEnd_toEndOf="parent"
    app:layout_constraintStart_toStartOf="parent"
    app:layout_constraintTop_toBottomOf="@id/home_today_music_oversea_tv">
    <LinearLayout
        android:layout_width="wrap_content"
        android:layout_height="wrap_content"
        android:orientation="horizontal">
        <LinearLayout
            android:layout_width="wrap_content"
            android:layout_height="wrap_content"
            android:layout_marginStart="20dp"
            android:orientation="vertical">
            <androidx.constraintlayout.widget.ConstraintLayout
                android:layout_width="wrap_content"
                android:layout_height="wrap_content">
                <ImageView
                    android:id="@+id/home_album_img_iv1"
                    android:layout_width="150dp"
                    android:layout_height="150dp"
                    android:scaleType="fitCenter"
                    android:src="@drawable/img_album_exp2"
                    app:layout_constraintBottom_toBottomOf="parent"
                    app:layout_constraintEnd_toEndOf="parent"
                    app:layout_constraintStart_toStartOf="parent"
                    app:layout_constraintTop_toTopOf="parent" />
                <ImageView
                    android:layout_width="40dp"
                    android:layout_height="40dp"
                    android:layout_marginEnd="8dp"
                    android:layout_marginBottom="5dp"
                    android:src="@drawable/widget_black_play"
                    app:layout_constraintBottom_toBottomOf="parent"
                    app:layout_constraintEnd_toEndOf="parent" />
            </androidx.constraintlayout.widget.ConstraintLayout>
            <TextView
                android:id="@+id/title_lilac"
                android:layout_width="wrap_content"
                android:layout_height="wrap_content"
                android:text="LILAC"
                android:layout_marginTop="10dp"
                android:textSize="16sp"
                android:textColor="@color/black" />
            <TextView
                android:id="@+id/singer_iu"
                android:layout_width="wrap_content"
                android:layout_height="wrap_content"
                android:layout_marginTop="3dp"
                android:text="아이유 (IU)"
                android:textSize="13sp"
                android:textColor="#a8a8a8" />
        </LinearLayout>
        <LinearLayout
            android:layout_width="wrap_content"
            android:layout_height="wrap_content"
            android:layout_marginStart="20dp"
            android:orientation="vertical">
            <ImageView
                android:layout_width="150dp"
                android:layout_height="150dp"
                android:scaleType="fitCenter"
                android:src="@drawable/img_album_exp" />
            <TextView
                android:layout_width="wrap_content"
                android:layout_height="wrap_content"
                android:text="제목"
                android:layout_marginTop="10dp"
                android:textSize="16sp"
                android:textColor="@color/black" />
            <TextView
                android:layout_width="wrap_content"
                android:layout_height="wrap_content"
                android:layout_marginTop="3dp"
                android:text="가수명"
                android:textSize="13sp"
                android:textColor="#a8a8a8" />
        </LinearLayout>
    </LinearLayout>
</HorizontalScrollView>
② 그리고 삭제한 자리에 아래의 내용을 입력한다.
- 위에서 제거한 레이아웃을 제약 조건으로 사용하고 있어 오류가 발생하는 부분을, RecyclerView의 id로 대체하여 해결한다.
<androidx.recyclerview.widget.RecyclerView
    android:id="@+id/home_today_music_album_rv"
    android:layout_width="match_parent"
    android:layout_height="210dp"
    android:layout_marginTop="10dp"
    tools:listitem="@layout/item_album"
    app:layoutManager="androidx.recyclerview.widget.LinearLayoutManager"
    android:orientation="horizontal"
app:layout_constraintTop_toBottomOf="@id/home_today_music_total_tv"/>- app:layoutManager="androidx.recyclerview...": RecyclerView의 항목이 어떻게 배치되는지를 미리보기로 보여준다.
- android:orientation="horizontal": default 값은 vertical이므로, 수평방향으로 배치하기 위해선 이 속성을 명시해야 한다.
3) Adapter 클래스 생성하기
① List의 Generics로 사용될 Data Model이 필요하므로, 먼저 Album이라는 이름의 data class를 생성해야 한다.
data class Album(
var title : String? = "",
var singer : String? = "",
var coverImage : Int? = null,
var songs: ArrayList<Song>? = null // 앨범 수록곡
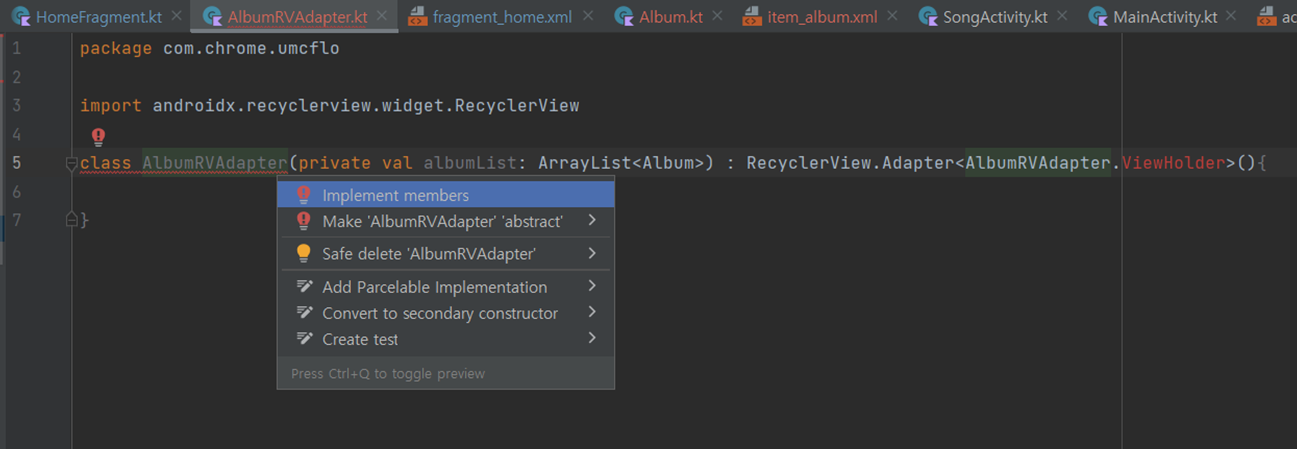
)② AlbumRVAdapter 클래스를 생성한 후 아래의 내용을 입력한다.
class AlbumRVAdapter(private val albumList: ArrayList<Album>) : RecyclerView.Adapter<AlbumRVAdapter.ViewHolder>(){

}
③ AlbumRVAdapter에 우클릭 > Show Context Actions > Implement members를 클릭한다.
4) ViewHolder inner class 작성하기
AlbumRVAdapter의 내부 클래스로 아래의 내용을 입력한다.
- data binding을 이용해 각 아이템과 View를 연결해주면 된다.
inner class ViewHolder(val binding: ItemAlbumBinding): RecyclerView.ViewHolder(binding.root){
    fun bind(album: Album){
        binding.itemAlbumTitleTv.text = album.title
        binding.itemAlbumSingerTv.text = album.singer
        binding.itemAlbumCoverImgIv.setImageResource(album.coverImage!!)
    }
}
5) 메서드 오버라이딩하기
AlbumRVAdapter에 아래의 내용을 입력한다.
// 뷰 홀더를 생성해줘야 할 때 호출되는 함수로, 아이템 뷰 객체를 만들어서 뷰홀더에 전달한다.
override fun onCreateViewHolder(viewGroup: ViewGroup, viewType: Int): AlbumRVAdapter.ViewHolder {
    val binding: ItemAlbumBinding = ItemAlbumBinding.inflate(LayoutInflater.from(viewGroup.context), viewGroup, false)
    return ViewHolder(binding)
}

// 뷰홀더에 데이터를 바인딩해줘야 할 때마다 호출되는 함수로 자주 호출된다.

override fun onBindViewHolder(holder: AlbumRVAdapter.ViewHolder, position: Int) {
    holder.bind(albumList[position])
}

// 데이터 세트 크기를 알려주는 함수 => 리사이클러뷰가 마지막이 언제인지를 알게 된다.
override fun getItemCount(): Int = albumList.size
6) RecyclerView를 적용할 Activity 파일에 리스트 생성하기
① HomeFragment에서 아래의 내용을 삭제한다.
- 각 ImageView에 일일이 클릭 이벤트 리스너를 등록하는 방식이 아닌 RecyclerView의 itemClickListener를 이용할 것이다.
binding.homeAlbumImgIv1.setOnClickListener {
    setFragmentResult("TitleInfo", bundleOf("title" to binding.titleLilac.text.toString()))
    setFragmentResult("SingerInfo", bundleOf("singer" to binding.singerIu.text.toString()))
    (context as MainActivity)
        .supportFragmentManager.beginTransaction()
        .replace(R.id.main_frm, AlbumFragment()).commitAllowingStateLoss()
}
② HomeFragment에 아래와 같이 앨범 리스트(더미 데이터)를 생성한다.
- img_album_exp에 해당하는 이미지는 직접 drawable 디렉토리에 넣어주어야 한다.
private var albumDatas = ArrayList<Album>()

override fun onCreateView(
	...
    // 데이터 리스트 생성 더미 데이터
	albumDatas.apply {
    	add(Album("Butter", "방탄소년단 (BTS)", R.drawable.img_album_exp))
    	add(Album("Lilac", "아이유 (IU)", R.drawable.img_album_exp2))
    	add(Album("Next Level", "에스파 (AESPA)", R.drawable.img_album_exp3))
    	add(Album("Boy with Luv", "방탄소년단 (BTS)", R.drawable.img_album_exp4))
    	add(Album("BBoom BBoom", "모모랜드 (MOMOLAND)", R.drawable.img_album_exp5))
    	add(Album("Weekend", "태연 (Tae Yeon)", R.drawable.img_album_exp6))
	}
    ...
7) List를 RecyclerView adapter와 연결하기
HomeFragment에 아래의 내용을 추가한다. 반드시 리스트 생성보다는 아래에 작성해야 한다.
val albumRVAdapter = AlbumRVAdapter(albumDatas)
binding.homeTodayMusicAlbumRv.adapter = albumRVAdapter
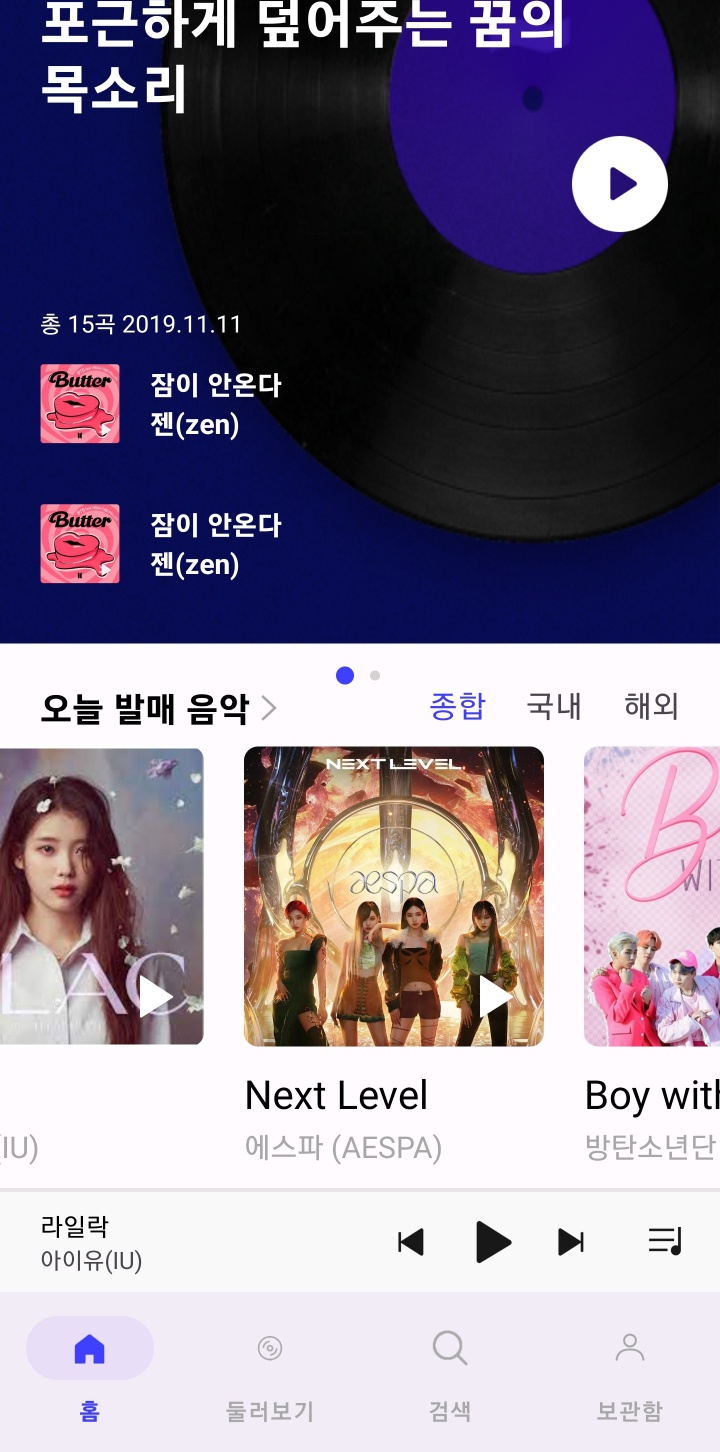
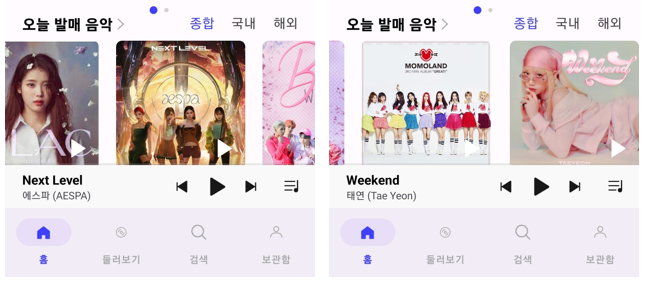
binding.homeTodayMusicAlbumRv.layoutManager = LinearLayoutManager(requireActivity(), LinearLayoutManager.HORIZONTAL, false)이제 코드를 실행시켜보자. 아래와 같이 오늘 발매 음악 목록이 RecyclerView 형태로 나타날 것이다.
3. RecyclerView에 클릭 이벤트 리스너 등록하기
RecyclerView의 경우 ListView보다 효율적이기는 하지만, ItemClickListener를 등록하는 과정이 ListView에 비해 다소 까다로운 편이다.
① RVAdapter에 클릭 리스너 역할을 수행할 인터페이스를 정의한다.
- RVAdapter 클래스 내부의 아무 곳에나 적어도 되지만, 여기서는 맨 아래 부분에 작성하였다.
interface OnItemClickListener {
    fun onItemClick(album : Album)
}

private lateinit var itemClickListener : OnItemClickListener

fun setItemClickListener(onItemClickListener: OnItemClickListener) {
    this.itemClickListener = onItemClickListener
}
② 계속해서 RVAdapter의 onBindViewHolder를 아래와 같이 수정한다.
override fun onBindViewHolder(holder: AlbumRVAdapter.ViewHolder, position: Int) {
holder.bind(albumList[position])
holder.itemView.setOnClickListener {
itemClickListener.onItemClick(albumList[position])
}
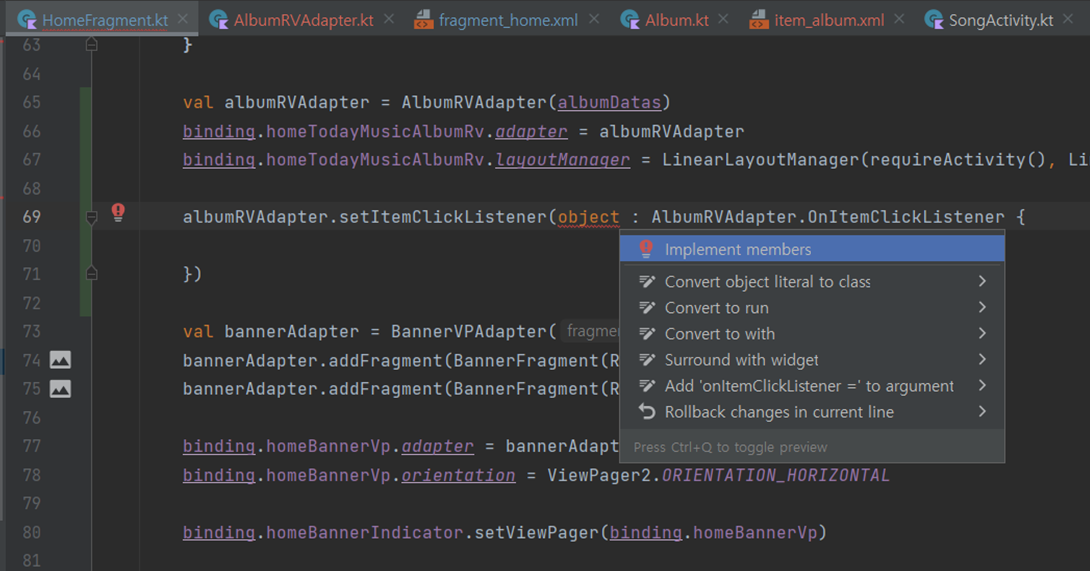
}③ HomeFragment에 아래의 내용을 추가한다.
albumRVAdapter.setItemClickListener(object : AlbumRVAdapter.OnItemClickListener {

})
④ 이번에도 우클릭 > Show Context Actions를 이용해 메서드를 오버라이드한다.
⑤ onItemClick에 클릭 이벤트 리스너에서 수행해야 할 역할을 작성하면 된다.
albumRVAdapter.setItemClickListener(object : AlbumRVAdapter.OnItemClickListener {
    override fun onItemClick(album : Album) {
        (context as MainActivity).supportFragmentManager.beginTransaction()
            .replace(R.id.main_frm, AlbumFragment())
            .commitAllowingStateLoss()
    }
})
⑥ AlbumFragment로 전환될 때 데이터를 넘겨주기 위해 클릭 이벤트 리스너를 아래와 같이 수정한다.
    albumRVAdapter.setItemClickListener(object : AlbumRVAdapter.OnItemClickListener {
        override fun onItemClick(album : Album) {
            changeToAlbumFragment(album)
        }
    })
    ...

 private fun changeToAlbumFragment(album: Album) {
    (context as MainActivity).supportFragmentManager.beginTransaction()
        .replace(R.id.main_frm, AlbumFragment().apply {
            arguments = Bundle().apply {
                val gson = Gson()
                val albuToJson = gson.toJson(album)
                putString("album", albumToJson)
            }
        })
        .commitAllowingStateLoss()
} - Fragment로의 전환에서 데이터를 넘겨줄 때에는 Bundle을 사용하는 것이 일반적이다.
- 선택된 앨범 객체를 Json으로 변환하여 앨범의 title, singer, coverImage, songs에 대한 모든 정보를 album이라는 이름(key)으로 한번에 전달한다.
⑦ AlbumFragment에 아래의 내용을 추가한다.
class AlbumFragment : Fragment() {

    lateinit var binding: FragmentAlbumBinding
    private var gson: Gson = Gson()

    private val information = arrayListOf("수록곡", "상세정보", "영상")

    override fun onCreateView(
        inflater: LayoutInflater,
        container: ViewGroup?,
        savedInstanceState: Bundle?
    ): View? {
        binding = FragmentAlbumBinding.inflate(inflater,container,false)

        val albumToJson = arguments?.getString("album")
        val album = gson.fromJson(albumToJson, Album::class.java)
        setInit(album)
        ...

	private fun setInit(album : Album) {
        binding.albumAlbumIv.setImageResource(album.coverImage!!)
        binding.albumMusicTitleTv.text = album.title.toString()
        binding.albumSingerNameTv.text = album.singer.toString()
    }
} - Bundle을 통해 전달받은 Json 타입의 앨범 정보를 다시 Album으로 변환한다.
- setInit이라는 메서드를 정의하여 Album 정보를 적절한 view에 binding 하고 있다.
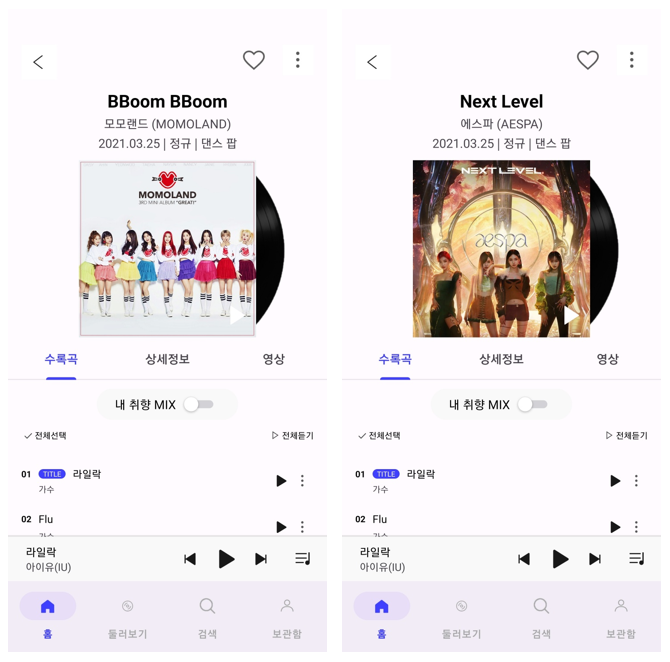
이제 코드를 실행시켜보자. 선택된 앨범 데이터와 일치하는 정보가 화면에 표시되는 것을 확인할 수 있을 것이다.

4. LockerFragment에 RecyclerView 적용하기
1) TabLayout 적용하기
① fragment_locker.xml에 아래의 내용을 입력한다.
<?xml version="1.0" encoding="utf-8"?>
<androidx.constraintlayout.widget.ConstraintLayout xmlns:android="http://schemas.android.com/apk/res/android"
    xmlns:app="http://schemas.android.com/apk/res-auto"
    android:layout_width="match_parent"
    android:layout_height="match_parent">

    <TextView
        android:id="@+id/locker_title_tv"
        android:layout_width="wrap_content"
        android:layout_height="wrap_content"
        android:text="보관함"
        android:textSize="25dp"
        android:textStyle="bold"
        android:textColor="@color/black"
        android:layout_marginTop="55dp"
        android:layout_marginStart="20dp"
        app:layout_constraintTop_toTopOf="parent"
        app:layout_constraintStart_toStartOf="parent"/>

    <TextView
        android:id="@+id/locker_login_tv"
        android:layout_width="wrap_content"
        android:layout_height="wrap_content"
        android:text="로그인"
        android:textSize="15dp"
        android:textColor="@color/song_player"
        android:layout_marginEnd="20dp"
        app:layout_constraintTop_toTopOf="@id/locker_title_tv"
        app:layout_constraintBottom_toBottomOf="@id/locker_title_tv"
        app:layout_constraintEnd_toEndOf="parent" />

    <com.google.android.material.tabs.TabLayout
        android:id="@+id/locker_content_tb"
        android:layout_width="170dp"
        android:layout_height="wrap_content"
        android:layout_marginTop="10dp"
        app:tabSelectedTextColor="#3f3fff"
        app:tabIndicatorFullWidth="false"
        app:tabIndicatorColor="#3f3fff"
        app:tabRippleColor="#00ff0000"
        android:layout_marginLeft="5dp"
        app:layout_constraintTop_toBottomOf="@id/locker_title_tv"
        app:layout_constraintStart_toStartOf="parent"/>

    <ImageView
        android:id="@+id/locker_select_all_img_iv"
        android:layout_width="25dp"
        android:layout_height="25dp"
        android:layout_marginStart="10dp"
        android:src="@drawable/btn_playlist_select_off"
        app:layout_constraintTop_toBottomOf="@id/locker_content_tb"
        app:layout_constraintStart_toStartOf="@id/locker_content_tb"/>

    <TextView
        android:id="@+id/locker_select_all_tv"
        android:layout_width="wrap_content"
        android:layout_height="wrap_content"
        android:text="전체선택"
        android:textColor="@color/colorPrimaryGrey"
        app:layout_constraintStart_toEndOf="@id/locker_select_all_img_iv"
        app:layout_constraintTop_toTopOf="@id/locker_select_all_img_iv"
        app:layout_constraintBottom_toBottomOf="@id/locker_select_all_img_iv"/>

    <ImageView
        android:id="@+id/locker_play_all_img_iv"
        android:layout_width="25dp"
        android:layout_height="25dp"
        android:src="@drawable/icon_browse_arrow_right"
        android:layout_marginStart="20dp"
        app:layout_constraintTop_toTopOf="@id/locker_select_all_img_iv"
        app:layout_constraintBottom_toBottomOf="@id/locker_select_all_img_iv"
        app:layout_constraintStart_toEndOf="@id/locker_select_all_tv"/>

    <TextView
        android:id="@+id/locker_play_all_tv"
        android:layout_width="wrap_content"
        android:layout_height="wrap_content"
        android:text="전체듣기"
        android:textColor="@color/colorPrimaryGrey"
        app:layout_constraintTop_toTopOf="@id/locker_select_all_img_iv"
        app:layout_constraintBottom_toBottomOf="@id/locker_select_all_img_iv"
        app:layout_constraintStart_toEndOf="@id/locker_play_all_img_iv"/>

    <TextView
        android:layout_width="wrap_content"
        android:layout_height="wrap_content"
        android:text="편집"
        android:layout_marginEnd="20dp"
        android:textColor="@color/colorPrimaryGrey"
        app:layout_constraintTop_toTopOf="@id/locker_select_all_img_iv"
        app:layout_constraintBottom_toBottomOf="@id/locker_select_all_img_iv"
        app:layout_constraintEnd_toEndOf="parent"/>

    <androidx.viewpager2.widget.ViewPager2
        android:id="@+id/locker_content_vp"
        android:layout_width="match_parent"
        android:layout_height="0dp"
        android:layout_marginTop="10dp"
        app:layout_constraintVertical_bias="1.0"
        app:layout_constraintBottom_toBottomOf="parent"
        app:layout_constraintEnd_toEndOf="parent"
        app:layout_constraintStart_toStartOf="parent"
        app:layout_constraintTop_toBottomOf="@id/locker_select_all_img_iv" />

</androidx.constraintlayout.widget.ConstraintLayout>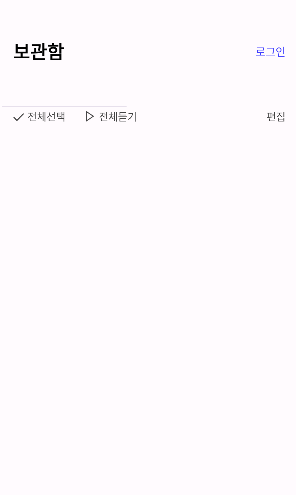
② SavedSongFragment, MusicFileFragment를 추가한다.
③ LockerVPAdapter 클래스를 생성한다.
class LockerVPAdapter (fragment : Fragment) : FragmentStateAdapter(fragment) {
    override fun getItemCount(): Int  = 2

    override fun createFragment(position: Int): Fragment {
        return when(position){
            0 -> SavedSongFragment()
            else -> MusicFileFragment()
        }
    }
}
④ LockerFragment에 아래의 내용을 입력한다.
class LockerFragment : Fragment() {
    lateinit var binding: FragmentLockerBinding
    private val information = arrayListOf("저장한곡", "음악파일")

    override fun onCreateView(
        inflater: LayoutInflater,
        container: ViewGroup?,
        savedInstanceState: Bundle?
    ): View {
        binding = FragmentLockerBinding.inflate(inflater, container, false)

        val lockerAdapter = LockerVPAdapter(this)
        binding.lockerContentVp.adapter = lockerAdapter
        TabLayoutMediator(binding.lockerContentTb, binding.lockerContentVp) { tab, position ->
            tab.text = information[position]
        }.attach()

        return binding.root
    }
}
⑤ SavedSongFragment에 아래의 내용을 입력한다.
class SavedSongFragment : Fragment() {

    private var albumDatas = ArrayList<Album>()
    lateinit var binding : FragmentSavedSongBinding

    override fun onCreate(savedInstanceState: Bundle?) {
        super.onCreate(savedInstanceState)
    }

    override fun onCreateView(
        inflater: LayoutInflater, container: ViewGroup?,
        savedInstanceState: Bundle?
    ): View? {
        binding = FragmentSavedSongBinding.inflate(inflater, container, false)


        return binding.root
    }

}
⑥ MusicFileFragment에 아래의 내용을 입력한다.
class MusicFileFragment: Fragment() {
lateinit var binding: FragmentMusicFileBinding
override fun onCreateView(inflater: LayoutInflater, container: ViewGroup?, savedInstanceState: Bundle?): View? {
binding = FragmentMusicFileBinding.inflate(inflater, container, false)
return binding.root
}
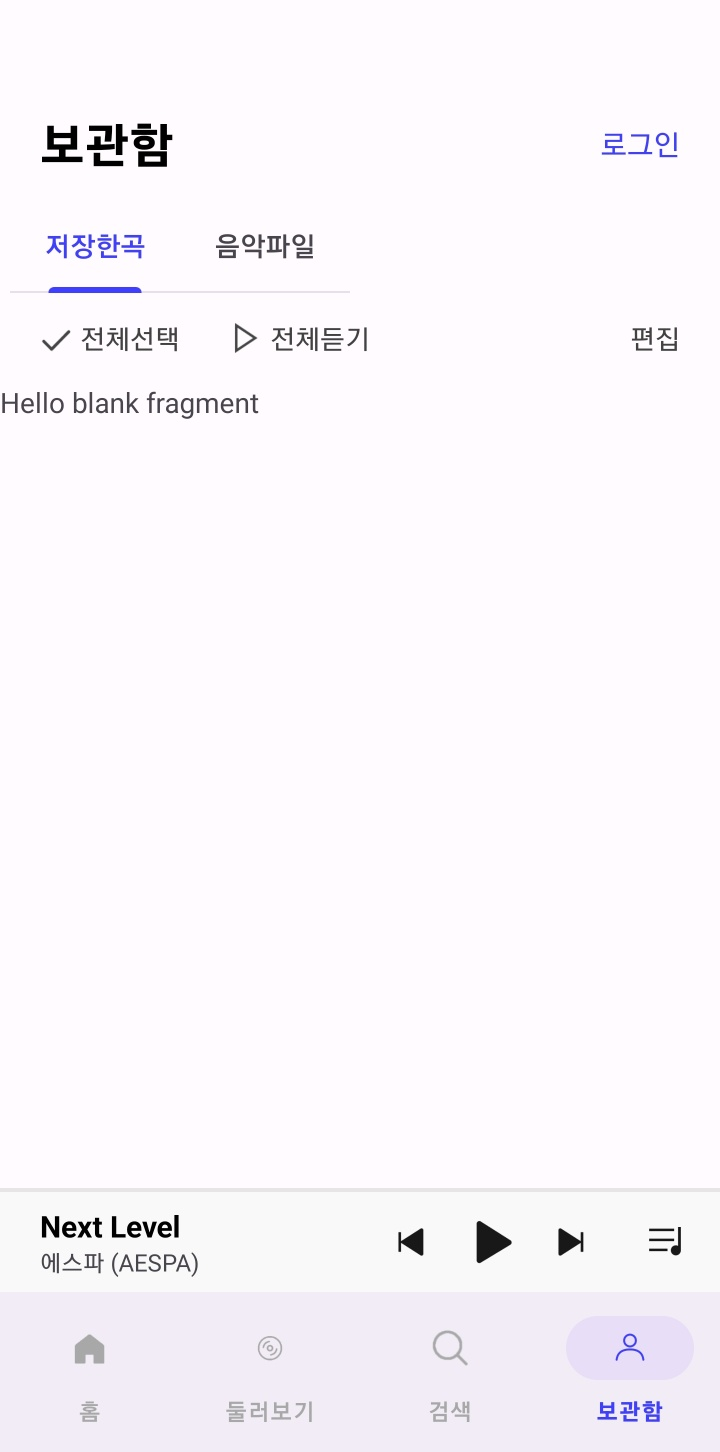
}코드를 실행시켜보자. LockerFragment에 TabLayout이 잘 적용되었을 것이다.
2) RecyclerView 적용하기
OverView에서 설명한 순서에 따라 RecyclerView를 적용해보자.
① recylerview_item.xml 파일 만들기
- layout 디렉토리 하위로, item_locker_album.xml 파일을 추가하고, 아래의 내용을 입력한다.
<?xml version="1.0" encoding="utf-8"?>
<androidx.constraintlayout.widget.ConstraintLayout
    xmlns:android="http://schemas.android.com/apk/res/android"
    xmlns:app="http://schemas.android.com/apk/res-auto"
    android:layout_width="match_parent"
    android:layout_height="wrap_content"
    android:layout_marginVertical="10dp">

    <androidx.cardview.widget.CardView
        android:id="@+id/item_album_cover_img_cardView"
        android:layout_width="50dp"
        android:layout_height="50dp"
        android:layout_marginLeft="20dp"
        app:cardCornerRadius="7dp"
        app:cardElevation="0dp"
        app:layout_constraintBottom_toBottomOf="parent"
        app:layout_constraintStart_toStartOf="parent"
        app:layout_constraintTop_toTopOf="parent">

        <ImageView
            android:id="@+id/item_locker_album_cover_img_iv"
            android:layout_width="match_parent"
            android:layout_height="match_parent"
            android:scaleType="fitCenter"
            android:src="@drawable/img_album_exp2"
            app:layout_constraintStart_toStartOf="parent"
            app:layout_constraintTop_toTopOf="parent" />
    </androidx.cardview.widget.CardView>

    <ImageView
        android:id="@+id/item_locker_album_more_iv"
        android:layout_width="40dp"
        android:layout_height="40dp"
        android:layout_marginRight="20dp"
        android:src="@drawable/btn_player_more"
        app:layout_constraintBottom_toBottomOf="parent"
        app:layout_constraintEnd_toEndOf="parent"
        app:layout_constraintTop_toTopOf="parent" />

    <ImageView
        android:id="@+id/item_locker_album_play_img_iv"
        android:layout_width="40dp"
        android:layout_height="40dp"
        android:src="@drawable/btn_miniplayer_play"
        app:layout_constraintBottom_toBottomOf="parent"
        app:layout_constraintEnd_toStartOf="@+id/item_locker_album_more_iv"
        app:layout_constraintTop_toTopOf="parent" />

    <LinearLayout
        android:layout_width="wrap_content"
        android:layout_height="match_parent"
        android:orientation="vertical"
        android:layout_marginLeft="10dp"
        app:layout_constraintBottom_toBottomOf="parent"
        app:layout_constraintStart_toEndOf="@+id/item_album_cover_img_cardView"
        app:layout_constraintTop_toTopOf="parent">

        <TextView
            android:id="@+id/item_locker_album_title_tv"
            android:layout_width="wrap_content"
            android:layout_height="wrap_content"
            android:text="LILAC"
            android:textColor="@color/black"
            android:textSize="15sp"
            android:textStyle="bold"
            app:layout_constraintBottom_toBottomOf="parent"
            app:layout_constraintStart_toEndOf="@+id/item_album_cover_img_cardView"
            app:layout_constraintTop_toTopOf="parent" />

        <TextView
            android:id="@+id/item_locker_album_singer_tv"
            android:layout_width="wrap_content"
            android:layout_height="wrap_content"
            android:text="아이유 (IU)"
            android:textColor="#a8a8a8"
            android:textSize="12sp"
            app:layout_constraintBottom_toBottomOf="parent"
            app:layout_constraintStart_toEndOf="@+id/item_album_cover_img_cardView"
            app:layout_constraintTop_toTopOf="parent" />
    </LinearLayout>

</androidx.constraintlayout.widget.ConstraintLayout>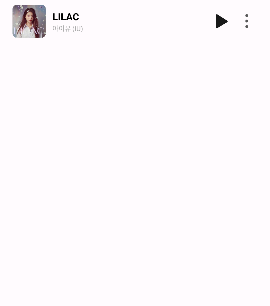
② recyclerview 태그 입력하기
- fragment_saved_song.xml 파일에 아래의 내용을 입력한다.
<?xml version="1.0" encoding="utf-8"?>
<androidx.constraintlayout.widget.ConstraintLayout
    xmlns:android="http://schemas.android.com/apk/res/android"
    xmlns:app="http://schemas.android.com/apk/res-auto"
    xmlns:tools="http://schemas.android.com/tools"
    android:layout_width="match_parent"
    android:layout_height="match_parent">

    <androidx.recyclerview.widget.RecyclerView
        android:id="@+id/locker_music_album_rv"
        android:layout_width="match_parent"
        android:layout_height="0dp"
        android:orientation="vertical"
        android:overScrollMode="never"
        app:layoutManager="androidx.recyclerview.widget.LinearLayoutManager"
        app:layout_constraintBottom_toBottomOf="parent"
        app:layout_constraintTop_toTopOf="parent"
        tools:listitem="@layout/item_locker_album" />

</androidx.constraintlayout.widget.ConstraintLayout>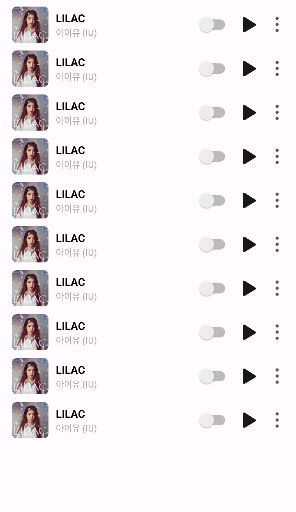
③ + ④ + ⑤ Adapter / ViewHolder / 메서드 오버라이딩
LockerAlbumRVAdapter 클래스를 생성한 후 아래의 내용을 입력한다.
class LockerAlbumRVAdapter (private val albumList: ArrayList<Album>) : RecyclerView.Adapter<LockerAlbumRVAdapter.ViewHolder>() {
    override fun onCreateViewHolder(
        parent: ViewGroup,
        viewType: Int
    ): LockerAlbumRVAdapter.ViewHolder {
        val binding: ItemLockerAlbumBinding = ItemLockerAlbumBinding
            .inflate(LayoutInflater.from(parent.context), parent, false)

        return ViewHolder(binding)
    }

    override fun onBindViewHolder(holder: LockerAlbumRVAdapter.ViewHolder, position: Int) {
        holder.bind(albumList[position])
    }

    override fun getItemCount(): Int = albumList.size

    inner class ViewHolder(val binding: ItemLockerAlbumBinding): RecyclerView.ViewHolder(binding.root){

        fun bind(album: Album){
            binding.itemLockerAlbumTitleTv.text = album.title
            binding.itemLockerAlbumSingerTv.text = album.singer
            binding.itemLockerAlbumCoverImgIv.setImageResource(album.coverImage!!)
        }
    }
}
⑥ + ⑦ 리스트 생성 / RecyclerView adapter와 연결
SavedSongFragment에 아래의 내용을 입력한다.
class SavedSongFragment : Fragment() {

    private var albumDatas = ArrayList<Album>()
    lateinit var binding : FragmentSavedSongBinding

    override fun onCreate(savedInstanceState: Bundle?) {
        super.onCreate(savedInstanceState)
    }

    override fun onCreateView(
        inflater: LayoutInflater, container: ViewGroup?,
        savedInstanceState: Bundle?
    ): View? {

        binding = FragmentSavedSongBinding.inflate(inflater, container, false)

        albumDatas.apply {
            add(Album("Butter", "방탄소년단 (BTS)", R.drawable.img_album_exp))
            add(Album("Lilac", "아이유 (IU)", R.drawable.img_album_exp2))
            add(Album("Next Level", "에스파 (AESPA)", R.drawable.img_album_exp3))
            add(Album("Boy with Luv", "방탄소년단 (BTS)", R.drawable.img_album_exp4))
            add(Album("BBoom BBoom", "모모랜드 (MOMOLAND)", R.drawable.img_album_exp5))
            add(Album("Weekend", "태연 (Tae Yeon)", R.drawable.img_album_exp6))
        }

        val lockerAlbumRVAdapter = LockerAlbumRVAdapter(albumDatas)
        binding.lockerMusicAlbumRv.adapter = lockerAlbumRVAdapter
        binding.lockerMusicAlbumRv.layoutManager = LinearLayoutManager(requireActivity())

        return binding.root
    }
}
이제 코드를 실행시켜보자. 아래와 같이 LockerFragment에 앨범 목록이 잘 나타날 것이다.
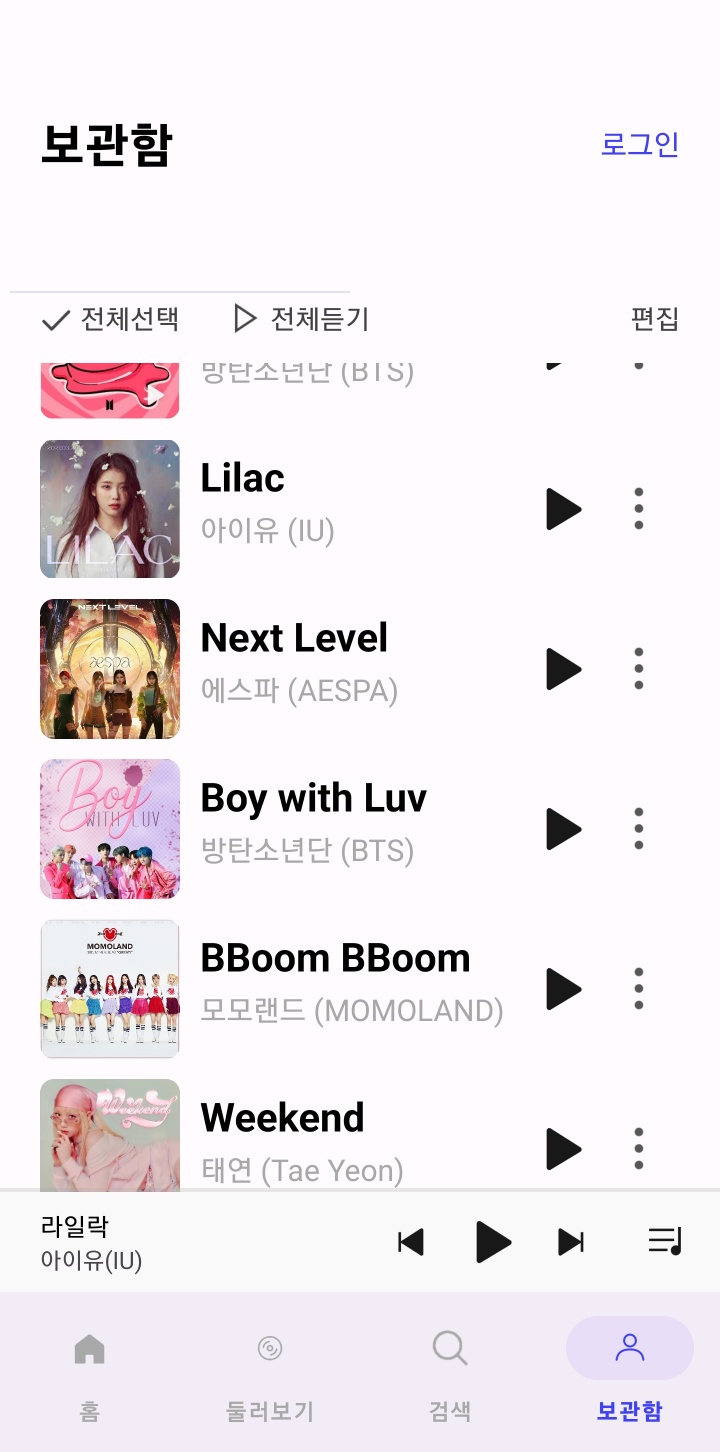
3) RecyclerView 클릭 이벤트 리스너 등록하기
① LockerAlbumRVAdpater를 아래와 같이 수정한다.
- 나중에 더보기 버튼을 클릭하여 앨범을 목록에서 삭제하는 기능을 구현할 것이므로, 리스트에서 아이템을 삭제하는 데 필요한 메서드도 추가해준다.
- 아이템을 추가하는 실습은 하지 않을 것이지만, 추가하는 메서드도 참고로 알아두자.
class LockerAlbumRVAdapter (private val albumList: ArrayList<Album>) : RecyclerView.Adapter<LockerAlbumRVAdapter.ViewHolder>() {
    override fun onCreateViewHolder(
    ...

    override fun onBindViewHolder(holder: LockerAlbumRVAdapter.ViewHolder, position: Int) {
        holder.bind(albumList[position])
        holder.itemView.setOnClickListener {
            itemClickListener.onItemClick(albumList[position])
        }

        holder.binding.itemLockerAlbumMoreIv.setOnClickListener {
            itemClickListener.onRemoveAlbum(position)
        }
    }
    ...

    interface OnItemClickListener {
        fun onItemClick(album : Album)
    }

    private lateinit var itemClickListener : OnItemClickListener

    fun setItemClickListener(onItemClickListener: OnItemClickListener) {
        this.itemClickListener = onItemClickListener
    }

    fun addItem(album: Album){
        albumList.add(album)
        notifyDataSetChanged()
    }

    fun removeItem(position: Int){
        albumList.removeAt(position)
        notifyDataSetChanged()
    }
}
② SavedSongFragment에 아래의 내용을 추가한다.
- 아이템을 클릭하면, AlbumFragment로 전환된다.
- 더 보기 버튼을 클릭하면 보관함 목록에서 해당 앨범이 제거된다.
class SavedSongFragment : Fragment() {
	...

    override fun onCreateView(
    	...

        val lockerAlbumRVAdapter = LockerAlbumRVAdapter(albumDatas)
        binding.lockerMusicAlbumRv.adapter = lockerAlbumRVAdapter
        binding.lockerMusicAlbumRv.layoutManager = LinearLayoutManager(requireActivity())

        lockerAlbumRVAdapter.setItemClickListener(object : LockerAlbumRVAdapter.OnItemClickListener {
            override fun onItemClick(album: Album) {
                changeAlbumFragment(album)
            }

            override fun onRemoveAlbum(position: Int) {
                lockerAlbumRVAdapter.removeItem(position)
            }
        })

        return binding.root
    }

    private fun changeAlbumFragment(album: Album) {
        (context as MainActivity).supportFragmentManager.beginTransaction()
            .replace(R.id.main_frm, AlbumFragment().apply {
                arguments = Bundle().apply {
                    val gson = Gson()
                    val albumToJson = gson.toJson(album)
                    putString("album", albumToJson)
                }
            })
            .commitAllowingStateLoss()
    }
}
이제 코드를 실행시켜보자. 아이템을 클릭하면 AlbumFragment로 화면이 전환되고, 더 보기 버튼을 클릭하면 해당 앨범을 목록에서 제거할 수 있다.
참고로 삭제된 아이템은 목록에서 영구 삭제되는 것이 아니라, 화면에서만 잠깐 사라지는 것이다. 이는 onBindViewHolder가 아이템을 화면에 그릴 때에 호출되는 함수이기 때문이다. 즉, 해당 아이템을 뺀 상태로 화면에 그릴 뿐, 리스트에서는 여전히 해당 아이템이 존재하고 있는 것이다.
그럼 영구적으로 삭제하는 방법은 무엇일까? 사실, 서버에서 아이템을 제거해주는 것이 일반적이기 때문에 프론트엔드에서 아이템 제거를 구현할 일이 많지는 않다. 그럼에도 프론트엔드에서 아이템을 영구 삭제해야 한다면, RoomDB를 활용하면 된다. 이에 대한 이야기는 다음 포스팅에서 자세히 다루기로 하자.
그러면 위의 방법은 언제 쓰는 것일까? 임시로 제거된 화면을 사용자에게 보여주어야 할 때에 사용될 수 있다. 예를 들어 편집 버튼을 눌러 사용자가 임의로 아이템을 삭제한 후에, 변경 완료 버튼을 클릭하는 방식으로 영구 삭제를 구현할 때에 유용하다.
5. Fragment에서 Activity의 UI 업데이트하기
오늘 발매 음악에 대한 재생 버튼은 HomeFragment에 있고, MiniPlayer는 MainActivity(HomeFragment를 호스팅하는 Activity)에 있다. 따라서 재생 버튼을 클릭했을 때 MiniPlayer에 해당 앨범의 제목과 가수가 표시되게 하려면, 상호 통신을 위한 인터페이스가 필요하다.
① AlbumRVAdapter에 재생 버튼에 대한 클릭 이벤트 리스너를 등록하자.
override fun onBindViewHolder(holder: AlbumRVAdapter.ViewHolder, position: Int) {
    holder.bind(albumList[position])
    holder.itemView.setOnClickListener {
        itemClickListener.onItemClick(albumList[position])
    }

    holder.binding.itemAlbumPlayImgIv.setOnClickListener {
        itemClickListener.onItemClick(albumList[position])
    }
}

interface OnItemClickListener {
    fun onItemClick(album : Album)
    fun onPlayAlbum(album : Album)
}
② Fragment와 그 Fragment를 호스팅 중인 액티비티 간의 통신을 위해 CommunicationInterface라는 이름의 인터페이스를 default 패키지 하위로 추가한다.
interface CommunicationInterface {
    fun sendData(album: Album)
}
③ HomeFragment 클래스에서 인터페이스를 상속 받은 후, 클래스 내부에서 인터페이스를 구현한다.
class HomeFragment : Fragment(), CommunicationInterface {
	...

    override fun sendData(album: Album) {
        if (activity is MainActivity) {
            val activity = activity as MainActivity
            activity.updateMainPlayerCl(album)
        }
    }
	...

}
④ 이후 MainActivity에서 MiniPlayer를 업데이트하는 updateMainPlayerCl 메서드를 정의해야 한다.
fun updateMainPlayerCl(album : Album) {
    binding.mainMiniplayerTitleTv.text = album.title
    binding.mainMiniplayerSingerTv.text = album.singer
    binding.mainMiniplayerProgressSb.progress = 0
}
⑤ HomeFragment에서 onPlayAlbum을 구현한다.
albumRVAdapter.setItemClickListener(object : AlbumRVAdapter.OnItemClickListener {
    override fun onItemClick(album : Album) {
        changeAlbumFragment(album)
    }

    override fun onPlayAlbum(album: Album) {
        sendData(album)
    }
})
이제 코드를 실행시켜보자. 오늘 발매 음악 목록의 재생 버튼을 클릭해보면, MiniPlayer의 text가 클릭한 앨범에 대한 정보로 변경되는 것을 확인할 수 있을 것이다.
6. RecyclerView 사용시 주의할 점
1) RecyclerView의 문제점
RecyclerView를 스위치, 체크 박스 등과 함께 사용할 때, 스위치의 On/Off나 체크 박스의 Check/Not-check가 제멋대로 설정되는 문제가 발생한다. 이 내용을 먼저 확인해보기로 하자.
① item_locker_album.xml 파일에 아래의 스위치 태그를 추가한다.
<Switch
    android:id="@+id/switchRV"
    android:layout_width="wrap_content"
    android:layout_height="wrap_content"
    android:switchMinWidth="50dp"
    android:switchPadding="20dp"
    app:layout_constraintBottom_toBottomOf="parent"
    app:layout_constraintEnd_toStartOf="@+id/item_locker_album_play_img_iv"
    app:layout_constraintRight_toRightOf="parent"
    app:layout_constraintTop_toTopOf="parent" />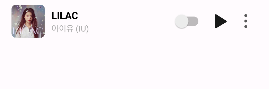
② LockerFragment에서 기존에 사용하던 리스트를 3배 확장한다.
- 스크롤을 사용하기 위해서이다.
albumDatas.apply {
    add(Album("Butter", "방탄소년단 (BTS)", R.drawable.img_album_exp))
    add(Album("Lilac", "아이유 (IU)", R.drawable.img_album_exp2))
    add(Album("Next Level", "에스파 (AESPA)", R.drawable.img_album_exp3))
    add(Album("Boy with Luv", "방탄소년단 (BTS)", R.drawable.img_album_exp4))
    add(Album("BBoom BBoom", "모모랜드 (MOMOLAND)", R.drawable.img_album_exp5))
    add(Album("Weekend", "태연 (Tae Yeon)", R.drawable.img_album_exp6))
}
코드를 실행시켜보자. 아래와 같이 스위치의 On/Off가 제멋대로 설정된 것을 확인할 수 있을 것이다.
2) 해결 방법
이는 ListView 또는 RecyclerView에서 스크롤로 인해 상단 아이템이 화면에서 가려질 때, 하단 아이템이 재사용된 뷰에 나타나면서 발생하는 문제이다. 이에 대한 해결책으로 아래의 두 가지 방법이 있다.
- sparseBooleanArray 사용
- position, 상태 저장 변수로 구성된 데이터 클래스 사용
여기서는 sparseBooleanArray 활용하는 방법에 대해서만 소개하기로 하겠다. SparseBooleanArray는 정수 값들을 boolean 값으로 매핑하는 클래스이다. 여기서 말하는 정수 값은 RecyclerView 아이템의 position을 의미하고, boolean 값은 On/Off 또는 Check/Not-check를 의미한다. (사실상 Map이라고 받아들이는게 이해하기 더 쉬울 수도 있다.)
LockerAlbumRVAdapter를 아래와 같이 수정한다.
class LockerAlbumRVAdapter (private val albumList: ArrayList<Album>) : RecyclerView.Adapter<LockerAlbumRVAdapter.ViewHolder>() {

    private val switchStatus = SparseBooleanArray()
    ...

    override fun onBindViewHolder(holder: LockerAlbumRVAdapter.ViewHolder, position: Int) {
        holder.bind(albumList[position])
        holder.itemView.setOnClickListener {
            itemClickListener.onItemClick(albumList[position])
        }

        holder.binding.itemLockerAlbumMoreIv.setOnClickListener {
            itemClickListener.onRemoveAlbum(position)
        }

        val switch =  holder.binding.switchRV
        switch.isChecked = switchStatus[position]
        switch.setOnClickListener {
            if (switch.isChecked) {
                switchStatus.put(position, true)
            }
            else {
                switchStatus.put(position, false)
            }

            notifyItemChanged(position)
        }
}- 스위치를 클릭했을 때 스위치가 On 상태로 toggle되면, 해당 position에 true 값을 저장하고, Off 상태로 toggle되면, 해당 position에 false 값을 저장한다.
- SparseBooleanArray의 기본값은 false이므로, 초기화되지 않은 매핑은 false로 간주된다. 즉, 초기의 switchStatus에는 모든 index에 false가 들어가있다.
이제 코드를 실행시켜보면 스위치의 On/Off가 제멋대로 설정되던 오류가 잘 해결되었음을 확인해볼 수 있을 것이다.
7. Foreground Service를 사용하여 알림창 띄우기
음악이 재생 중일 때, 음악이 재생 중임을 Foreground Service 알림창으로 표시하고 음악이 일시정지되었을 때 Foreground Service 알림창을 제거하는 기능을 구현해보기로 하자.
① Foreground Service를 사용하려면, 가장 먼저 Manifest 파일에서 관련 권한을 허용해주어야 한다.
- 반드시 휴대폰에서 해당 앱의 알림 설정을 허용됨으로 바꿔주여야 한다.
<uses-permission android:name="android.permission.FOREGROUND_SERVICE"/>
<uses-permission android:name="android.permission.INTERNET" />
<uses-permission android:name="android.permission.POST_NOTIFICATIONS" />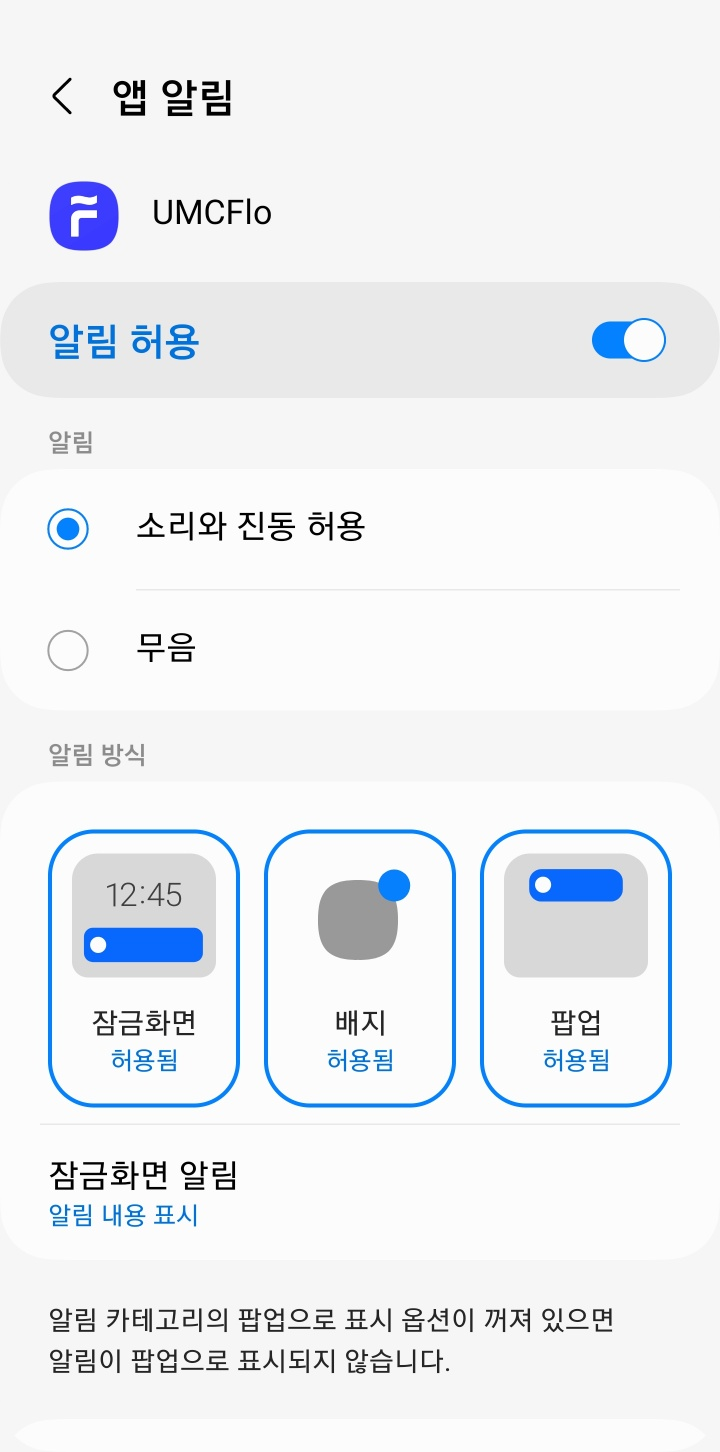
② default 패키지 하위로 Constant라는 이름의 Object를 추가한다.
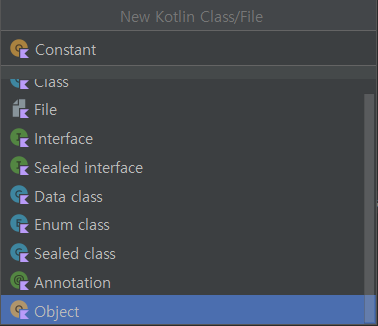
- ID 값은 아무런 값이나 입력하면 된다.
object Constant {
    const val CHANNEL_ID = "ch123"
    const val MUSIC_NOTIFICATION_ID = 123
}
③ ForegroundService라는 이름의 Service를 생성한다.
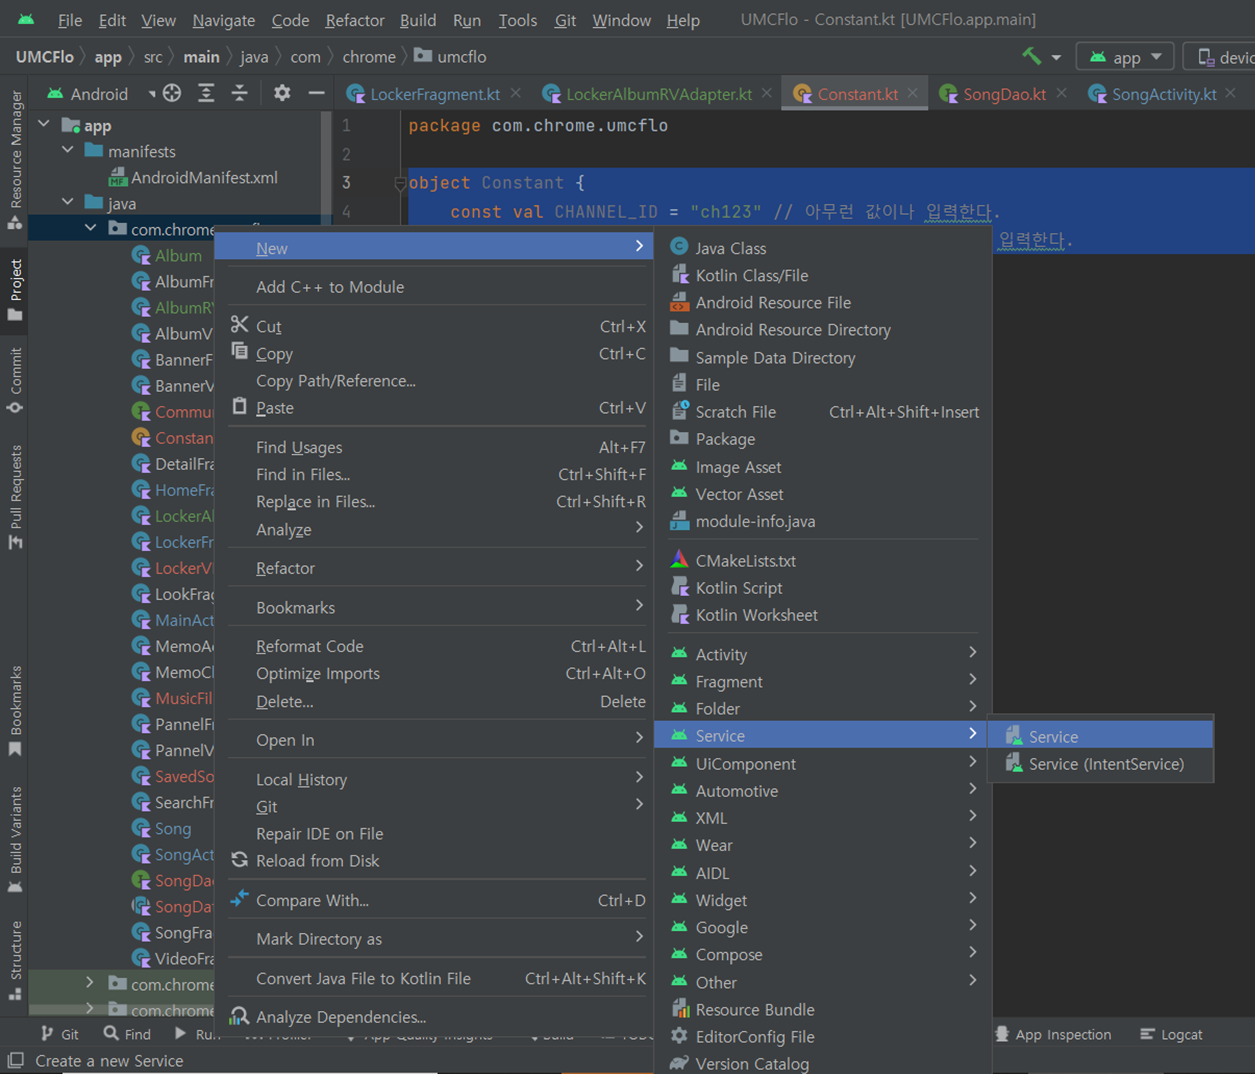
class ForegroundService : Service() {

    override fun onBind(intent: Intent): IBinder? {
        return null // 사용하지 않음을 의미한다.
    }

    override fun onCreate() {
        super.onCreate()
        createNotificationChannel()
    }

    override fun onStartCommand(intent: Intent?, flags: Int, startId: Int): Int {

        if (Build.VERSION.SDK_INT >= Build.VERSION_CODES.O) { // 버전 확인
            showNotification()
        }

        return START_STICKY
    }

    @RequiresApi(Build.VERSION_CODES.O)
    private fun showNotification() {
    	// 알림을 클릭했을 때 이동할 화면을 지정한다.
        val notificationIntent = Intent(this, SongActivity::class.java)
        val pendingIntent = PendingIntent.getActivity(
            this, 0, notificationIntent, PendingIntent.FLAG_IMMUTABLE
        )
        val notification = Notification
            .Builder(this, Constant.CHANNEL_ID)
            .setContentText("현재 음악이 재생 중입니다.")
            .setSmallIcon(R.drawable.app_icon)
            .setContentIntent(pendingIntent)
            .build()

        startForeground(Constant.MUSIC_NOTIFICATION_ID, notification)
    }

    private fun createNotificationChannel() {
        if (Build.VERSION.SDK_INT >= Build.VERSION_CODES.O) {
            val serviceChannel = NotificationChannel(
                Constant.CHANNEL_ID, "Service Channel",
                NotificationManager.IMPORTANCE_DEFAULT
            )

            val manager = getSystemService(
                NotificationManager::class.java
            )

            manager.createNotificationChannel(serviceChannel)
        }
    }
}- onStartCommand(): 서비스가 시작되면 호출되는 메서드이다. startService 메서드를 통해 실행할 수 있다.
- if (Build.VERSION.SDK_INT >= Build.VERSION_CODES.O)
- Android 기기의 SDK 버전이 Android Oreo(8.0) 이상인지를 확인하는 조건문이다.
- Android Oreo부터는 포그라운드 서비스를 실행할 때 알림을 표시하는 알림 채널이 필요하므로, 이 조건을 사용하여 알림을 표시할지 여부를 결정한다.
- return START_STICKY
- 서비스가 시스템에 의해 강제 종료되더라도 시스템이 자동으로 서비스를 다시 시작하도록 지시하는 상수이다.
- 사실은 지금처럼 간단한 Service가 아닌, 음악 재생과 같이 지속적으로 실행되어야하는 Service에서 사용한다.
- @RequiresApi(Build.VERSION_CODES.O): 이 함수가 Android Oreo (8.0) 이상에서만 실행될 수 있음을 나타내는 어노테이션이다.
- PendingIntent.getActivity()
- 주로 알림 클릭 핸들링에 사용된다.
- getActivity() 메서드를 통해 PendingIntent 객체를 생성할 수 있다.
- getActivity()는 context, request code(Pending Intent의 식별자), 실행할 Intent(알림 클릭 시 이동할 화면), Flag를 입력 인자로 받는다.
- 여기서 사용된 PendingIntent.FLAG_IMMUTABLE은 PendingIntent가 생성된 후에는 그 내용을 수정할 수 없음을 의미한다.
- startForeground: 서비스를 포그라운드 서비스로 설정하고 알림을 표시한다.
- getSystemService: NotificationManager 서비스를 가져온다. NotificationManager는 알림 채널을 생성하고 관리하는 데 사용한다.
④ SongActivity에 아래의 내용을 추가한다.
- 재생버튼과 일시정지버튼의 클릭 이벤트 리스너에서 Foreground Service를 시작 및 종료하는 메서드를 호출한다.
	override fun onCreate(savedInstanceState: Bundle?) {
    	...

        binding.songMiniplayerIv.setOnClickListener {
            setPlayerStatus(true)
            startStopService()
        }

        binding.songPauseIv.setOnClickListener {
            setPlayerStatus(false)
            startStopService()
        }
        ...

	private fun startStopService() {
        if (isServiceRunning(ForegroundService::class.java)) {
            Toast.makeText(this, "Foreground Service Stopped", Toast.LENGTH_SHORT).show()
            stopService(Intent(this, ForegroundService::class.java))
        }
        else {
            Toast.makeText(this, "Foreground Service Started", Toast.LENGTH_SHORT).show()
            startService(Intent(this, ForegroundService::class.java))
        }
    }

    private fun isServiceRunning(inputClass : Class<ForegroundService>) : Boolean {
        val manager : ActivityManager = getSystemService(
            Context.ACTIVITY_SERVICE
        ) as ActivityManager

        for (service : ActivityManager.RunningServiceInfo in manager.getRunningServices(Integer.MAX_VALUE)) {
            if (inputClass.name.equals(service.service.className)) {
                return true
            }

        }
        return false
    }
...- startService() / stopService()
- ForegroundService를 시작하거나 중지하는 메서드이다.
- Intent를 사용하여 시작 및 중지하려는 서비스를 지정한다.
- getSystemService(Context.ACTIVITY_SERVICE) as ActivityManager: ActivityManager 객체를 생성한 후 시스템 서비스인 ACTIVITY_SERVICE를 사용하여 Activity 및 Service Manager를 얻는다.
- for (service: ActivityManager.RunningServiceInfo in manager.getRunningServices(Integer.MAX_VALUE))
- 시스템에서 실행 중인 서비스 목록을 가져오기 위해 manager.getRunningServices(Integer.MAX_VALUE)를 호출하고, 이 목록을 순회한다.
- 목록을 순회하다가 입력으로 주어진 inputClass 클래스 이름이 ForegroundService 클래스의 이름과 일치하면, ForegroundService가 실행 중인 것으로 간주하고 true를 반환한다.
이제 코드를 실행시켜보자. 재생 버튼을 클릭하면 음악이 현재 재생 중임을 알리는 알림창이 뜨고, 반대로 일시정지 버튼을 누르면 알림창이 사라진다. 또한, 알림창을 클릭하여 SongActivity로 이동할 수도 있다.