
1. Swagger Autogen
1) 필요성
Node.js에 Swagger UI를 적용해야 할 때, swagger-jsdoc 모듈을 사용하는 것이 일반적이다. 그러나, 모든 API를 일일이 Swagger에 등록해야 하기 때문에 절차가 번거롭고, 길이가 긴 Swagger 주석이 코드의 가독성을 해친다는 단점이 있다. 또한, Swagger 주석은 들여쓰기에 매우 민감하기 때문에, 실수할 가능성이 높다는 것도 큰 문제이다.
참고로 여기서 말하는 Swagger 주석이란, Swagger에 API를 등록하기 위해 작성하는 것으로, 보통 아래와 같은 형식을 가진다. (코드 출처: https://any-ting.tistory.com/105)
/**
 * @swagger
 * paths:
 *  /api/user/users:
 *    get:
 *      summary: "유저 데이터 전체조회"
 *      description: "서버에 데이터를 보내지 않고 Get방식으로 요청"
 *      tags: [Users]
 *      responses:
 *        "200":
 *          description: 전체 유저 정보
 *          content:
 *            application/json:
 *              schema:
 *                type: object
 *                properties:
 *                    ok:
 *                      type: boolean
 *                    users:
 *                      type: object
 *                      example:
 *                          [
 *                            { "id": 1, "name": "유저1" },
 *                            { "id": 2, "name": "유저2" },
 *                            { "id": 3, "name": "유저3" },
 *                          ]
 */
userRouter.get("/users", userController.getUsers)
이러한 문제를 해결하기 위해, swagger-autogen 모듈을 사용하기로 한다. 해결 전략은 아래와 같다.
- 기존 코드의 가독성을 유지하기 위해 Swagger 관련 설정을 별도의 파일로 관리
- Swagger에 모든 API를 등록하는 과정을 자동화
- 중괄호 쌍이나 콤마가 맞지 않을 때, 에러를 바로 표시하는 json 형식의 파일 사용
2) 사용법
① src 디렉토리 하위에서 아래의 명령을 입력하여, Swagger UI 적용에 필요한 모듈을 설치한다.
- Express로 구축한 API에 Swagger UI를 적용하기 위해선 swagger-ui-express 모듈이 필요하다.
cd src # src 디렉토리 하위에 설치
npm install swagger-ui-express
npm install swagger-autogen
② src 디렉토리 하위로 swagger.js 파일을 생성한 후, 아래의 내용을 입력한다.
- swagger.js 파일은 Swagger에 API를 자동 등록하기 위해 임시로 생성하는 파일이므로, Swagger 등록이 완료된 이후에는 삭제해도 된다.
const swaggerAutogen = require('swagger-autogen')({ openapi: '3.0.0' });
const PORT = 3000; // 사용하는 포트 번호에 맞게 변경

const options = {
  info: {
    title: 'DB Integration Server API 명세',
    description: '인사연동 모듈에 사용되는 다양한 API를 테스트합니다.',
  },
  servers: [
    {
      url: `http://localhost:${PORT}`, // base URL
    },
  ],
  schemes: ['http'], // 사용할 프로토콜
  securityDefinitions: { // JWT 인증을 위한 설정
    bearerAuth: {
      type: 'http',
      scheme: 'bearer',
      in: 'header',
      bearerFormat: 'JWT',
    },
  },
};

const outputFile = './swagger/swagger-output.json'; // 생성될 Swagger 설정 파일의 경로 및 파일명
const endpointsFiles = ['./index.js']; // 기본 라우터 즉, app.use("/", router)가 정의된 파일의 경로
swaggerAutogen(outputFile, endpointsFiles, options); // Swagger 문서를 outputFile 경로에 생성
③ 서버의 진입점이 되는 파일에 아래의 내용을 입력한다.
- 여기서는 index.js 파일에 아래의 내용을 입력하였다.
- 아래의 입력 표시가 달려있는 코드를 추가해주면 된다.
const express = require("express");
const router = require("./router");
const swaggerUi = require("swagger-ui-express"); // 입력
const swaggerFile = require("./swagger/swagger-output.json"); // 입력
const app = express();
...
app.use(express.json());
app.use("/", router);
app.use("/swagger", swaggerUi.serve, swaggerUi.setup(swaggerFile)); // 입력 (http://localhost:3000/swagger로 Swagger 페이지 접속 가능)
...
app.listen(PORT, () => {
console.log(`
#############################################
🛡️ Server listening on port: ${PORT} 🛡️
#############################################
`);
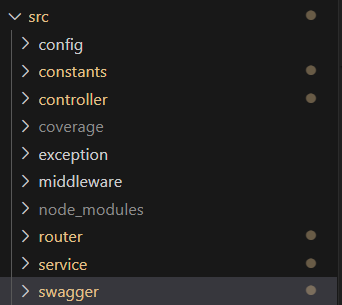
});④ src 디렉토리 하위로 swagger 디렉토리를 생성한다. 이 swagger 디렉토리 하위에 Swagger 설정 파일을 저장할 것이다.
⑤ src 디렉토리 하위에서 아래의 명령을 입력한다.
- 모든 API를 Swagger에 자동으로 등록하는 명령이다.
- 명령을 수행할 때마다 swagger-output.json 파일을 초기화하므로, API가 추가될 때마다 실행하는 것이 아니라 최초 한번만 실행해야 한다.
- 이후 추가된 API에 대한 설정은 swagger-output.json 파일에 직접 추가해주어야 한다.
cd src
node ./swagger.js
⑥ Swagger-autogen에 성공하면, swagger 디렉토리 하위로 swagger-output.json 파일이 생성된다.
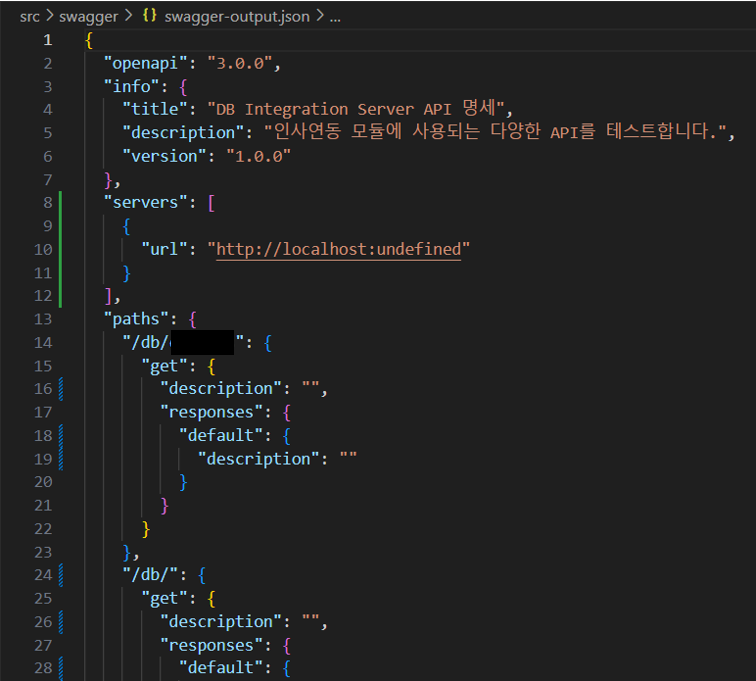
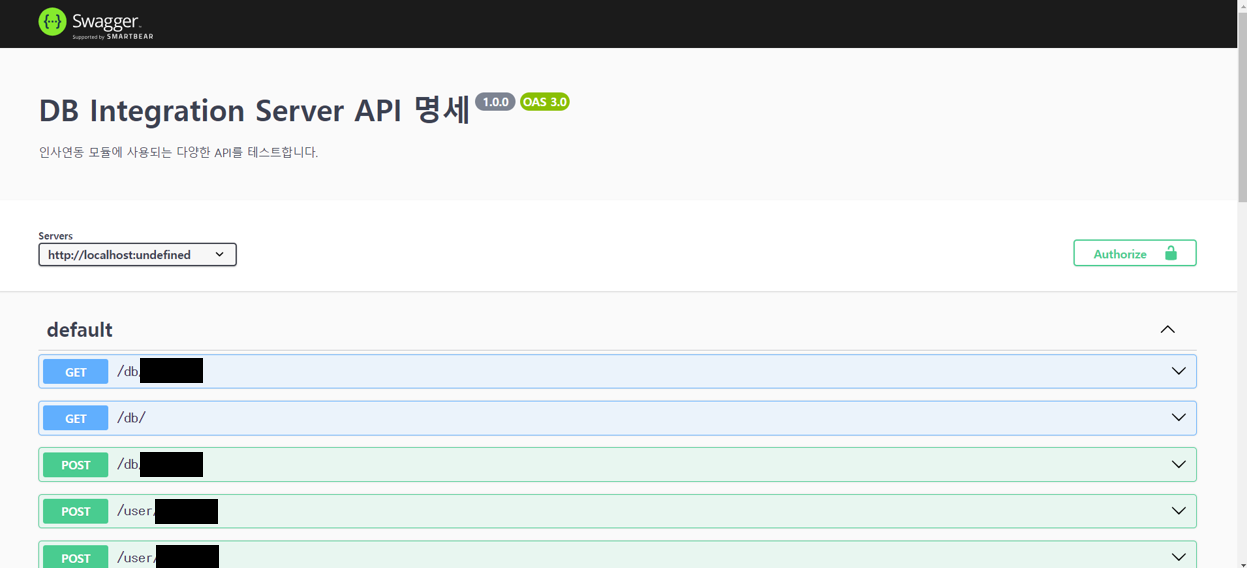
⑦ 서버를 실행한 후 http://localhost:3000/swagger에 접속하면, Swagger 페이지를 확인할 수 있다.
2. Swagger 페이지에 설명 추가하기
Swagger 페이지에서 API를 확인할 수 있게 되었지만, 아직까진 API에 대한 설명도 없을 뿐더러 API를 실행할 수도 없다.

지금부터 API에 대한 설명을 작성하는 부분과 API Response를 표기하는 방법에 대해 알아보도록 하자.
1) API에 대한 설명 작성하기
각 API에 대한 설명은 아래의 ... 부분에 작성되어야 한다. (완성된 형식은 포스팅에 가장 마지막 부분에 작성해두었으니 참고하기 바란다.)
"paths": {
    "/db": {
      "get": {
      	... → 이 부분에 작성
      }
    },
① tags
- API를 구분하는 태그
"tags": ["DB API"],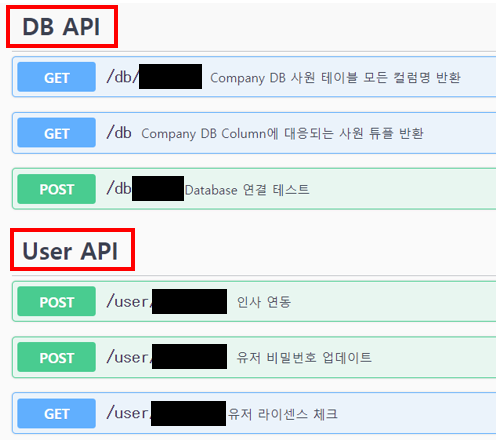
② summary
- API 엔드포인트 옆에 표시되는 설명
"summary": "Company DB 사원 테이블 모든 컬럼명 반환",
③ description
- API를 클릭했을 때 나타나는 부가 설명
"description": "Company DB 사원 테이블의 모든 컬럼명을 반환합니다.",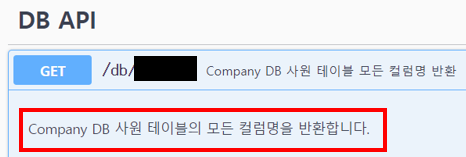
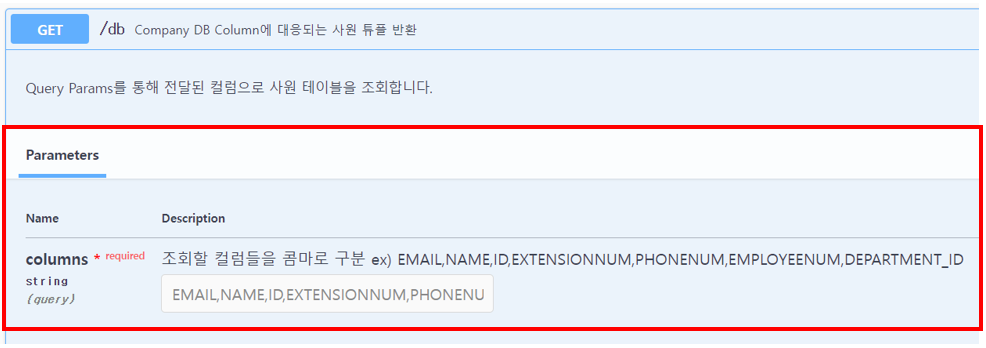
④ parameters
- 입력 받아야하는 값이 Query Parameter인 경우
"parameters": [
{
	"name": "columns", // Query Parameter의 이름
    "in": "query",
    "description": "조회할 컬럼들을 콤마로 구분 ex) EMAIL,NAME,ID,EXTENSIONNUM,PHONENUM,EMPLOYEENUM,DEPARTMENT_ID",
    "required": true, // 필수 입력
    "schema": {
    	"type": "string", // 입력 값의 타입을 설정 ex) integer, string, boolean
        "example": "EMAIL,NAME,ID,EXTENSIONNUM,PHONENUM,EMPLOYEENUM,DEPARTMENT_ID"
    }
},
    ... // 추가적으로 입력 받을 Query Parameter 입력
],
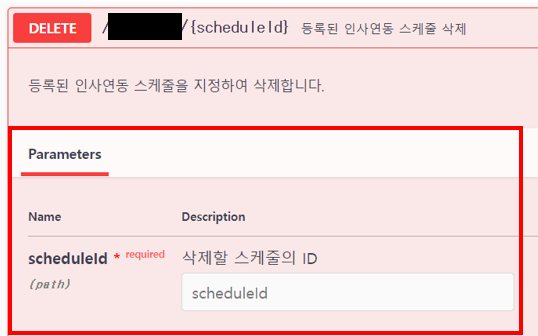
- 입력 받아야하는 값이 Path Variable인 경우
"parameters": [
	{
    	"name": "scheduleId", // Path Variable의 이름
        "in": "path",
        "required": true,
        "type": "integer",
        "description": "삭제할 스케줄의 ID"
    }
],
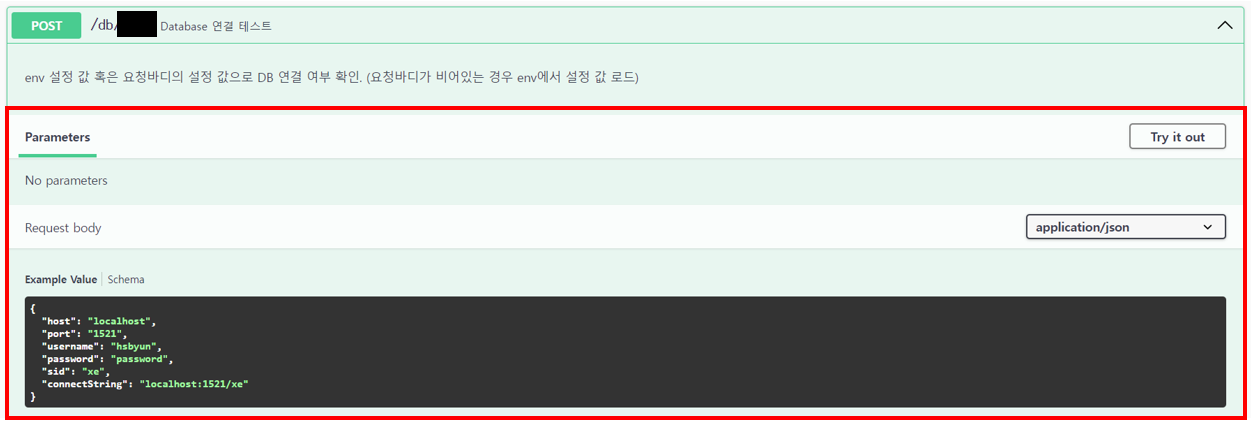
⑤ requestBody
- 요청 본문을 통해 입력 값을 받아야 하는 경우
"requestBody": {
	"required": false,
    "content": {
    	"application/json": {
        	"schema": {
            	"type": "object",
                "properties": {
                  "host": {
                    "type": "string",
                    "example": "localhost"
                  },
                  "port": {
                    "type": "string",
                    "example": "1521"
                  },
                  "username": {
                    "type": "string",
                    "example": "hsbyun"
                  },
                  "password": {
                    "type": "string",
                    "example": "password"
                  },
                  "sid": {
                    "type": "string",
                    "example": "xe"
                  },
                  "connectString": {
                    "type": "string",
                    "example": "localhost:1521/xe"
                  }
               }
        	}
    	}
	}
},
2) API Response 작성하기
API Response 표기에 대한 설정은 아래의 ... 부분에 작성되어야 한다.
"paths": {
"/db": {
"get": {
"responses": {
... → 이 부분에 작성
}
}
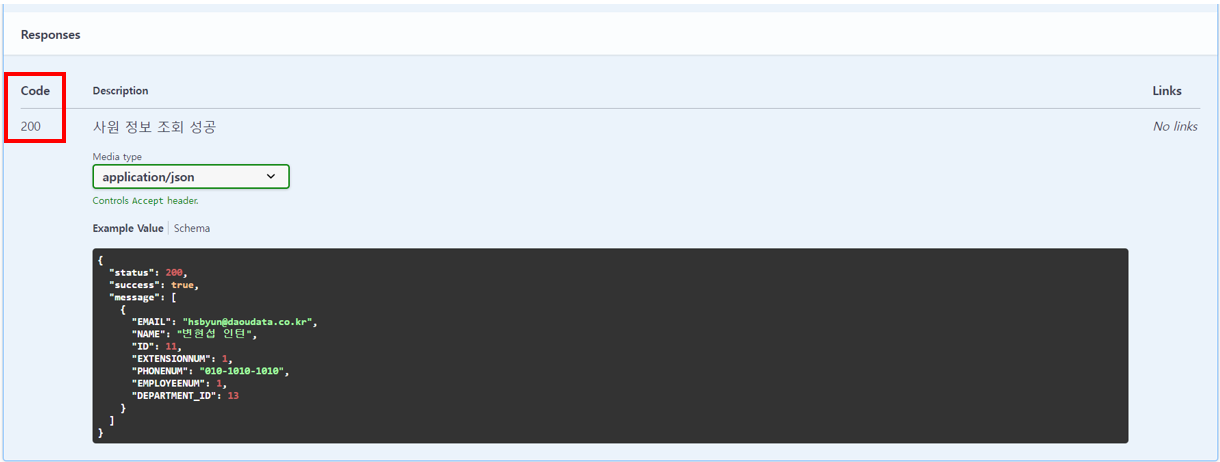
}, ① Status Code
- Response의 Status Code에 따라 Response를 분류한다.
"200": {
	...
},
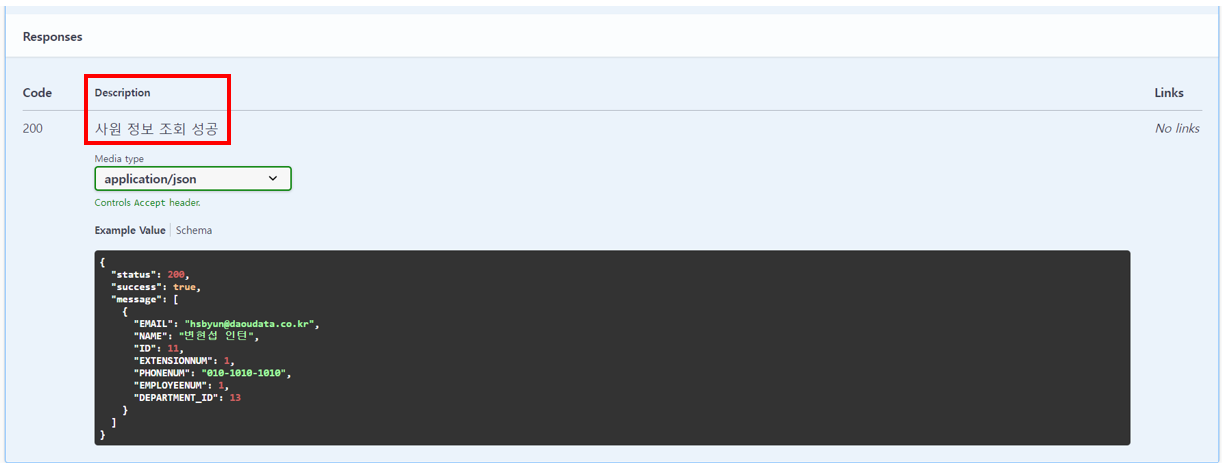
② description
- Status Code 별 설명
- Status Code 하위에 작성
"200": {
	"description": "사원 정보 조회 성공",
    ...
}
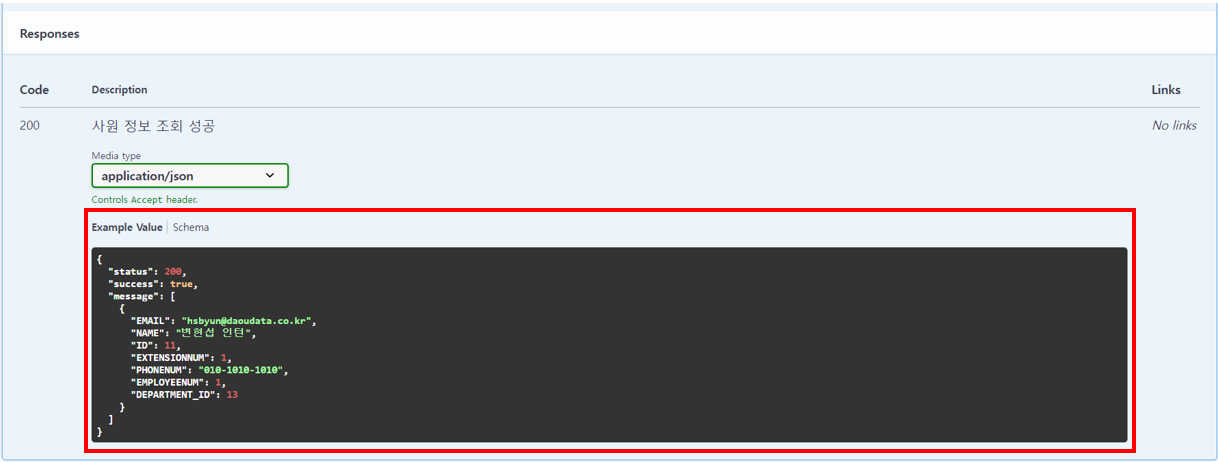
③ content
- 응답 데이터의 형식을 정의
- 마찬가지로, Status Code 하위에 작성
- 응답 데이터를 ChatGPT에 넣는 방식으로 쉽게 생성 가능
"200": {
	...
	"content": {
    	"application/json": {
        	"schema": {
            	"type": "object",
                "properties": {
                	"status": {
                      "type": "integer",
                      "example": 200
                    },
                    "success": {
                      "type": "boolean",
                      "example": true
                    },
                    "message": {
                      "type": "array",
                      "items": {
                        "type": "object",
                        "properties": {
                          "EMAIL": {
                            "type": "string",
                            "example": "hsbyun@daoudata.co.kr"
                          },
                          "NAME": {
                            "type": "string",
                            "example": "변현섭 인턴"
                          },
                          "ID": {
                            "type": "integer",
                            "example": 11
                          },
                          "EXTENSIONNUM": {
                            "type": "integer",
                            "example": 1
                          },
                          "PHONENUM": {
                            "type": "string",
                            "example": "010-1010-1010"
                          },
                          "EMPLOYEENUM": {
                            "type": "integer",
                            "example": 1
                          },
                          "DEPARTMENT_ID": {
                            "type": "integer",
                            "example": 13
                          }
                       }
                    }
                 }
             }
    	 }
	 }
}
이렇게 해서 완성된 형식은 아래와 같다.
"/db": {
	"get": {
    	"summary": "Company DB Column에 대응되는 사원 튜플 반환",
        "tags": ["DB API"],
        "description": "Query Params를 통해 전달된 컬럼으로 사원 테이블을 조회합니다.",
        "parameters": [
        {
          "name": "columns",
          "in": "query",
          "description": "조회할 컬럼들을 콤마로 구분 ex) EMAIL,NAME,ID,EXTENSIONNUM,PHONENUM,EMPLOYEENUM,DEPARTMENT_ID",
          "required": true,
          "schema": {
            "type": "string",
            "example": "EMAIL,NAME,ID,EXTENSIONNUM,PHONENUM,EMPLOYEENUM,DEPARTMENT_ID"
          }
        }
        ],
        "responses": {
          "200": {
            "description": "사원 정보 조회 성공",
            "content": {
              "application/json": {
                "schema": {
                  "type": "object",
                  "properties": {
                    "status": {
                      "type": "integer",
                      "example": 200
                    },
                    "success": {
                      "type": "boolean",
                      "example": true
                    },
                    "message": {
                      "type": "array",
                      "items": {
                        "type": "object",
                        "properties": {
                          "EMAIL": {
                            "type": "string",
                            "example": "hsbyun@daoudata.co.kr"
                          },
                          "NAME": {
                            "type": "string",
                            "example": "변현섭 인턴"
                          },
                          "ID": {
                            "type": "integer",
                            "example": 11
                          },
                          "EXTENSIONNUM": {
                            "type": "integer",
                            "example": 1
                          },
                          "PHONENUM": {
                            "type": "string",
                            "example": "010-1010-1010"
                          },
                          "EMPLOYEENUM": {
                            "type": "integer",
                            "example": 1
                          },
                          "DEPARTMENT_ID": {
                            "type": "integer",
                            "example": 13
                          }
                        }
                      }
                    }
                  }
                }
              }
           }
         }
      }
   }
},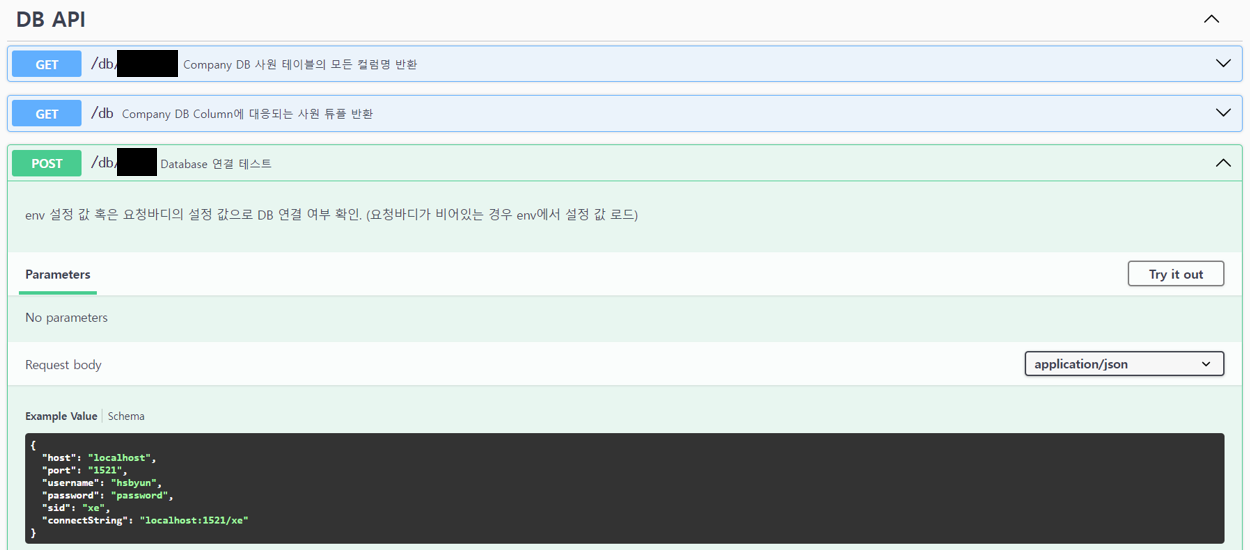
API를 직접 실행하여, 실제 서버의 응답과 예시 응답을 비교해 볼 수 있다.
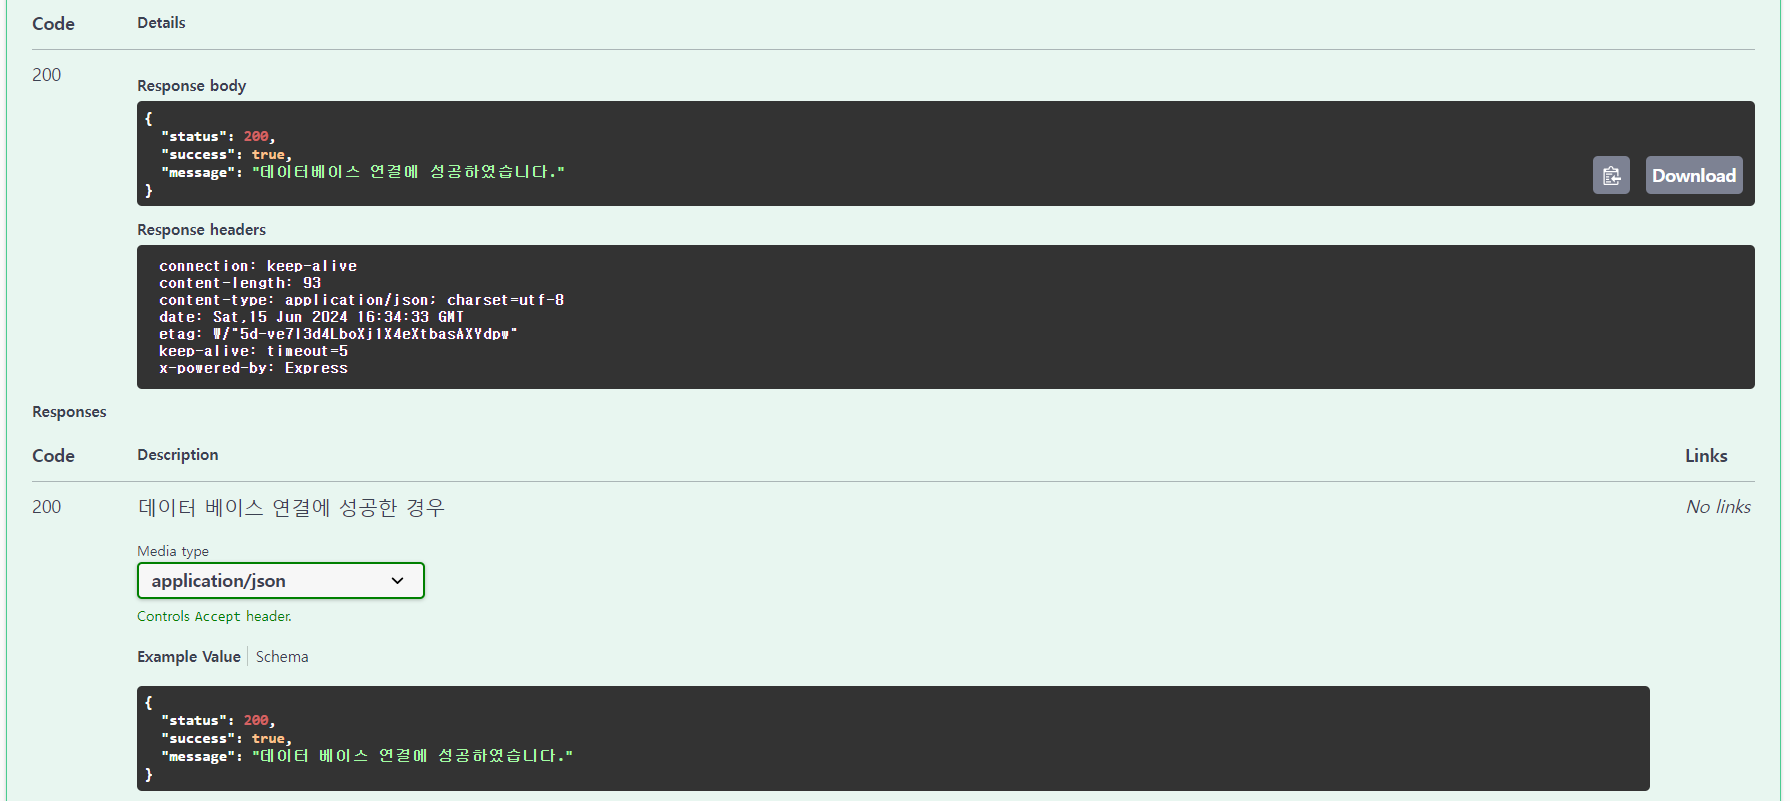
API를 테스트하는 방법은 이미 알고 있을 것이라 가정하여, 이 부분에 대한 설명은 생략하기로 한다. 사용법이 궁금하다면, 아래의 포스팅을 참조하기 바란다.
>> Swagger를 이용한 API 테스트