

검색 결과가 검색폼 아래 위치한다. 검색 결과가 없을 경우와 있을 경우를 구분한다
1. 검색 결과가 없을 경우
this.state = {
searchKeyword: "",
// TODO
searchResult: [],
};
}
render() {
return (
<>
<header>
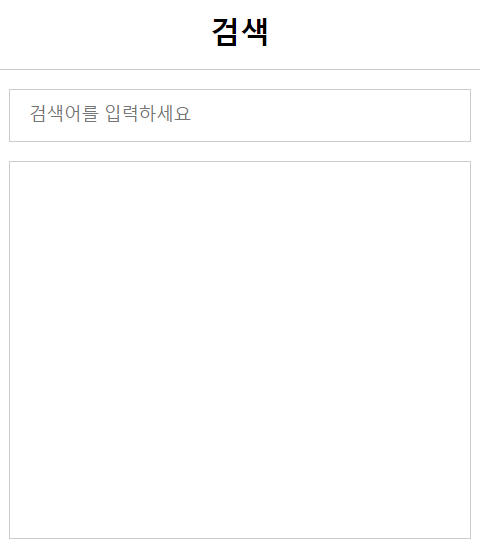
<h2 className="container">검색</h2>
</header>
<div className="container">
<form
onSubmit={(event) => this.handleSubmit(event)}
onReset={() => this.handleReset()}
>
<input
type="text"
placeholder="검색어를 입력하세요"
autoFocus
value={this.state.searchKeyword}
onChange={(event) => this.handleChangeInput(event)}
/>
{this.state.searchKeyword.length > 0 && (
<button type="reset" className="btn-reset"></button>
)}
</form>
// 새로 추가된 태그
<div className="content">
{this.state.searchResult.length > 0 ? (
<div>TODO: 검색 결과 목록 표시하기</div>
) : (
<div className="empty-box"> 검색 결과가 없습니다 </div>
)}
</div>
</div>
</>
);
}
}
검색하기 전에는 검색 결과가 안 나오고, 검색을 한 경우에는 검색 결과가 나와야 한다. (최근 검색어 포함)
이것도 조건부 렌더링이다.
검색 결과를 모아두기 위해서, state 객체에 searchResult 라는 빈 배열을 만들었다.
또한, form 태그 밑에 content라는 클래스네임을 가진 div태그를 추가 후,
삼항 연산자로 검색 결과 목록 유무에 따라서, 다른 태그들이 표시 되도했다.
현재는 searchResult가 빈 배열이기 때문에, "검색 결과가 없습니다"로만 표기된다.

2. 검색 결과가 있을 경우
storage.js 에 더미 데이터들을 저장해놨다.
그곳에 productData 를 확인해보면, 객체를 요소들로 가지고 있는 배열이라는 것을 알수 있다.
그 안의 name과 imageUrl 이 searchResult에 배열 형태로 들어올 예정이다.
이제, 검색 결과가 있을 시에, 이 데이터들을 어떻게 출력할 것인가??
일단, 리스트 이기 때문에 <ul>을 사용하자
    <div className="content">
            {this.state.searchResult.length > 0 ? (
             ////// 새로 추가된 부분
              <ul className="result">
                {this.state.searchResult.map((item) => {
                  return (
                    <li>
                      <img src={item.imageUrl} alt={item.name} />
                      <p>{item.name}</p>
                    </li>
                  );
                })}
              </ul>
			 //////
            ) : (
              <div className="empty-box">검색 결과가 없습니다</div>
            )}
          </div>
src같은 속성도 JS를 쓰려면, {}를 써서 값을 할당해야 한다.
=> 이렇게하면, searchResult 배열을 map()으로 돌리면서, <li>를 배열로 만들어낼 것이다.
그것을 <ul>가 감싸서 검색결과가 리스트 형태로 보일 것이다.
searchResult는 생성자에서 처음 초기화했다. 이것을 어디선가 가져와서 검색 결과를 담아야 할 것이다. 여러 시점에서 담을 수 있겠지만, 검색어를 치고 엔터를 친 시점에 데이터를 담는 게 제일 문안한 것같다.
즉, handleSubmit(event)을 수정해주자!!
handleSubmit(event) {
    event.preventDefault();
    this.search(this.state.searchKeyword);
  }

  search(searchKeyword) {
    const searchResult = store.search(searchKeyword);
    this.setState({ searchResult });
  }
Q.
this.setState({ searchResult });에서
현재,state에는searchKeyword와searchResult필드가 두개 있는데,setState({ searchResult })를 하면,
searchResult하나로 overwrite 되지 않을까??
=> 그렇지는 않다.
setState()는 변경된 필드만 기존의 필드와 병합하는 방식으로state를 관리한다.
추가적으로, 바닐라JS로 구현한 코드에서 storage.js , Store.js , helpers.js를 가져와서 재활용한다.
// Store.js
  search(keyword) {
    return this.storage.productData.filter((product) =>
      product.name.includes(keyword)
    );
  }
정리하면,
처음에는searchResult가 빈 배열이었다. 그래서 render()는 검색결과를 보여주는 부분에서 검색결과의 길이가 0보다 작기 때문에, "검색 결과가 없습니다"를 출력한다.
다시 검색어를 입력해서, 엔터를 치면,handleSubmit(event)이 호출이 되고, 내부적으로search(searchKeyword)를 호출한다. 이 메소드는 입력한 검색어로 Store에서search(searchKeyword)를 호출한다.
그럼 Store를 검색된 상품 목록을 반환하고, 다시this.setState({ searchResult });로 상태를 갱신한다. 그러면, 리엑트 컴포넌트는 상태가 갱신되었음을 알고 다시render()를 호출하고, 새로운 UI가 찍힌다.
리스트와 키

그런데, 현재 결과물에는 위와 같은 Warning이 뜬다.
Key는 React가 어떤 항목을 변경, 추가 또는 삭제할지 식별하는 것을 돕습니다. key는 엘리먼트에 안정적인 고유성을 부여하기 위해 배열 내부의 엘리먼트에 지정해야 합니다.
자료출처 : " Key와 리스트 " from 리엑트 공식문서
다시 말해서, searchResult 배열을 이용해서 li 엘리먼트를 여러 개를 만들었는데 이 때 li 엘리먼트에 key 속성을 추가해야 한다는 것이다.
이렇게 해야 되는 이유에 대해서 설명하자면, 다음과 같다.
간단하게 말해서, 가상돔이 트리 자료구조(DOM)를 비교하는 것은 꽤 무거운 계산이다. 그래서, 리엑트는 이 계산 복잡도를 줄이기 위해서, 몇가지 제약 사항을 두었다.
=> 두 가지 가정하에, 재조정(Reconciliation) 알고리즘을 사용한다.
(1) 앨리먼트 타입이 다를 경우와 (2) Key 값이 다를 경우, 각 각 화면을 조정하도록 하는데 O(n)으로 계산 복잡도가 확연하게 줄어든다고 한다.
자료출처 : 김정환 블로그
리스트 앨리먼트는 li를 여러 개 사용하기 때문에 앨리먼트 타입으로 차이를 판단할 수는 없고, 이 경우 유일한 값을 key 속성에 사용함으로써 리액트가 이전 가상돔과 차이를 계산하도록 알려야 한다.
현재 코드의 경우 productData 에 객체마다 고유한 ID가 들어있다. 그것을 활용하자!!
 <div className="content">
            {this.state.searchResult.length > 0 ? (
              <ul className="result">
                {this.state.searchResult.map((item) => {
                  return (
                    <li key={item.id}>
                      <img src={item.imageUrl} alt={item.name} />
                      <p>{item.name}</p>
                    </li>
                  );
                })}
              </ul>
            ) : (
              <div className="empty-box">검색 결과가 없습니다</div>
            )}
  </div>
- Key 사용할 때, 주의사항
<ul className="result">
                {this.state.searchResult.map((item, index) => {
                  return (
                    <li key={index}>
                      <img src={item.imageUrl} alt={item.name} />
                      <p>{item.name}</p>
                    </li>
                  );
                })}
              </ul>
map()으로 돌리게 되면, 콜백 함수의 2번째 인자로 해당 배열의 index가 들어오게 된다.
그래서, key={index}를 넣어주는 경우도 있다. 그러나, 이렇게 하는 것은 고유한 값이 없을 때, 최후의 수단으로 사용하는 것이 좋다.
왜냐면, index를 넣게 되면, 성능 저하나 화면이 갱신되지 않는 문제를 내포할 수 있다고 한다.
3. 검색결과 초기화면 제어하기
현재는 UI는 다음과 같다. 그런데, 아직 검색을 하지도 않았는데, "검색 결과가 없습니다"라는 문구가 뜬다. 이 부분이 수정이 필요해보인다.
 this.state = {
      searchKeyword: "",
      searchResult: [],
      submitted: false,
    };
submitted 라는 boolean 값을 추가했다.
 search(searchKeyword) {
    const searchResult = store.search(searchKeyword);
    this.setState({
      searchResult,
      submitted: true,
    });
  }
 <div className="content">
            {this.state.submitted &&
              (this.state.searchResult.length > 0 ? (
                <ul className="result">
                  {this.state.searchResult.map((item) => {
                    return (
                      <li key={item.id}>
                        <img src={item.imageUrl} alt={item.name} />
                        <p>{item.name}</p>
                      </li>
                    );
                  })}
                </ul>
              ) : (
                <div className="empty-box">검색 결과가 없습니다</div>
              ))}
          </div>
this.state.submitted && 이 true일 경우에만 && 이하의 코드가 실행되도록 수정해주었다.
render() 리펙토링
 render() {
    return (
      <>
        <header>
          <h2 className="container">검색</h2>
        </header>
        <div className="container">
          <form
            onSubmit={(event) => this.handleSubmit(event)}
            onReset={() => this.handleReset()}
          >
            <input
              type="text"
              placeholder="검색어를 입력하세요"
              autoFocus
              value={this.state.searchKeyword}
              onChange={(event) => this.handleChangeInput(event)}
            />
            {this.state.searchKeyword.length > 0 && (
              <button type="reset" className="btn-reset"></button>
            )}
          </form>
          <div className="content">
            {this.state.submitted &&
              (this.state.searchResult.length > 0 ? (
                <ul className="result">
                  {this.state.searchResult.map((item) => {
                    return (
                      <li key={item.id}>
                        <img src={item.imageUrl} alt={item.name} />
                        <p>{item.name}</p>
                      </li>
                    );
                  })}
                </ul>
              ) : (
                <div className="empty-box">검색 결과가 없습니다</div>
              ))}
          </div>
        </div>
      </>
    );
  }
현재, render()를 확인해보면, JSX문법을 사용함에도 불구하고, 상당히 길어져서 가독성이 떨어진다. 아마 앞으로 더 길어질 텐데, 그 전에 리펙토링을 좀 해보자!!
이전에 사용했던 엘리먼트 변수를 사용해보자!!
 render() {
    const searchForm = (
      <form
        onSubmit={(event) => this.handleSubmit(event)}
        onReset={() => this.handleReset()}
      >
        <input
          type="text"
          placeholder="검색어를 입력하세요"
          autoFocus
          value={this.state.searchKeyword}
          onChange={(event) => this.handleChangeInput(event)}
        />
        {this.state.searchKeyword.length > 0 && (
          <button type="reset" className="btn-reset"></button>
        )}
      </form>
    );

    const searchResult =
      this.state.searchResult.length > 0 ? (
        <ul className="result">
          {this.state.searchResult.map((item) => {
            return (
              <li key={item.id}>
                <img src={item.imageUrl} alt={item.name} />
                <p>{item.name}</p>
              </li>
            );
          })}
        </ul>
      ) : (
        <div className="empty-box">검색 결과가 없습니다</div>
      );

      // 실제 컴포넌트의 UI
    return (
      <>
        <header>
          <h2 className="container">검색</h2>
        </header>
        <div className="container">
          {searchForm}
          <div className="content">{this.state.submitted && searchResult}</div>
        </div>
      </>
    );
  }
searchForm 과 searchResult 변수로 태그를 분리시켜주므로써, 실제 컴포넌트의 UI를 담당하는 return() 부분의 가독성이 훨씬 더 높아졌다.
X버튼을 클릭하면, 검색폼이 초기화 되고, 검색 결과가 사라진다.
1. 검색결과 초기화
 handleReset() {
    this.setState({
      searchKeyword: "",
      // TODO
      submitted: false,
    });
}- handleChangeInput(event) 1차 완성본
  handleChangeInput(event) {
    const searchKeyword = event.target.value;

    // TODO
    // 검색어를 입력한 값이 없을 경우에도 처리를 해줘야 한다.
    // "샐러드" => "샐러" 로 글자를 삭제한 경우에도 검색 결과가 사라지도록 해준다.

    this.setState({ searchKeyword, submitted: false });
  }

=> 이렇게 해도 동작은 하는데, 좀 더 디테일하게 구현해보자
- handleChangeInput(event) 2차 완성본
 handleChangeInput(event) {
    const searchKeyword = event.target.value;

    // TODO
    // 검색어를 입력한 값이 없을 경우에도 처리를 해줘야 한다.
    // "샐러드" => "샐러" 로 글자를 삭제한 경우에도 검색 결과가 사라지도록 해준다.


    if (searchKeyword.length <= 0 && this.state.submitted) {
      this.handleReset();
    }

    this.setState({ searchKeyword });
  }

근데, 비교해보니 그냥 스타일의 차이일 뿐이지 뭐가 더 좋다 나쁘다의 문제는 아닌 것같다.
일단, 2차 수정본으로 계속 진행하겠다.
모든 UI가
state에 의존하기 때문에 잘 설계된state만 관리하면 UI를 예측하기 쉽게 제어할 수 있다.
해당 github 링크
