
⭐ 액티브 링크 스타일링
📎 사이드바에서 사용 “NavLink”
src/routes/root.jsx
import {
  Outlet,
  NavLink,
  useLoaderData,
  Form,
  redirect,
} from "react-router-dom";

export default function Root() {
  return (
    <>
      <div id="sidebar">
        {/* other code */}

        <nav>
          {contacts.length ? (
            <ul>
              {contacts.map((contact) => (
                <li key={contact.id}>
                  <NavLink
                    to={`contacts/${contact.id}`}
                    className={({ isActive, isPending }) =>
                      isActive
                        ? "active"
                        : isPending
                        ? "pending"
                        : ""
                    }
                  >
                    {/* other code */}
                  </NavLink>
                </li>
              ))}
            </ul>
          ) : (
            <p>{/* other code */}</p>
          )}
        </nav>
      </div>
    </>
  );
}
Nav 링크를 사용하면 어던 링크를 사용중인지 확인할 수 있습니다.
isActive: url이 해당링크를 가리키는지 확인isPending: 내용이 로딩중인지 확인
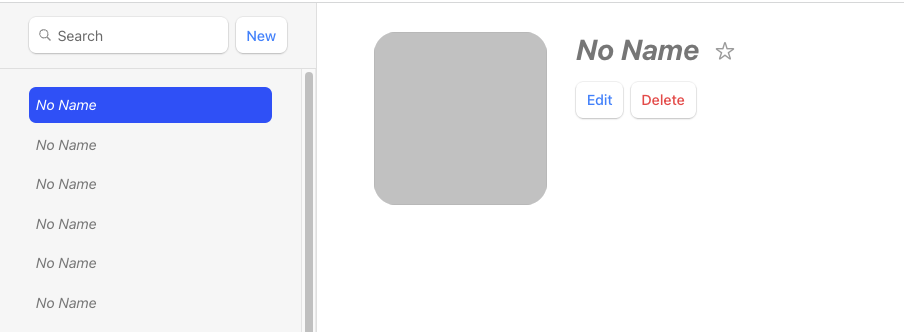
이제 사용자가 어떤 링크를 보고있는지 확실히 알 수 있게 됩니다. 안의 함수를 사용해서 isActive와 isPending을 사용할 수 있습니다.
⭐ 글로벌 보류 UI
사용자가 앱을 탐색할 때 React Router는 다음 페이지에 대한 데이터가 로드 되는동안 이전페이지를 그대로 둡니다. 이 때 앱이 약간 응답하지 않는다는 느낌을 받을 수 있습니다.
이경우 useNavigation을 사용할 수 있습니다.
📎 useNavigation 사용
src/routes/root.jsx
import {
  // existing code
  useNavigation,
} from "react-router-dom";

// existing code

export default function Root() {
  const { contacts } = useLoaderData();
  const navigation = useNavigation();

  return (
    <>
      <div id="sidebar">{/* existing code */}</div>
      <div
        id="detail"
        className={
          navigation.state === "loading" ? "loading" : ""  //상태를 가져와 화면을 변경할 수 있음
        }
      >
        <Outlet />
      </div>
    </>
  );
}useNavigation으로 로딩상태를 받아와 화면에 표시할 수 있습니다.
여기서 navigation의 상태는 다음과 같습니다.
- idle
- submitting
- loading
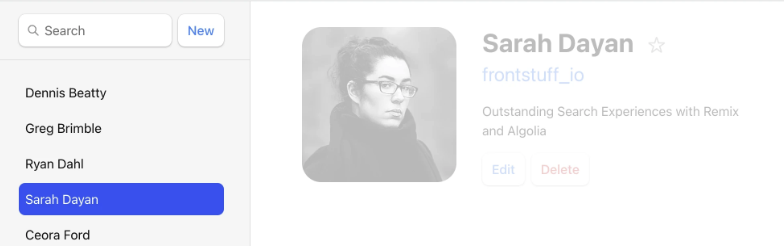
이러한 상태값으로 화면 상단에 스피너나 로딩바를 표시하는 등, 사용자가 앱을 끊김없이 사용한다는 느낌을 줄 수 있습니다.
%89%E1%85%A3%E1%86%BA2023-08-23%E1%84%8B%E1%85%A9%E1%84%92%E1%85%AE_5.10.26.png)
이처럼 이동할 때 살짝 어두워 지는 효과를 줘서 앱이 끊기는 느낌을 최소화 할 수 있습니다.
⭐ 기록 삭제
이제 삭제 버튼을 만들어 봅시다.
src/routes/contact.jsx
<Form
  method="post"
  action="destroy"
  onSubmit={(event) => {
    if (
      !confirm(
        "Please confirm you want to delete this record."
      )
    ) {
      event.preventDefault();
    }
  }}
>
  <button type="submit">Delete</button>
</Form>
다음 코드를 살펴보면 action에 destroy라고 되어있는것을 볼 수 있습니다. 이것은 에서 to를 쓰는것과 비슷합니다.
무슨뜻이냐 하면 Form 에 있는 Delete버튼을 눌렀을 때 현재 url에서 /destory로 이동한다는 것입니다. 즉
http://localhost:3000/contacts/ysi7vro ⇒ `http://localhost:3000/contacts/ysi7vro/destory` 로 이동하게 됩니다.
📎 파괴액션 추가
이제 해당 버튼이 동작하기 위해 destroy.jsx를 만들어 봅시다.
src/routes/destroy.jsx
import { redirect } from "react-router-dom";
import { deleteContact } from "../contacts";

export async function action({ params }) {
  await deleteContact(params.contactId); // 삭제모션
  return redirect("/"); // 메인경로로 이동
}
📎 경로 구성에 파괴 경로 추가
src/index.jsx
/* existing code */
import { action as destroyAction } from "./routes/destroy";

const router = createBrowserRouter([
  {
    path: "/",
    /* existing root route props */
    children: [
      /* existing routes */
      {
        path: "contacts/:contactId/destroy", // 경로추가
        action: destroyAction, //함수만 사용할거기 때문에 elements가 필요없다.
      },
    ],
  },
]);

/* existing code */
해당 경로는 컴포넌트가 아닌 action함수만을 위한 컴포넌트입니다.
아직 코드만 봐서는 어떻게 동작하는지 어렵게 느껴집니다. 이제 동작원리를 살펴봅시다.
<Form>새POST요청을 서버에 보내는 기본브라우저 동작을 방지합니다. 대신 클라이언트 측 라우팅을 사용하여POST 요청을 생성하여 브라우저를 에뮬레이트합니다.<Form action=”destroy”/>의경로와 일치하는‘contact/:contactId/destroy’에 요청을 보냅니다.contact/:contactId/destroy경로에 있는destroy.jsx에서 요청을 실행하게 되며 이는action이 동작함을 의미합니다.- 작업이 리디렉션 된 후 React Router는 페이지가 마치
새로고침 된 것 처럼 동작해야하기 때문에 ( 기본 브라우저는 서버에 요청을 할 때 페이지가 새로고침된것 처럼 동작하기 때문에 React도 이를 따라 새로고침한것처럼 행동합니다. ) React-router는 페이지의 데이터에 대한모든 로더를 호출합니다. (이 덕분에 edit을 실행할 때 다른 컴포넌트인 sidebar도 자동으로 변경됩니다. ) 이것을재검증이라고 합니다. ⇒useLoaderData()가 새로운 값을 반환하고 구성요소를 업데이트 합니다.
⭐ 문맥상의 오류
destroy 액션에서 오류를 던지면 어떻게 될까요?
src/routes/destroy.jsx
export async function action({ params }) {
  throw new Error("oh dang!");
  await deleteContact(params.contactId);
  return redirect("/");
}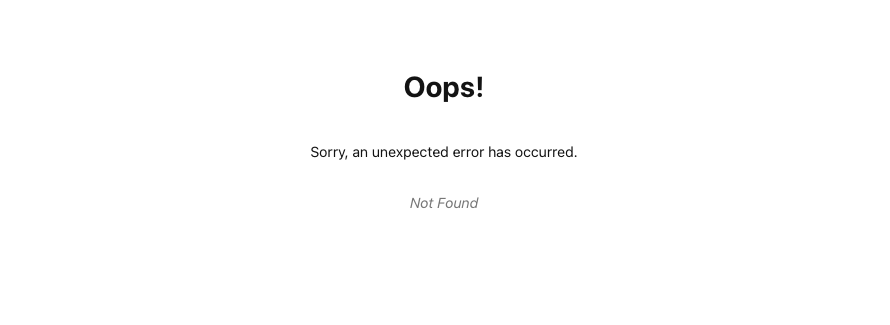
rl본적으로 “/”에서 생성했던 에러페이지를 사용하게 됩니다. 하지만 이 경우에는 사용자가 새로고침하는것 이외에 아무것도 할 수 없습니다.
먼저 삭제 경로에 대한 상황별 오류 메시지를 만들어 봅시다.
src/index.jsx
[
  /* other routes */
  {
    path: "contacts/:contactId/destroy",
    action: destroyAction,
    errorElement: <div>Oops! There was an error.</div>,
  },
];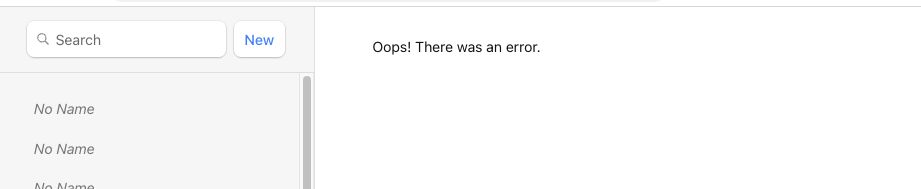
라우팅에 의해 전체 화면에서 에러가 나오는것이 아닌 children이 종속된 화면에서만 에러가 나오게 됩니다. 이는 새로고침을 통해 문제를 해결하는것 보다 더 많은옵션이 있으며 문제가 없는 페이지 부분과 계속 상호작용할 수 있게 해줍니다.
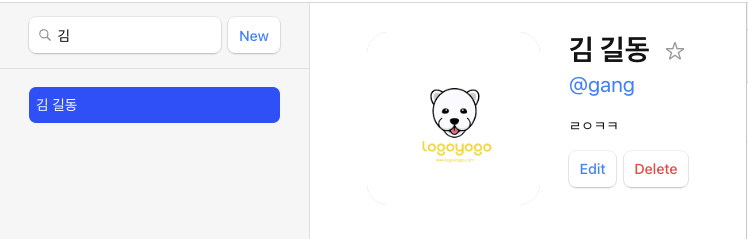
⭐ 색인경로
앱을 로드하면 목록 오른쪽 에 큰 빈페이지가 표시 됩니다.
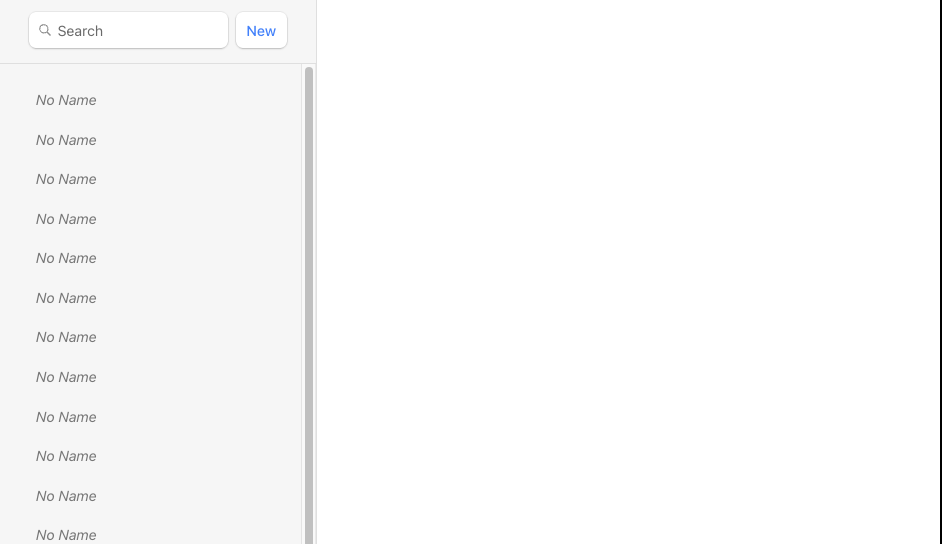
왜 이런 현상이 발생할 까요?
부모경로와 일치하는 자식이 없기 때문에 ‘<Outlet/>’에 렌더링 할만한게 없는것입니다.
📎 메인 페이지 보여줄화면 그리기
우선 렌더링 할만한 메인 페이지를 하나 만들어 봅시다.
src/routes/main.jsx
export default function Index() {
  return (
    <p id="zero-state">
      This is a demo for React Router.
      <br />
      Check out{" "}
      <a href="https://reactrouter.com">
        the docs at reactrouter.com
      </a>
      .
    </p>
  );
}
이 화면을 “/”와 연결해 봅시다.
📎 인덱스 경로 구성
src/index.jsx
// existing code
import Index from "./routes/index";

const router = createBrowserRouter([
  {
    path: "/",
    element: <Root />,
    errorElement: <ErrorPage />,
    loader: rootLoader,
    action: rootAction,
    children: [
      { index: true, element: <Index /> },  //부모화면이랑 같은경로사용
      /* existing routes */
    ],
  },
]);
이제 부모 컴포넌트경로일 때 { index:true } 의 컴포넌트가 <Outlet/> 에 렌더링 됩니다. { path:”” }를 해도 되지만 공식문서에서는 { index:true} 를 좀 더 권장하고 있습니다.
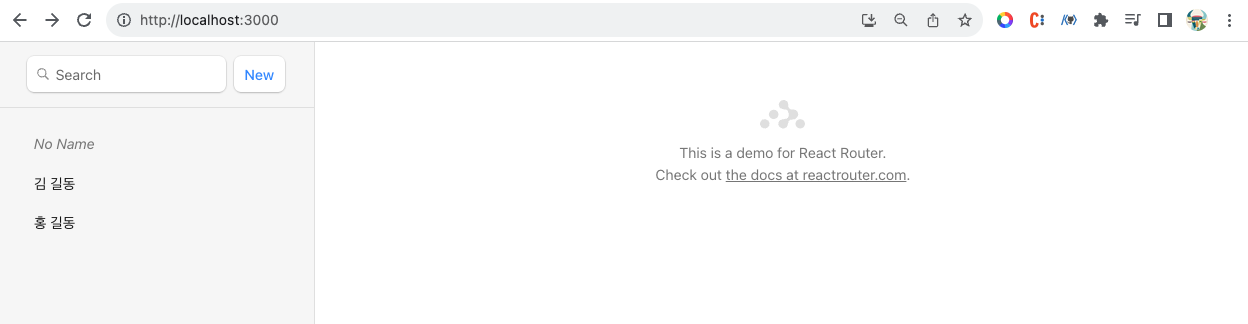
이제 부모 컴포넌트를 랜더링할 때 디폴트로 렌더링할 자식 컴포넌트가 생겼습니다.
⭐ 취소버튼
편집 페이지에는 아직 취소버튼이 기능이 동작하지 않습니다. 우리는 이 버튼이 뒤로가기와 동일한 동작을 하도록 만들려고 합니다.
이때는 useNavigate 와 React-router의 클릭 핸들러가 필요합니다.
📎 취소버튼 클릭 핸들러 추가하기
src/routes/edit.jsx
import {
  Form,
  useLoaderData,
  redirect,
  useNavigate,
} from "react-router-dom";

export default function EditContact() {
  const { contact } = useLoaderData();
  const navigate = useNavigate(); //리엑트-라우터 훅 추가하기

  return (
    <Form method="post" id="contact-form">
      {/* existing code */}

      <p>
        <button type="submit">Save</button>
{/* 뒤로가는 동작 실행 */}
        <button
          type="button"
          onClick={() => {
            navigate(-1);
          }}
        >
          Cancel
        </button>
      </p>
    </Form>
  );
}
이제 Cancel 버튼을 누르면 뒤로 가는 동작이 활성화 됩니다. 근데 여기서 submit 버튼처럼 <Form/> 안에 있기 때문에 버튼이 양식을 제출하는것 처럼보이지만 <button type=”button/> 은 해당기능을 미리 방지하고 있습니다. 때문에 e.preventDefault() 을 사용하지 않아도 됩니다.
⭐ URL 검색 매개변수 및 GET 제출
일반적인 HTML 문법인
은 브라우저에서 어떻게 동작할까요?http://127.0.0.1:5173/?q=ryan검색을 하게 되면 다음과 같은 URL에 쿼리가 포함된 형태가 됩니다.
src/routes/root.jsx
<form id="search-form" role="search">
  <input
    id="q"
    aria-label="Search contacts"
    placeholder="Search"
    type="search"
    name="q"
  />
  <div id="search-spinner" aria-hidden hidden={true} />
  <div className="sr-only" aria-live="polite"></div>
</form>
즉 <form method=”post”/> 와는 다르게 URL에 GET 요청을 넣습니다.
기본 html에서는 다음과 같이 동작하는 react-router에서는 어떻게 동작할 까요?
⭐ 클라이언트 측 라우팅으로 GET제출
📎 form 을 Form으로 변경
src/routes/root.jsx
<Form id="search-form" role="search">
  <input
    id="q"
    aria-label="Search contacts"
    placeholder="Search"
    type="search"
    name="q"
  />
  <div id="search-spinner" aria-hidden hidden={true} />
  <div className="sr-only" aria-live="polite"></div>
</Form>
📎 URLSearchParams가 있는 경우 목록 필터링
src/routes/root.jsx
export async function loader({request}) {
  //post는 formData로 가져오는 반면 get 요청은 url에서 가져오게 된다.
  const url = new URL(request.url); //url이 문자열로 되어있는데 그걸 객체로 변환해서 사용
  const q = url.searchParams.get("q"); // get함수를 사용해서 값을 가져옴 , 없을 경우 null이 뜬다.
  const contacts = await getContacts(q);
  return { contacts };
}
이제 다음과 같이 필터링이 가능합니다. !
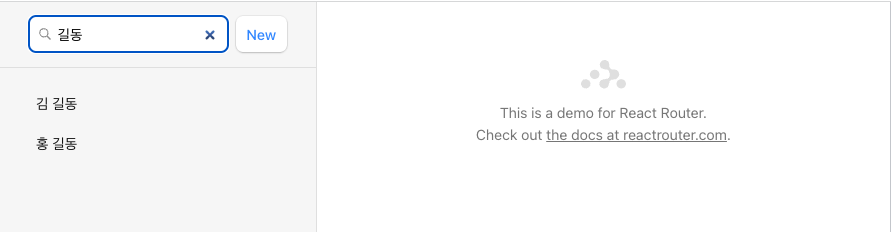
이것도 form을 제출하는 과정이지만 post와는 다르게 url만 변경하는것이기 때문에 요청을 처리하는 로직은 action이 아닌 loader에 존재합니다.
⭐ 양식 상태에 URL 동기화
아직 한가지 문제가 더 존재합니다. 필터링 후에 ‘홍 길동’을 누르게 되면 url에 변화가 생깁니다. 우리는 url에서의 q의 상태를 유지시킬 필요가 있습니다.
이게 무슨말인지 코드수정을 통해 확인해 보겠습니다.
📎 q검색 필드 기본값 설정
src/routes/root.jsx
// existing code
export async function loader({ request }) {
const url = new URL(request.url);
const q = url.searchParams.get("q");
const contacts = await getContacts(q);
return { contacts, q };
}
export default function Root() {
const { contacts, q } = useLoaderData();
const navigation = useNavigation();
return (
<>
<div id="sidebar">
<h1>React Router Contacts</h1>
<div>
<Form id="search-form" role="search">
<input
id="q"
aria-label="Search contacts"
placeholder="Search"
type="search"
name="q"
defaultValue={q}
/>
{/* existing code */}
</Form>
{/* existing code */}
</div>
{/* existing code */}
</div>
<nav>
{" "}
{/* 가져온 데이터 화면에 그리기! */}
{contacts.length ? (
<ul>
{contacts.map((contact) => (
<li key={contact.id}>
<NavLink
to={`contacts/${contact.id}/?q=${q}`} //url이 변경되어도 사이드바가 유지될 수 있다.
className={(
{ isActive, isPending } // 현재 링크가 활성화 되었는지 pending중인지 알 수 있다.
) => (isActive ? "active" : isPending ? "pending" : "")}
>
{contact.first || contact.last ? (
<>
{contact.first} {contact.last}
</>
) : (
<i>No Name</i>
)}{" "}
{contact.favorite && <span>★</span>}
</NavLink>
</li>
))}
</ul>
) : (
<p>
<i>No contacts</i>
</p>
)}
</nav>
</>
);
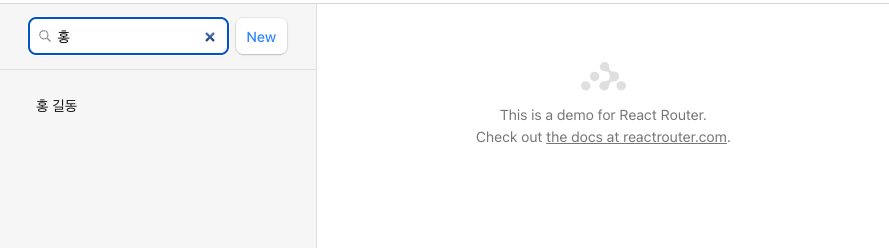
}이제 검색후 클릭을 통해 URL이 변경되어도 검색창에 값이 남아있게 됩니다.
또 NavLink에 query 값을 넣어주면 sidebar에서 클릭을 해도 검색된 목록이 그대로 유지 됩니다.
📎 입력값을 URL 검색 매개변수와 동기화
src/routes/root.jsx
import { useEffect } from "react";

// existing code

export default function Root() {
  const { contacts, q } = useLoaderData();
  const navigation = useNavigation();

  useEffect(() => {
    document.getElementById("q").value = q;
  }, [q]);

  // existing code
}
defaultValue 뿐만 아니라 value와도 값을 동기화 해줍니다.
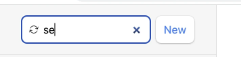
⭐ 양식제출 ‘onChange’
엔터로 양식을 명시적으로 제출하는것 보다 모든 키 입력에서 필터링 되도록 수행하는것이 좋습니다.
이럴 때는 useSubmit을 사용할 수 있습니다.
src/routes/root.jsx
// existing code
import {
  // existing code
  useSubmit,
} from "react-router-dom";

export default function Root() {
  const { contacts, q } = useLoaderData();
  const navigation = useNavigation();
  const submit = useSubmit();

  return (
    <>
      <div id="sidebar">
        <h1>React Router Contacts</h1>
        <div>
          <Form id="search-form" role="search">
            <input
              id="q"
              aria-label="Search contacts"
              placeholder="Search"
              type="search"
              name="q"
              defaultValue={q}
              onChange={(event) => {
                submit(event.currentTarget.form); // 해당 Form을 제출한다는 의미
              }}
            />
            {/* existing code */}
          </Form>
          {/* existing code */}
        </div>
        {/* existing code */}
      </div>
      {/* existing code */}
    </>
  );
}currentTarget은 이벤트가 연결된 DOM노드 즉 input이고, currentTarget.form은 입력의 상위 양식 노드입니다. submit은 해당 form을 자동으로 직렬화해서 제출하게 됩니다. onChange함수로 인해 input값이 변경될때마다 지정한 Form이 제출되기 때문에 더이상 enter를 눌러서 양식을 제출할 필요가 없습니다.!
⭐ 검색 스피너 추가
로딩표시가 없으면 검색이 다소 느린 느낌이 듭니다. 어쩔 때는 앱이 멈춘것 처럼 보이기도 합니다. 데이터 베이스를 더 빠르게 만드는것도 중요하지만 더 나은 UX를 위해 검색에 대한 즉각적인 UI 피드백을 추가해 봅시다.
여기서는 useNavigation을 사용합니다.
📎 검색 스피너 추가
src/routes/root.jsx
// existing code

export default function Root() {
  const { contacts, q } = useLoaderData();
  const navigation = useNavigation();
  const submit = useSubmit();

  const searching =
    navigation.location &&
    new URLSearchParams(navigation.location.search).has(
      "q"
    );

  useEffect(() => {
    document.getElementById("q").value = q;
  }, [q]);

  return (
    <>
      <div id="sidebar">
        <h1>React Router Contacts</h1>
        <div>
          <Form id="search-form" role="search">
            <input
              id="q"
              className={searching ? "loading" : ""}
              // existing code
            />
            <div
              id="search-spinner"
              aria-hidden
              hidden={!searching}
            />
            {/* existing code */}
          </Form>
          {/* existing code */}
        </div>
        {/* existing code */}
      </div>
      {/* existing code */}
    </>
  );
}
이제 검색을 진행할 때 로딩스피너가 추가되었습니다.
여기서 navigation.location 은 앱이 새 URL로 이동하고 이에 대한 데이터를 로드할 때 표시됩니다. 새 URl로 이동할 때 loader가 데이터를 전부 로딩하기 전까지는 여전히 이전페이지를 보여줍니다. 그사이의 시간동안 로딩스피너를 보여주므로써 사용자경험을 향상시킬 수 있습니다.