개발 환경
EC2 ubuntu 18.04
Docker CE, CE-CLI 20.10.6
Docker Compose 1.29.1
폴더 구조
docker-compose.yml
init-letsencrypt.sh
data/nginx/conf.d/app.conf
과정
1) SSL 인증서 발급을 위한 코드 작성
- data/nginx/conf.d/app.conf
server {
     listen 80;
     listen [::]:80;

     server_name {domain}; // 등록한 도메인 추가

     location /.well-known/acme-challenge/ {
             allow all;
             root /var/www/certbot;
     }
}- docker-compose.yml
version: '3.8'
  nginx:
    container_name: {contaniner_name}
    image: nginx:1.15-alpine
    restart: always
    ports:
    - 80:80
    - 443:443
    volumes:
    - ./data/nginx/conf.d:/etc/nginx/conf.d
    - ./data/certbot/conf:/etc/letsencrypt
    - ./data/certbot/www:/var/www/certbot

  certbot:
    container_name: {container_name}
    image: certbot/certbot:v0.36.0
    restart: always
    volumes:
      - ./data/certbot/conf:/etc/letsencrypt
- ./data/certbot/www:/var/www/certbot- init-letsencrypt.sh
#!/bin/bash

if ! [ -x "$(command -v docker-compose)" ]; then
  echo 'Error: docker-compose is not installed.' >&2
  exit 1
fi

domains=({domain}) // 각자 등록한 도메인
rsa_key_size=4096
data_path="./data/certbot"
email="{email}" # Adding a valid address is strongly recommended
staging=0 # Set to 1 if you're testing your setup to avoid hitting request limits

if [ -d "$data_path" ]; then
  read -p "Existing data found for $domains. Continue and replace existing certificate? (y/N) " decision
  if [ "$decision" != "Y" ] && [ "$decision" != "y" ]; then
    exit
  fi
fi


if [ ! -e "$data_path/conf/options-ssl-nginx.conf" ] || [ ! -e "$data_path/conf/ssl-dhparams.pem" ]; then
  echo "### Downloading recommended TLS parameters ..."
  mkdir -p "$data_path/conf"
  curl -s https://raw.githubusercontent.com/certbot/certbot/master/certbot-nginx/certbot_nginx/_internal/tls_configs/options-ssl-nginx.conf > "$data_path/conf/options-ssl-nginx.conf"
  curl -s https://raw.githubusercontent.com/certbot/certbot/master/certbot/certbot/ssl-dhparams.pem > "$data_path/conf/ssl-dhparams.pem"
  echo
fi

echo "### Creating dummy certificate for $domains ..."
path="/etc/letsencrypt/live/$domains"
mkdir -p "$data_path/conf/live/$domains"
docker-compose run --rm --entrypoint "\
  openssl req -x509 -nodes -newkey rsa:$rsa_key_size -days 1\
    -keyout '$path/privkey.pem' \
    -out '$path/fullchain.pem' \
    -subj '/CN=localhost'" certbot
echo


echo "### Starting nginx ..."
docker-compose up --force-recreate -d nginx
echo

echo "### Deleting dummy certificate for $domains ..."
docker-compose run --rm --entrypoint "\
  rm -Rf /etc/letsencrypt/live/$domains && \
  rm -Rf /etc/letsencrypt/archive/$domains && \
  rm -Rf /etc/letsencrypt/renewal/$domains.conf" certbot
echo


echo "### Requesting Let's Encrypt certificate for $domains ..."
#Join $domains to -d args
domain_args=""
for domain in "${domains[@]}"; do
  domain_args="$domain_args -d $domain"
done

# Select appropriate email arg
case "$email" in
  "") email_arg="--register-unsafely-without-email" ;;
  *) email_arg="--email $email" ;;
esac

# Enable staging mode if needed
if [ $staging != "0" ]; then staging_arg="--staging"; fi

docker-compose run --rm --entrypoint "\
  certbot certonly -a webroot -v --debug-challenges -w /var/www/certbot \
    $staging_arg \
    $email_arg \
    $domain_args \
    --rsa-key-size $rsa_key_size \
    --agree-tos \
    --force-renewal" certbot
echo

echo "### Reloading nginx ..."
docker-compose exec nginx nginx -s reload
2) 위에서 작성한 init-letsencrypt.sh 파일 실행
$ ./init-letsencrypt.sh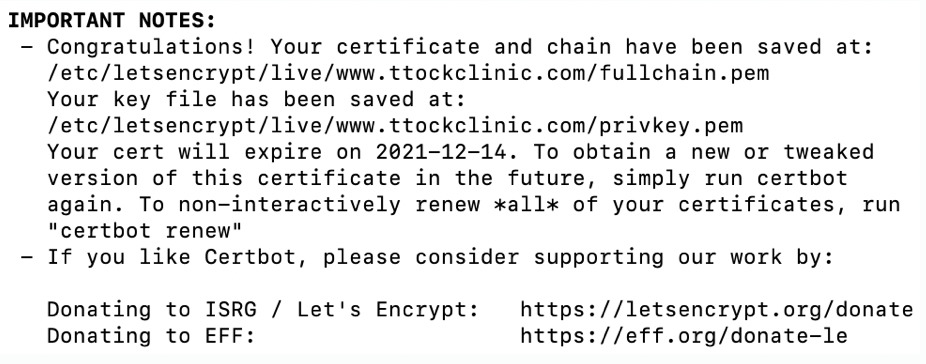
→ 위의 알림 문구가 떠야 등록한 도메인에 대한 SSL 인증서 발급 성공!
3) HTTPS server 설정 추가
server {
    listen 80;
    listen [::]:80;

    server_name {domain};

    location /.well-known/acme-challenge/ {
            allow all;
            root /var/www/certbot;
    }

    location / {
        return 301 https://$host$request_uri;
    }
}

server {
    listen 443 ssl;
    server_name {domain};
    server_tokens off;

    ssl_certificate /etc/letsencrypt/live/{my_domain}/fullchain.pem;
    ssl_certificate_key /etc/letsencrypt/live/{my_domain}/privkey.pem;
    include /etc/letsencrypt/options-ssl-nginx.conf;
    ssl_dhparam /etc/letsencrypt/ssl-dhparams.pem;

    location / {
        proxy_pass http://{application}:8080;
        proxy_set_header    Host                $http_host;
        proxy_set_header    X-Real-IP           $remote_addr;
        proxy_set_header    X-Forwarded-For     $proxy_add_x_forwarded_for;
    }
}
→ proxy_pass : 등록한 도메인으로 들어온 요청을 proxy_pass에 작성한 url로 전달해줌
4) 이후 개발 시
Certbot 컨테이너는 이제 SSL 인증서를 새로 발급하거나 재발급할 때만 필요하고 다른 때에는 필요하지 않음
$ docker-compose up --build -d nginx참고
nginx-and-lets-encrypt-with-docker-in-less-than-5-minutes → 전체적인 구조 및 흐름 참고
https://github.com/wmnnd/nginx-certbot/issues/52#issuecomment-640393401 → 위의 링크를 참고했을 때 오류발생 시 수정해볼 사항들 (nginx & certbot docker image version, init-letsencrypt.sh 스크립트 명령어 등등)
https://velog.io/@hytenic/SSL-Lets-Encrypt-Certbot-docker를-이용하여-SSL-인증서-발급받기
configuring https_servers
간단 느낀 점
과정을 정리해보면 정말 간단한 것이었지만 하루동안 구글링을 하며 헤맸었다. 특히 SSL 인증을 받지 않았는데 nginx의 app.conf에 443 server 내용을 작성해놔서 자꾸 에러가 발생했었다. 코드를 참고해서 작성할 때도 해당 코드의 역할이 무엇인지 정확히 파악하는 것이 중요함을 깨달았다.