[Oil of Yats] Input 태그 다루기
Input type에 따른 분기처리
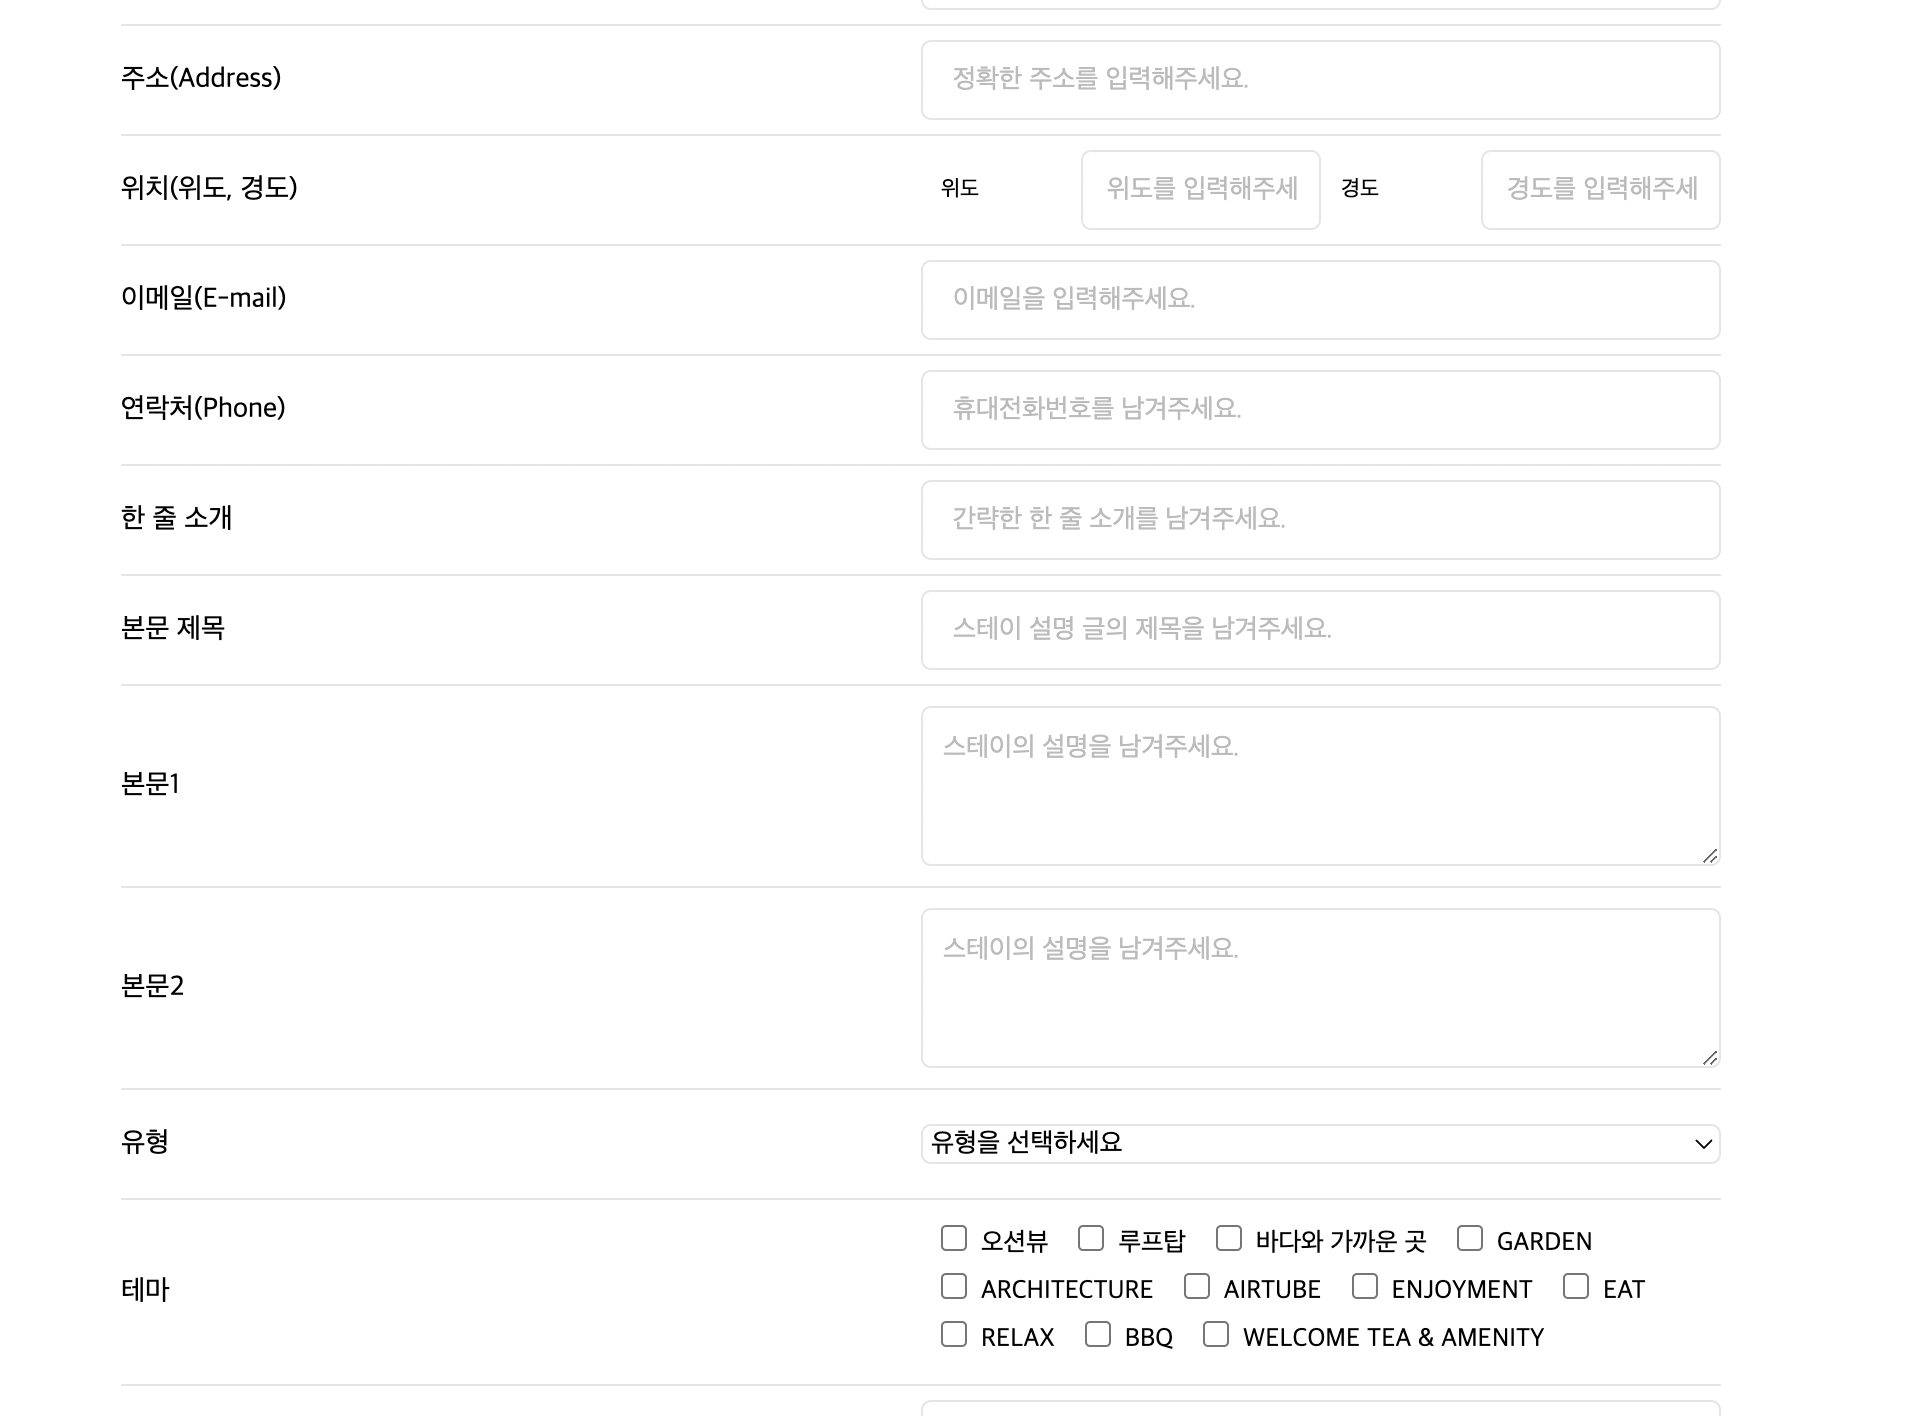
- 입점문의 페이지는 유저의 숙소 정보를 작성하는 페이지로 수많은 Input box가 존재한다.
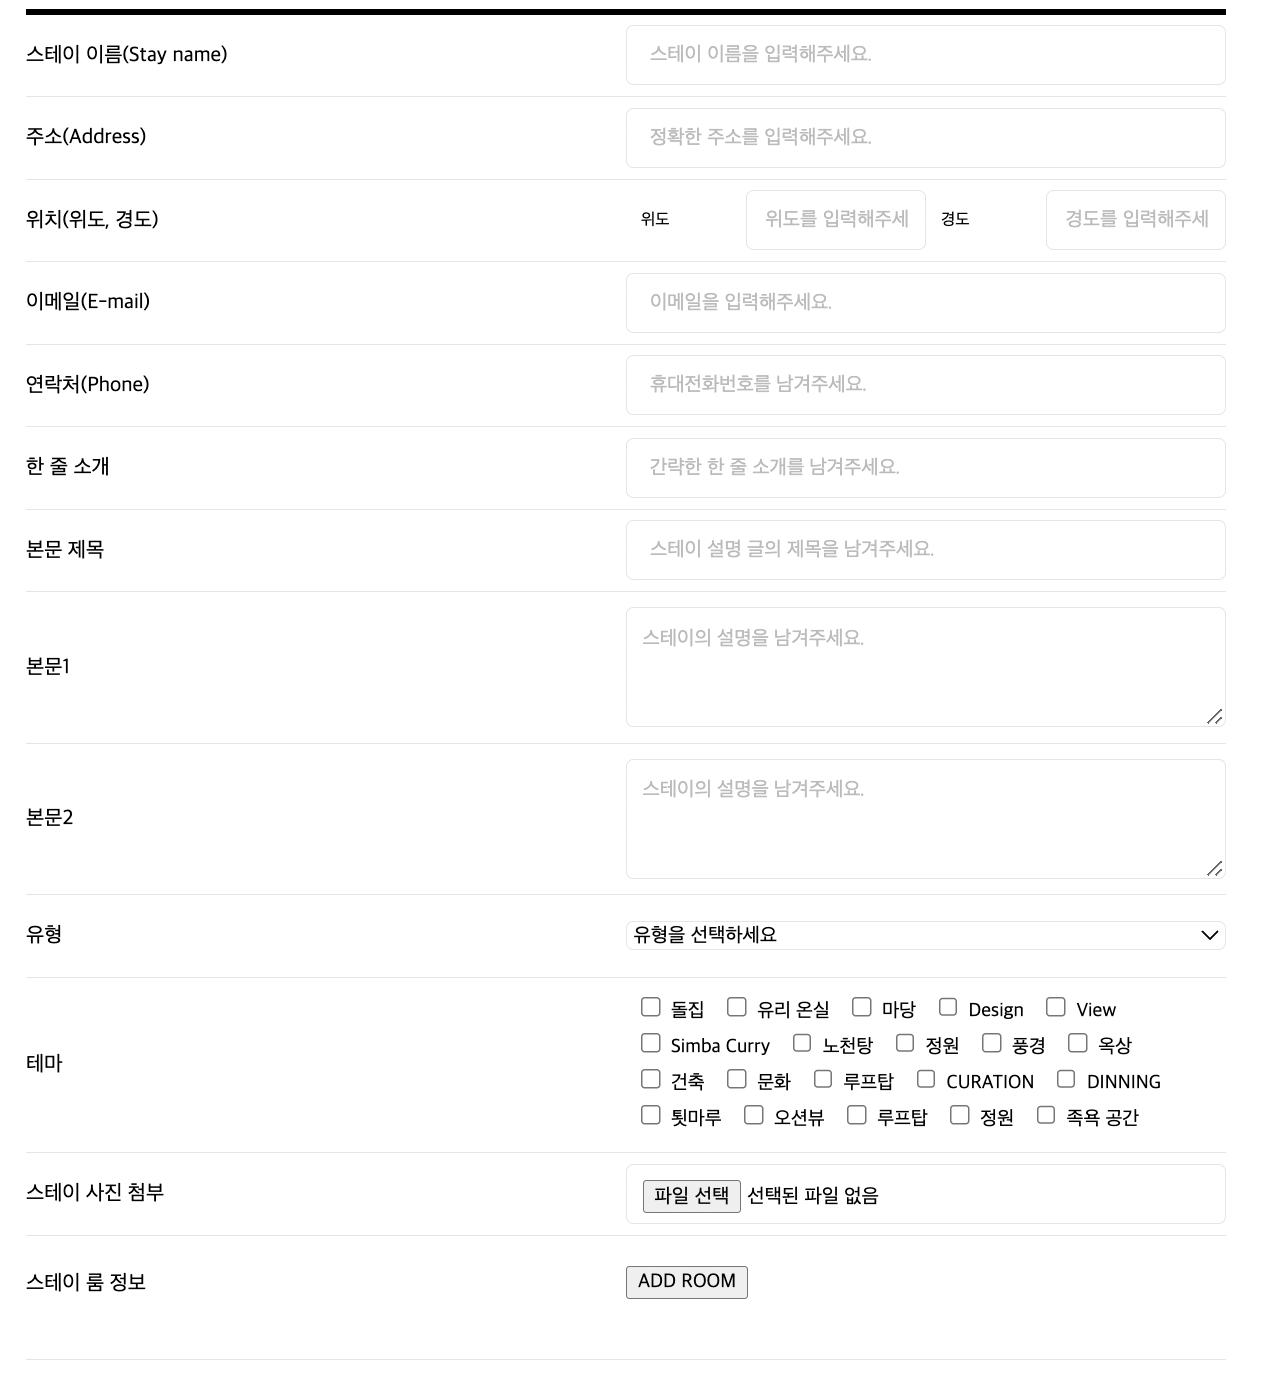
- 작성하는 input의 종류는 크게 textbox, select, file로 나눠진다.
- 이 Input들을 반복문을 통해 UI에 구현하였는데, 이를 적절하게 분기처리 하는 과정이 필요했다.
// InputList.js

const InputList = ({ input, handleInput, handleCheckbox, handleInputFile }) => {
  const isInput = input.type;

	return (
		 <InputContainer type={isInput}>
	      <InputTitle>{input.title}</InputTitle>
	      {isInput ? (
	        isInput === 'checkbox' ? (
	          <CheckboxList
	            input={input}
	            handleCheckbox={handleCheckbox}
	            // isChecked={isChecked}
	          />
	        ) : (
	          <InputTypes
	            input={input}
	            handleInput={handleInput}
	            handleInputFile={handleInputFile}
	          />
	        )
	      ) : (
	        <Select input={input} handleInput={handleInput} />
	      )}
	    </InputContainer>
		);
};props로 받은input은 각 input에 대한 정보가 들어있는 객체- 예시
{
    id: 0,
    title: '스테이 이름(Stay name)',
    name: 'stay_name',
    placeholder: '스테이 이름을 입력해주세요.',
    type: 'text',
  },
- 예시
input onChange속성에 부여한 함수 handleInput의 분기처리
handleInput 함수는 위에서 언급했듯이 폼에 값이 입력될때 그 값을 Info라는 state에 저장하는 함수다. 문제는 InputList가 스테이를 입력하는 란에도 있고, 룸 추가 버튼을 클릭해 생성되는 모달창에도 InputList가 있다. 이 2가지의 InputList에 같은 handleInput이 작동하고 있다.
const handleInput = e => {
    const { name, value } = e.target;
    setRoomInfo({ ...roomInfo, [name]: value });
  };
이때 setRoomInfo이라고 되어있기 때문에 스테이의 값을 입력하고 그 값을 저장하기 위해선 stayInfo state가 필요하다. 또한 target이 속한 컴포넌트가 stay 관련된 컴포넌트인지 room 관련 컴포넌트인지 알아야 적절한 info state에 저장할 수 있다고 생각했다.
먼저, roomInfo state와 같이 stayInfo state도 선언해줬다.
const [stayInfo, setStayInfo] = useState({
    stay_name: '',
    address: '',
    latitude: '',
    longitude: '',
    email: '',
    phone: '',
    keyword: '',
    summary: '',
    content_top: '',
    content_bottom: '',
    types: '',
    themes: [],
    rooms: [],
    stay_images: [],
  });
그리고 Object.keys(stayInfo).includes(name); 를 이용해 입력값이 stayInfo의 키값인지 확인한다. 여기서, name은
const { name, value } = e.target 을 의미한다.
위의 과정으로 분기처리를 한 후 그에 맞게 값을 할당해줬다.
const handleInput = e => {
    const { name, value } = e.target;
    const isInfoOfStay = Object.keys(stayInfo).includes(name);
    isInfoOfStay
      ? setStayInfo({ ...stayInfo, [name]: value })
      : setRoomInfo({ ...roomInfo, [name]: value });
  };
타겟의 name이 stayInfo에 있는 키값이면 stayInfo에 값을 저장하고, 그게 아니라면 roomInfo에 저장한다.
Input 상수데이터에서 name에 따라 다른 JSX를 출력하기.
Input에 대한 상수데이터는 아래와 같이 다양한 type으로 구성되어 있다.
const STAY_DATA = [
  {
    id: 0,
    title: '스테이 이름(Stay name)',
    name: 'stay_name',
    placeholder: '스테이 이름을 입력해주세요.',
    type: 'text',
  },
  {
    id: 11,
    title: '위치(위도, 경도)',
    name: 'location',
    name1: 'latitude',
    name2: 'longitude',
    placeholder1: '위도를 입력해주세요',
    placeholder2: '경도를 입력해주세요',
    type: 'text',
  },
  {
    id: 7,
    title: '본문2',
    name: 'content_bottom',
    placeholder: '스테이의 설명을 남겨주세요.',
    type: 'textarea',
  },
  {
    id: 8,
    title: '유형',
    name: 'types',
    option: [
      { type: '유형을 선택하세요', id: 0 },
      { type: '펜션', id: 60 },
//중략
    ],
  },
  {
    id: 9,
    title: '테마',
    name: 'themes',
    type: 'checkbox',
    option: [
      { type: '오션뷰', id: 70 },
      { type: '루프탑', id: 71 },
//중략
    ],
  },
  {
    id: 10,
    title: '스테이 사진 첨부',
    name: 'stay_images',
    type: 'file',
  },
];
이때 input은 다양한 형태로 출력되어야 한다. 예를 들면 위치에 대한 input은 위도, 경도 2개의 input이 필요하고, 본문을 입력하는 input은 인풋의 크기가 다른 인풋들보다 크다.
따라서, input name에 따라서 다른 JSX를 출력해야한다. 제일 먼저 생각한 방법은 조건문이었는데, 생각해보니 객체에도 JSX를 저장할 수 있어서 이번에는 객체를 활용해서 name에 맞는 input 값을 부여했다.
const inputList = {
    text: (
      <input
        onChange={handleInput}
        placeholder={input.placeholder}
        type={input.type}
        name={input.name}
      />
    ),
    textarea: (
      <textarea
        onChange={handleInput}
        placeholder={input.placeholder}
        type={input.type}
        name={input.name}
      />
    ),
    file: (
      <input
        type={input.type}
        accept="image/*"
        name={input.name}
        onChange={handleInputFile}
        multiple
      />
    ),
    time: (
      <>
        <span>체크인</span>
        <input
          onChange={handleInput}
          placeholder={input.placeholder}
          type={input.type}
          name={input.name1}
        />
        <span>체크아웃</span>
        <input
          onChange={handleInput}
          placeholder={input.placeholder}
          type={input.type}
          name={input.name2}
        />
      </>
    ),
    location: (
      <>
        <span>위도</span>
        <input
          onChange={handleInput}
          placeholder={input.placeholder1}
          type={input.type}
          name={input.name1}
        />
        <span>경도</span>
        <input
          onChange={handleInput}
          placeholder={input.placeholder2}
          type={input.type}
          name={input.name2}
        />
      </>
    ),
    capacity: (
      <>
        <span>기본인원</span>
        <input
          onChange={handleInput}
          placeholder={input.placeholder1}
          type={input.type}
          name={input.name1}
        />
        <span>최대인원</span>
        <input
          onChange={handleInput}
          placeholder={input.placeholder2}
          type={input.type}
          name={input.name2}
        />
      </>
    ),
    price: (
      <>
        <span>주중</span>
        <input
          onChange={handleInput}
          placeholder={input.placeholder1}
          type={input.type}
          name={input.name1}
        />
        <span>주말</span>
        <input
          onChange={handleInput}
          placeholder={input.placeholder2}
          type={input.type}
          name={input.name2}
        />
        <span>성수기</span>
        <input
          onChange={handleInput}
          placeholder={input.placeholder3}
          type={input.type}
          name={input.name3}
        />
      </>
    ),
  };

  return (
    <div className={className}>
      {!inputList[input.name] ? inputList[input.type] : inputList[input.name]}
    </div>
  );
};
!inputList[input.name] ? inputList[input.type] : inputList[input.name] 를 통해서 요구에 맞는 JSX를 출력했다.
input은 위 상수데이터(STAY_DATA)의 각 input 객체이며, name은 부여된 name값이다. inputList에 input.name이라는 키가 있으면, 그에 해당하는 JSX값을 출력하고 input.name이라는 키가 없으면 inputList에서 input.type에 해당하는 키를 찾아 JSX를 출력한다.