
Github.io 레포지토리 만들기
우선 공식 문서에서 설명하는 것처럼
1. [git nickname].github.io라는 이름의 repository를 만든다.
2. repository를 원하는 폴더에서 clone한다.
3. 아래의 명령어를 통해 파일을 생성한뒤 push해준다.
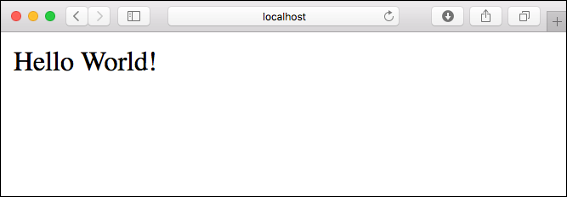
echo "hello world!" > index.html- url입력칸에 [git nickname].github.io 누르면 간단한 website 창을 확인할 수 있다.
(아래의 이미지는 결과와 유사한 이미지입니다.)
Jekyll로 GitHub 페이지 사이트 만들기
루비 설치
홈브류(macOS)용 설치
brew install rubybundle 설치
Gemfile 종속 항목 지정
source 'https://rubygems.org'
gem 'nokogiri'
gem 'rack', '~> 2.2.4'
gem 'rspec'
지정된 소스에 필요한 모든 gem 설치
$ bundle install
$ git add Gemfile Gemfile.lock
혹시 비밀번호를 물어보며 잘 동작하지 않는다면 아래 명령어 실행
sudo chown -R danielpclark.danielpclark ~/.rvmmac 비밀번호 입력하니 동작하였습니다.
jekyll 빠른 시작
- Install the jekyll and bundler gems.
gem install jekyll bundler- Create a new Jekyll site at ./myblog.
jekyll new myblog- Change into your new directory.
cd myblog- Build the site and make it available on a local server.
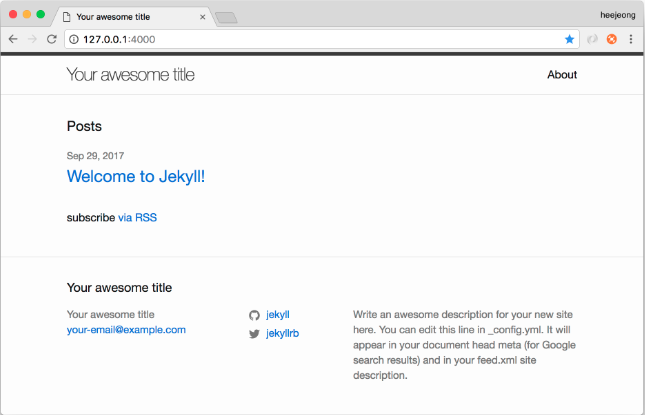
bundle exec jekyll serve- Browse to http://localhost:4000
아래처럼 jekyll의 기본 theme을 확인할 수 있다.
github에 관리가 가능하도록 변경
앞서 넣어둔 myblog 폴더 내에 생긴 jekyll theme의 모든 파일을 clone해둔 github.io에 모두 옮겨주면 된다.
jekyll 구성 설정 방법
jekyll 테마 적용
jekyll theme 모음 사이트
내가 적용한 theme : Neumorphism
-
혹시 기존 jekyll theme이 갖고있던 gemfile, gemfile.lock이 있다면 지워준다.
-
원하는 테마를 찾아서 Download 후 압출을 풀어준다.
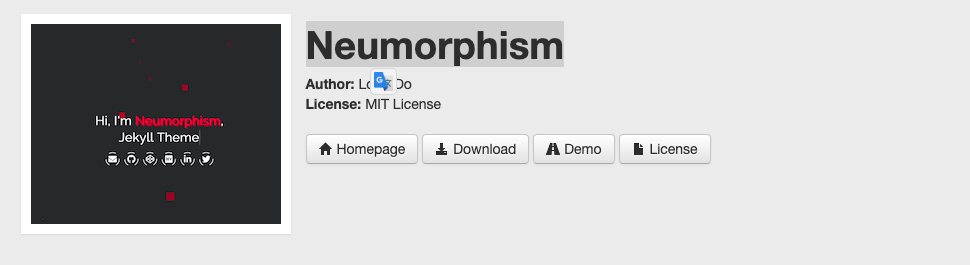
Demo를 누르면 Boilerplate website를 확인 할 수 있다.
-
압축을 푼 폴더 내의 모든 파일을 clone 받은 [git nickname].github.io 폴더에 모두 옮겨 준다.
-
bundle exec jekyll serve명령어를 실행한다.
이 때 에러가 발생 할 수 있는데 이 글을 읽어보면 도움이 될 수 있다.혹시 중간중간 권한 문제로 인하여 파일 설치 및 변경이 안될 수 있는데
chmod 666 -R [문제가 생긴 파일 경로 or 문제 파일 상위 폴더 경로]이 명령어를 사용하여 해결 할 수 있다.
-
localhost 말고 github.io 주소로 접근하기
4000포트로 블로그 내용이 확인이 되는데 github.io로 확인이 안 될 수 있습니다.
_config.yml 파일 내용중 baseurl부분을
baseurl: ""
이렇게 수정한 뒤 push를 진행하면 git action이 끝난 뒤 접속이 가능해 집니다.
theme를 적용한 뒤 폴더 구조
├── 404.html
├── Gemfile
├── Gemfile.lock
├── LICENSE
├── README.md
├── _config.yml
├── _config_dev.yml
├── _data
│   ├── certificate.yml
│   ├── projects.yml
│   ├── skills-frameworks.yml
│   ├── skills-languages.yml
│   ├── skills-tools.yml
│   └── timeline.yml
├── _includes
│   ├── footer.html
│   ├── landing-page.html
│   ├── section-aboutme.html
│   ├── section-certificates.html
│   ├── section-contact.html
│   ├── section-projects.html
│   ├── section-skills.html
│   └── section-timeline.html
├── _js
│   ├── app.js
│   └── vendors
│       ├── aos.js
│       ├── jquery-3.5.1.slim.js
│       └── particles.js
├── _layouts
│   └── default.html
├── _posts
│   └── 2023-01-26-welcome-to-jekyll.markdown
├── _sass
│   ├── main.scss
│   └── vendors
│       ├── aos.css
│       └── normalize.css
├── _site
│   ├── 404.html
│   ├── LICENSE
│   ├── README.md
│   ├── about
│   │   └── index.html
│   ├── assets
│   │   ├── css
│   │   │   ├── main.min.css
│   │   │   └── vendors.min.css
│   │   ├── favicon
│   │   │   ├── android-chrome-192x192.png
│   │   │   ├── android-chrome-512x512.png
│   │   │   ├── apple-touch-icon.png
│   │   │   ├── favicon-16x16.png
│   │   │   ├── favicon-32x32.png
│   │   │   ├── favicon.ico
│   │   │   └── site.webmanifest
│   │   ├── img
│   │   │   ├── brands.svg
│   │   │   └── solid.svg
│   │   ├── js
│   │   │   ├── app.min.js
│   │   │   └── vendors.min.js
│   │   └── particles.json
│   ├── docs
│   │   ├── config.md
│   │   ├── data.md
│   │   ├── github-repo-info.png
│   │   ├── screenshot-thumbnail-250.png
│   │   ├── screenshot-thumbnail-400.png
│   │   ├── screenshot.gif
│   │   └── screenshot.png
│   ├── index.html
│   ├── jekyll
│   │   └── update
│   │       └── 2023
│   │           └── 01
│   │               └── 26
│   │                   └── welcome-to-jekyll.html
│   └── yarn.lock
├── about.markdown
├── assets
│   ├── css
│   │   ├── main.min.css
│   │   └── vendors.min.css
│   ├── favicon
│   │   ├── android-chrome-192x192.png
│   │   ├── android-chrome-512x512.png
│   │   ├── apple-touch-icon.png
│   │   ├── favicon-16x16.png
│   │   ├── favicon-32x32.png
│   │   ├── favicon.ico
│   │   └── site.webmanifest
│   ├── img
│   │   ├── brands.svg
│   │   └── solid.svg
│   ├── js
│   │   ├── app.min.js
│   │   └── vendors.min.js
│   └── particles.json
├── docs
│   ├── config.md
│   ├── data.md
│   ├── github-repo-info.png
│   ├── screenshot-thumbnail-250.png
│   ├── screenshot-thumbnail-400.png
│   ├── screenshot.gif
│   └── screenshot.png
├── gulpfile.js
├── index.html
├── index.markdown
├── package.json
└── yarn.lock
theme의 순정과 다른 몇몇 파일은 나의 portfolio를 위해 생성 및 수정을 하였습니다.
결과

This is a great guide for setting up a GitHub Pages site with Jekyll! I recently followed similar steps to create my portfolio, and it was a smooth process overall. However, I ran into a few issues during the setup, especially when it came to installing Ruby and Jekyll.
I’m on Debian 12, and I had to figure out how to Install Ruby on Rails on Debian 12 first before I could even get started with Jekyll. Once I had Ruby installed, I followed the steps to install Jekyll and set up my GitHub Pages site. Here’s what I did:
The only hiccup I faced was with file permissions when running bundle exec jekyll serve. I resolved it by using:
bash
Copy
chmod 666 -R [problematic file or folder]
For anyone else trying to Install Ruby on Rails on Debian 12or set up a Jekyll site, I’d recommend using rbenv for Ruby installation and carefully following the Jekyll documentation. It’s a bit of a learning curve, but the result is worth it!
Thanks for the detailed guide—it was super helpful in setting up my portfolio!