Webpack이란
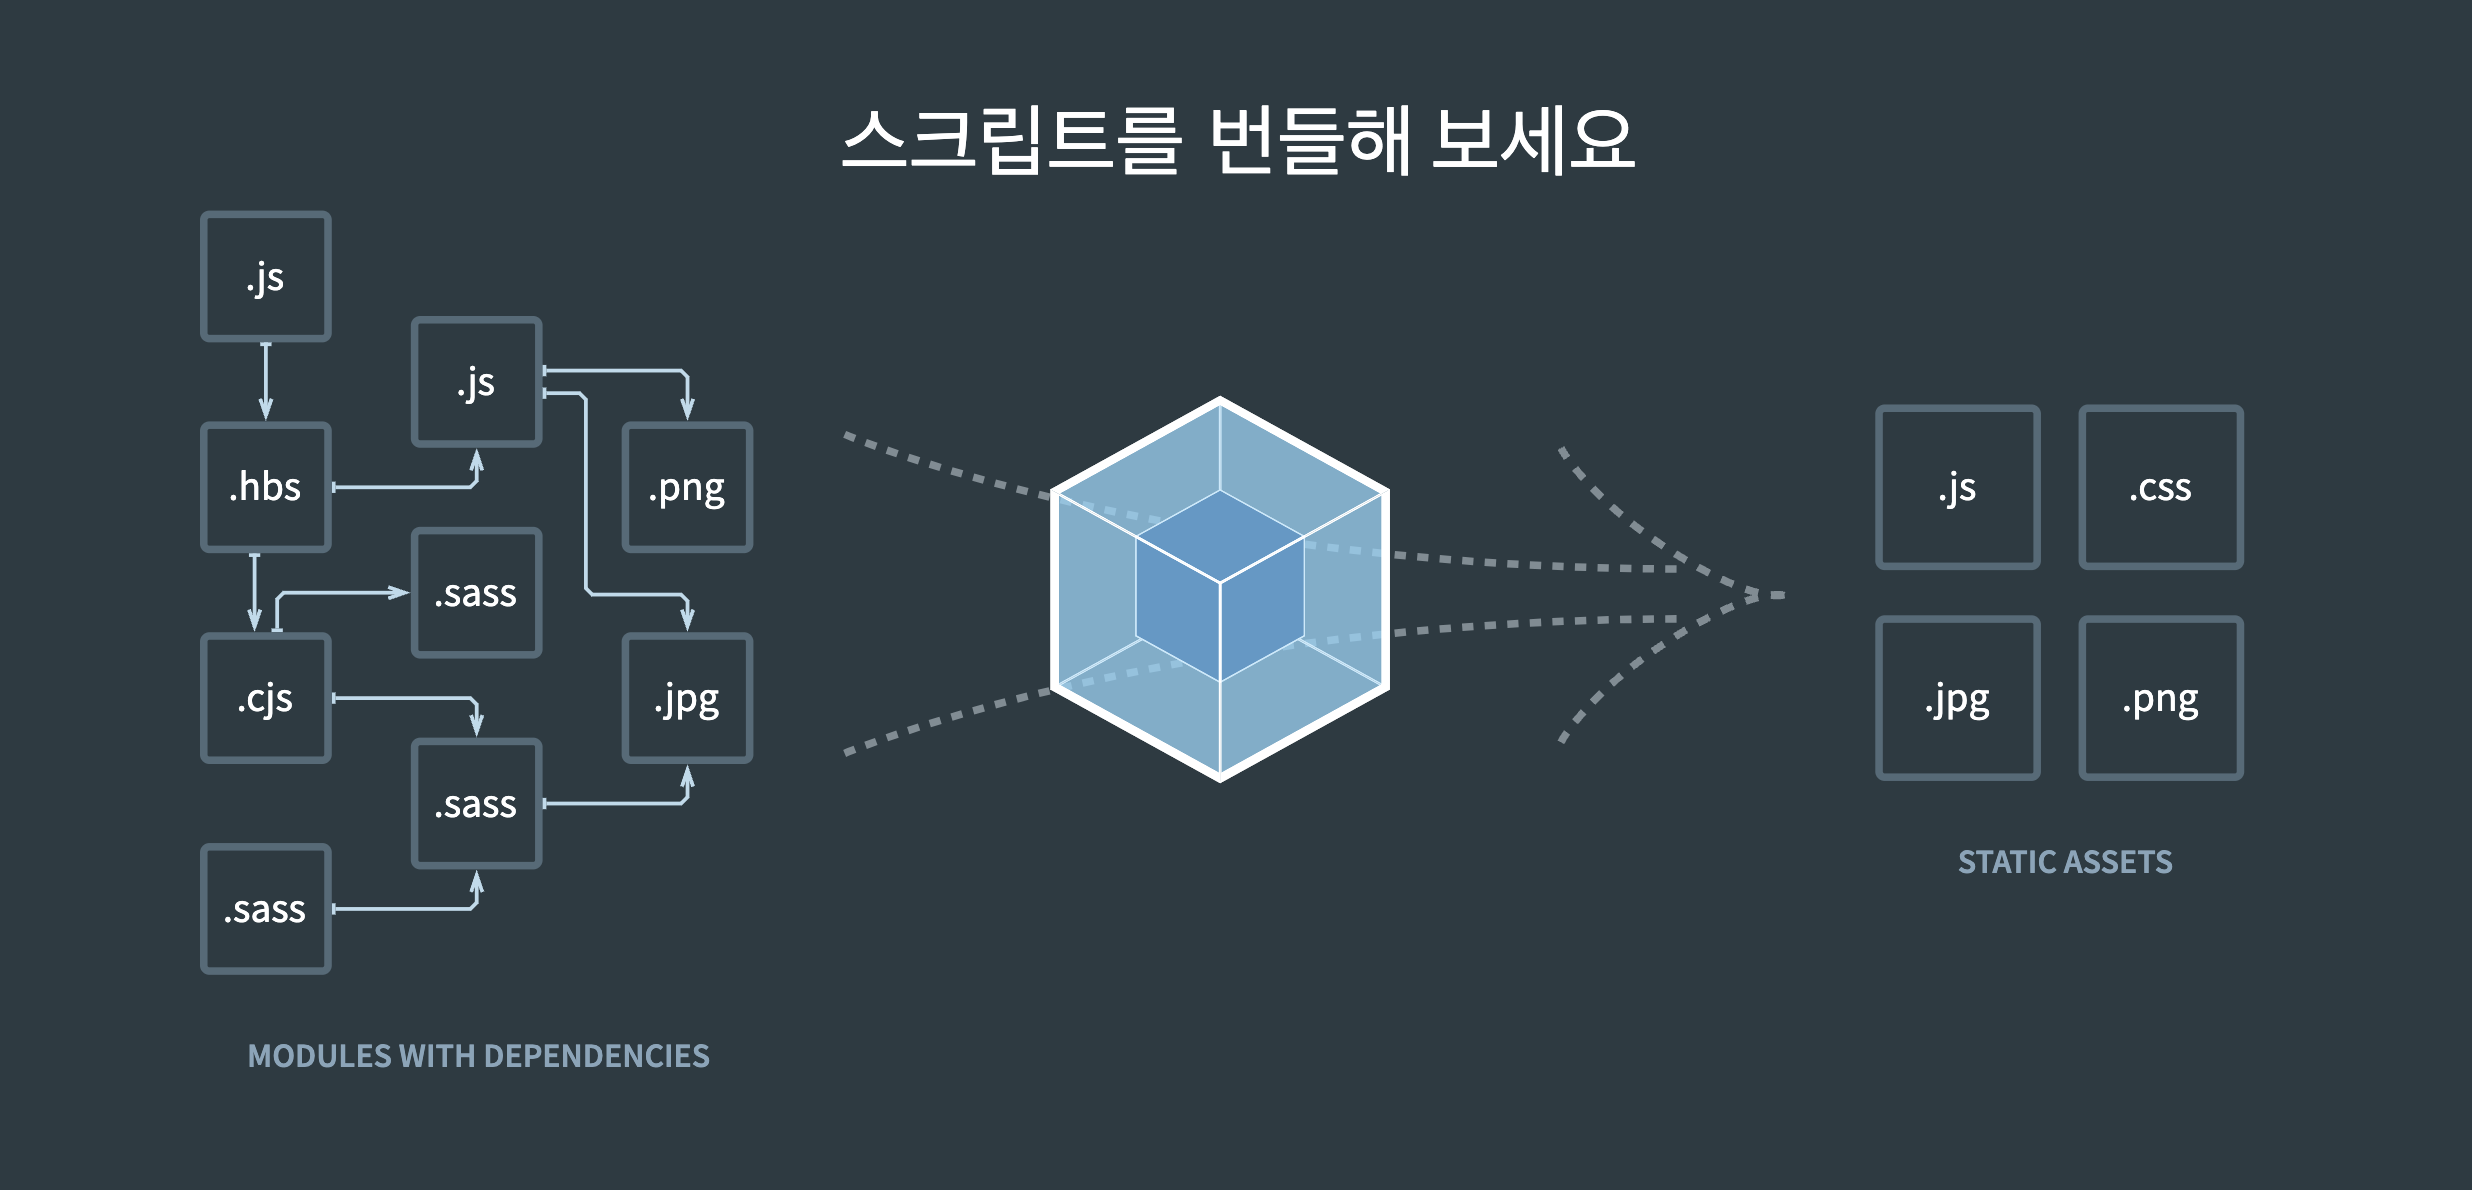
webpack 홈페이지에서 'webpack은 모던 JavaScript 애플리케이션을 위한 정적 모듈 번들러'라고 소개하고 있다.
bundle은 '묶음'이란 뜻으로 모듈로 이루어진 정적 파일들을 묶어준다.
정적 파일에는 HTML, CSS, JS, 이미지 파일 등이 있으며, 컴파일이 필요한 sass, typescript 등의 파일도 번들할 수 있다.
 출처: [webpack 홈페이지](https://webpack.kr/)
Webpack 설정
기본 Webpack 설정
-
webpack 관련 라이브러리 설치
> npm install webpack webpack-cli -
webpack.config.js 추가
typescript를 사용하는 환경에서 다음과 같이 기본 설정을 했다.
각 속성에 대해서는 아래에서 설명을 하겠다.const path = require("path"); const TerserWebpackPlugin = require("terser-webpack-plugin"); const HtmlWebpackPlugin = require("html-webpack-plugin"); const MiniCssExtractPlugin = require("mini-css-extract-plugin"); const CSSMinimizerPlugin = require("css-minimizer-webpack-plugin"); module.exports = (env) => { const isDevMode = env.mode === "development"; const devServer = { static: { directory: path.join(__dirname, "dist") }, watchFiles: "./index.html", }; return { mode: isDevMode ? "development" : "production", devtool: isDevMode ? "inline-source-map" : "source-map", resolve: { extensions: [".tsx", ".ts", ".jsx", ".js"], }, entry: "./src/js/index", module: { rules: [ { test: /\.(ts|js)$/, use: [ { loader: "ts-loader", }, ], exclude: /node_modules/, }, { test: /\.css$/, use: [MiniCssExtractPlugin.loader, "css-loader"], }, ], }, output: { filename: "bundle.[chunkhash].js", path: path.resolve(__dirname, "./dist"), clean: true, }, plugins: [ new HtmlWebpackPlugin({ template: "./index.html", inject: "body", favicon: "./favicon.png", }), new MiniCssExtractPlugin({ filename: "./style.css", }), ], optimization: { minimizer: [new TerserWebpackPlugin(), new CSSMinimizerPlugin()], }, ...(isDevMode ? { devServer } : {}), }; }; -
package.json 명령어 추가
"scripts": { "build": "webpack --env mode=production", "start": "webpack serve --env mode=development", ... }, -
tsconfig.json
typescript환경을 사용하므로 tsconfig.json이 추가적으로 필요하다.{ "compilerOptions": { "outDir": "./dist/", "noImplicitAny": true, "module": "esnext", "target": "es5", "allowJs": true, "moduleResolution": "node" } }
기본 속성
-
mode
- 개발 환경: "development"
- 프로덕션 환경: "production"
-
devtool : 소스맵 생성 여부와 방법 제어 (devtool 설정 알아보기)
- 개발 환경: "inline-source-map"
- 프로덕션 환경: "source-map"
-
resolve.extenstions: 기본으로 접근 가능한 파일 확장자 설정
- extenstion: [".js", ".ts"]
-
entry: 번들 빌드를 시작하는 곳, 객체 형식으로 여러개를 지정할 수 있다.
-
output: 번들 결과 파일에 대한 설정
- filename: 번들 파일의 이름 설정
- path: 번들 결과의 디렉터리 설정
- clean: output 디렉터리 정리 여부 설정
-
module: 정적 파일 별 처리 방법 설정
- rules: 정적 파일 별 처리 규칙 설정
- test: 규칙 설정할 모듈 설정
- use: test에 해당하는 파일들을 처리할 규칙 상세 설정
- rules: 정적 파일 별 처리 규칙 설정
터미널 명령어로 환경변수 전달
--env를 사용하면 webpack.config.js 파일에 환경 변수를 전달 할 수 있다.
// package.json 파일 script 속성
"build": "webpack --env mode=production"
webpack.config.js에서 함수형으로 전달 시 매개변수의 속성으로 확인할 수 있다.
npm run build 실행 시 "아래 코드에서 env.mode = "production"이 된다.
module.exports = (env) => {
  const isDevMode = env.mode === "development";
  ...
}
프론트엔드 개발자