
1. Wordpress
- Open Source(라이센스가 없고 소스코드가 공개된) 블로그 앱
- Web(httpd) + PHP + DB (MySQL = Maria DB)
- Front-end + Back-end + DB
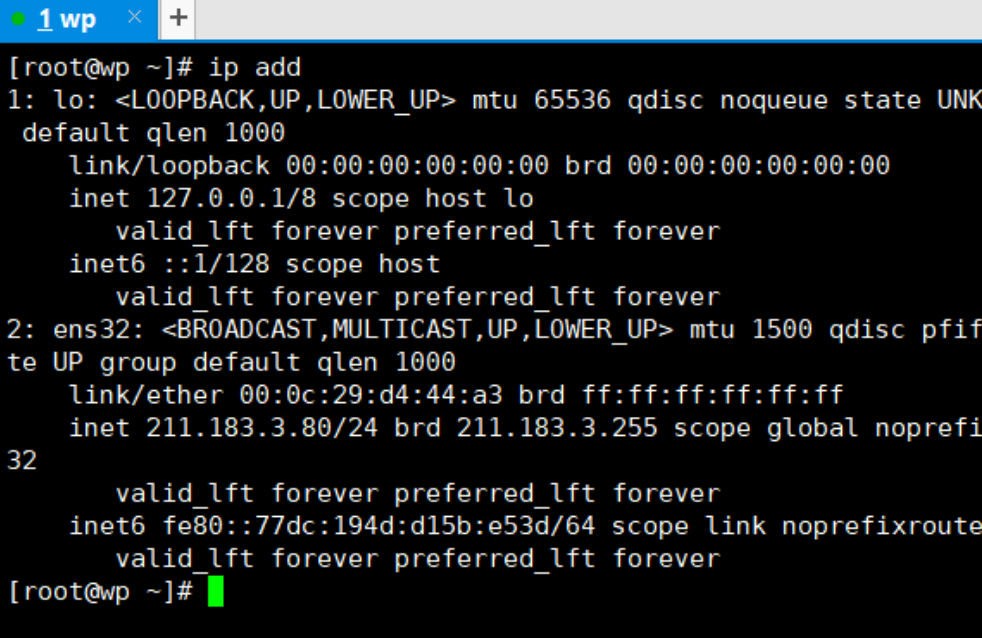
wp 라는 이름의 가상 서버 생성
방화벽( Firewalld), Selinux 해제
> systemctl stop firewalld
> systemctl disable firewalld

> vi /etc/selinux/config
파일 수정 - disabled

> init 6
reboot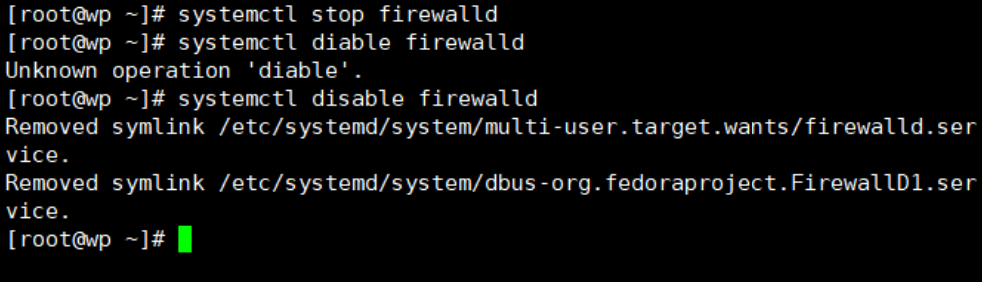
패키지 설치
> yum install -y epel-release yum-utils
epel-release - epl 이라는 레포지토리를 추가 (extra packages for enterprise linux)
yum-utils - 수동으로 레포지토리를 추가하기 위한 패키지

> yum -y install install
https://rpms.remirepo.net/enterprise/remi-release-7.rpm
패키지 설치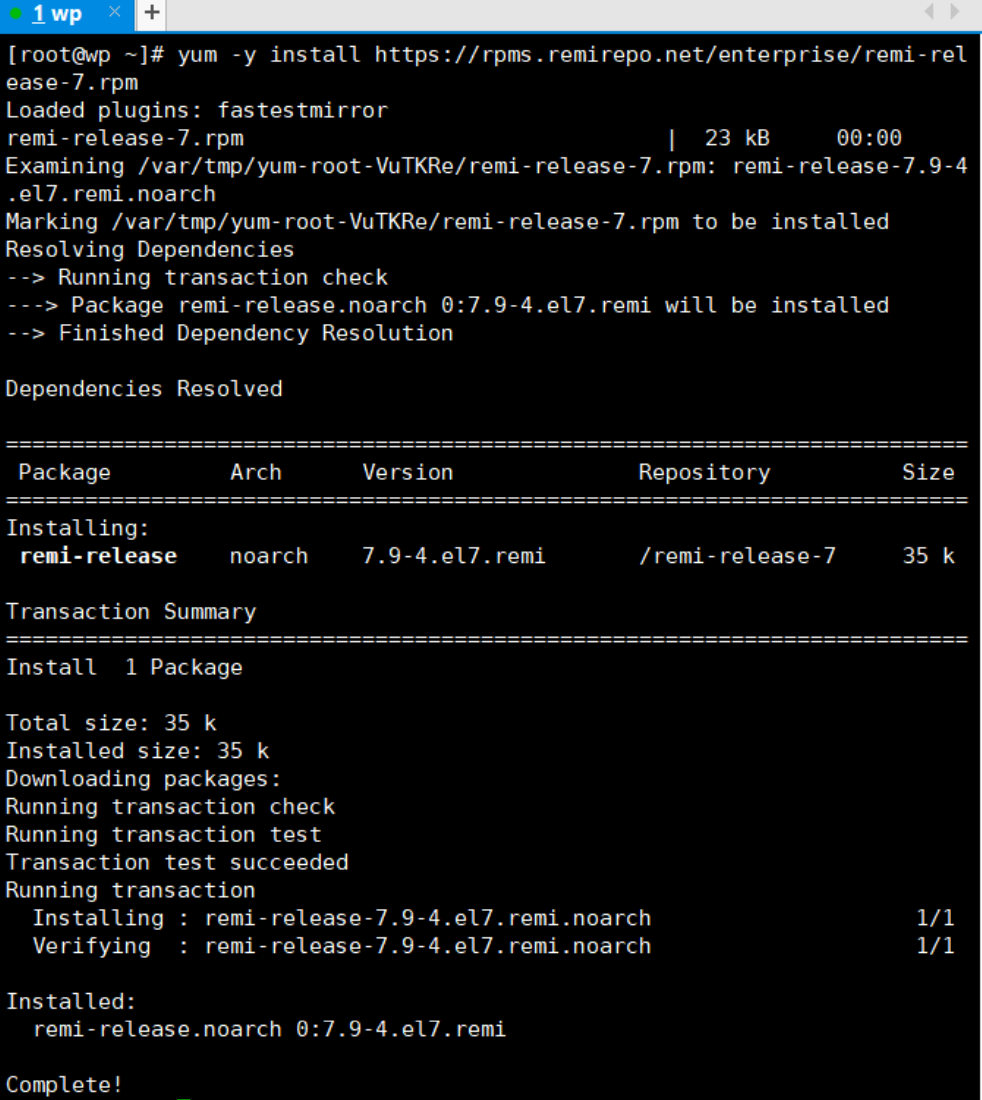
> yum-config-manager --enable remi-php73
php 7.3 버전을 설치하기 위한 remirepo 수동 업데이트 명령어

> yum install -y httpd php php-mysql
httpd 설치 및 php 와 db연동을 위한 패키지 설치

> php -v
php 버전 확인  - 반드시 7.xx Version 이어야 함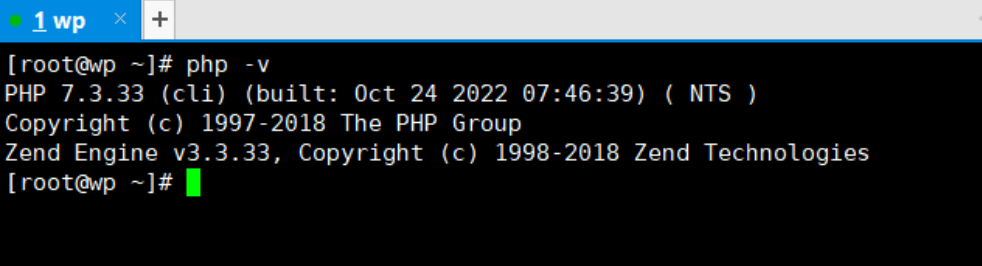
> yum install -y wget unzip
웹에서 파일을 받아올 수 있는 패키지와 unzip (압축해제, zip파일 다루는) 할 수 있는 패키지 설치
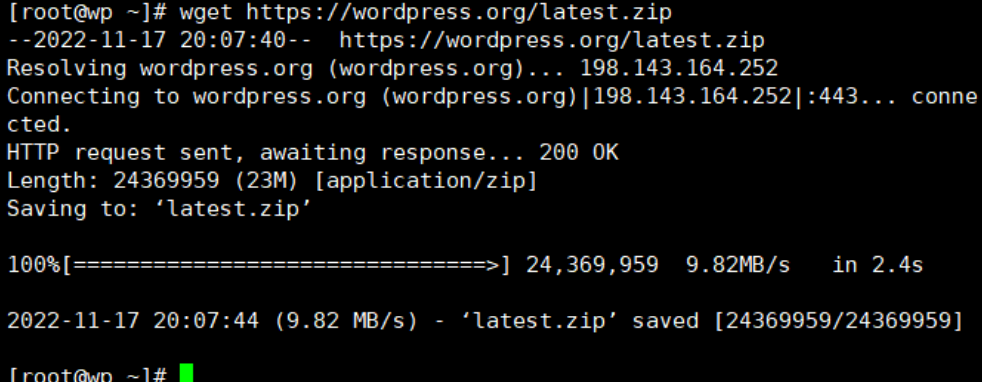
> ls
ls 명령어로 latest.zip 파일 다운받아졌는지 확인

> unzip latest.zip
압축 해제

> ls
ls 명령어로 wordpress 설치됐는지 확인

> mv ./wordpress/ /var/www/html
wordpress 파일을 /var/www/html 디렉토리로 이동

> rm -rf latest.zip
기존에 다운받은 latest.zip 파일 제거

> ls /var/www/html
wordpress 파일 이동 됐는지 확인


2. DB - Maria DB
> yum install -y mariadb-server
mariadb 서버 설치

> systemctl restart mariadb
> systemctl enable maradb

> mysql
mysql 명령어를 통해 Mariadb 서버에 접속 - exit 서버 나가기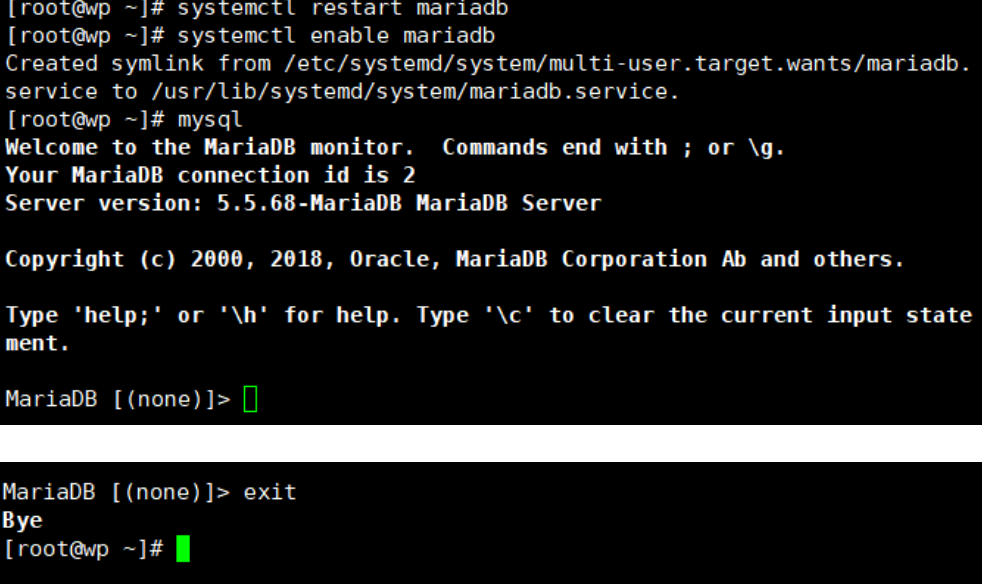
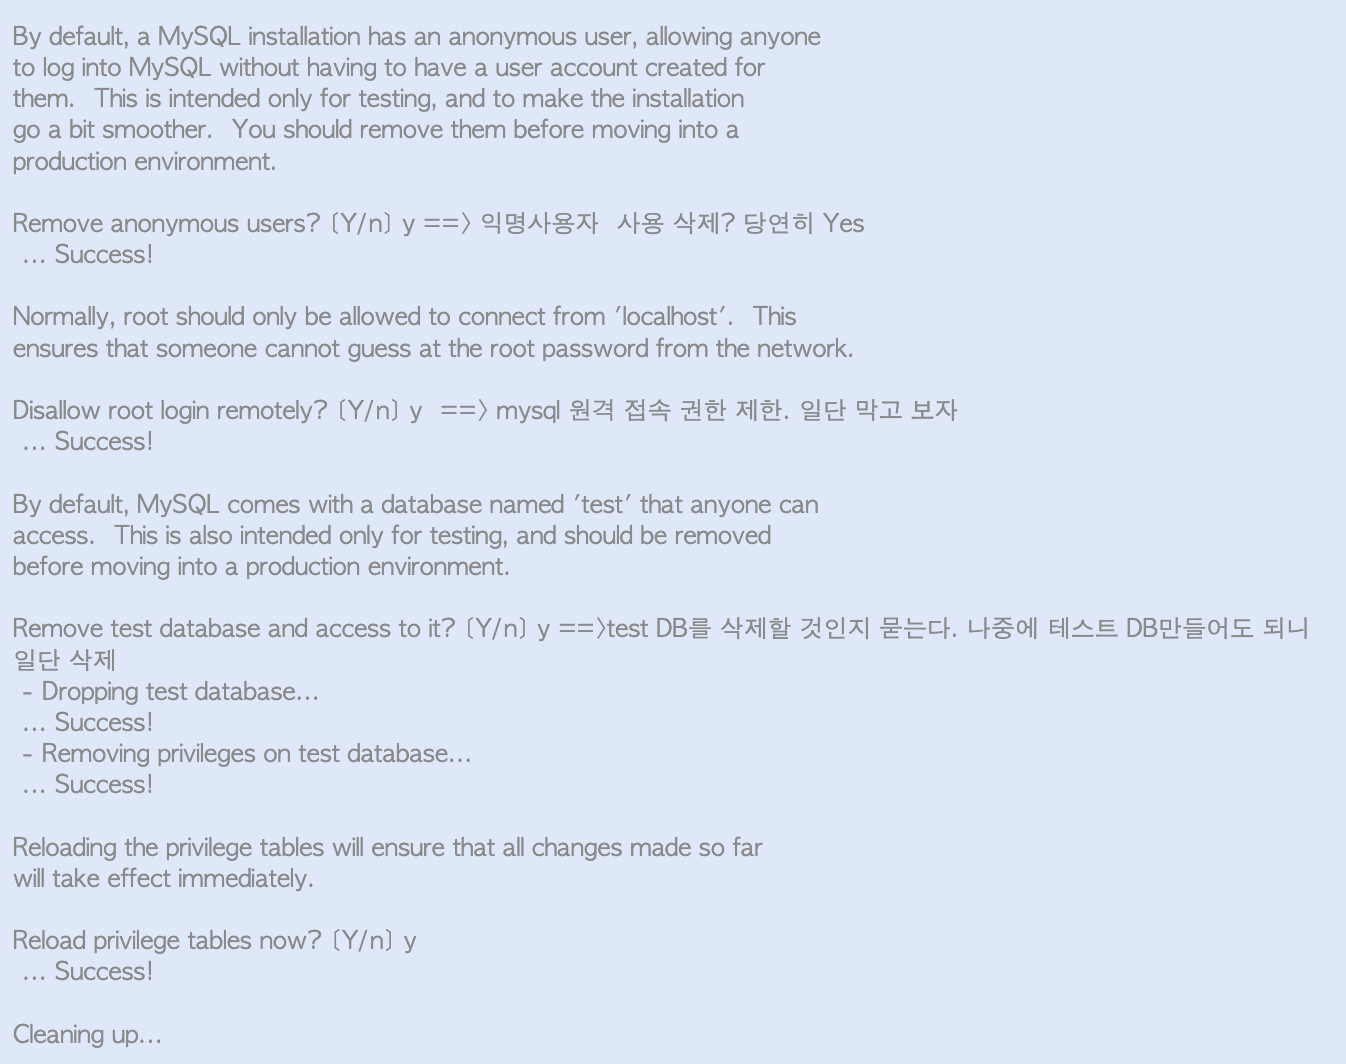
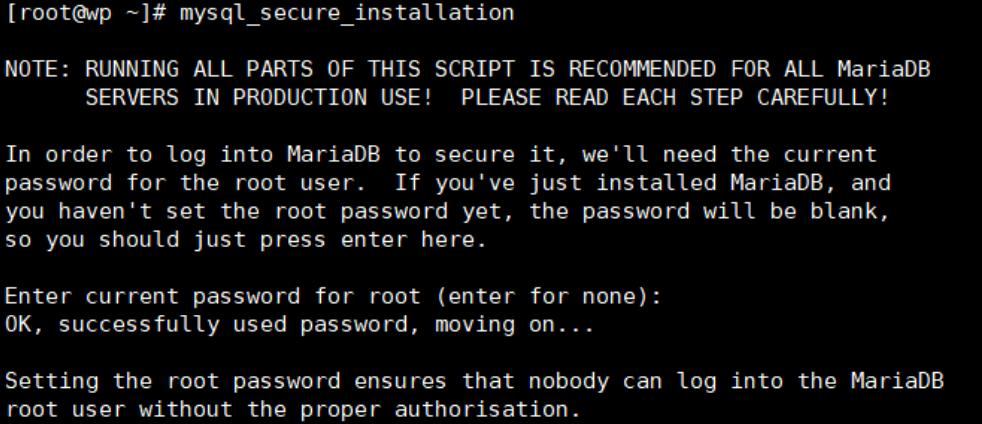
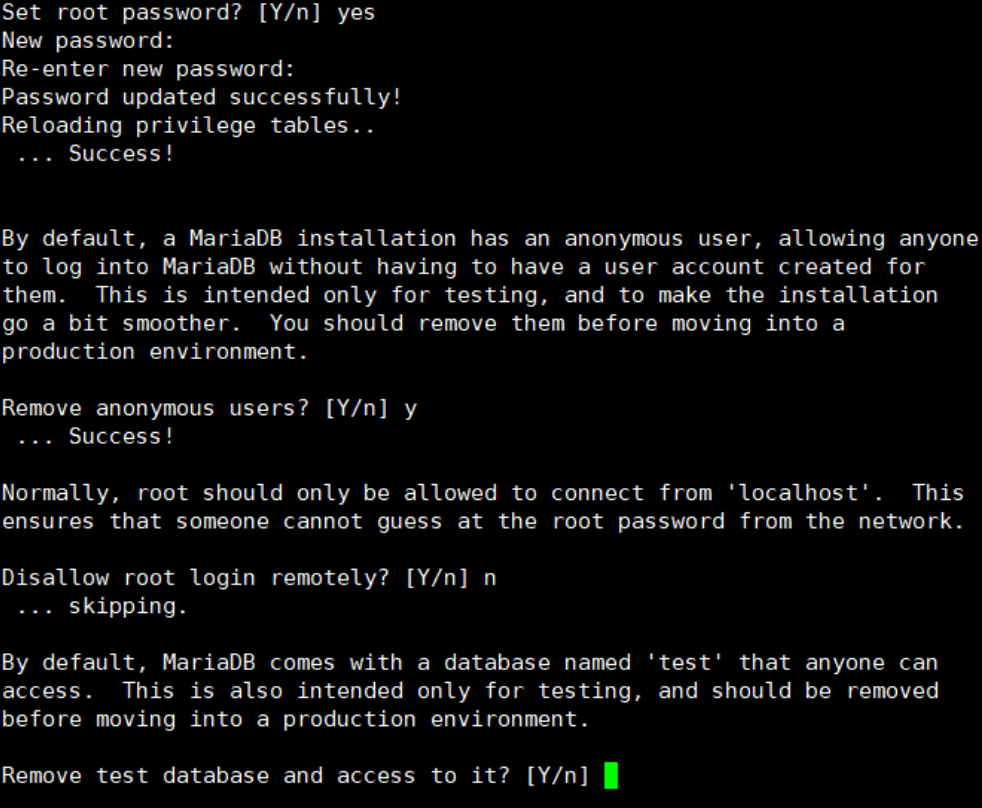
> mysql_secure_installation
mysql 초기 설치 혹은 재설치 이후에 기본적으로 보안 적용할 수 있는 명령어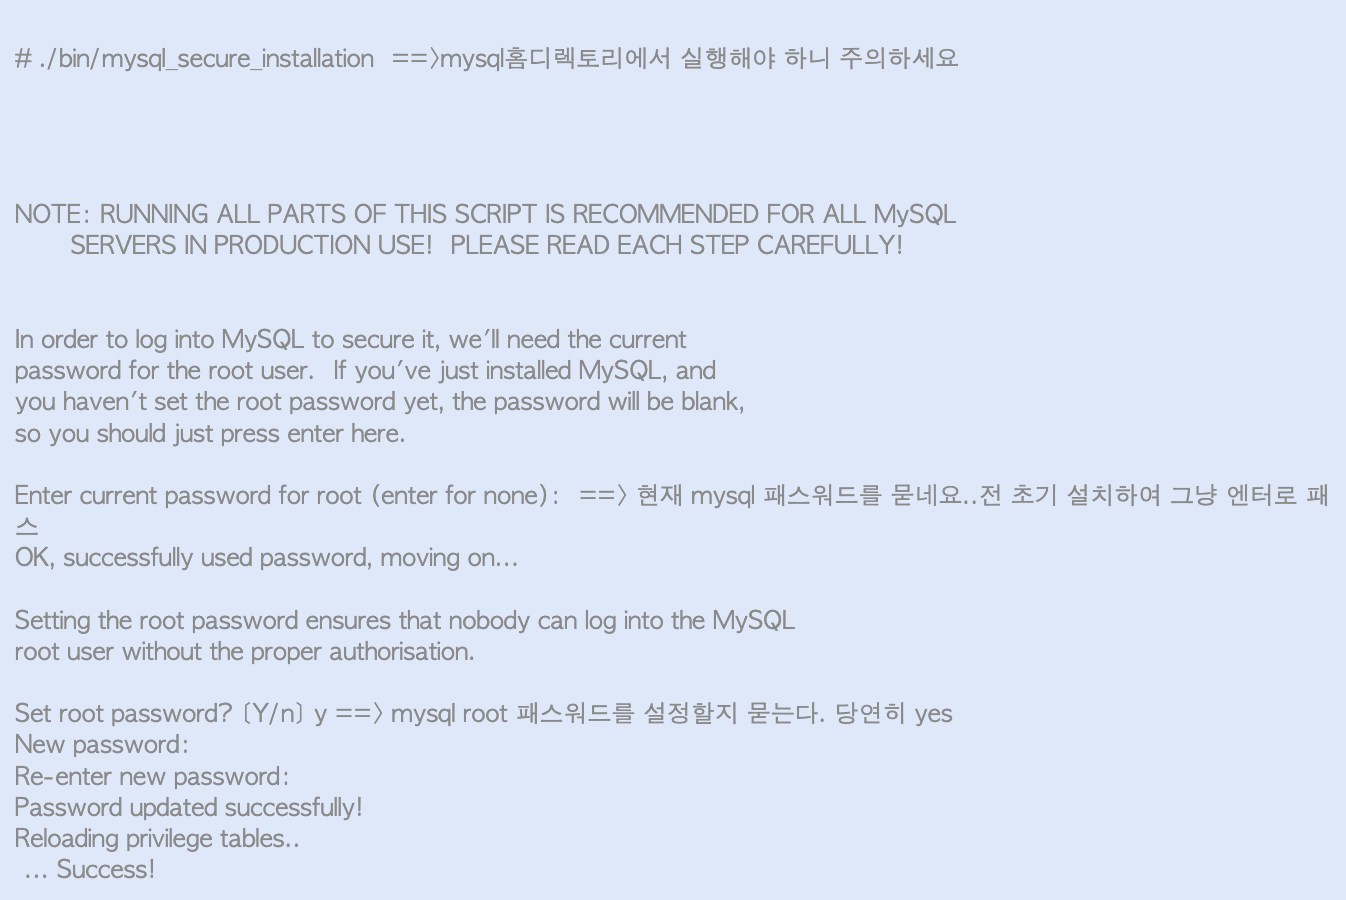

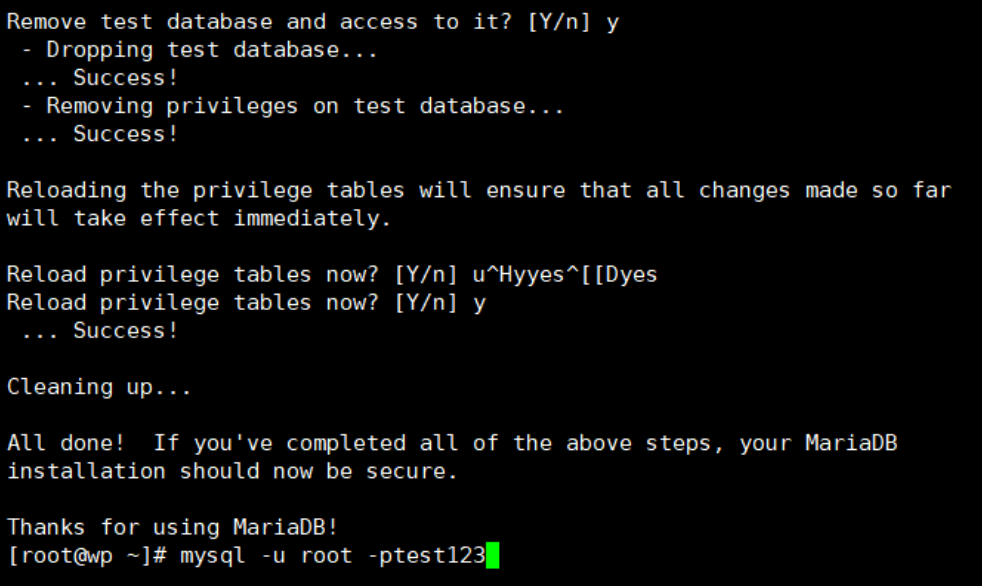
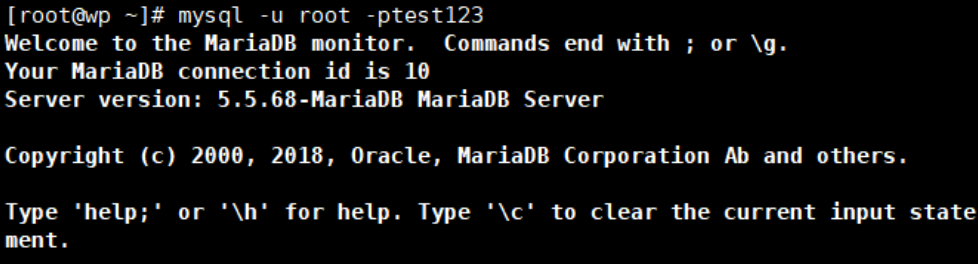
> mysql -u root -ptest123
mysql root 계정과 비밀 번호 test123 으로 접속
Mara DB [NONE]> CREATE DATABASE wp_DB;
wp_DB 라는 데이터베이스를 생성하겠다

-
옵션 1 : grant all privileges on db이름.* to 계정명@'%' identified by '비밀번호';
-
옵션 2 : grant all privileges on db이름.* to 계정명@'대역대' identified by '비밀번호';
계정명@'%' : 해당 계정이 모든 클라이언트에서 접근 가능하다.
계정명@'localhost' : 해당 계정이 localhost(본인 pc)에서만 접근 가능하다.
- 대역대
-localhost : 로컬에서만 접속 가능, 외부 IP 접근 불가
-% : 모든 외부 IP 접근 가능
-123.123.123.123 : 해당 IP(123.123.123.123)에서만 접근 가능
-123.123.123.% : 123.123.123.xxx(/24) 대역에서만 접근 가능
Mara DB [NONE]> GRNAT ALL PRIVILEGES on wp_DB.* to wpuser@localhost IDENTIFIED by '1234'

모든 권한을 wp_DB의 모든테이블을 DB유저@로컬호스트 에게 부여하겠고,
유저의 비밀번호는 1234 로 설정한다는 뜻이다.

Mara DB [NONE]> show databases;
생성한 데이터 베이스를 볼 수 있는 명령어
Mara DB [NONE]> use wp_DB
wp_DB 라는 데이터 베이스를 사용하겠다.
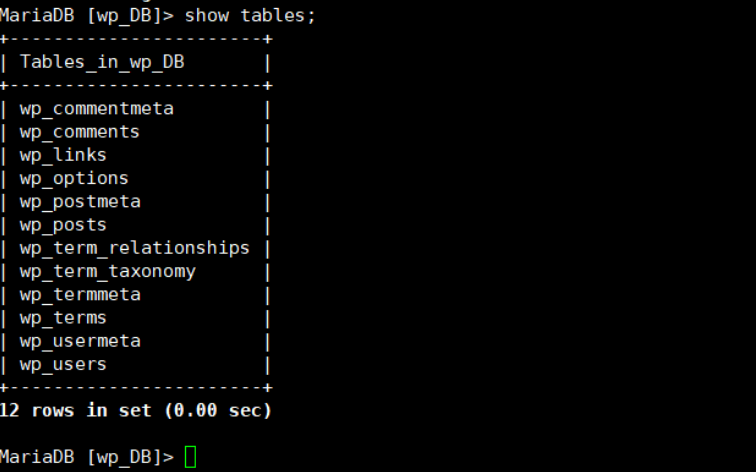
Mara DB [NONE]> show tables;
DB의 테이블 확인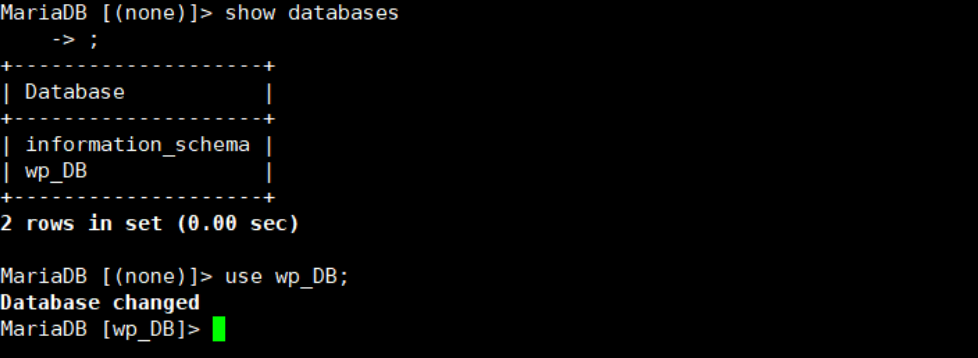
Mara DB [wp_DB]> exit
데이터베이스 나가기

> cd /var/www/html/wordpress/
wordpress 디렉토리로 이동

> ls
wordpress 파일 내용 보기
참고로 앞에서 /var/www/html 에  wordpress 파일이 있음

> mv wp-config-sample.php wp-config.php
파일명 변경

> vi wp-config.php
wp-config.php 파일을 수정

- DB 이름(name)
- User 이름
- password

> systemctl restart httpd
> systemcrl enable httpd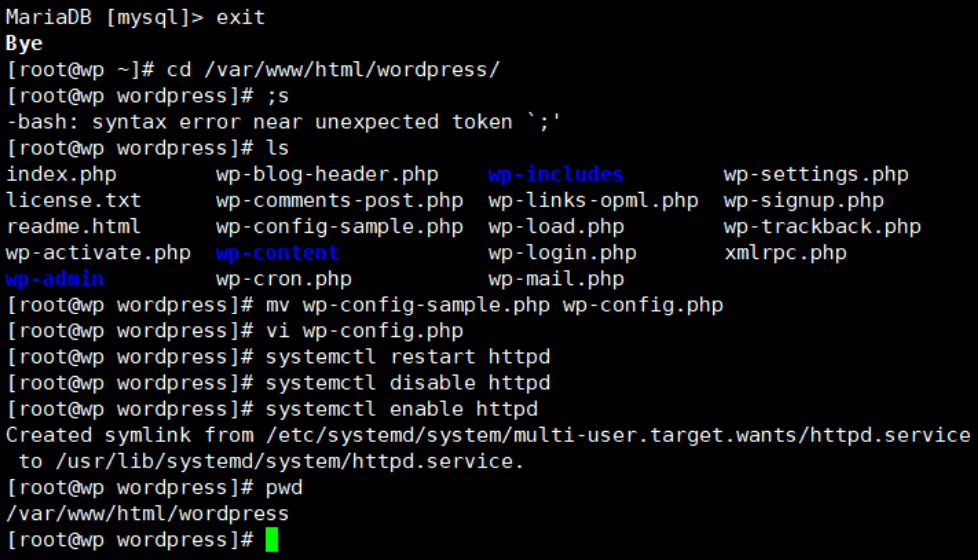
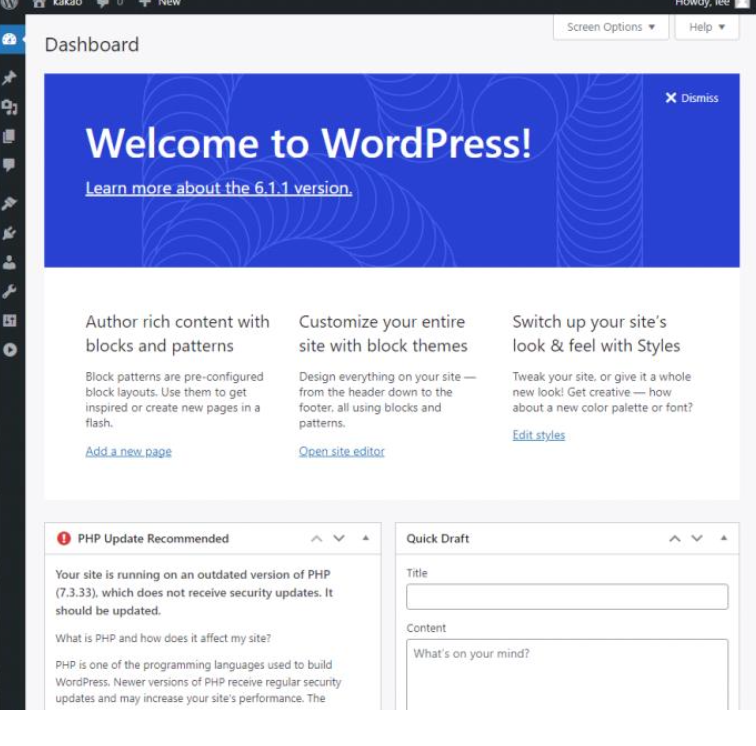
Chrome 에서 211.183.3.80/wordpress
3. FTP (File Transfer Protocol)
*7계층인 응용계층에 속한다.
- 파일을 전송하는데 사용되는 프로토콜 (서버와 클라이언트, PC와 PC사이)
- TCP 를 사용하여 신뢰성 있고, 연결지향적인 방식으로 파일을 전송, 수신하는 프로토콜이다.
- 20번 Port는 DATA를 전송하고 21번 Port는 제어정보 (FTP의 명령어 Connection) 를 전송한다.
- 데이터를 잘 받았다는 신호인 ACK(Acknoledgement) 존재하고 ACK를 받아야만 다음 데이터를 보내게 된다.
- FTP의 예시는 FileZilla 가 있다.
3-1. TCP
- 4계층인 전송계층에 속한다.
- 서로 다른 네트워크에서도 통신이 가능한 연결지향형 프로토콜이고, 양방향 전송이다.
- 대용량의 데이터나 중요한 데이터 전송에 사용한다.
- 3way handshake 방식을 거치기 때문에 신뢰성을 보장한다.
실습
wordpress 서버에서 진행
> yum instal -y vsftpd
vsftpd 설치
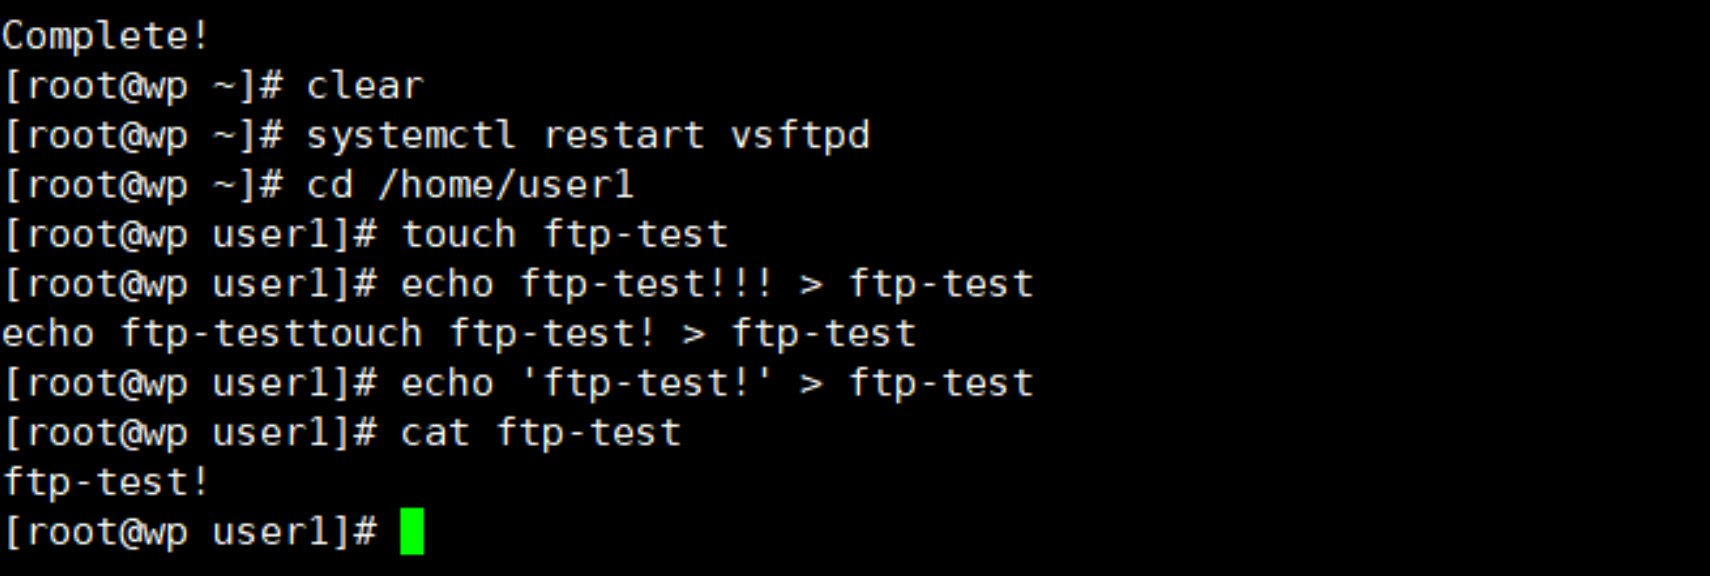
> systemctl restart vsftpd
> cd /home/user1
user1의 홈 디렉토리로 이동
> touch ftp-test
테스트 file 하나 생성
> echo ftp-test! > ftp-test
ftp-test! 문장 등록
> cat ftp-test
확인
- Client 서버 하나 띄우기
IP : 211.183.3.100 /24
GW : 211.183.3.2
Client 서버에서 동작
> yum install -y ftp
ftp 명령어 사용하기 위한 패키지 설치
ftp> open 211.183.3.80
user name, password 설정
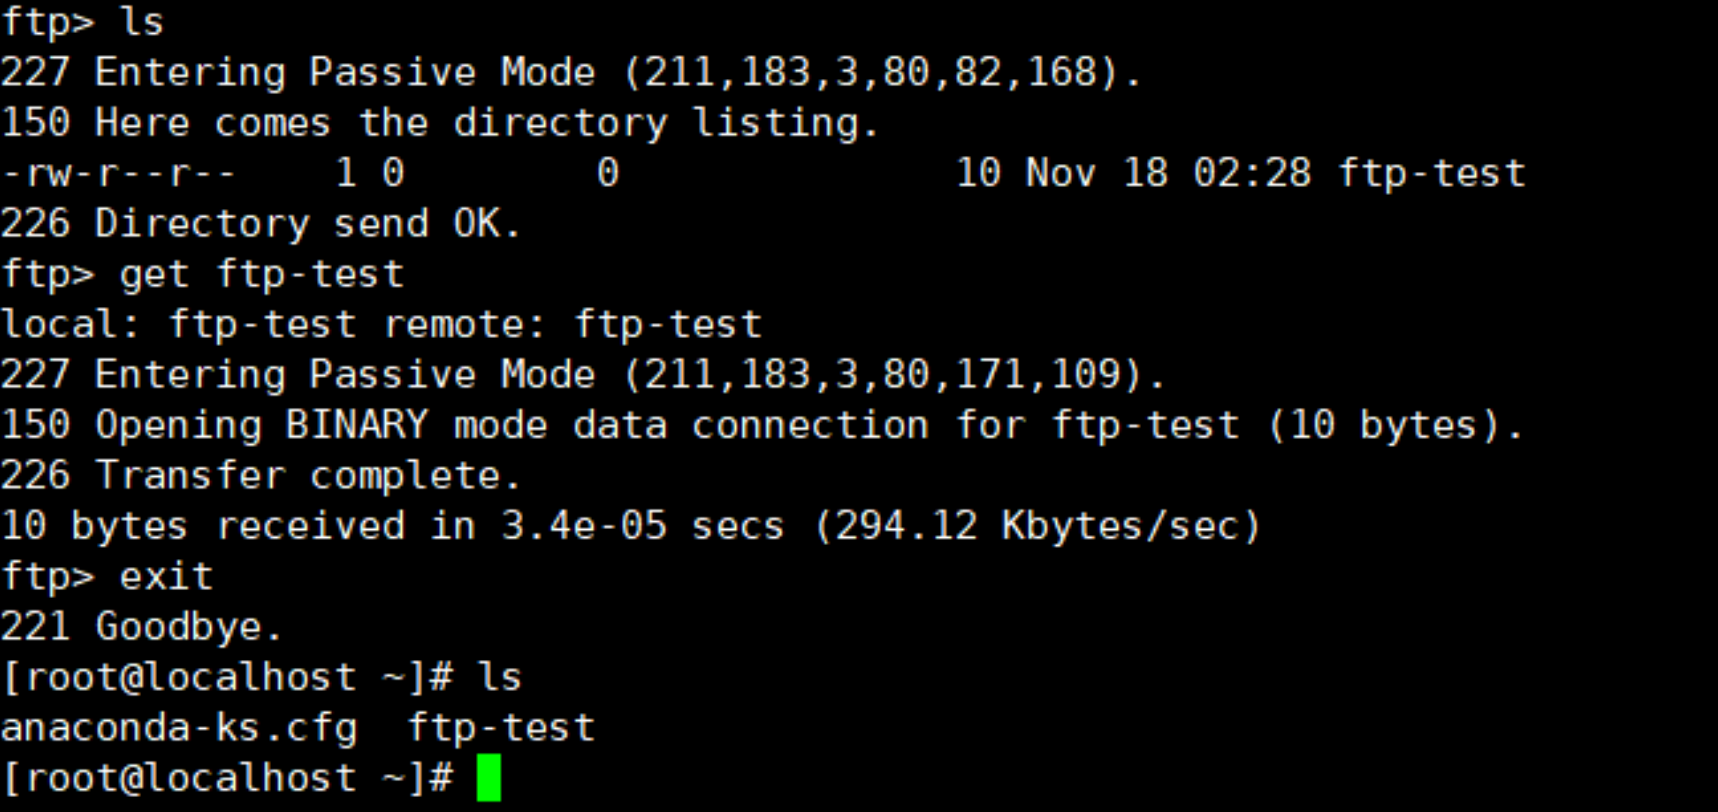
ftp> ls
ls 명령어를 통해 ftp-test 파일 확인
ftp> get ftp-test
ftp-test 파일 get
ftp> exit
ftp 명령어 나가기
> ls
ls 명령어를 통해 ftp-test파일을 잘 받아 왔는지 확인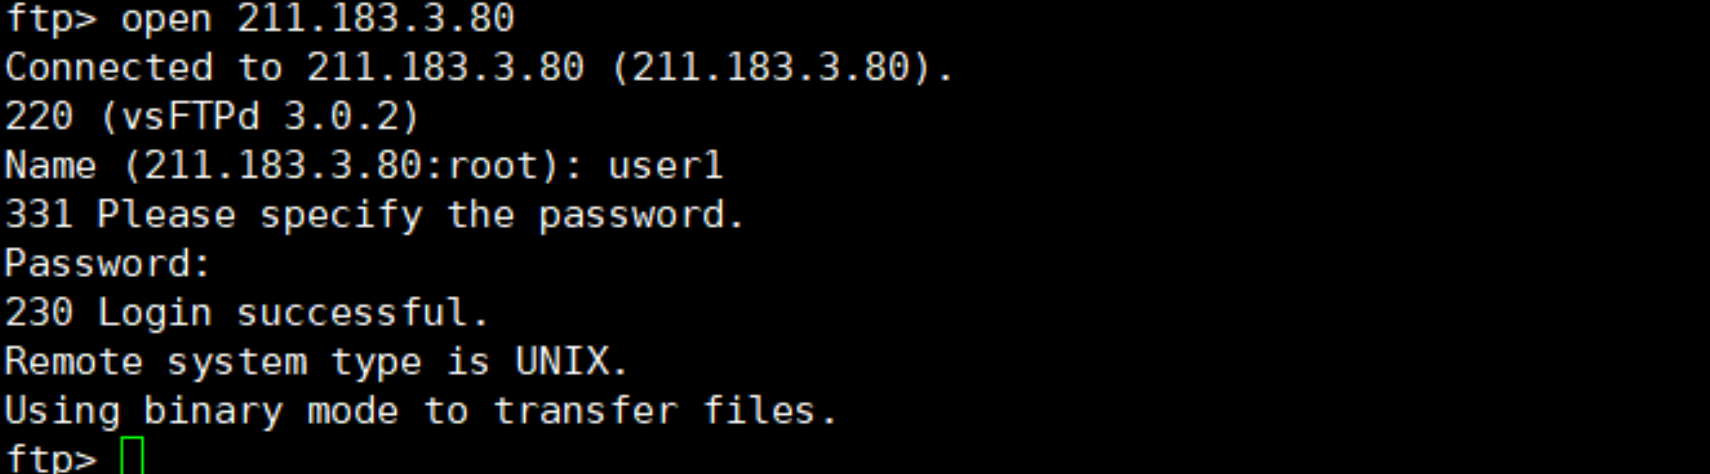
Filzilla 설치 후 user name, password port 21번 설정 후 확인해보자!
4. TFTP (Trivial File Transfer Protocol)
- 7계층인 응용계층에 속한다.
- FTP에 비해 단순하고 빠르게 파일을 전송하는데 사용되는 프로토콜
- 보안에 취약하다
- Port : 69
- 라우터나 스위치의 설정파일과 IOS 이미지를 받아올때 주로 사용된다.
- 인증 절차가 없기 때문에 누구나 호스트에 접근해 정보를 가져갈 수 있다.
4-1. UDP
- 4계층인 전송계층에 속한다.
- 같은 네트워크에서만 통신이 가능한 비연결성 전송 프로토콜
- 속도가 빠르다.
- 단방향 전송
- 신뢰성이 낮고, 오버헤드가 적다.
실습
wordpress 서버에서진행
> yun install -y tftp-server
tftp 서버 패키지 설치
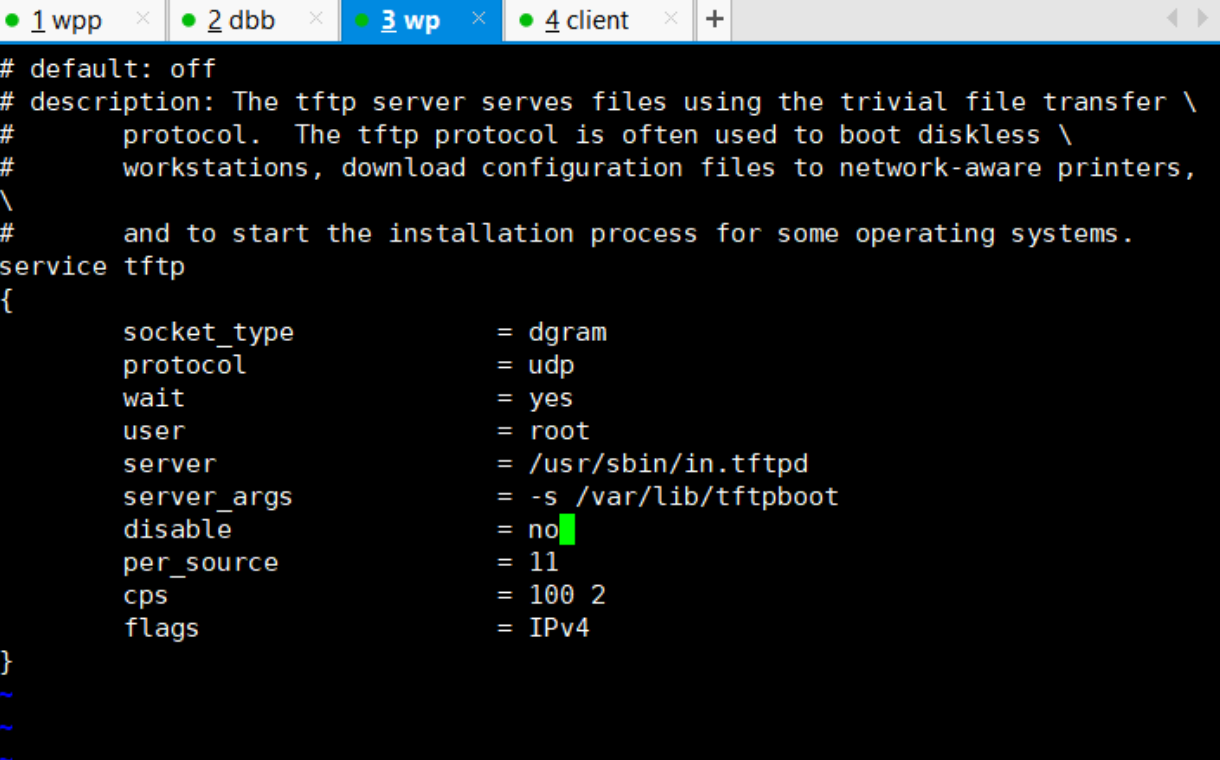
> vi /etc/xinetd.d/tftp
tftp 파일 들여다보가
disable - no 로 수정!
server_args : -s /var/lib/tftpboot 주목
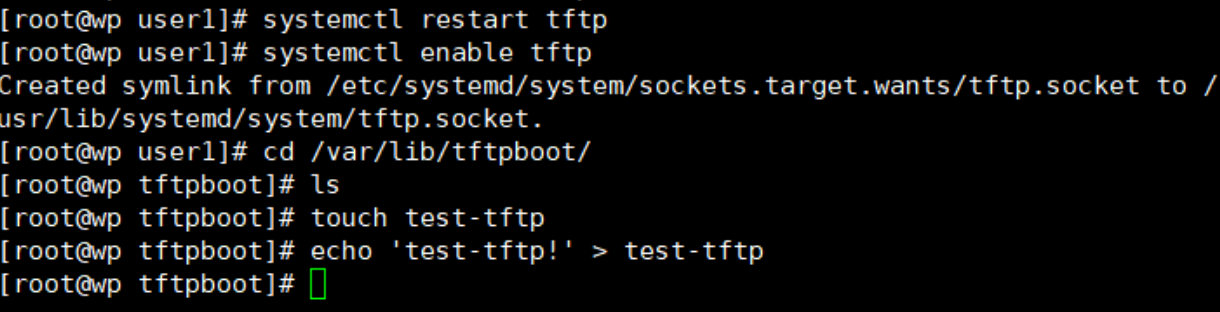
> systemctl restart tftp
> systemctl enable tftp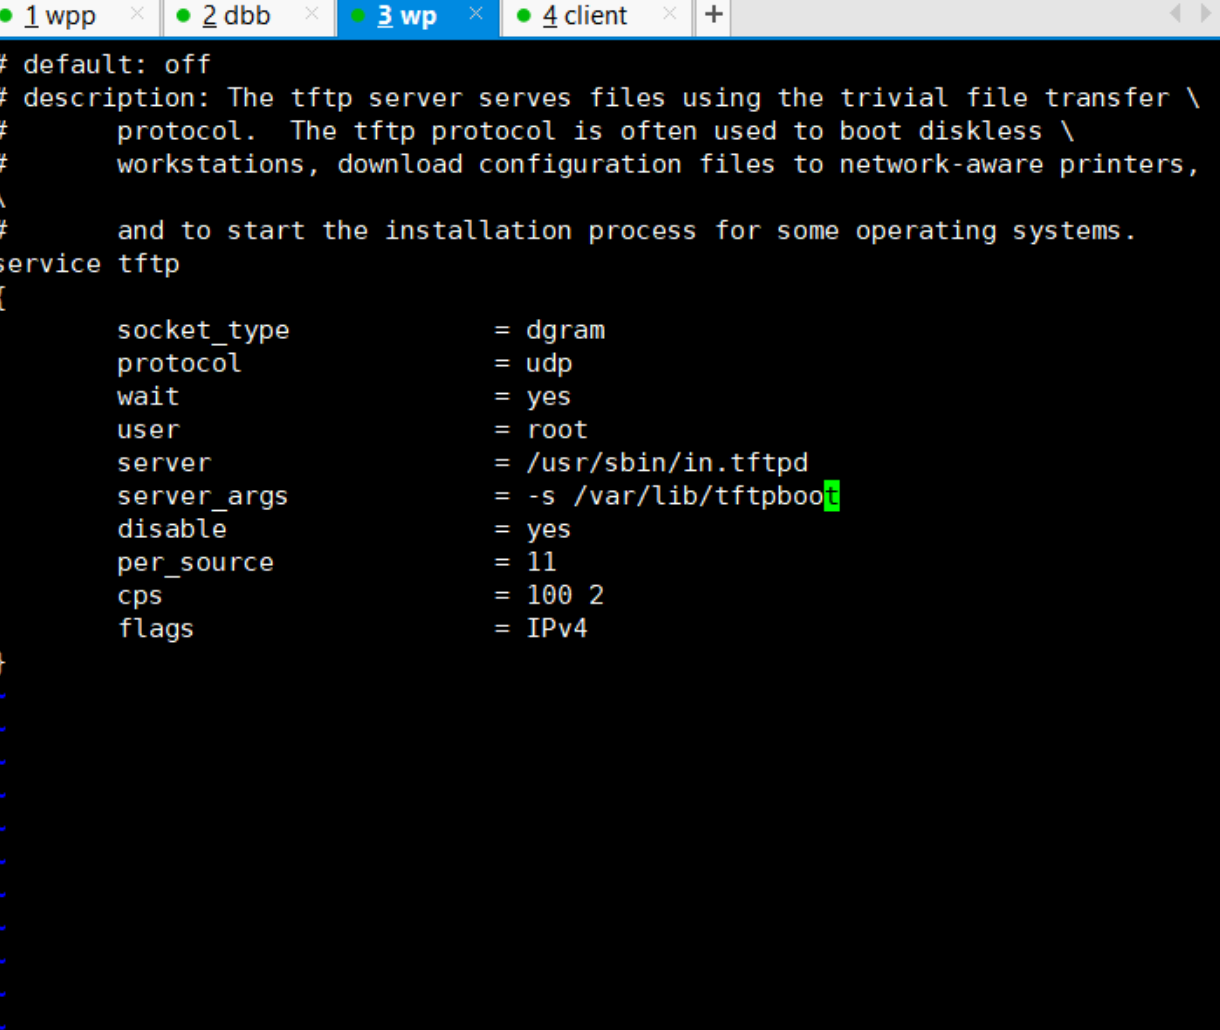
> cd /var/lib/tftpboot/
tftp 디렉토리로 이동

> touch test-tftp
테스트용 파일 생상

> echo 'test-tftp' > test-tftp
문장 삽입

> ls 로 확인
Client 서버에서 진행

> yum install -y tftp-server
tftp 서버 패키지 설치

> tftp
tftp 실행 후 tftp 서버에 접속 (IP 입력)

> get test-tftp
test 파일 받기

--- 만약 get 명령어가 동작하지 않을 경우 방화벽 혹은 셀리눅스 꺼줘야 함!

> cat test-tftp
제대로 받아 왔는지 결과 확인
5. PxE Server

무럭무럭 자라볼까