Redux 적용하기 (함수형, Class 형)
React-redux

React에서 가장 많이 사용 되는 Redux 에 대하여 조금은 바닥 부터 정리를 해봤습니다.
물론 저의 글이 읽기가 진 않아서 개념 정리 보다는 코드로 풀어보도록 하겠습니다.
먼저 개념 정리는 Velopert 님 께서 아주 잘 정리해주셔서 이를 참고 하도록 하겠습니다.
Redux 란...?
요약하자면 React에서 상태를 관리하기 용이하도록 구현해낸 방법? 패턴? 이고
Action 을 정의하고 Action creator를 dispatch 하여 Reducer가 그에 맞게 Store를 변경 시켜준다고 생각하면 될것 같습니다.
그 외의 컴포넌트들은 Store를 바라보면서 변경된 Store가 있을시 그에 맞게 컴포넌트를 변경해주게 되는 겁니다.
그럼 간단한게 리액트 프로젝트에 적용해보겠습니다.
만들 프로젝트는 간단한 Count 입니다.
먼저 의존 모듈을 설치해줍니다.
$ npm i redux react-redux
actions 정의
src/actions/count.js 를 만듭니다.
// Action types
export const INCREASE_COUNT = 'count/INCREASE_COUNT';
export const DECREASE_COUNT = 'count/DECREASE_COUNT';

export const SET_COUNT = 'count/SET_COUNT';

// Action creators
export const increaseCount = () => {
  return {
    type: INCREASE_COUNT,
  }
};

export const decreaseCount = () => {
  return {
    type: DECREASE_COUNT,
  }
};

export const setCount = () => {
  return {
    type: SET_COUNT,
  }
};
Action types 들을 정의하고, 그에 맞는 Action creators 를 만듭니다.
reducers 정의
reducers/index.js
import { combineReducers } from 'redux';

import count from './count';

const rootReducer = combineReducers({
  count,
});

export default rootReducer;
index.js 를 통하여 여러 reducer를 combineReducers를 통하여 묶어 줄 수 있습니다.
실직적으로 count store를 변경시켜줄 reducer는 reducers/count.js 에 정의되어 있습니다.
reducers/count.js
import * as countActions from '../actions/count';

const initialStates = {
  count: 0,
}

const reducers = (state = initialStates, action) => {
  const { type } = action;
  switch (type) {
    case countActions.INCREASE_COUNT: {
      return {
        ...state,
        count: state.count +1
      }
    }
    case countActions.DECREASE_COUNT: {
      return {
        ...state,
        count: state.count - 1,
      }
    }
    default: {
      return state;
    }
  }
}

export default reducers;
dispatch된 action type 에 의하여 reducer 는 store를 변경시켜 줍니다.
action type 이 INCREASE_COUNT 이면 state count 값을 1 증가시켜주고 DECREASE_COUNT 이면 1 감소시켜 줍니다.
이제 이렇게 만든 reducer를 전체 프로젝트 store에 올려야하는데요. 이는 매우 간단합니다. 이미 'react-redux' 에서 제공해주고 있기 때문이죠.
Store 정의
store/index.js 를 만들어서 createStore를 할 수 있게 해줍니다.
import { createStore } from 'redux';

const create = (reducers) => {
  return createStore(reducers);
}

export default create;
Store 적용
마지막으로 App.js 에서
import React from 'react';
import { Provider } from 'react-redux';

import './App.css';

// Redux & Redux-Thunk test
import CountComponent from './components/Count';
import CountFCComponent from './components/CountFC';

import createStore from './store';
import reducers from './reducers';

const store = createStore(reducers); // reducers 를 바탕으로 store 생성

// Provider tag 를 통하여 전체 프로젝트에 store 적용
function App() {
  return (
    <Provider store={store}>
      <div className="App">
        <CountComponent />
        <CountFCComponent />
      </div>
    </Provider>
  );
}

export default App;
이렇게 하면 전반적인 redux 적용은 끝이납니다.
action을 생성하는 방법은 여러가지 있지만 이번 포스팅에서는 조금 더 상세하게 기능을 나누어서 기초적으로 정의해보았습니다.
보통 저는 actions 와 reducers 를 합치는 duck pattern을 주로 많이 쓰는데 추후에 포스팅해보도록 하겠습니다.
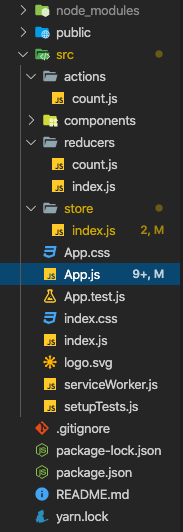
폴더 구조
컴포넌트에 Redux 적용하여 테스트
이제 실질적으로 구조가 잡힌 Redux를 실제 컴포넌트에 적용해보아야합니다.
두 가지 방법이 있는데 하나는 Class형에 적용하는법과 또 하나는 함수형에서 Hooks 를 사용하여 적용하는 법을 해보겠습니다.
Class형
./components/Count.jsx
import React from 'react';
import { connect } from 'react-redux';

import * as actions from '../../actions/count';

class Count extends React.Component {
  constructor(props) {
    super(props);
    this.state = {
      localCount: 0,
    }
  }

  componentDidMount() {
    console.log('Component did mount.');
  }

  increaseCount = () => {
    this.setState((prevState) => {
      return {
        localCount: prevState.localCount + 1,
      }
    });
  };

  decreaseCount = () => {
    this.setState((prevState) => {
      return {
        localCount: prevState.localCount - 1,
      }
    });
  };

  render () {
    const { localCount } = this.state;
    const { storeCount, increaseStoreCount, decreaseStoreCount } = this.props;

    return (
      <>
        {'Class component'}
        <div>
          <div>
            {`localCount: ${localCount}`}
          </div>
          <div>
            {`storeCount: ${storeCount}`}
          </div>
        </div>
        <div onClick={() => {
          this.increaseCount();
          increaseStoreCount();
        }}>
          {'+'}
        </div>
        <div onClick={() => {
          this.decreaseCount();
          decreaseStoreCount();
        }}>
          {'-'}
        </div>
      </>
    )
  }
}

const mapStateToProps = (state) => ({
  storeCount: state.count.count,
});

const mapDispatchToProps = (dispatch) => ({
  increaseStoreCount: () => dispatch(actions.increaseCount()),
  decreaseStoreCount: () => dispatch(actions.decreaseCount()),
});

export default connect(mapStateToProps, mapDispatchToProps)(Count);
mapStateToProps, mapDispatchToProps 을 이용하여 state, dispatch 된 action creators을 컴포넌트에 props로 전달하여 사용하는 방법입니다.
react-redux 에서 제공해주는 connect 라는 함수를 이용하여 컴포넌트와 연결 시킬 수 있습니다.
컴포넌트 내부에서는 storeCount, increaseStoreCount, decreaseStoreCount를 props로 받아서 사용하게 됩니다.
함수형
./components/CountFC.jsx
import React, { useEffect, useState, useCallback } from 'react';
import { useSelector, useDispatch } from 'react-redux';

import * as actions from '../../actions/count';

const CountFC = () => {
  const dispatch = useDispatch();
  const [localCount, setLocalCount] = useState(0);

  const { count: storeCount } = useSelector((state) => state.count);

  useEffect(() => {
    console.log('Component did mount.');
  }, []);

  const increaseCount = useCallback(() => {
    setLocalCount(localCount + 1);
    dispatch(actions.increaseCount());
  }, [localCount, dispatch]);

  const decreaseCount = useCallback(() => {
    setLocalCount(localCount - 1);
    dispatch(actions.decreaseCount());
  }, [localCount, dispatch]);

  return (
    <>
      {'Function component'}
      <div>
        <div>
          {`localCount: ${localCount}`}
        </div>
        <div>
          {`storeCount: ${storeCount}`}
        </div>
      </div>
      <div onClick={increaseCount}>
        {'+'}
      </div>
      <div onClick={decreaseCount}>
        {'-'}
      </div>
    </>
  )
};

export default CountFC;
보시는 바와 같이 훨씬 간단합니다. useSelector를 통하여 store에 접근하여 변수를 가져올 수 있고 useDispatch를 통하여 직접 action creator들을 dispatch 시킬 수 있습니다.
실제로 코드를 실행해보면 Function component에서 increaseCount를 하게 되면 Class component에 storeCount도 변경되는 것을 확인 해 볼 수 있습니다. Redux 를 통해서 연결되어 있기 때문에 같은 Store를 바라봐서 count가 변경되는 것이죠.
다음 포스팅에서는 비동기 처리를 위해 많이 사용되는 redux-thunk, redux-saga 를 적용시켜서 포스팅 해보겠습니다.