
Next router
Next 에서는 routing 을 자체적으로 지원해주는데요.
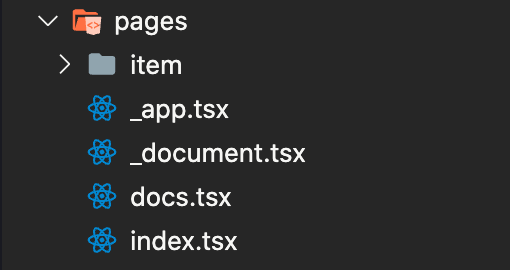
그렇기 때문에 react-router, react navigation을 굳이 사용하지 않아도 되고, pages/ 안에 파일을 만들면 그 파일 이름으로 path 를 생성해주기 때문에 쉽게 routing service 를 구축 할 수 있습니다.
제가 최초로 사용하였던 Next 8에는 dynamic route 가 지원되지 않아서 custom 한 node server를 만든 뒤 각각에 맞게 pages 로 연결을 시켜줬어야 했는데 이제는 아주 쉽게 dynamic route 도 적용시킬 수 있습니다.
자세한 사항은 공식문서를 참고해주세요
useRouter
Next 내에서 페이지 이동은 useRouter 훅을 이용하여 이동 할 수 있습니다.
import { useGetPokemonList } from 'hooks/useGetPokemonList';
import { useRouter } from 'next/router';
import React, { useCallback, useEffect, useMemo, useState } from 'react';
import * as Styles from './styles';

export const Thumbnailes = () => {
  const router = useRouter();
  const { data, isLoading } = useGetPokemonList();
  const handleClickFindPokemon = useCallback(() => {
    router.push('docs');
  }, [router]);

  if (isLoading || !data) {
    return <div>Loading...</div>;
  }

  return (
    <Styles.Container>
      <Styles.Text onClick={handleClickFindPokemon}>
        {'포켓몬 찾기 >'}
      </Styles.Text>
    </Styles.Container>
  );
};
위의 예제 코드와 같이 useRouter 를 import 시켜준 뒤 router.push('') 를 통하여 원하는 pages/*.tsx 에 있는 파일 이름을 넣어주면 됩니다.
저의 프로젝트에서는 pages/docs.tsx 가 있어서 위의 예제 코드에서는 router.push('docs') 로 넣어주었습니다.
Dynamic route
Dynamic route 역시 적용하는것이 아주 쉬운데요. 다음 사진과 같습니다.
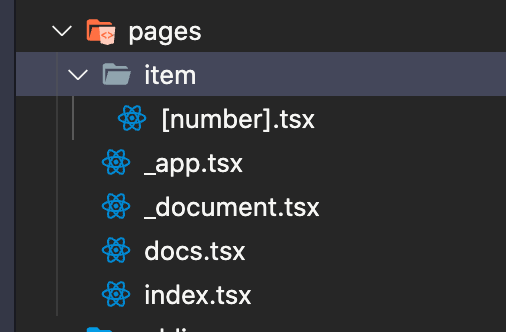
pages 내에 item 폴더를 만들고 그 안에 [].tsx 형식으로 파일을 만들어 주면 됩니다.
import { getPokemon } from 'apis/getPokemon';
import { Card } from 'components/Card';
import { Layout } from 'components/Layout';
import { MAX_POKEMON_COUNT } from 'constants/common';
import { Name } from 'constants/name';
import { GetStaticProps } from 'next';
import React, { useMemo } from 'react';
import { QueryClient, useQuery } from 'react-query';
import { dehydrate } from 'react-query/hydration';

interface ItemProps {
  id: number;
}

const Item = ({ id }: ItemProps) => {
  const { data, isLoading } = useQuery('pokemons', () => getPokemon(id));

  const types = useMemo(
    () => data?.types.reduce((acc, cur) => `${cur.type.name}, ${acc}`, ''),
    [data?.types],
  );

  if (isLoading || !data) {
    return <div>Lodaing...</div>;
  }

  return (
    <Layout
      title={Name[data.id]}
      image={data.sprites.frontDefault}
      favicon={data.sprites.frontDefault}
      description={types}
    >
      <Card pokemon={data} />
    </Layout>
  );
};

export async function getStaticPaths() {
  return {
    paths: Array(MAX_POKEMON_COUNT)
      .fill(null)
      .map((item, index) => ({
        params: {
          number: `${index + 1}`,
        },
      })),
    fallback: false,
  };
}

export const getStaticProps: GetStaticProps = async contexts => {
  try {
    if (contexts?.params?.number) {
      const queryClient = new QueryClient();

      await queryClient.prefetchQuery('pokemons', () =>
        getPokemon(Number(contexts?.params?.number)),
      );

      return {
        props: {
          dehydratedState: dehydrate(queryClient),
          id: contexts.params.number,
        },
      };
    }
  } catch (error) {
    console.error('Error', error);
  }

  return {
    props: {
      id: 0,
    },
  };
};

export default Item;
실제 코드에서 보면 저의 경우 [number].tsx 로 파일을 만들었기 때문에 getStaticProps 에서 contexts.params 안에 number 가 들어가는 것을 볼 수 있습니다.
만약 파일 이름이 [id].tsx 라면 contexts.params.id 가 될것입니다.
이렇게 pageName/[pageParam].tsx 형식으로 dynamic route 를 만들 수 있습니다.
getStaticProps/getStaticPaths
지난 포스팅에서 잠시 언급을 했었는데, 위의 코드와 같이 getStaticProps 와 getStaticPaths 함께 써주어야 dynamic route page 에 적용할 수 있게 됩니다.
만약 두가지를 한번에 쓰기 싫다면 getServerSideProps 사용하면 됩니다.
허나 그렇게 되면 성능이 떨어지는건 어쩔 수 없다고 생각이 듭니다. 기본적으로 사용할 path 만 정의해서 사용하는 것과 동적으로 모든것을 대응하는것에 차이라고 생각하면 될듯 합니다.
결론
이렇게 Next 에서는 강력하고 간단한 routing system 을 제공합니다. 또한 next router 이용하지 않고 href 와 같은 다른방식으로 이용하게 된다면 SPA 가 깨지기 때문에 next page 간에 이동은 next route 를 이용하여 이동하시는것이 좋을것 같습니다.
다음에는 Next를 쓰기 위한 목적인 SEO를 잘 적용하기 위해 동적으로 meta tag 적용하는 법을 포스팅 해보겠습니다.
저의 앱에서는 현재 /docs, item/[number] 마다 각각 다른 image, title, description, favicon이 적용되는것을 보실 수 있는데요. 아주 쉽게 적용할 수 있습니다. 그럼 다음 포스팅에서 ㅎㅎ