HTML video and audio
전형적인 video와 audio의 구현은 다음과 같다.
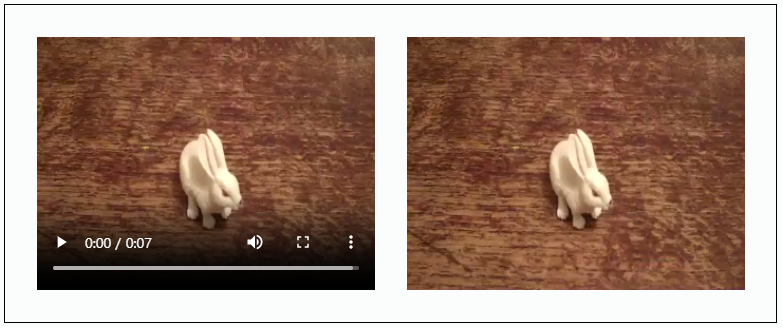
<video controls>
  <source src="rabbit320.mp4" type="video/mp4" />
  <source src="rabbit320.webm" type="video/webm" />
  <p>
    Your browser doesn't support HTML video. Here is a
    <a href="rabbit320.mp4">link to the video</a> instead.
  </p>
</video>
주목해야 할 점은 controls 어트리뷰트이다.
이 어트리뷰트를 사용하지 않으면 재생 컨트롤이 표시되지 않는다.
controls 가 없다면 유용하지 않을 것 같지만 꼭 그렇지만은 않다.
2가지 문제점이 있다.
하나는 브라우저마다 controls 가 달라서 크로스 브러우저에 좋지 않다는 것이고
나머지 하나는 키보드 사용자들에게 불편하다는 점이다.
이 2가지 문제점은 기본 controls 를 없애고 프로그래밍으로 controls 기능을 만드는 것으로 해결할 수 있다.
The HTMLMediaElement API
DOM의 HTMLMediaElement 객체는 비디오와 오디오 플레이어를 프로그래밍적으로 컨트롤 할 수 있게 해준다.
예를 들어 HTMLMediaElement.play() , HTMLMediaElement.pause() .
다음과 같은 비디오 플레이어를 만들어 보자.
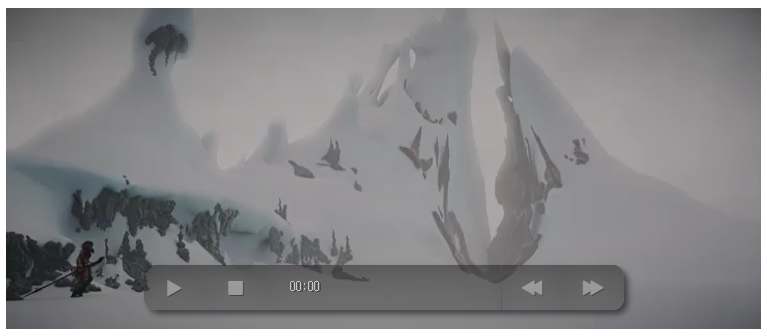
Getting started
Exploring the HTML
<div class="player">
  <video controls>
    <source src="video/sintel-short.mp4" type="video/mp4" />
    <source src="video/sintel-short.webm" type="video/webm" />
    <!-- fallback content here -->
  </video>
  <div class="controls">
    <button class="play" data-icon="P" aria-label="play pause toggle"></button>
    <button class="stop" data-icon="S" aria-label="stop"></button>
    <div class="timer">
      <div></div>
      <span aria-label="timer">00:00</span>
    </div>
    <button class="rwd" data-icon="B" aria-label="rewind"></button>
    <button class="fwd" data-icon="F" aria-label="fast forward"></button>
  </div>
</div>- 4개의 버튼을 가진다. (재생/일시정지, 정지, 뒤로 감기, 앞으로 감기)
- 각 버튼에 표시되어야할 아이콘을 정의하기 위해
data-icon어트리뷰트를 사용했다.
그리고 버튼에 읽을 만한 텍스트노드가 없으므로 대신aria-label어트리뷰트를 버튼 설명을 위해 달았다.aria-label어트리뷰트는 스크린 리더에 의해 읽혀진다. - 수평 바를 위한 빈
<div>와 재생 시간을 나타내기 위한<span>를 정의했다.
Exploring the CSS
.controls {
  visibility: hidden;
  opacity: 0.5;
  width: 400px;
  border-radius: 10px;
  position: absolute;
  bottom: 20px;
  left: 50%;
  margin-left: -200px;
  background-color: black;
  box-shadow: 3px 3px 5px black;
  transition: 1s all;
  display: flex;
}

.player:hover .controls,
.player:focus-within .controls {
  opacity: 1;
}- 커스텀 컨트롤 박스의 기본 설정이
hidden이다.
자바스크립트에서 커스텀 컨트롤 박스를visible로 바꾸고 비디오 엘리먼트의controls어트리뷰트를 삭제한다.
이렇게 하는 이유는 자바스크립트 로드가 정상적으로 되지 않았을 때, 사용자가 기본 컨트롤 박스라도 이용하게끔 하기 위함이다.
다음은 버튼 CSS이다.
@font-face {
  font-family: "HeydingsControlsRegular";
  src: url("fonts/heydings_controls-webfont.eot");
  src: url("fonts/heydings_controls-webfont.eot?#iefix") format("embedded-opentype"),
    url("fonts/heydings_controls-webfont.woff") format("woff"),
    url("fonts/heydings_controls-webfont.ttf") format("truetype");
  font-weight: normal;
  font-style: normal;
}

button:before {
  font-family: HeydingsControlsRegular;
  font-size: 20px;
  position: relative;
  content: attr(data-icon);
  color: #aaa;
  text-shadow: 1px 1px 0px black;
}
커스텀 웹 폰트를 이용하기 위해 @font-face 를 사용했다.
이 폰트는 icon font이다.
content프로퍼티를 사용하여 각 버튼에 표시할 텍스트를 data-icon 프로퍼티의 값과 동일하게 설정한다.
아이콘 폰트는 이미지 파일로 아이콘을 다운로드할 필요가 없고 확장성이 뛰어나며 텍스트를 대상으로하는 프로퍼티를 사용하여 스타일을 지정할 수 있기 때문에 HTTP 요청을 줄일 수 있다는 장점을 갖고 있다.
attr()CSS 함수는 선택한 엘리먼트의 어트리뷰트 값을 검색하여 스타일시트에서 사용하는 데 사용된다.
pseudo-elements에 사용할 수도 있으며, 이 경우 pseudo-elements의 원래 엘리먼트에 대한 어트리뷰트 값이 반환된다.
content프로퍼티에 사용되며,content외의 프로퍼티에도 기본적으로 사용될 수 있지만 아직까지는 실험적으로 지원되고 있다.
다음은 타이머 CSS이다.
.timer {
  line-height: 38px;
  font-size: 10px;
  font-family: monospace;
  text-shadow: 1px 1px 0px black;
  color: white;
  flex: 5;
  position: relative;
}

.timer div {
  position: absolute;
  background-color: rgba(255, 255, 255, 0.2);
  left: 0;
  top: 0;
  width: 0;
  height: 38px;
  z-index: 2;
}

.timer span {
  position: absolute;
  z-index: 3;
  left: 19px;
}
Implementing the JavaScript
const media = document.querySelector('video');
const controls = document.querySelector('.controls');

const play = document.querySelector('.play');
const stop = document.querySelector('.stop');
const rwd = document.querySelector('.rwd');
const fwd = document.querySelector('.fwd');

const timerWrapper = document.querySelector('.timer');
const timer = document.querySelector('.timer span');
const timerBar = document.querySelector('.timer div');

media.removeAttribute('controls');
controls.style.visibility = 'visible';

play.addEventListener('click', playPauseMedia);
function playPauseMedia() {
  if (media.paused) {
    play.setAttribute('data-icon','u');
    media.play();
  } else {
    play.setAttribute('data-icon','P');
    media.pause();
  }
}
stop.addEventListener('click', stopMedia);
media.addEventListener('ended', stopMedia);
function stopMedia() {
  rwd.classList.remove('active');
  fwd.classList.remove('active');
  clearInterval(intervalRwd);
  clearInterval(intervalFwd);
  media.pause();
  media.currentTime = 0;
  play.setAttribute('data-icon','P');
}
rwd.addEventListener('click', mediaBackward);
fwd.addEventListener('click', mediaForward);
let intervalFwd;
let intervalRwd;

function mediaBackward() {
  clearInterval(intervalFwd);
  fwd.classList.remove('active');

  if (rwd.classList.contains('active')) {
    rwd.classList.remove('active');
    clearInterval(intervalRwd);
    media.play();
  } else {
    rwd.classList.add('active');
    media.pause();
    intervalRwd = setInterval(windBackward, 200);
  }
}

function mediaForward() {
  clearInterval(intervalRwd);
  rwd.classList.remove('active');

  if (fwd.classList.contains('active')) {
    fwd.classList.remove('active');
    clearInterval(intervalFwd);
    media.play();
  } else {
    fwd.classList.add('active');
    media.pause();
    intervalFwd = setInterval(windForward, 200);
  }
}
function windBackward() {
  if (media.currentTime <= 3) {
    rwd.classList.remove('active');
    clearInterval(intervalRwd);
    stopMedia();
  } else {
    media.currentTime -= 3;
  }
}

function windForward() {
  if (media.currentTime >= media.duration - 3) {
    fwd.classList.remove('active');
    clearInterval(intervalFwd);
    stopMedia();
  } else {
    media.currentTime += 3;
  }
}

media.addEventListener('timeupdate', setTime);
function setTime() {
  const minutes = Math.floor(media.currentTime / 60);
  const seconds = Math.floor(media.currentTime - minutes * 60);

  const minuteValue = minutes.toString().padStart(2, '0');
  const secondValue = seconds.toString().padStart(2, '0');

  const mediaTime = `${minuteValue}:${secondValue}`;
  timer.textContent = mediaTime;

  const barLength = timerWrapper.clientWidth * (media.currentTime/media.duration);
  timerBar.style.width = `${barLength}px`;
}- 마지막 부분에
timeupdate이벤트를 사용했는데, 이 이벤트가 실행되는 빈도는 브라우저, CPU, 파워 등에 따라 달라지지만 크게 신경쓰지 않아도 된다.

프론트에_가까운_풀스택_개발자