Node.js로 웹 서버 만들기
const http = require("http");
const fs = require("fs");
const path = require("path");
const PORT = 8081;

const app = http.createServer((request, response) => {
  let url = request.url;
  if (url === "/") {
    url = "index.html";
  }
  if (url === "/favicon.ico") {
    return response.writeHead(404);
  }
  response.writeHead(200);
  response.end(fs.readFileSync(path.join(__dirname, url)));
});
app.listen(PORT, () => {
  console.log(`http://localhost:${PORT}`);
});
createServer() 메서드는 서버를 만들고 서버에 자동으로 requestListener 를 달아준다.
createServer() 의 매개변수로 전달된 콜백 함수가 바로 requestListener 이다.
URL의 이해
const http = require("node:http");
const fs = require("node:fs");
const path = require("node:path");
const url = require("node:url");
const PORT = 8081;

const app = http.createServer((request, response) => {
  const myUrl = new url.URL(request.url, `http://${request.headers.host}`);
  let curPath = myUrl.pathname;
  const params = myUrl.searchParams.toString();
  if (curPath === "/") {
    curPath = "index.html";
  } else if (curPath === "/favicon.ico") {
    return response.writeHead(404);
  }
  response.writeHead(200);
  //   response.end(fs.readFileSync(path.join(__dirname, curPath)));
  response.end(params);
});
app.listen(PORT, () => {
  console.log(`http://localhost:${PORT}`);
});
클라이언트가 어떤 url로 접근하는지는 request 객체에 있을 것이다.
아니나 다를까 request.url에 그 정보가 담겨있다.
이 url 문자열을 원하는 정보로 파싱해주는 노드 모듈을 사용하자.
node.js의 기본모듈을 import 할 땐 모듈명 앞에 node: 를 붙여서 가져올 수 있다.
물론 안해도 되지만 만약 외부 모듈과 노드 모듈의 이름이 같을 경우엔 node: 를 붙여서 구분해야 한다.
url모듈엔 URL 클래스가 있다.
URL 클래스로 protocol, host, pathname 등을 파싱할 수 있으며
searchParams() 메서드로 URLSearchParams 인스턴스를 생성할 수 있다.
URLSearchParams 클래스는 url 파라미터를 파싱해주는 클래스이다.
동적인 웹페이지 만들기
const http = require("node:http");
const fs = require("node:fs");
const path = require("node:path");
const url = require("node:url");
const PORT = 8081;

const app = http.createServer((request, response) => {
  const myUrl = new url.URL(request.url, `http://${request.headers.host}`);
  const params = myUrl.searchParams;
  const curPath = myUrl.pathname;
  if (curPath === "/") {
    const title = "메인 페이지";
    const content = params.get("id") ?? "메인 ID";
    response.writeHead(200);
    const template = `<!DOCTYPE html>
    <html lang="en">
      <head>
        <meta charset="UTF-8" />
        <meta http-equiv="X-UA-Compatible" content="IE=edge" />
        <meta name="viewport" content="width=device-width, initial-scale=1.0" />
        <title>${title}</title>
      </head>
      <body>
        <h1>ID : ${content}</h1>
      </body>
    </html>`;
    response.end(template);
  } else {
    return response.writeHead(404);
  }
});
app.listen(PORT, () => {
  console.log(`http://localhost:${PORT}`);
});
URLSearchParams 클래스로 url 파라미터중에 id를 파싱하여 id별로 다른 페이지를 출력했다.
단, pathname은 / 로 동일하다고 가정했다.
파일을 이용해 페이지 구현
const http = require("node:http");
const fs = require("node:fs");
const path = require("node:path");
const url = require("node:url");
const PORT = 8081;

const app = http.createServer((request, response) => {
  const myUrl = new url.URL(request.url, `http://${request.headers.host}`);
  const params = myUrl.searchParams;
  const curPath = myUrl.pathname;
  if (curPath === "/") {
    const title = "메인 페이지";
    fs.readFile("./sample.txt", { encoding: "utf-8" }, function (err, content) {
      const template = `<!DOCTYPE html>
        <html lang="en">
          <head>
            <meta charset="UTF-8" />
            <meta http-equiv="X-UA-Compatible" content="IE=edge" />
            <meta name="viewport" content="width=device-width, initial-scale=1.0" />
            <title>${title}</title>
          </head>
          <body>
            ${content}
          </body>
        </html>`;
      response.writeHead(200);
      response.end(template);
    });
  } else {
    return response.writeHead(404);
  }
});
app.listen(PORT, () => {
  console.log(`http://localhost:${PORT}`);
});
fs.readFile 로 sample.txt파일을 읽어들여 content 파라미터에 파일 내용을 넣었다.
위에서 사용한 fs.readFile 은 callback APi이지만 동기, 비동기용으로 제공되는 메서드들도 있다.
다음은 동기용 메서드이다.
const content = fs.readFileSync("./sample.txt", { encoding: "utf-8" })비동기인 프로미스용 메서드를 사용하려면 프로미스용 모듈을 가져와야 한다.
const { readFile } = require("node:fs/promises");
readFile("./sample.txt", { encoding: "utf8" })
  .then((content) => {
  const template = `<!DOCTYPE html>
    <html lang="en">
    <head>
    <meta charset="UTF-8" />
    <meta http-equiv="X-UA-Compatible" content="IE=edge" />
    <meta name="viewport" content="width=device-width, initial-scale=1.0" />
    <title>${title}</title>
    </head>
    <body>
    ${content}
    </body>
    </html>`;
  response.writeHead(200);
  response.end(template);
})
  .catch((err) => {
  response.writeHead(404);
  response.end(err);
});
Not Found 구현
const http = require("node:http");
const fs = require("node:fs");
const path = require("node:path");
const url = require("node:url");
const PORT = 8081;

const app = http.createServer((request, response) => {
  const myUrl = new url.URL(request.url, `http://${request.headers.host}`);
  const curPath = myUrl.pathname;
  if (curPath === "/") {
    const params = myUrl.searchParams;
    fs.readFile(
      `data/${params.get("id") ?? "1"}`,
      { encoding: "utf-8" },
      function (err, content) {
        if (err) {
          response.writeHead(404);
          return response.end("Not Fount");
        }
        const template = `<!DOCTYPE html>
        <html lang="en">
          <head>
            <meta charset="UTF-8" />
            <meta http-equiv="X-UA-Compatible" content="IE=edge" />
            <meta name="viewport" content="width=device-width, initial-scale=1.0" />
            <title>메인페이지</title>
          </head>
          <body>
            ${content}
          </body>
        </html>`;
        response.writeHead(200);
        response.end(template);
      }
    );
  } else {
    response.writeHead(404);
    response.end("Not Fount");
  }
});
app.listen(PORT, () => {
  console.log(`http://localhost:${PORT}`);
});
pathname이 / 가 아닌 경우 Not Found를 출력한다.
id 파라미터가 없을 경우엔 기본 값으로 1을 지정하고 id 파라미터가 있을 경우 data폴더 내의 파일을 읽어들여와 출력한다.
해당 파일이 없을 경우도 Not Found를 출력한다.
form 페이지 만들기
const http = require("node:http");
const path = require("node:path");
const url = require("node:url");
const PORT = 8081;

function templateHTML(title, content) {
  return `<!DOCTYPE html>
    <html lang="en">
      <head>
        <meta charset="UTF-8" />
        <meta http-equiv="X-UA-Compatible" content="IE=edge" />
        <meta name="viewport" content="width=device-width, initial-scale=1.0" />
        <title>${title}</title>
      </head>
      <body>
        ${content}
      </body>
    </html>
    `;
}

const app = http.createServer((request, response) => {
  const myUrl = new url.URL(request.url, `http://${request.headers.host}`);
  const curPath = myUrl.pathname;
  console.log(curPath);
  if (curPath === "/") {
    const title = "메인";
    const content = `<h1>메인 화면</h1><a href="/create">이동</a>`;
    response.writeHead(200);
    response.end(templateHTML(title, content));
  } else if (curPath === "/create") {
    const title = "FORM";
    const content = `<form action="/created_data">
    <input type="text" name="title" id="title">
    <textarea name="description" id="description"></textarea>
    <button>전송</button>
  </form>`;
    response.writeHead(200);
    response.end(templateHTML(title, content));
  } else if (curPath === "/created_data") {
    response.writeHead(200);
    response.end(`<h1>Finished</h1><a href='/'>HOME</a>`);
  } else {
    response.writeHead(404);
    response.end("Not Found");
  }
});
app.listen(PORT, () => {
  console.log(`http://localhost:${PORT}`);
});
HTML 템플릿을 리턴하는 함수를 만들어서 코드를 정리했다.
또한 다음과 같이 navigate 버튼을 3개를 만들었다.
- 메인 화면(/) -> 폼 화면(/create)
- 폼 화면(/create) -> 폼 결과 화면(/created_data)
- 폼 결과 화면(/created_data) -> 메인 화면(/)
GET 정보 받기
const http = require("node:http");
const path = require("node:path");
const url = require("node:url");
const PORT = 8081;

function templateHTML(title, content) {
  return `<!DOCTYPE html>
    <html lang="en">
      <head>
        <meta charset="UTF-8" />
        <meta http-equiv="X-UA-Compatible" content="IE=edge" />
        <meta name="viewport" content="width=device-width, initial-scale=1.0" />
        <title>${title}</title>
      </head>
      <body>
        ${content}
      </body>
    </html>
    `;
}

const app = http.createServer((request, response) => {
  const myUrl = new url.URL(request.url, `http://${request.headers.host}`);
  const curPath = myUrl.pathname;
  console.log(curPath);
  if (curPath === "/") {
    const title = "메인";
    const content = `<h1>메인 화면</h1><a href="/create">이동</a>`;
    response.writeHead(200);
    response.end(templateHTML(title, content));
  } else if (curPath === "/create") {
    const title = "FORM";
    const content = `<form action="/created_data">
    <input type="text" name="title" id="title">
    <textarea name="description" id="description"></textarea>
    <button>전송</button>
  </form>`;
    response.writeHead(200);
    response.end(templateHTML(title, content));
  } else if (curPath === "/created_data") {
    for (const entry of myUrl.searchParams.entries()) {
      console.log(entry);
    }
    response.writeHead(200);
    response.end(`<h1>Finished</h1><a href='/'>HOME</a>`);
  } else {
    response.writeHead(404);
    response.end("Not Found");
  }
});
app.listen(PORT, () => {
  console.log(`http://localhost:${PORT}`);
});
URLSearchParams 클래스를 이용해서 url query를 파싱했다.
for (const entry of myUrl.searchParams.entries()) {
  console.log(entry);
}
이 부분이다.
input 박스에 "aa", textarea 박스에 "bb" 를 입력한뒤 전송버튼을 클릭하면
서버에 다음과 같이 출력된다.
[ 'title', 'aa' ]
[ 'description', 'bb' ]
POST 정보 받기
const server = http.createServer((request, response) => {});POST 데이터도 결국 클라이언트로부터 오는 데이터이니 어떤 식으로든 request에 있을 것이다.
따라서 위 코드의 request 객체를 샅샅히 뒤져보자.
출발은 createServer() 메서드이다.
공식 문서에 따르면 createServer() 메서드의 정식 사용 문법은
http.createServer([options][, requestListener]) 이며,
createServer() 호출 시 server 객체에 request event의 리스너로 requestListener를 자동으로 달아준다고 한다.
즉, 위의 코드는 아래와 같다.
const server = http.createServer();
server.on('request', (resquest, response)=>{});
request 이벤트를 보자.

request 매개변수를 찾았다.
request 알고보니 http.IncomingMessage 객체였던 것이다.
위에서 사용한 request.url 도 사실은 이 객체의 속성이다.
그런데 이 객체의 이벤트 및 속성 및 메서드 어느것을 보더라도 post 데이터를 가져올 수 없다.
혹시 이 객체는 다른 클래스로부터 상속받은 놈일까?
맞다.
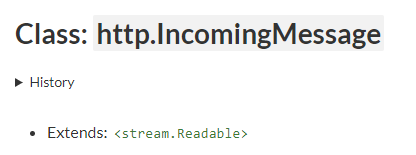
stream.Readable 클래스로 가보자.
스트림을 읽어들이는 객체이다.
아래는 이 객체를 이용해서 txt파일을 gz파일로 압축하는 코드이다.
const fs = require('node:fs');
const zlib = require('node:zlib');
const r = fs.createReadStream('file.txt');
const z = zlib.createGzip();
const w = fs.createWriteStream('file.txt.gz');
r.pipe(z).pipe(w);
createReadStream()메서드의 결과값으로stream.Readable객체가 생성된다.
마찬가지로createWriteStream()메서드의 결과값으로stream.Writable객체가 생성된다.
그리고 그 두 스트림객체를pipe()메서드로 연결했다.
stream.Readable 객체를 살펴보니 data 이벤트와 end 이벤트가 있다.
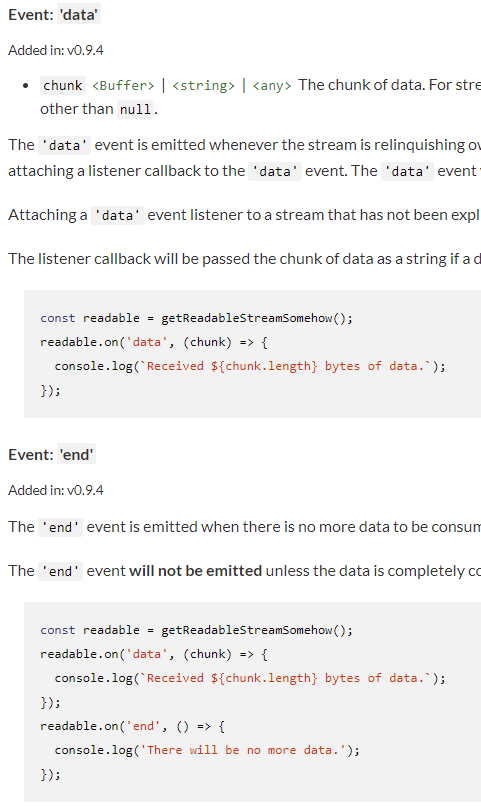
stream.Readable 객체가 데이터를 읽어들일때마다 data 이벤트가 발생된다.
data 이벤트에 리스너를 다는 것과 data 이벤트를 발생시키는 것은 다른문제다.
하지만 공식문서에 보면 data 이벤트에 리스너를 다는 즉시 data 이벤트가 발생된다고 한다.
또한 전달할 데이터가 남아있는 경우, 자동으로 data 이벤트를 발생한다.
뿐만 아니라 여러 메서드들의 호출로 data 이벤트의 발생및 중지할 수 있으니 궁금하면 공식문서를 읽어보자.
멀리 돌아 왔지만, 원래의 목적은 POST 데이터를 받는 것이다.
다음과 같이 작성할 수 있다.
let body = "";
request.on("data", (data) => {
  body += data;
});
request.on("end", () => {
  console.log(body);
});
input 박스에 "aa", textarea 박스에 "bb"를 입력하면 다음과 같이 출력된다.
title=aa&description=bb
이 문자열을 파싱하기 위해 노드의 기본 모듈인 querystring을 사용하면 된다.
const http = require("node:http");
const path = require("node:path");
const url = require("node:url");
const qs = require("node:querystring");
const PORT = 8081;

function templateHTML(title, content) {
  return `<!DOCTYPE html>
    <html lang="en">
      <head>
        <meta charset="UTF-8" />
        <meta http-equiv="X-UA-Compatible" content="IE=edge" />
        <meta name="viewport" content="width=device-width, initial-scale=1.0" />
        <title>${title}</title>
      </head>
      <body>
        ${content}
      </body>
    </html>
    `;
}

const app = http.createServer((request, response) => {
  const myUrl = new url.URL(request.url, `http://${request.headers.host}`);
  const curPath = myUrl.pathname;
  console.log(curPath);
  if (curPath === "/") {
    const title = "메인";
    const content = `<h1>메인 화면</h1><a href="/create">이동</a>`;
    response.writeHead(200);
    response.end(templateHTML(title, content));
  } else if (curPath === "/create") {
    const title = "FORM";
    const content = `<form action="/created_data" method="post">
    <input type="text" name="title" id="title">
    <textarea name="description" id="description"></textarea>
    <button>전송</button>
  </form>`;
    response.writeHead(200);
    response.end(templateHTML(title, content));
  } else if (curPath === "/created_data") {
    let body = "";
    request.on("data", (data) => {
      body += data;
    });
    request.on("end", () => {
      const post = qs.parse(body);
      console.log(post);
    });
    response.writeHead(200);
    response.end(`<h1>Finished</h1><a href='/'>HOME</a>`);
  } else {
    response.writeHead(404);
    response.end("Not Found");
  }
});
app.listen(PORT, () => {
  console.log(`http://localhost:${PORT}`);
});
입력정보에 대한 보안
사용자가 입력하는 데이터는 항상 의심해야 한다.
다음의 코드를 보자.
const id = myUrl.searchParams.get("title");
const text = fs.readFileSync(`${id}`, { encoding: "utf-8" });
response.writeHead(200);
response.end(text);
id 파라미터에 따라 다른 외부 데이터를 읽어와서 출력해주는 코드이다.
만약 id 에 .env 를 입력했다면?
.env 파일을 열어 환경변수 내용이 출력된다.
id 에 ../../파일명 을 입력한다면 해당 파일이 출력된다.
이를 방지하기 위해서 사용자가 입력하는 데이터엔 항상 후처리가 필요하다.
../../파일명->파일명
ex) path 모듈의parse()메서드를 사용해서 반환된 객체의base키를 사용하자.파일명->특정 파일명
ex) 접근 가능한 파일들에 액세스할 수 있는 인터페이스를 만들고, 그 인터페이스를 노출하자.
출력정보에 대한 보안
출력정보를 통해 보안이 뚫릴수도 있다.
예를 들어보자.
다음의 코드는 input 박스와 textarea 박스에 데이터를 입력하고 제출하면 데이터가 생성되고 생성된 데이터를 출력해주는 코드이다.
let body = "";
request.on("data", (data) => {
  body += data;
});
request.on("end", () => {
  post = qs.parse(body);
  const { title, description } = post;
  console.log(title, description);
  response.end(`<h1>${title}</h1><p>${description}</p>`);
});
response.writeHead(200);
만약 위와 같이 textarea에 자바스크립트 코드를 입력한 뒤 제출하게되면 description 변수에는 자바스크립트 코드 문자열이 들어가게 되고 앞으로 서버에서 description 변수를 브라우저에 보낼때마다 브라우저는 문자열로 인식하지 않고 자바스크립트 코드로 인식해서 실행시킨다.
description 이 출력되는 페이지에 사용자가 접근하려고 하면 문제가 발생한다.
alert() 정도는 애교지만, location.href="특정 url" 로 원하는 url로 리다이렉트시킬 수도 있고 사용자 정보도 빼갈 수 있다.
이러한 공격기법을 XSS(Cross-site scripting)이라고 한다.
한마디로 악의적인 사용자가 공격하려는 사이트에 스크립트를 넣는 기법을 말한다.
해결 방법으로는 다음과 같다.
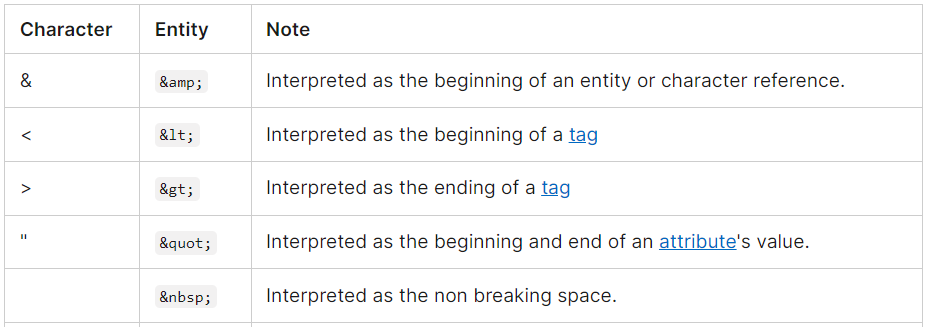
- 사용자가 입력하는 문자열 중
<script>태그를 없앤다. <script>를 HTML Entity를 이용해서 코드가 아닌 문자열 그대로 출력하게 한다.HTML Entity란?
이러한 문제는 나만 겪는게 아니라 모든 개발자가 겪는 문제이다.
따라서 다른 개발자들이 여러 해결책을 내놓았고 그 중 하나를 가져와서 사용하자.
sanitize-html 모듈은 위의 해결책 중에 첫 번째 방법을 사용해서 문제를 해결해준다.
간단한 사용법은 아래와 같다.
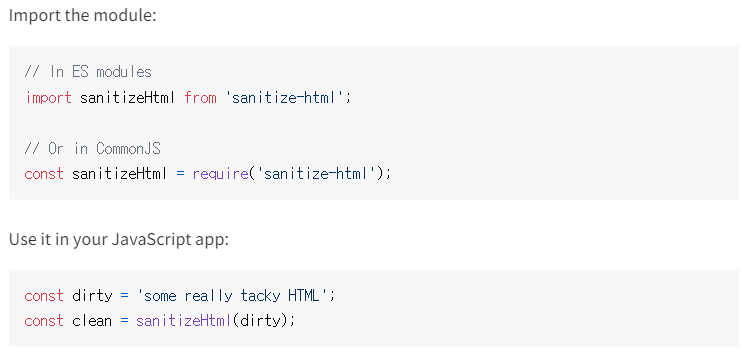
코드에 적용해보자.
const sanitizeHtml = require("sanitize-html");
let body = "";
request.on("data", (data) => {
  body += data;
});
request.on("end", () => {
  post = qs.parse(body);
  const { title, description } = post;
  const sanitizedTitle = sanitizeHtml(title);
  const sanitizedDescription = sanitizeHtml(description);
  response.end(`<h1>${sanitizedTitle}</h1><p>${sanitizedDescription}</p>`);
});
response.writeHead(200);
response.write(`<h1>Finished</h1><a href='/'>HOME</a>`);
이제 악의적인 코드를 심어보자.


<h3> 는 남아있지만 <script> 는 사라졌다.
<h3> 의 태그만 없애고 content만 남아있도록 커스텀할 수도 있다.
그런 디테일한 동작은 모듈의 공식 사용법을 읽어보도록 하자.
[참고자료] : 생활코딩 유튜브
