Master1
--- Master ---
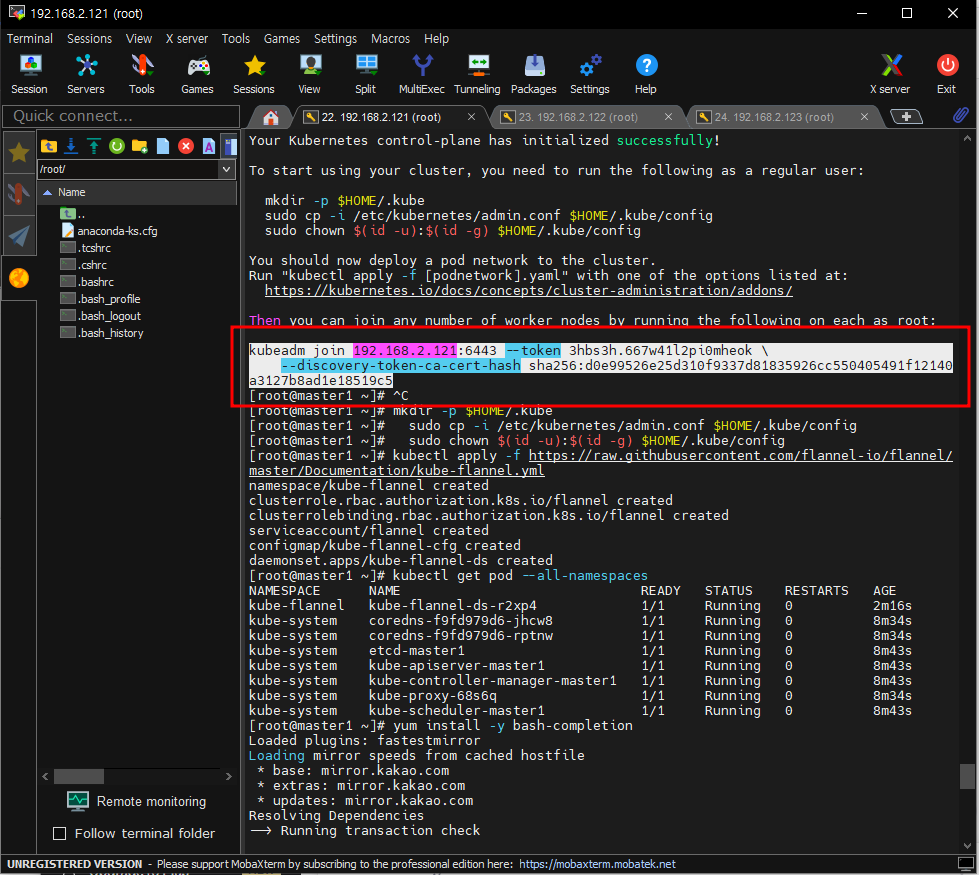
# kubeadm init --apiserver-advertise-address=192.168.2.121 --pod-network-cidr=10.244.0.0/16
보편적인 ip?
# mkdir -p $HOME/.kube
# cp -i /etc/kubernetes/admin.conf $HOME/.kube/config
# chown $(id -u):$(id -g) $HOME/.kube/config
# kubectl apply -f https://raw.githubusercontent.com/flannel-io/flannel/master/Documentation/kube-flannel.yml
# kubectl get pods --all-namespaces
# yum install -y bash-completion
# source <(kubectl completion bash)
# echo "source <(kubectl completion bash)" >> ~/.bashrc
# exit-
위로올라가서 이거 찾고 worker1, worker2에 복사
-
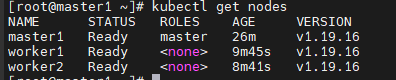
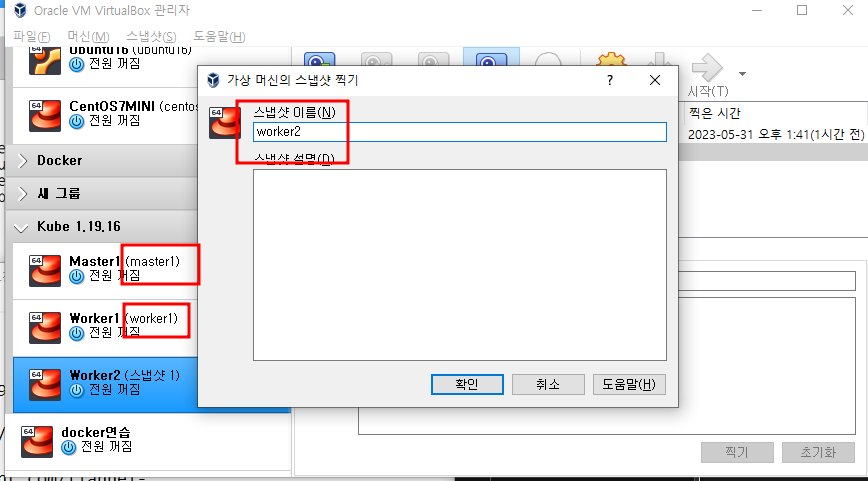
ready 다뜨면 스냅샷 찍기
master1
mkdir workspace && cd $_
kubectl get namespaces
kubectl create namespace eeapbh
kubectl run nginx-pod -n eeapbh --image=halilinux/web-site:aws
kubectl get pod
kubectl get pod -n eeapbh
kubectl get pod -o wide -n eeapbh
kubectl get pod -o wide -n eeapbh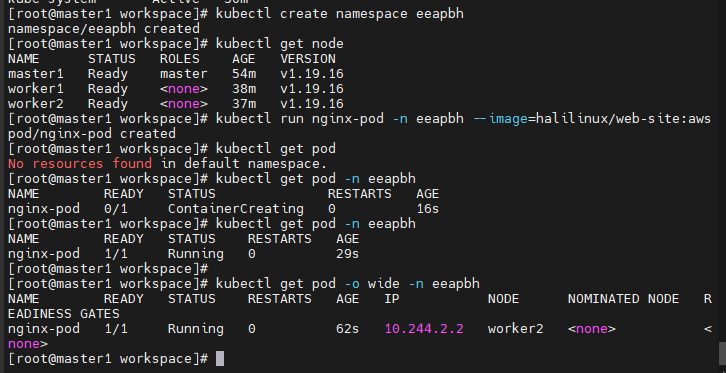
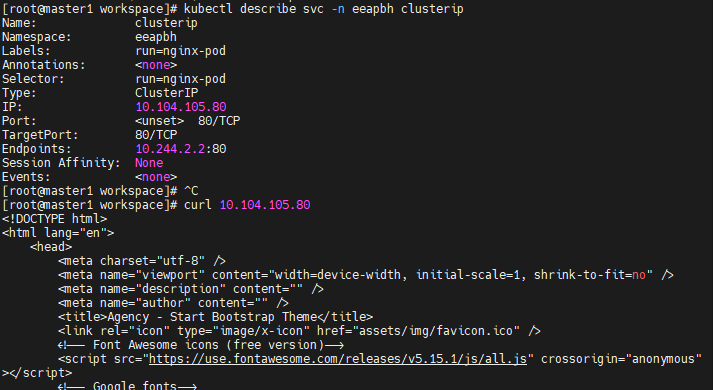
kubectl expose pod nginx-pod -n eeapbh --name clusterip --type=ClusterIP --port 80

kubectl describe svc -n eeapbh clusterip
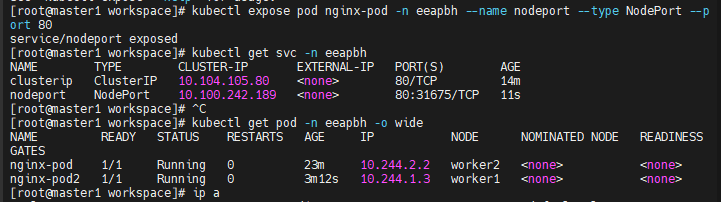
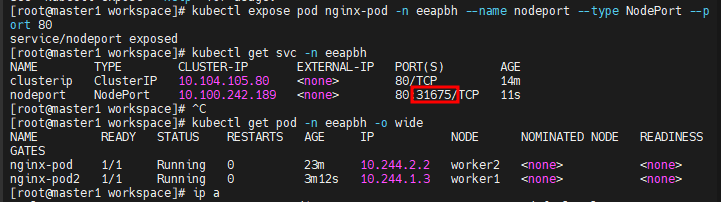
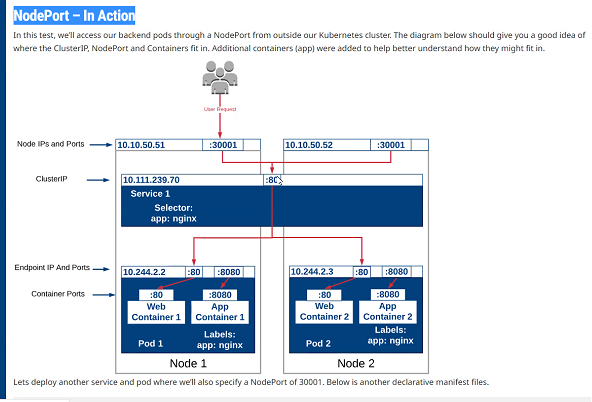
kubectl expose pod nginx-pod -n eeapbh --name nodeport --type NodePort --port 80

kubectl get svc -n eeapbh
kubectl get pod -n eeapbh -o wide

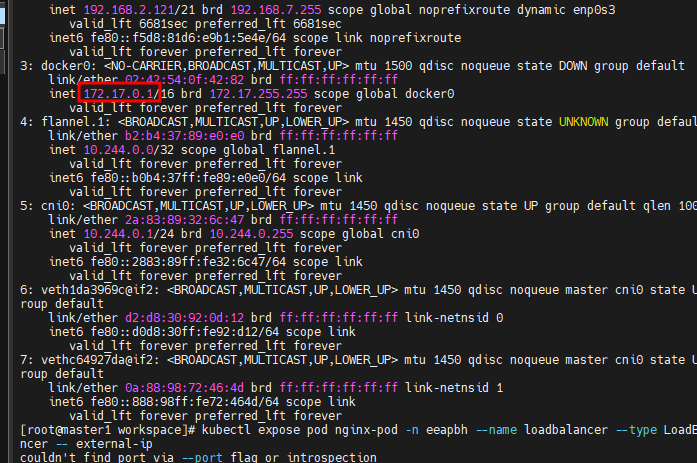
kubectl expose pod nginx-pod -n eeapbh --name loadbalancer --type LoadBalancer --external-ip 192.168.2.121 --port 80-
master1도 worker1, worker2

-
docker의 ip
kubectl -n eeapbh exec -it nginx-pod -- bash- 멀티 노드는 docker ip 안쓴다..?

kubectl get -n eeapbh all
kubectl config current-context
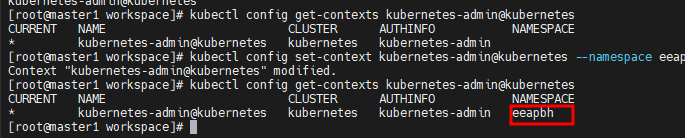
kubectl config get-contexts kubernetes-admin@kubernetes
kubectl config set-context kubernetes-admin@kubernetes --namespace eeapbh # 위에 사진 namespace 정보를 바꿈

kubectl config get-contexts kubernetes-admin@kubernetes
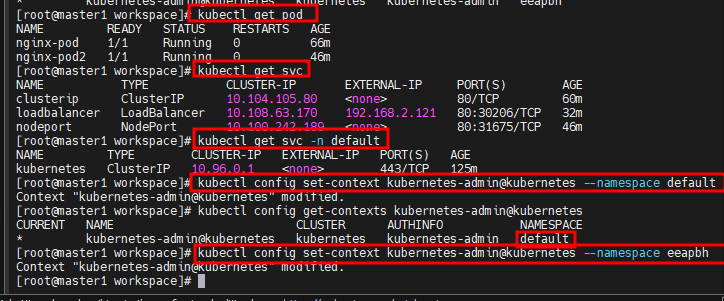
kubectl get pod
kubectl get svc
kubectl get svc -n default

kubectl config set-context kubernetes-admin@kubernetes --namespace default

kubectl config get-contexts kubernetes-admin@kubernetes

kubectl config set-context kubernetes-admin@kubernetes --namespace eeapbh
kubectl exec -it nginx-pod -- bash
exit
kubectl exec -it nginx-pod2 -- bash
kubectl get pod
kubectl exec -it nginx-pod -- sh -c 'echo "<h1>web01</h1>" > /usr/share/nginx/html/index.html'
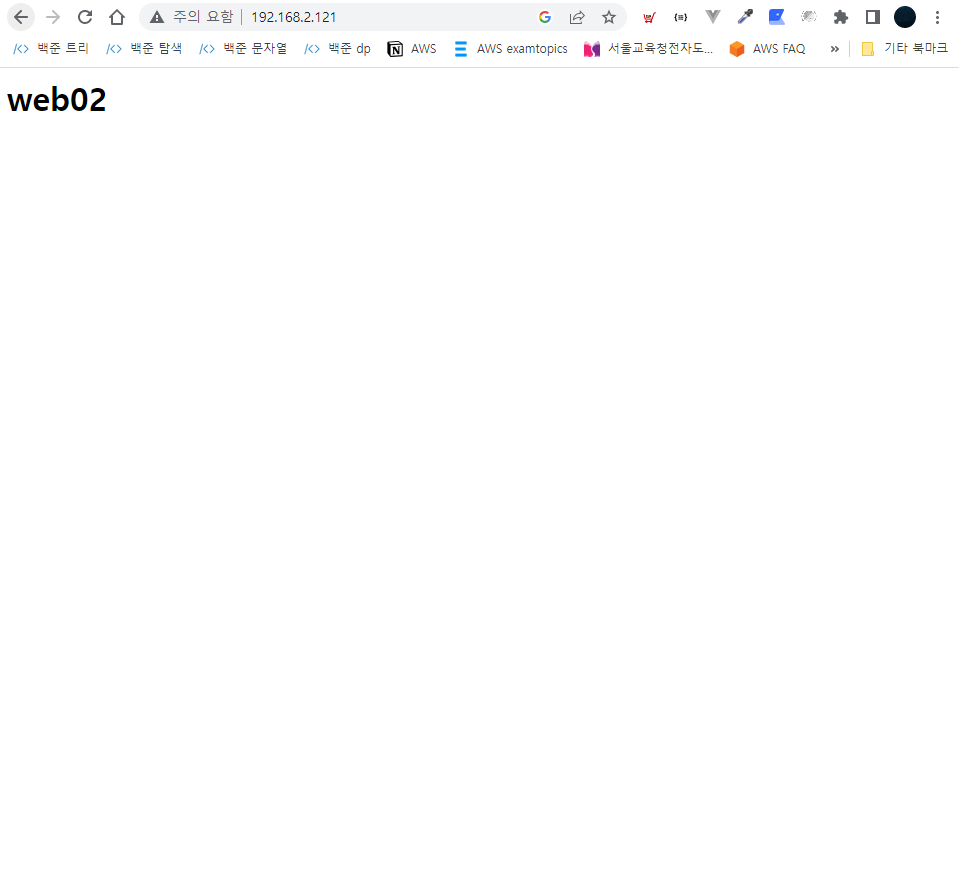
kubectl exec -it nginx-pod2 -- sh -c 'echo "<h1>web02</h1>" > /usr/share/nginx/html/index.html'kubectl exec -it nginx-pod -- cat /usr/share/nginx/html/index.html- 바껴있네..? 그렇다면 이경로가 아니였군,,

kubectl exec -it nginx-pod -- sh -c 'echo "<h1>web01</h1>" > /var/www/html/index.html'

kubectl exec -it nginx-pod2 -- sh -c 'echo "<h1>web02</h1>" > /var/www/html/index.html'- 바뀜

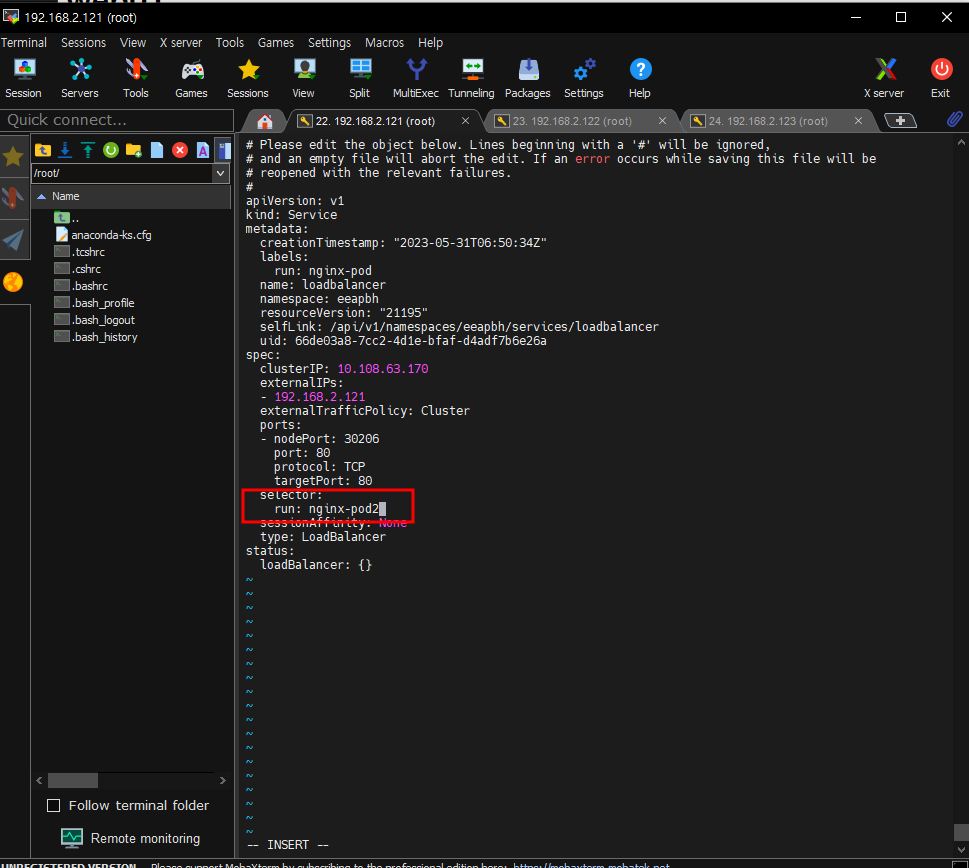
kubectl edit svc

kubectl edit svc loadbalncer
--- Service

# vi nginx-pod.yaml


apiVersion: v1
kind: Pod
metadata:
  namespace: eeapbh
  name: nginx-pod
  labels:
    app: nginx-pod
spec:
  containers:
  - name: nginx-pod-container
    image: nginx
    ports:
    - containerPort: 8080
kubectl delete all --all
kubectl apply -f nginx-pod.yaml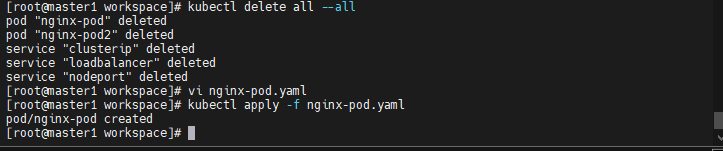
kubectl expose pod nginx-pod --name clusterip --type ClusterIP --port 80
kubectl get svc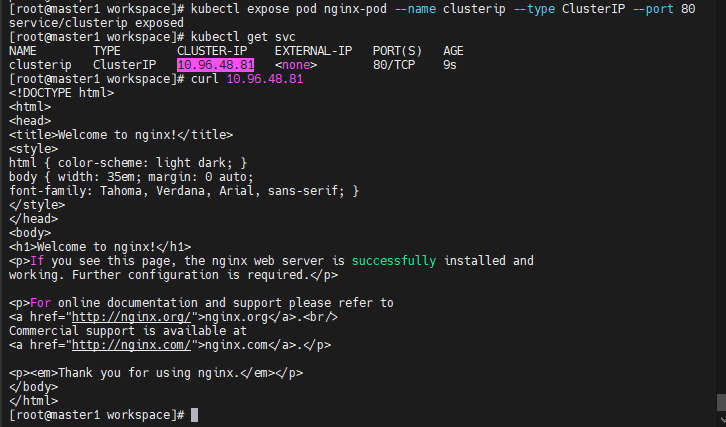
kubectl delete svc clusterip
kubectl expose pod nginx-pod --name clusterip --type ClusterIP  # 이번엔 포트번호를 지워서 ㄱㄱ 만들어진다. 아까 설정한 8080포트로 만들어짐

kubectl delete svc clusterip
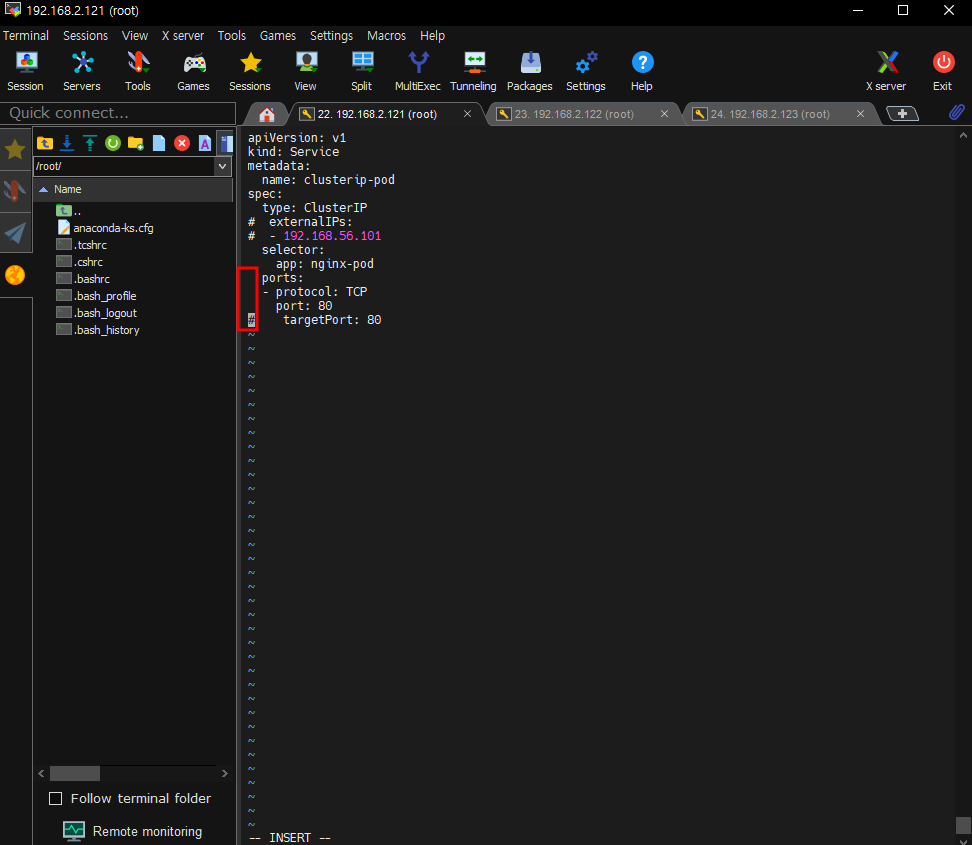
vi clusterip-pod.yaml
apiVersion: v1
kind: Service
metadata:
name: clusterip-pod
spec:
type: ClusterIP
# externalIPs:
# - 192.168.56.101
selector:
app: nginx-pod
ports:
- protocol: TCP
port: 80 <- cluster의 포트
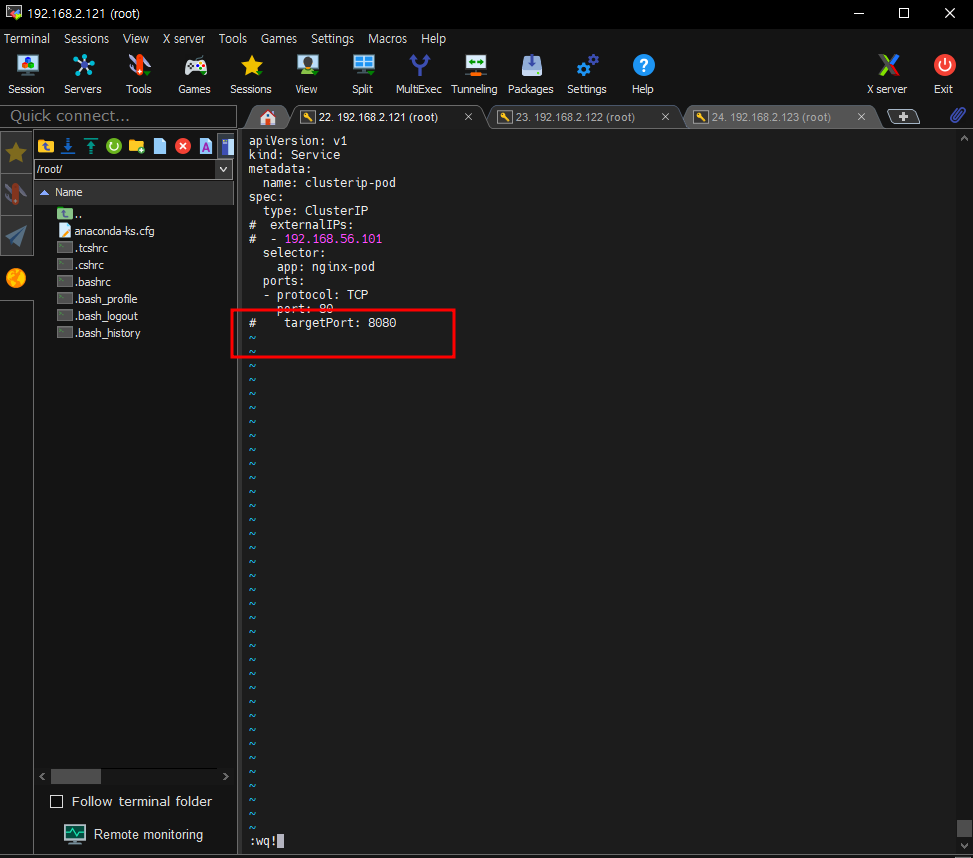
# targetPort: 80 <- 컨테이너의 포트
kubectl apply -f clusterip-pod.yaml-
port 다 주석처리

-
안되넹

yaml 파일 경우에는 ports라는 정보가 들어가야하고 protocol, port 까지는 들어가야한다. 필수!
vi clusterip-pod.yaml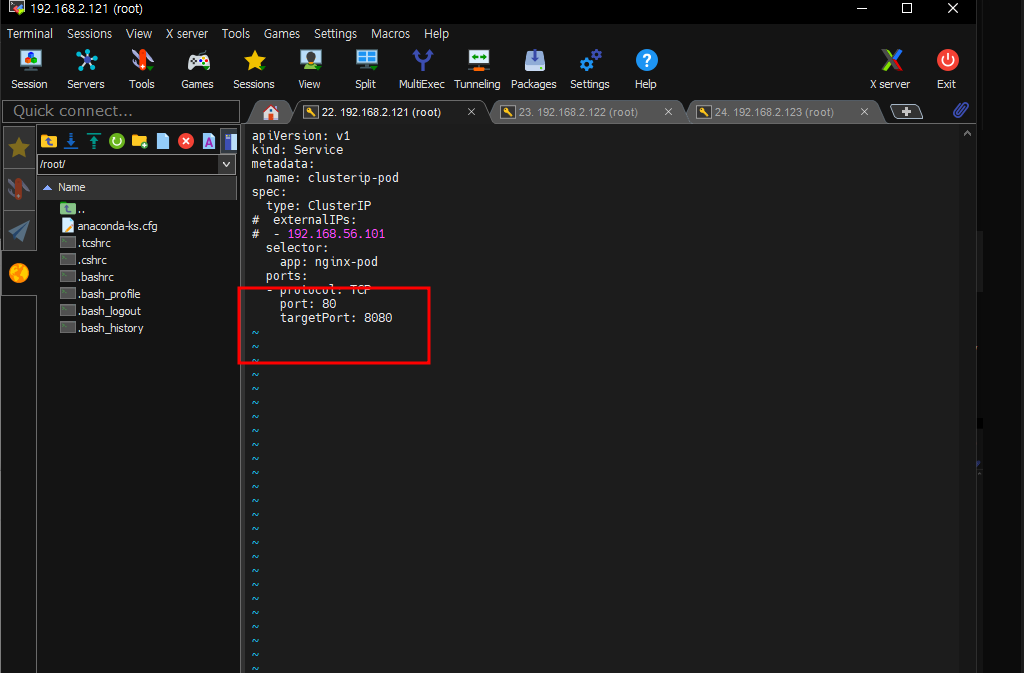
- 굳이 tagetport 8080으로 바꾸면 안됨

kubectl delete svc clusterip

vi clusterip-pod.yaml
kubectl apply -f clusterip-pod.yaml
kubectl get svc

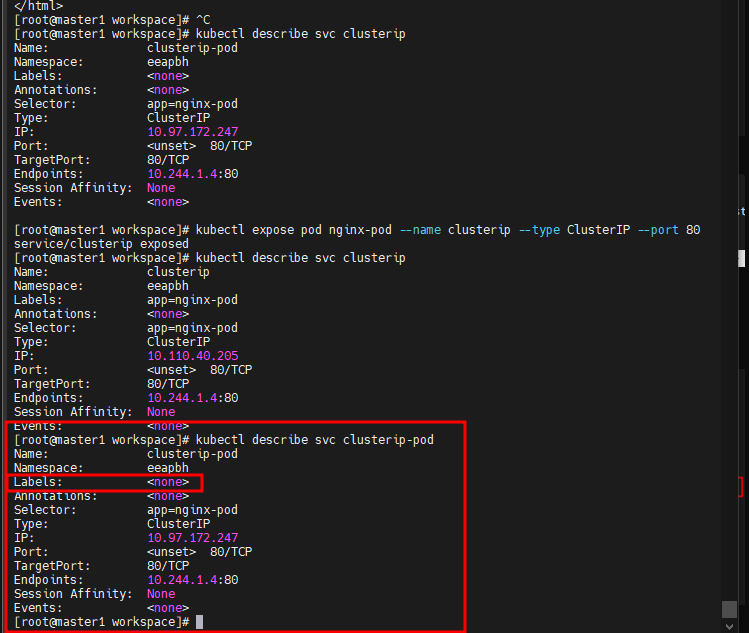
kubectl describe svc clusterip
kubectl expose pod nginx-pod --name clusterip --type ClusterIP --port 80
kubectl describe svc clusterip- 커맨드는 자동으로 라벨이 들어감 pod가 가지고 있는 라벨이다
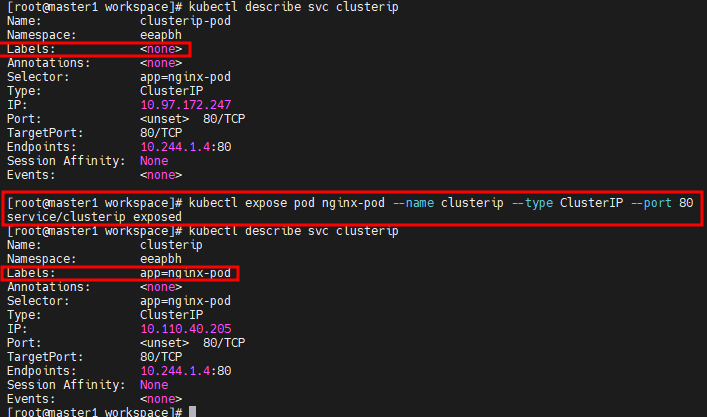
- yaml로 만든애는 라벨없다.