단위 테스트나 빠른 개발 환경을 위해 H2 메모리 데이터베이스를 사용하는 경우가 많습니다.
그래서 프로젝트에 H2를 적용해보겠습니다.
1. Gradle 의존성 추가
먼저 build.gradle.kts 파일에 H2 와 JPA 관련 의존성을 추가해줍니다:
dependencies {
    implementation("com.h2database:h2")
    implementation("org.springframework.boot:spring-boot-starter-data-jpa")
}
2. application.yml 설정
다음으로 application.yml에 H2 설정을 추가해줍니다:
spring:
  application:
    name: 프로젝트 이름
  datasource:
    url: jdbc:h2:mem:testdb
    driver-class-name: org.h2.Driver
    username: sa
    password:
  jpa:
    hibernate:
      ddl-auto: update
    show-sql: true
  h2:
    console:
      enabled: true
      path: /h2-console
jdbc:h2:mem:testdb 에서 mem 은 메모리 기반이라는 뜻이고
앱이 종료되면 데이터도 함께 사라지는 휘발성 데이터베이스입니다.
3. H2 콘솔 접속
애플리케이션을 실행한 뒤 브라우저에서 아래 경로로 접속해봅니다:
http://localhost:8080/h2-console접속 후 아래와 같이 JDBC URL을 jdbc:h2:mem:testdb로 설정하고 Connect 버튼을 누릅니다.
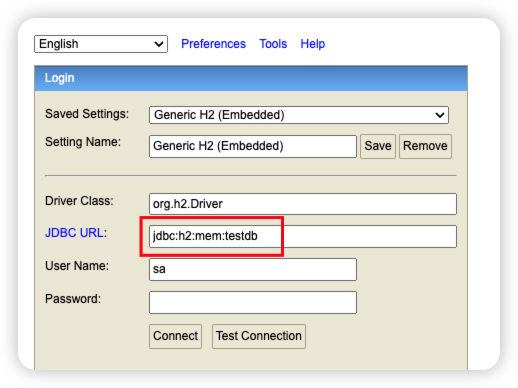
이렇게 콘솔 화면이 잘 뜨는 걸 확인할 수 있습니다:
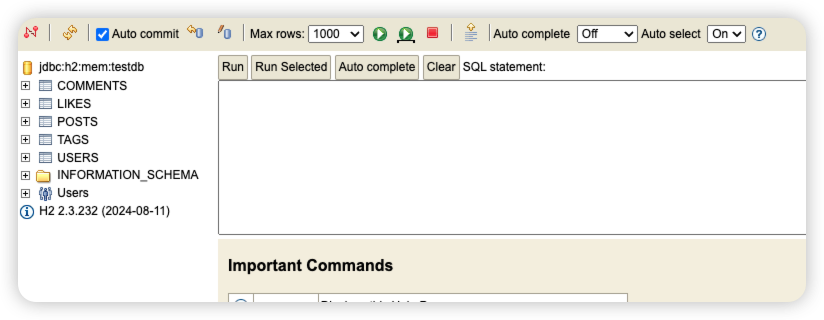
간단한 테스트를 위한 DB 설정이 끝났습니다.