detail 페이지 api 요청은
Article Extractor을 사용하여 뉴스 본문을 추출 -> open ai api를 이용하여 html 태그를 유지하면서 번역 요청 -> 데이터 저장 순으로 진행을 하였다
그 후 뉴스 요약 버튼 클릭시 open ai api를 이용하여 해당 뉴스 내용을 요약 했다
open ai의 model은 gpt-4는 속도가 빠르지만 너무 비싸기 때문에 값이 싸면서 많은 내용을 사용 할수 있는 gpt-3.5-turbo-1106를 선택했다
Article Extractor api 연동
Article Extractor를 이용하여 뉴스의 본문을 추출 하였다
import axios from "axios";

export const useGetExtractor = () => {
  const { postOpenAITrans } = usePostOpenAITrans();

  const getExtractor = async (url) => {
    try {
      // get을 위한 params 및 headers 작성 후 해낭 url 뉴스 데이터 요청
      const params = { url };
      const headers = {
        "X-RapidAPI-Key": process.env.NEXT_PUBLIC_X_RAPID_API_KEY,
        "X-RapidAPI-Host": "article-extractor2.p.rapidapi.com",
      };

      const response = await axios.get(
        "https://article-extractor2.p.rapidapi.com/article/parse",
        { params, headers },
      );

      if (!response.data.data)
        return alert("문제가 발생하였습니다\n잠시 후 다시 시도해 주세요.");

      // 필요한 것만 담기
      const extractorData = {
        title: response.data.data.title,
        content: response.data.data.content,
      };

    } catch (error) {
      if (error instanceof Error) {
        alert("문제가 발생하였습니다\n잠시 후 다시 시도해 주세요.");
      }
    }
  };

  return { getExtractor };
};
이렇게 사용 하였고 결과로는
{
  content: "<article><p>뉴스 본문</p>...</article>..."
  title: "뉴스 제목"
}
이렇게 들어온다
open ai api key 노출 문제
open ai의 api를 연동 하던중 오류가 하나 발생 하였다
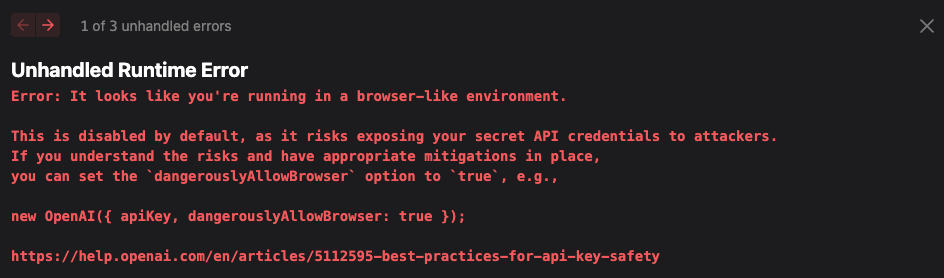
하단에 있는 주소로 들어가 살펴보니 이러한 항목이 있었다
Never deploy your key in client-side environments like browsers or mobile apps.
Exposing your OpenAI API key in client-side environments like browsers or mobile apps allows malicious users to take that key and make requests on your behalf – which may lead to unexpected charges or compromise of certain account data. Requests should always be routed through your own backend server where you can keep your API key secure.
해당 내용은 client-side에서 api를 사용할 경우 api키가 노출된다는 의미였고 확인을 해보기 위해 나와있는 방법대로
import OpenAI from "openai";

const openai = new OpenAI({
  apiKey: process.env.NEXT_PUBLIC_OPENAI_API_KEY,
  dangerouslyAllowBrowser: true,
});
...
const response = await openai.chat.completions.create({
  messages: [{ role: "user", content: "안녕" }],
  model: "gpt-3.5-turbo-1106",
});
위와 같이 dangerouslyAllowBrowser를 추가하여 확인해보니 Request Headers측에

이렇게 api키가 노출되어 있었다
open ai측에서 권고해준 방법대로 client-side에서 사용하지 않기로 했고 next.js의 API Routes를 사용하여 pages/api안에 open ai api를 요청하는 api를 구축 하고 해당 api를 사용하였다
import OpenAI from "openai";

const openai = new OpenAI({ apiKey: process.env.NEXT_PUBLIC_OPENAI_API_KEY });

export default async function (req, res) {
  try {
    const response = await openai.chat.completions.create({
      messages: [
        {
          role: "system",
          content:
            "You are a translator. You have to translate title, contents into Korean with the object type maintained no matter what language the news content is written in, keep the html structure related to the news content, and remove any parts that are not related to the news",
        },

        { role: "user", content: JSON.stringify(req.body.content) },
      ],
      model: "gpt-3.5-turbo-1106",
      temperature: 0.55,
    });

    if (response.choices[0].message.content === null)
      return res
        .status(502)
        .json({ error: "문제가 발생하였습니다\n잠시 후 다시 시도해 주세요." });

    return res
      .status(200)
      .json({ result: JSON.parse(response.choices[0].message.content) });
  } catch (error) {
    if (error instanceof Error) {
      return res.status(500).json({ error: error.message });
    }
  }
}
const response = await axios.post("/api/openAITranslate", {
content: extractorData,
});
이런식으로 사용하여 해결하였다
추가적으로 뉴스 내용을 요약 하는 요청도 content의 값만 변경해서 사용했다
    const response = await openai.chat.completions.create({
      messages: [
        {
          role: "system",
          content:
            "입력받은 해당 뉴스 기사를 간단하게 요약해야한다, 단 요약된 내용만으로 새로운 html태그에 담아서 반환해야한다",
        },
        { role: "user", content: req.body.content },
      ],
      model: "gpt-3.5-turbo-1106",
      temperature: 0.8,
    });
dompurify를 사용하여 xss 공격 방지
받은 데이터는 문자열에 html태그에 담겨 오기 때문에 dangerouslySetInnerHTML을 사용 해야 했고 해당 방식으로 입력시 혹시 모를 Cross Site Scripting(XSS) 공격에 위험이 있다
xss 공격이란 input의 값이나 img의 onError 속성을 이용하여 코드를 실행시켜 서버에 접근하던가 아니면 cookie를 탈취하는 등의 공격을 이다
이러한 공격을 방지해주는 dompurify 라이브러리를 사용했고
import DOMPurify from "dompurify";

...

 <div
 dangerouslySetInnerHTML={{
   __html: DOMPurify.sanitize(detailState[url].content),
 }}
...
이런 방식으로 사용했다
detail 페이지 완료
불러오기

요약하기