구글로그인
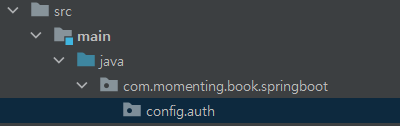
config.auth 패키지 생성
- config.auth 패키지를 생성해 주세요
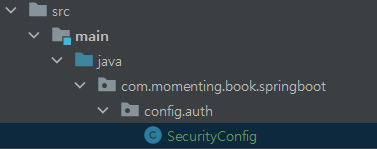
SecurityConfig 클래스 생성 및 작성
- config.auth 패키지에 SecurityConfig 클래스를 생성해 주세요
- 작성
package com.momenting.book.springboot.config.auth;

import com.momenting.book.springboot.domain.user.Role;
import lombok.RequiredArgsConstructor;
import org.springframework.security.config.annotation.web.builders.HttpSecurity;
import org.springframework.security.config.annotation.web.configuration.EnableWebSecurity;
import org.springframework.security.config.annotation.web.configuration.WebSecurityConfigurerAdapter;

@RequiredArgsConstructor
@EnableWebSecurity
public class SecurityConfig extends WebSecurityConfigurerAdapter {

    private final CustomOAuth2UserService customOAuth2UserService;

    @Override
    protected void configure(HttpSecurity http) throws Exception {
        http.csrf().disable().headers().frameOptions().disable()
               	.and()
                    .authorizeRequests()
                    .antMatchers("/", "/css/**", "/images/**", "/js/**", "/h2-console/**").permitAll()
                    .antMatchers("/api/v1/**").hasRole(Role.USER.name())
                    .anyRequest().authenticated()
                .and()
                    .logout() //로그아웃 시 할 일들의 진입점
                        .logoutSuccessUrl("/") //로그아웃 성공시 이동할 URL지정
                .and()
                    .oauth2Login() //OAuth2 로그인 기능에 대한 설정의 진입점
                        .userInfoEndpoint() //OAuth2 로그인 성공 이후 사용자 성보를 가져올때의 설정들을 담당
                            .userService(customOAuth2UserService);
    }
}-
@EnableWebSecurity
Spring Security 설정들을 활성화 시켜주는 어노테이션 -
csrf().disable().headers().frameOptions().disable()
h2-console 화면을 사용하기 위해 해당 옵션들을 disable 합니다. -
authorizeRequests
URL별 권한 관리를 설정하는 옵션의 시작점 authorizeRequests가 선언되어야만 antMatchers 옵션을 사용할 수 있습니다. -
antMatchers
권한 관리 대상을 지정하는 옵션
URL, HTTP 메소드별로 관리가 가능 -
anyRequest
설정한 URL이외의 나머지 URL을 나타냄
CustomOAuth2UserService 클래스 생성 및 작성
-
config.auth 패키지에 CustomOAuth2UserService 클래스 생성해 주세요
-
작성
package com.momenting.book.springboot.config.auth;

import com.momenting.book.springboot.domain.user.User;
import com.momenting.book.springboot.domain.user.UserRepository;
import lombok.RequiredArgsConstructor;
import org.springframework.security.core.authority.SimpleGrantedAuthority;
import org.springframework.security.oauth2.client.userinfo.DefaultOAuth2UserService;
import org.springframework.security.oauth2.client.userinfo.OAuth2UserRequest;
import org.springframework.security.oauth2.client.userinfo.OAuth2UserService;
import org.springframework.security.oauth2.core.OAuth2AuthenticationException;
import org.springframework.security.oauth2.core.user.DefaultOAuth2User;
import org.springframework.security.oauth2.core.user.OAuth2User;
import org.springframework.stereotype.Service;

import javax.servlet.http.HttpSession;
import java.util.Collection;
import java.util.Collections;

@RequiredArgsConstructor
@Service
public class CustomOAuth2UserService implements OAuth2UserService<OAuth2UserRequest, OAuth2User> {
    private final UserRepository userRepository;
    private final HttpSession httpSession;

    @Override
    public OAuth2User loadUser(OAuth2UserRequest userRequest) throws OAuth2AuthenticationException {
        OAuth2UserService<OAuth2UserRequest, OAuth2User> delegate = new DefaultOAuth2UserService();
        OAuth2User oAuth2User = delegate.loadUser(userRequest);

        String registrationId = userRequest.getClientRegistration().getRegistrationId();
        String userNameAttributeName = userRequest.getClientRegistration().getProviderDetails().getUserInfoEndpoint().getUserNameAttributeName();
        OAuthAttributes attributes = OAuthAttributes.of(registrationId, userNameAttributeName, oAuth2User.getAttributes());
        User user = saveOrUpdate(attributes);
        httpSession.setAttribute("user", new SessionUser(user));
        return new DefaultOAuth2User(
                Collections.singleton(new SimpleGrantedAuthority(user.getRoleKey())),
                attributes.getAttributes(),
                attributes.getNameAttributeKey()
        );
    }

    private User saveOrUpdate(OAuthAttributes attributes) {
        User user = userRepository.findByEmail(attributes.getEmail())
                .map(entity -> entity.update(attributes.getName(), attributes.getPicture()))
                .orElse(attributes.toEntity());

        return userRepository.save(user);
    }
}-
registrationId
현재 로그인 진행 중인 서비스를 구분하는 코드 -
userNameAttributeName
OAuth2 로그인 진행 시 키가 되는 필드값을 이야기 함, Primary Key와 같은 의미 -
OAuthAttributes
OAuth2UserService를 통해 가져온 OAuth2User의 attribute를 담을 클래스
-SessionUser
세션에 사용자 정보를 저장하기 휘한 Dto 클래스
OAuthAttributes 생성 및 작성
-
config.auth패키지에 dto패키지 생성 후 OAuthAttributes 클래스를 생성해 주세요
-
작성
package com.momenting.book.springboot.config.auth.dto;

import com.momenting.book.springboot.domain.user.Role;
import com.momenting.book.springboot.domain.user.User;
import lombok.Builder;
import lombok.Getter;

import java.util.Map;

@Getter
public class OAuthAttributes {
    private Map<String, Object> attributes;
    private String nameAttributeKey;
    private String name;
    private String email;
    private String picture;

    @Builder
    public OAuthAttributes(Map<String, Object> attributes, String nameAttributeKey, String name, String email, String picture) {
        this.attributes = attributes;
        this.nameAttributeKey = nameAttributeKey;
        this.name = name;
        this.email = email;
        this.picture = picture;
    }

    public static OAuthAttributes of(String registrationId, String userNameAttributeName, Map<String, Object> attributes) {

        return ofGoogle(userNameAttributeName, attributes);
    }

    private static OAuthAttributes ofGoogle(String userNameAttributeName, Map<String, Object> attributes) {
        return OAuthAttributes.builder()
                .name((String) attributes.get("name"))
                .email((String) attributes.get("email"))
                .picture((String) attributes.get("picture"))
                .attributes(attributes)
                .nameAttributeKey(userNameAttributeName)
                .build();
    }

    public User toEntity() {
        return User.builder()
                .name(name)
                .email(email)
                .picture(picture)
                .role(Role.GUEST)
                .build();
    }
}-
of()
OAuth2User에서 반환하는 사용자 정보는 Map이기 때문에 값 하나하나를 변환해야만 합니다. -
toEntity()
User 엔티티를 생성
OAuthAttributes에서 엔티티를 생성하는 시점은 처음 가입할 때임
가입할 때의 기본 권한을 GUEST로 줌
SessionUser 클래스 생성 및 작성
- config.auth.dto 패키지에 SessionUser클래스를 생성합니다.
-작성
package com.momenting.book.springboot.config.auth.dto;

import com.momenting.book.springboot.domain.user.User;
import lombok.Getter;

import java.io.Serializable;

@Getter
public class SessionUser implements Serializable {
    private String name;
    private String email;
    private String picture;

    public SessionUser(User user) {
        this.name = user.getName();
        this.email = user.getEmail();
        this.picture = user.getPicture();
    }
}- SessionUser 클래스를 생성한 이유
사용자 정보를 세션에 저장하기 위해서는 직렬화를 구현해야합니다. 하지만 User클래스에서 직렬화를 직접 구현하면 User클래스는 가장 기본이되는 엔티티입니다. 다른 엔티티와도 관계가 형성될수 있습니다. 그렇게되면 관계가 형성된 다른 클래스들도 직렬화는 구현해야하기 때문에SessionUser라는 클래스를 생성해 직렬화는 구현합니다.
다음 포스팅에서 할 것
시큐리티 설정을 끝냈습니다. 다음 포스팅에서는 로그인 기능을 브러우저에서 테스트 해보겠습니다.
