Vue.js 완벽 가이드 - 9. 라우터 실전

동적 라우트 매칭 원리 및 적용
vue.js 인프런 학습을 위한 강의와 책
제목에서 사용자의 정보로 이동하는 작업

News페이지에서 유저네임을 클릭하면 유저정보가 있는 라우터로 가는것이 이번 목표
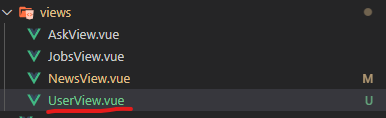
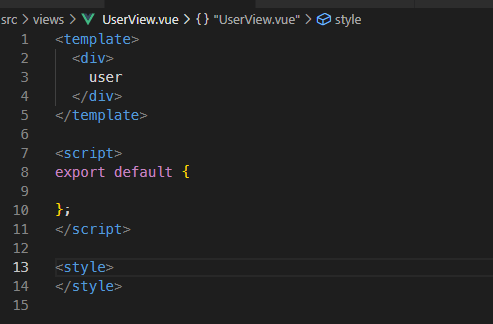
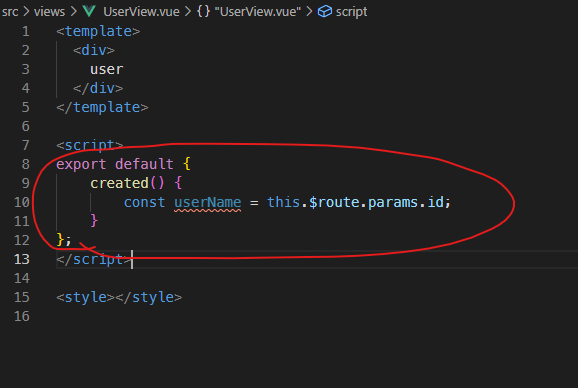
UserView.vue 파일을 생성
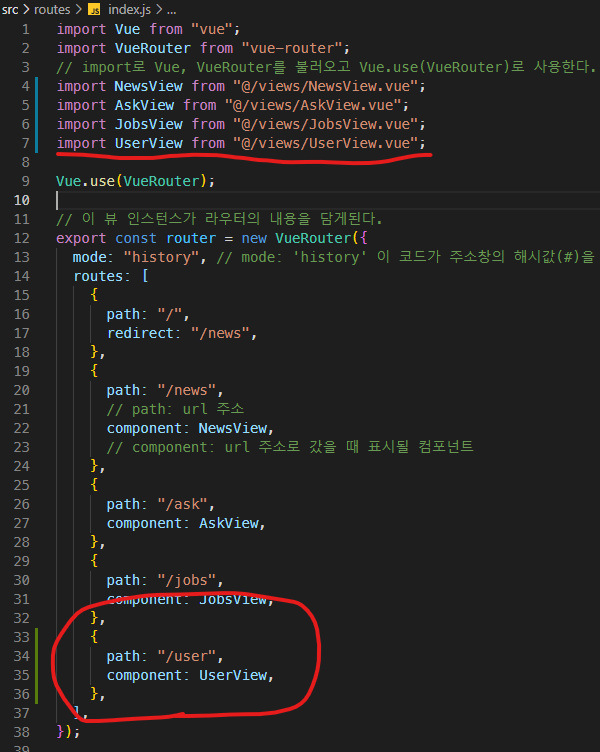
routes / index.js 파일에서 UserView.vue 파일경로 추가
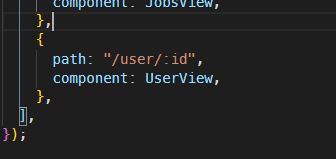
브라우저에서 user 라우터 생성 확인 후 routes / index.js 파일에서 사진처럼 path 수정
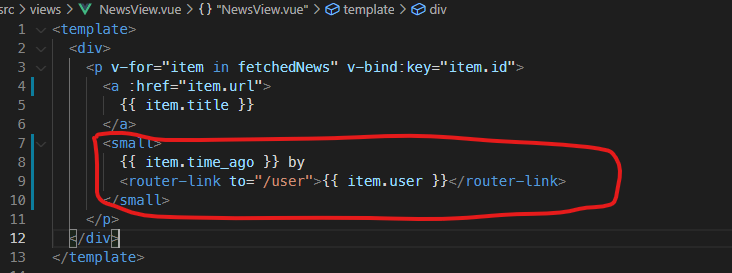
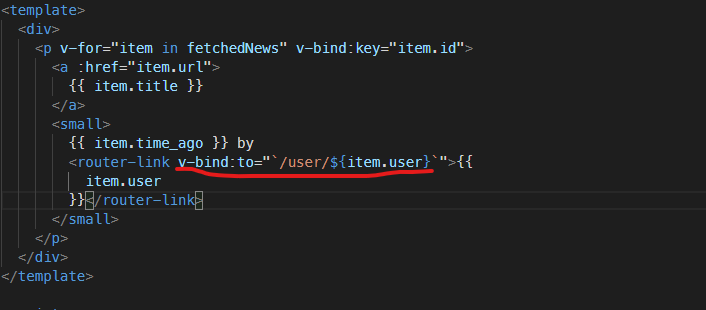
NewsView.vue에서 router-link추가
라우터의 주소(/user/)와 유저정보를 담는 변수(${item,user})를 넣는다.

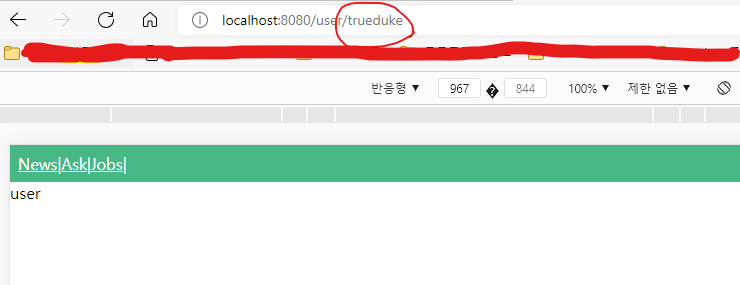
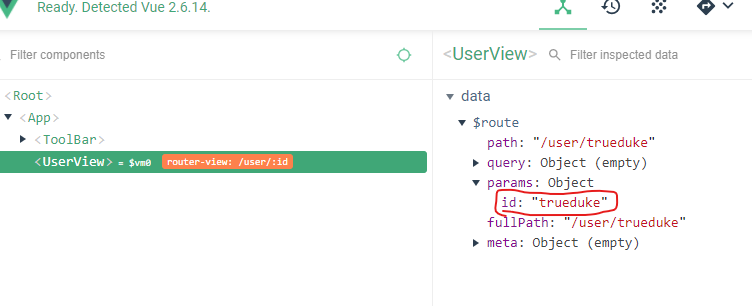
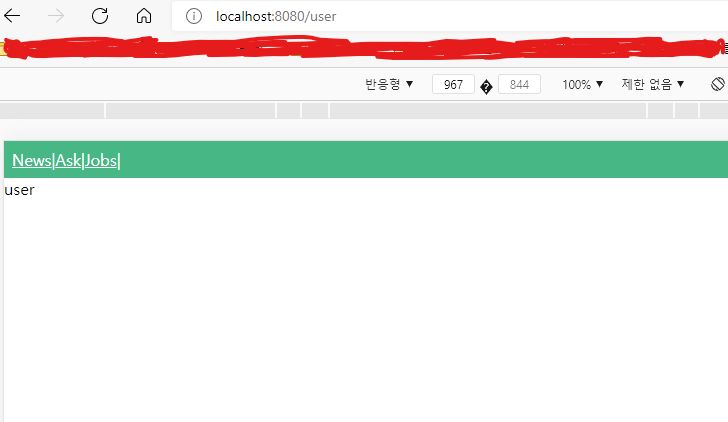
user/유저네임이 주소창에 표시되며 UserView.vue에서 만든 컴포넌트가 보이면 성공
라우터 params을 이용한 User 상세 페이지 구현
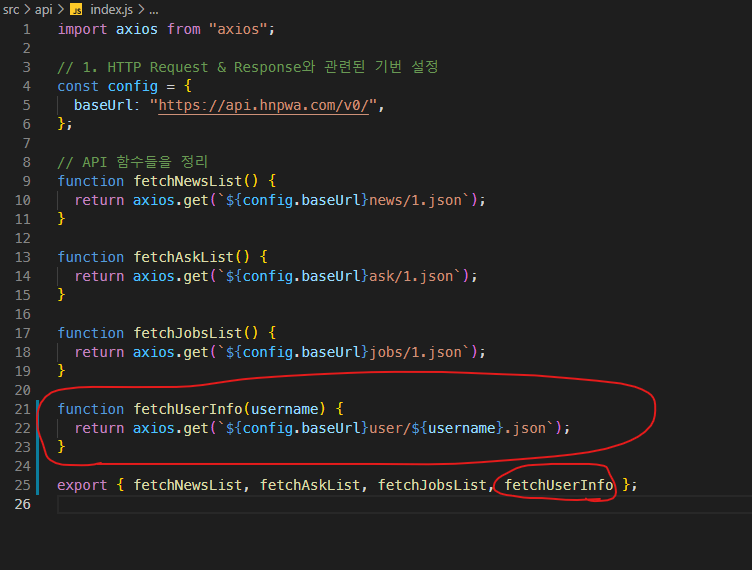
HTTP API 연결을 위해 fetchUserInfo함수 작성
해당강의 dispathch 관련 질문
dispathch 로 인자를 전달할 때, 1개만 전달할 수 있기 때문에 여러개일 경우 객체로 감싸서 전달해야 한다. 아래처럼 적용
// UserView.vue
this.$store.dispatch('FETCH_USER', {userName, userName2});

// store/actions.js
 Fetch_USER({commit}, {name, name2})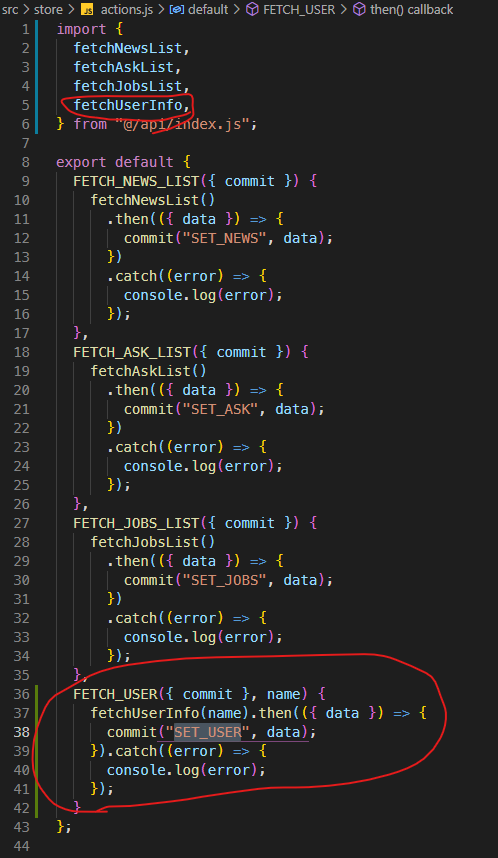
actions.js로 가서 FETCH_USER 내용추가
"SET_USER" 는 mutation.js로 넘어간다

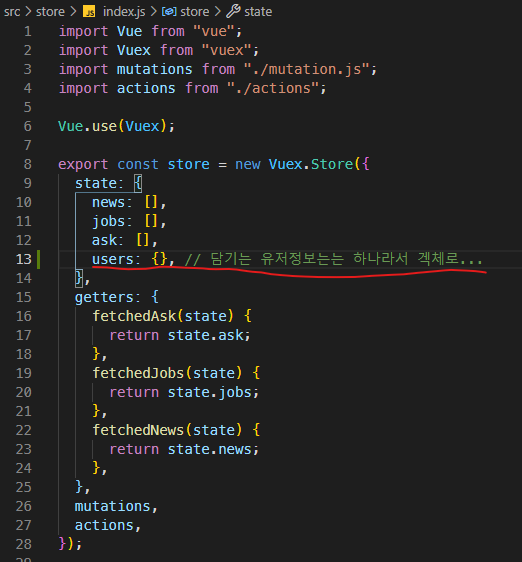
"SET_USER" 의 정보는 index.js의 state에 추가된 user로 넘어가 겍체에 담어진다.(users는 오타)
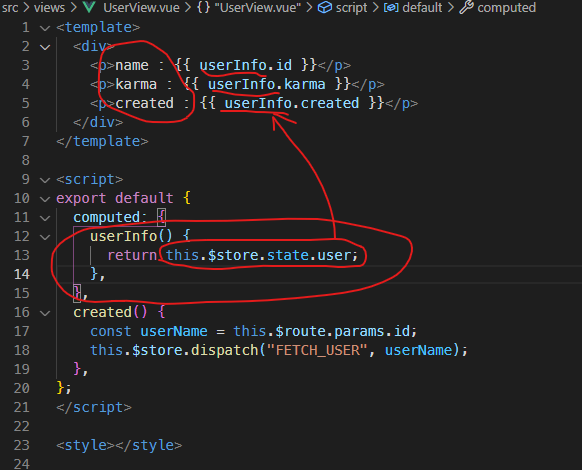
UserView.vue 파일로 돌아가 사진처럼 코드를 작성
이 경우는 computed안에 함수를 이용해서 파일경로를 없애고 유저 그 자체의 정보만 템플릿에 넣기 쉽게 만들어진것이다.
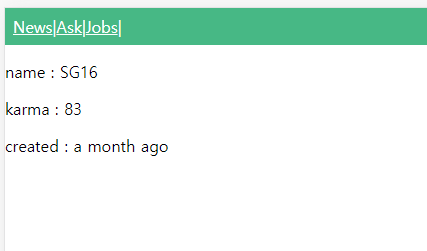
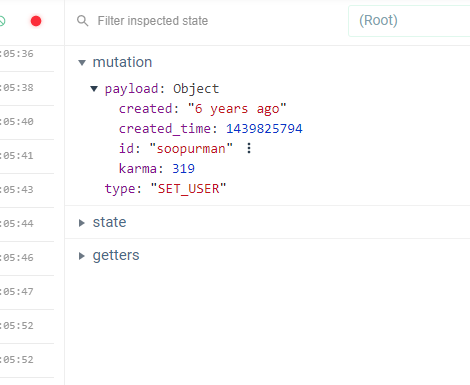
브라우저와 vue개발자모드에 이렇게 뜨면 성공이다.
[실습] 질문 상세 페이지 구현 실습 안내


[실습] 질문 상세 페이지 실습 풀이 및 오류 디버깅
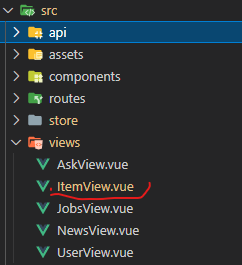
ItemView.vue를 생성해서 AskView.vue 에 링크연결 하는 작업과정은 src/view/NewsView.vue 의 유저정보를 호출하는 작업과 비슷하지만 조금 다른점이 있다.
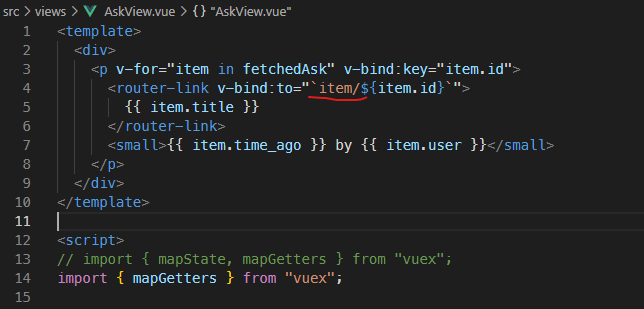
router-link의 주소에서 item앞에 /를 넣으면 데이터를 바인딩이 안되서인지 텍스트가 표시되지 않는다. 빨간줄처럼 해야한다.
질문 상세 페이지 스타일링 및 v-html 디렉티브 사용법 소개
<template>
  <div>
    <section>
      <!-- 질문 -->
      <div>
        <div>
          User
        </div>
        <div>
          **<router-link :to="`/user/${fetchedItem.user}`">**
            {{ fetchedItem.user }}
          </router-link>
          <div>
            {{ fetchedItem.time_ago }}
          </div>
        </div>
        <h2>{{ fetchedItem.title }}</h2>
      </div>
    </section>
    <section>
      <!-- 질문 댓글 -->
    </section>
    <!-- <p>
      {{ fetchedItem.title }}
    </p>
    <div>
      {{ fetchedItem.content }}
    </div> -->
  </div>
</template>
router-link의 대략 링크 거는 코드. /가 앞에 있어야 잘 작동하는 경우도 있으므로 주의해야 한다.
<template>
  <div>
    <section>
      <!-- 질문 -->
      <div class="user-container">
        <div>
          <i class="fas fa-user"></i>
        </div>
        <div class="user-description">
          <router-link :to="`/user/${fetchedItem.user}`">
            {{ fetchedItem.user }}
          </router-link>
          <div class="time">
            {{ fetchedItem.time_ago }}
          </div>
        </div>
      </div>
      <h2>{{ fetchedItem.title }}</h2>
    </section>
    <section>
      **<div v-html="fetchedItem.content">**
        <!-- {{ fetchedItem.content }} -->
      </div>
    </section>
    <!-- <p>
      {{ fetchedItem.title }}
    </p>
    <div>
      {{ fetchedItem.content }}
    </div> -->
  </div>
</template>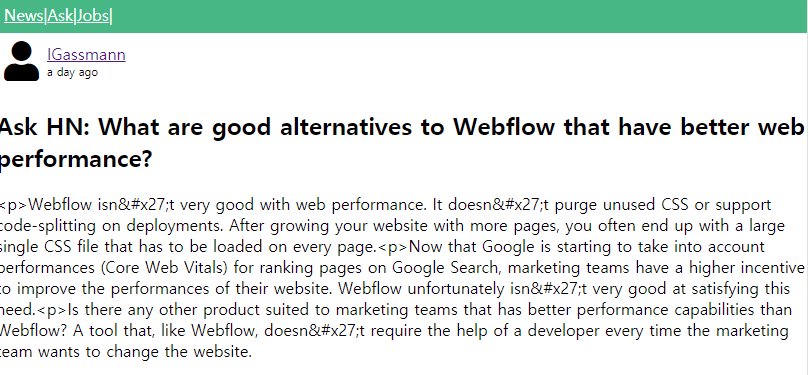
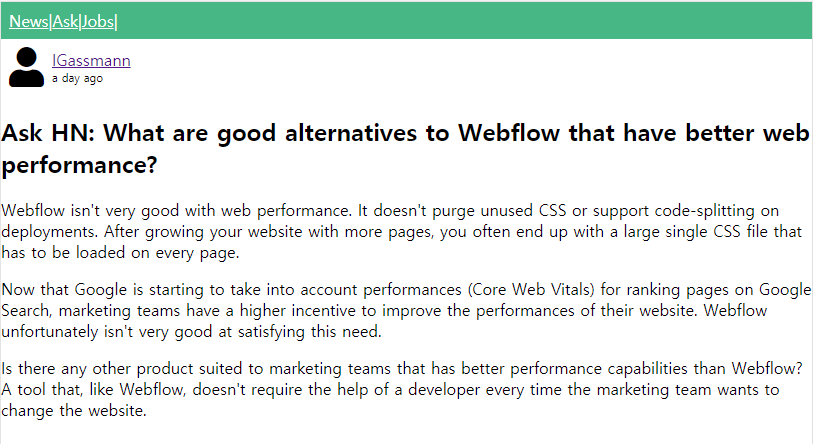
v-html 구문은 텍스트 문단정리를 위한 테그가 그대로 들어난 텍스트코드를 테그를 제거되고 문단정리를 마친 순수텍스트로 파싱해준다
v-html 디렉티브 참고자료
라우터 트랜지션
<template>
  <div id="app">
    <tool-bar></tool-bar>
    <transition name="page">
      <router-view></router-view>
    </transition>
  </div>
</template>

<script>
import ToolBar from "./components/ToolBar.vue";

export default {
  components: {
    ToolBar, // 파스칼케이스 (컴포넌트 테그)
  },
};
</script>

<style>
body {
  padding: 0;
  margin: 0;
}

/* Router Transaction */
.page-enter-active,
.page-leave-active {
  transition: opacity 0.5s;
}
.page-enter, .page-leave-to /* .page-leave-active below version 2.1.8 */ {
  opacity: 0;
}
</style>
vue에서 제공하는 transition 테그는 선택한 요소(여기서는 텍스트)를 부드럽게 나오고 사라지는 효과를 준다.
name="page"같이 여러가지 속성을 줄 수 있으며 .page-enter-active, .page-leave등등 이런 transition 에 적용되는 vue 전용 css문법이 있다.
translation 테그 관련 참고자료