꼼꼼한 재은씨의 기본편의 내용과 애플 공식 문서를 바탕으로 작성합니다!
로컬 알림은 앱 내부에서 작성한 메세지를 iOS 기기에 알리는 방법이다. 종료되었거나 백그라운드 실행중일때 메세지를 전달하는 방법입니다.
로컬 알림을 처리하는 객체는 iOS10.0 버전 이상에선 UserNotification 프레임워크를 사용하고 있습니다. 9.0 이하의 버전에서는 UILocalNotification 객체를 사용하지만 여기서는 다루지 않겠습니다.
UserNotification
위의 프레임워크를 사용하기 위해 아래의 코드를 반드시 작성해야만 합니다.
import UserNotification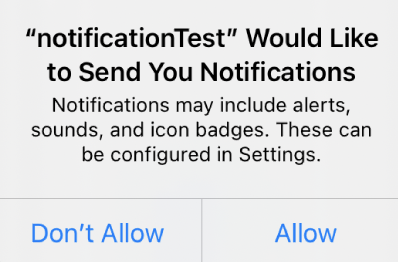
로컬 알림 메세지를 설정하는 과정에는 크게 4단계가 있습니다.
- 발송할 내용 정의
- 발송할 조건 정의
- 알림 요청 생성
- 노티피케이션 센터에 등록
위의 4단계를 차례로 알아보겠습니다.
알림 메세지 설정.
발송 내용 정의 : UNMutableNotificationContent
알림에 필요한 메세지의 기본 속성(title,body,sound,badge,userInfo)을 설정하는 역할을 한다.
비슷한 객체로 UNNotificationContent가 있는데 이 객체는 수정이 불가능하여 객체로 부터 속성을 읽어 들일 수만 있는 특성을 가지며, 기존에 등록된 알림 컨텐츠를 읽을때만 사용합니다.
badge는 아래의 사진처럼 읽지 않은 알림을 나타내는 숫자이다. 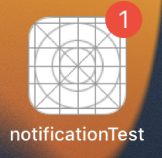
userInfo는 dictionary타입으로, 알림과 관련된 정보들을 설정할 수 있다.
// Configure the notification's payload.
let content = UNMutableNotificationContent()
content.title = "Hello!"
content.body = "Hello_message_body"
content.sound = UNNotificationSound.default()
content.badge = 1
content.userInfo = ["name":"doyun"]
발송 조건 관리 : UNTimeIntervalNotificationTrigger
시간 간격과 반복 여부를 매개변수로 가지며 알림이 언제 발송될지를 설정하는 역할을 하는 객체이며, 이때 시간의 입력값은 초단위로 입력합니다.
let trigger = UNTimeIntervalNotificationTrigger(timeInterval: 5, repeats: false)위 처럼 5초 후, 딱 한번만이라는 시간 간격을 설정하였습니다.
초단위로 설정하는 UNTimeIntervalNotification을 제외하고 특정 날짜에 알림을 발송하고 싶다면 UNCalendarNotificationTrigger,
특정 위치를 벗어났을 때 발송하고 싶다면 UNLocationNotificationTrigger을 사용하면 됩니다.
알림 요청 생성 : UNNotificationRequest
설정할 알림들을 구별할 식별자 identifier과 Content 과 trigger들을 매개변수로 가진다.
이 결과로 알림 요청 객체가 생성되었습니다.
let request = UNNotificationRequest(identifier: "FiveSecond", content: content, trigger: trigger)
// Schedule the notification.
알림 등록 : UNUserNotificationCenter
UNUserNotificationCenter에 등록하기 위한 사전작업을 마쳤습니다!
이제 등록하기만 하면 되는데 이 객체는 싱글톤 방식이기 때문에 객체를 따로 생성하는 것이 아니라 current() 메소드를 통해 접근해야 합니다.
let center = UNUserNotificationCenter.current()
center.add(request) { (error : Error?) in
     if let theError = error {
         // Handle any errors
     }
}
add를 통해 request를 등록하면 알림 등록이 완료 됩니다!
전체 코드를 한번에 보겠습니다
import UserNotification
// Configure the notification's payload.
let content = UNMutableNotificationContent()
content.title = "Hello!"
content.body = "Hello_message_body"
content.sound = UNNotificationSound.default()
content.badge = 1
content.userInfo = ["name":"doyun"]

// Deliver the notification in five seconds.
let trigger = UNTimeIntervalNotificationTrigger(timeInterval: 5, repeats: false)
let request = UNNotificationRequest(identifier: "FiveSecond", content: content, trigger: trigger) // Schedule the notification.
let center = UNUserNotificationCenter.current()
center.add(request) { (error : Error?) in
     if let theError = error {
         // Handle any errors
     }
}
위와 같이 설정한 메세지를 발송하기에 앞서서 기기에 알림을 받을것인지 아닐것인지 유무를 확인해야 합니다!
이렇게 앱에 처음 접속하게 되었을 때 알림 수신 여부를 확인하는 메세지를 자주 보았을 겁니다. 어떻게 하는지 알아보겠습니다!
requestAuthorization
대부분 앱을 설치하고 제일 처음 실행할 때 수신 여부를 확인합니다!
앱 델리게이트의 application(_:didFinishLaunchingWithOptions:) 이 함수를 적절하게 이용하면 됩니다.
func application(_ application: UIApplication, didFinishLaunchingWithOptions launchOptions: [UIApplication.LaunchOptionsKey: Any]?) -> Bool {
        // Override point for customization after application launch.
        if #available(iOS 10.0, *) {
            let notificationCenter = UNUserNotificationCenter.current()
            notificationCenter.requestAuthorization(options: [.alert,.badge,.sound]) { (didAllow,e) in
            }
        }
위에서 언급했듯이 UNUserNotificationCenter 객체는 싱글톤이기 때문에 접근할 때 생성이 아닌 current()를 통해 접근해야 합니다.
이 후 requestAuthorization() 메소드를 호출하여 사용자에게 알림 설정 동의를 받아야 합니다. 이 메소드는 두개의 인자를 받는데 첫번째는 알림 메세지에 포함될 항목들을 받기 위해 배열 타입으로 정의되어 있습니다.
option 배열에는 alert,badge,sound를 사용하도록 설정하였습니다. UNAuthorizationOptions 열거형 객체로 정의되어 있습니다.
만약 알림을 받는 것에 동의를 했다면 위 didAllow의 값이 true이고 아니면 false입니다.
이렇게 앱을 설치하고 가장 처음 실행할 때 메세지 수신 여부를 확인하는 알림을 작성하는 코드를 알아보았습니다!
이렇게 알림 수신 여부를 확인하고, 보낼 메세지를 직접 작성하는 방법까지 알아보았습니다.
버튼을 클릭하여 로컬 푸쉬 알림을 설정할 수도 있지만 백그라운드 상태로 갔거나 앱 사용 도중 전화가 왔을 때 처럼 비활성화 됐을 때를 기준으로 로컬 알림을 띄울 수도 있습니다!
책에선 AppDelegate의 applcationWillResignActive(_:) 메소드를 이용하라고 되어있으나 iOS13 버전 이후부터는 SceneDelegate가 AppDeleagte의 일부 역할을 담당하도록 변경되어서
SceneDelegate의 SceneWillResignActive는 백그라운드 상태가 된다면 실행할 코드를 작성하면 됩니다.
우선 알림 발송을 하기 전 사용자가 알림 수신을 동의 했는지 확인해야 할 필요가 있습니다!
getNotificationSettings
우선 알림 동의 여부를 확인해야 합니다. 위 메서드는 UNUserNotificationCenter.current()의 메서드로, 알림 수신 여부를 확인하는 역할을 합니다.
UNUserNotificationCenter.current().getNotificationSettings { settings in

if settings.authorizationStatus == .authorized {
    	...(중략)...
    } else {
    	...(중략)...
    }
}
사용자가 Allow버튼을 클릭했다면 getNotificationSettings() 메소드의 인자값 settings 객체에서 .authorizationStatus 의 속성값은 UNAuthorizationStatus.authorized로 설정됩니다. 이제 알림 동의 여부를 확인했다면 위 처럼 알림 메세지를 작성하는 코드를 통해 센터에 알림을 등록하면 됩니다!
이제 백그라운드 상태가 되었을 때 사용자에게 알림을 전송하는 코드를 보겠습니다!
func sceneWillResignActive(_ scene: UIScene) {
        // Called when the scene will move from an active state to an inactive state.
        // This may occur due to temporary interruptions (ex. an incoming phone call).

        // UserNotification 프레임워크를 이용한 로컬 알림
        UNUserNotificationCenter.current().getNotificationSettings { settings in // 앱의 알람 설정 상태 확인
            print("Notification")

            if settings.authorizationStatus == UNAuthorizationStatus.authorized {
                // setting이 알람을 받는다고 한 상태가 권한을 받은 상태라면

                // 1. 발송 내용 정의
                let nContent = UNMutableNotificationContent()
                nContent.badge = 1
                nContent.title = "로컬 알람 메세지"
                nContent.subtitle = "준비된 내용이 아주 많아요! 얼른 다시 앱을 열어주세요."
                nContent.body = "다시 들어와!"
                nContent.sound = .default
                nContent.userInfo = ["name":"홍길동"]

                // 2. 발송 조건 정의
                let trigger = UNTimeIntervalNotificationTrigger(timeInterval: 3, repeats: false)

                // 3. 알림 요청 생성
                let request = UNNotificationRequest(identifier: "wakeup", content: nContent, trigger: trigger)

                // 4. 노티피케이션 센터에 등록
                UNUserNotificationCenter.current().add(request) { err in
                    print("complete")
                }
            } else {
                print("알림설정 X")
            }
        }

    }

}
전송받은 알림을 클릭했을 때 어떻게 처리하는지에 대한 방법도 알아보도록 하겠습니다!
여러개의 알림메세지 중 어떤 것을 클릭했는지 식별하기 위해서 UserNotification 프레임워크에서 델리게이트 패턴을 이용하여 처리할 수 있습니다.
그렇게 하기 위해선 UNUserNotificationCenterDelegate 프로토콜을 채택해야 합니다!
func application(_ application: UIApplication, didFinishLaunchingWithOptions launchOptions: [UIApplication.LaunchOptionsKey: Any]?) -> Bool {
        // Override point for customization after application launch.
        if #available(iOS 10.0, *) {
            let notificationCenter = UNUserNotificationCenter.current()
            notificationCenter.requestAuthorization(options: [.alert,.badge,.sound]) { (didAllow,e) in
                notificationCenter.delegate = self
            }
        } else {
            let setting = UIUserNotificationSettings(types: [.alert,.badge,.sound], categories: nil)
            application.registerUserNotificationSettings(setting)
        }
        return true
    }
위 처럼 앱을 첫 실행할 때 notificationCenter.delegate = self로 설정하였고, "알림 센터와 관련하여 뭔가 발생하면 나(AppDelegate)에 알려줘"라는 의미입니다.
사용자가 받은 알림을 클릭하면 userNotificationCenter(_:willPresent:withCompletionHandler) 메서드가 자동으로 호출됩니다. 이 메서드 내에서 알림 내용 작성시 request의 identfier를 통해 알림을 구분하고 각 알림에 맞는 내용을 작성해주면 됩니다.
func userNotificationCenter(_ center: UNUserNotificationCenter, didReceive response: UNNotificationResponse, withCompletionHandler completionHandler: @escaping () -> Void) {
        if response.notification.request.identifier == "wakeup" {
            let userInfo = response.notification.request.content.userInfo
            print(userInfo["name"]!)
        }
        completionHandler()
    }
알림 메세지에 대한 정보는 response 매개변수에 담겨서 response.notification.request.identifier == "wakeup"를 통해 "wakeup" 알림이면 클릭했을 때 유저의 이름을 출력하도록 하는 코드를 작성했습니다.
실제 앱을 만들 땐 원하는 동작을 하도록 위의 코드를 작성하면 됩니다!