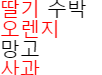
🌕선택자
<div>
   <ul>
      <li>딸기</li>
      <li>수박</li>
      <li class="orange">오렌지</li>
      <li>망고</li>
      <li>멜론</li>
   <ul>
</div>
1. ABC ~ XYZ
🌙선택자 ABC의 다음 형제 요소 XYZ 모두를 선택
🌙[ex]
.orange ~ li { color: red;}

2. ABC + XYZ
🌙선택자 ABC의 다음 형제 요소 XYZ 하나를 선택 (가장 인접해 있는, 바로 다음 형제)
🌙[ex]
.organge <a>+</a> li { color: red;}
3. ABC XYZ
🌙'하위 선택자', 선택자 ABC의 하위 요소 XYZ 선택. '띄어쓰기'가 선택자의 기호!
🌙[ex]
div .orange { color: red; }
4. ABC > XYZ
🌙'자식 선택자', 선택자 ABC의 자식 요소 XYZ 선택
🌙[ex]
ul > .orange { color: red; }
5. ABCXYZ
🌙'일치 선택자', 선택자 ABC와 XYZ를 동시에 만족하는 요소 선택
🌙태그를 먼저 쓰고, class 쓰는 순서로 해야 원하는대로 작동함
🌙[ex]
span.orange { color: red; }<div>
<ul>
<li>딸기</li>
<li class="orange"> 오렌지 </li>
<span class="orange"> 오렌지 </span>
<ul>
</div>

🌖 가상 선택자 (ABC:가상 선택자)
[1] 동작을 처리해주는 가상 선택자
1. ABC:hover
- 🌙선택자 ABC 요소에 마우스를 올리고 있는 동안 선택
🌙[ex] 100x100size의 빨간색 사각형에 마우스를 올리면 파란색으로 변화
.box {
	width: 100px;
	height: 100px;
	background-color: red;
	transition: 1s;
}
.box:hover { background-color: blue;}
<div class="box"> </div>2. ABC:active
- 🌙선택자 ABC 요소에 마우스를 클릭하고 있는 동안 선택
🌙[ex] 100X100size의 빨간색 사각형을 클릭하고 있는 동안 변화 (마우스 버튼을 누르고 있지 않으면 아무 변화가 없다.)
.box {
	width: 100px;
	height: 100px;
	background-color: red;
	transition: 1s;
}
.box:active { background-color: blue;}
<div class="box"> </div>3. ABC:focus
- 🌙선택 요소가 포커스되는 동안 선택
- 🌙기본적으로 focus가 가능한 요소들: input, text-align, selector.....etc.
- 🌙tabindex : 불가능한 요소에 focus가 가능하도록 만들어주는 속성. tab키를 사용해 focus 할 수 있는 순서를 지정하는 속성
- 🌙다른 요소가 포커스되었을 때 전에 선택된 포커스가 해제됨
🌙[ex]
.box { width: 10px; height: 10px; color: red; transition: 1s;}
.box:focus { color: blue; } <div class="box" tabindex="-1"></div>⭐순서(값)을 -1이 아닌 다른 값을 넣는 것은 논리적 흐름을 방해하기 때문에 권장하지 않는다.
⭐검색 추천: tabindex mdn🌟CSS는 동작을 처리하는 언어가 아니지만, 위의 3가지 가상 선택자 로 극히 일부는 가능하다.
[2] 특정한 요소를 선택하는 가상 클래스 선택자
 <div class="fruits">
          <span>딸기</span>
          <span>수박</span>
          <div>오렌지</div>
          <p>망고</p>
          <h3>사과</h3>
       </div>
1. first-child
🌙선택자 ABC가 형제 요소 중 첫째라면 선택
🌙ABC:first-child
🌙[ex1] 
.fruits span:first-child { color: red; }🌙[ex2]
.fruits div:first-child { color: red; } ❌오류❌⭐원인: first-child이면서 div 태그인 것이 없기 때문
(div:first-child는 일치 선택자)
2. last-child
🌙선택자 ABC가 형제 요소 중 막내라면 선택
🌙ABC:last-child
🌙[ex]

.fruits h3:last-child { color: red; }
3. nth-child
🌙선택자 ABC가 형제 요소 중 (n)째라면 선택
🌙ABC:nth-child(n)
🌙[ex1]

.fruits *:nth-child(2) { color: red; } * : 전체 선택자
n 은 숫자 0부터 시작한다.
🌙[ex2]

.fruits *:nth-child(2n) { color: red } <div class="fruits">
<span>수박</span>
<p>망고</p>🌙[ex3]
.fruits *:nth-child(2n+1) { color: red }🌙[ex4]

.fruits *:nth-child(n+2) { color: red }<div class="fruits">
// 2, 3, 4, 5번째 요소 선택
4. not
🌙부정 선택자 (Negation)
🌙선택자 XYZ가 아닌 ABC 요소 선택
🌙ABC :not(XYZ)
🌙[ex]

.fruits *:not(span) { color: red; }🌗가상 요소 선택자 (ABC::가상 요소 선택자)
- ::before:
🌙선택자 ABC 요소의 내부 앞에 내용(Content)을 삽입.
🌙:before은 인라인(글자) 요소
[ex] 앞! Content!
.box::before { content: "앞!"; }<div class="box">
Content!
</div>- ::after
🌙선택자 ABC 요소의 내부 뒤에 내용(Content)을 삽입.
🌙inline(글자)요소
🌙[ex1] Content! 뒤!
.box::after {content: "뒤!"; }<div class="box">
Content!
</div>🌙[ex2] 
.box {
  width: 100px;
  height: 100px;
  background-color: orange;
}
.box::after {
  content: "Youh";
}<div class="box"></div>코드를 입력하세요🌙[ex3] width와 height 변화를 주고 싶을 때: Content ""; & display: block
.box {
  width: 100px;
  height: 100px;
  background-color: orange;
}

.box::after {
  content: "";
  width: 30px;
  height: 30px;
background-color: royalblue;}<div class="box">
Content!
</div>
❗아무 변화 없음❗
❗원인: inline 요소는 width와 height 값이 적용되지 않기 때문
.box {
  width: 100px;
  height: 100px;
  background-color: orange;
}

.box::after {
  content: "";
/* inline 요소를 block으로 출력되도록 속성 부여 */
✅display: block;
  width: 30px;
  height: 30px;
  background-color: royalblue;
}<div class="box">
Content!
</div>
🌘속성 선택자 (Atrribute) (ATTR)
🌙속성 ABC를 포함한 요소를 선택한다!
1. [속성 ABC를 포함한 요소] { 속성 : 값; }
🌙[ex1]
(빨간색으로 출력)
[disabled] {
   			color: red;
}<input type="text" value="banana">
<input type="password" value="1234">
<input type="text" value="ABCD" disabled>🌙[ex2]
<--- 빨강
<---- 빨강
<----- 빨강
[type] {color: red;}<input type="text" value="banana">
<input type="password" value="1234">
<input type="text" value="ABCD" disabled>2. ABC="XYZ": 속성 ABC를 포함해 값이 XYZ인 요소 선택
🌙[ex]
<---- 빨강
[type="password"] {color: red;}<input type="text" value="banana">
<input type="password" value="1234">
<input type="text" value="ABCD" disabled>- 상속되는 CSS 속성들은 모두 글자/문자 '관련 속성'들 (문자 속성이 아니라)
- 글자/문자와 관련없는 속성들도 상속시키고 싶을땐 ⭐inherit⭐
🌙[ex1] Inherit 적용 전

.parent {
   width: 300px;
   height: 200px;
   background-color: orange;
}
.child {
   width: 200px;
   height: 100px;
   background-color: red;
}<div class="parent">
<div class="child"> </div>
</div>🌙[ex2] Inherit 적용 후

.parent {
   width: 300px;
   height: 200px;
   background-color: orange;
}
.child {
   width: inherit;
   height: 100px;
   background-color: red;
}<div class="parent">
<div class="child"> </div>
</div>🌙[기타] Viewport 위치 표현: <a>Position</a>, top/right/bottom/left

.parent {
   width: 300px;
   height: 200px;
   background-color: orange;
}
.child {
   width: inherit;
   hieght: 100px;
   background-color: red;
/* viewport에 고정해서 위치를 나타내겠다. */
   position: fixed;
   top: 100px;
   right: 10px;
}<div class="parent">
<div class="child"> </div>
</div>🌛선택자 선언 순서
- 🌙 선택자 선언 순서는 구체적인 선택자일수록 뒤에.. 왜냐하면 더 포괄적인 선택자를 뒤에 배치하면 상대적으로 더 구체적인 선택자 아래 깔리면서 화면에 결과값이 안 보일 수 있음
- 🌙inline 선택자는 우선순위가 가장 높기 때문에 수정이 용이하게 만들기 위해 웬만해서는 inline으로 선언하지 않는 것이 좋다.
- 🌙! important;도 동일한 의미로다가 많이 쓰지 않는 것이 좋다. 정말 중요한, 극히 일부에만 사용하고, 우선순위를 잘 고려해 선언하자!
- 🌙언제까지나 임의로 구분하는 거지만 점수를 매겨보면 그 우선순위를 가늠하기 편리하다.
- class = 10점
- id = 100점
- 태그 = 1점
- :not = 0점
- 태그가 아닌 '전체선택자(*)' 같은 것은 0점
- inline = 10000점
- !important = 무한